
Popular categories
Looking for a yarn?


Comments / Questions (99)
![]() Kasia wrote:
Kasia wrote:
Dzień dobry, kiedy mogę spodziewać się informacji o korekcie? Zależy mi na skończeniu robótki i wolałabym jej nie pruć . Pozdrawiam
19.02.2026 - 21:48DROPS Design answered:
Witaj Kasiu, narzut i oczko prawe liczymy jak 1 oczko. Jak zamkniemy 3 oczka z boku na prawej stronie przodu, to dalej na prawej stronie mamy: 1 oczko brzegowe, *1 oczko lewe, narzut i oczko prawe (1 oczko)*, itd. A więc teraz gdy wykonujemy karczek, zdejmujemy na nitkę 18 o. (parzysta liczba) – tj. 1 oczko brzegowe, 1 o.l. [2 o.], *narzut i 1 o.p., 1 o.l.* [2 o.] itd. Po zdjęciu 18 o., na lewym drucie mamy narzut i 1 o.p. Czyli dalszą część możesz zacząć tak jak jest w opisie. Pozdrawiamy!
25.02.2026 - 09:24
![]() Kasia wrote:
Kasia wrote:
Dziękuję za odpowiedź . Jednak kiedy zdejmę na drut pomocniczy 1o. więcej przerobię przód ale na końcu łącząc z rękawem będą 3 oczka lewe ponieważ rękaw zaczyna się od 2 o. lewych . Tak mi wyszło po zamknięciu trzech pierwszych oczek rękawa . Czyli rękaw zaczyna i kończy się dwoma oczkami lewymi. Nie wiem co dalej
09.02.2026 - 17:53DROPS Design answered:
Witaj Kasiu, przepraszam, że tyle czekasz na odpowiedź, ale jestem na krótkim urlopie. Ewidentnie coś tutaj nie pasuje w opisie. Wyślę to do sprawdzenia do działu projektów. Jeśli będzie tam błąd, na stronie pojawi się korekta. Jeśli okaże się, że wszystko jest w porządku, wyślę Ci informację jak dalej postąpić z tym wzorem. Pozdrawiam!
12.02.2026 - 09:54
![]() Kasia wrote:
Kasia wrote:
Proszę o pomoc
06.02.2026 - 16:10
![]() Kasia wrote:
Kasia wrote:
Dalej nabrać 1 o. za każdym z 7 oczek obszycia przodu, W TYM SAMYM CZASIE we wszystkich przejściach między przodami/tyłem i rękawami, przerabiać razem na prawo 2 ostatnie oczka. Nie rozumiem kiedy przerabiać drugą część obszycia? Czy w trakcie przerabiania 18 oczek?
04.02.2026 - 21:44DROPS Design answered:
Witaj Kasiu, tak, przerabiasz drugą część przodu i nabierasz oczka na obszycie przodu na końcu następująco: nabrać 1 o. za każdym z 7 oczek obszycia przodu, czyli wkłuwając się z tyłu oczek pierwszego obszycia. Pozdrawiamy!
06.02.2026 - 08:28
![]() Kasia wrote:
Kasia wrote:
Zaczynam karczek. Po zdjęciu 18 oczek ( rozmiar M) pozostaje oczko lewe a następnie oczko prawe z narzutem . Nie mogę więc rozpocząć od oczka z narzutem. Co zrobić? Liczba oczek się zgadza jest 43o. Przód zaczyna się od oczka lewego a następnie od prawego z narzutem .
04.02.2026 - 18:52DROPS Design answered:
Witaj Kasiu, masz rację tutaj musi być jakaś pomyłka. Zgłoszę to do korekty. Ja bym zdjęła na drut pomocniczy o 1 oczko więcej (czyli jeszcze to oczko lewe) i przerabiała dalej jak jest napisane we wzorze, a w razie potrzeby dodała oczko na końcu (nie będzie to widoczne). Pozdrawiamy!
06.02.2026 - 08:24
![]() Kasia wrote:
Kasia wrote:
Proszę o pomoc , kiedy nabrać oczko w rękawie po 8 cm w rozm . M . Po pierwszym ściegiem francuskim jest u mnie narzut i zdjęcie oczka a następnie do przerobienia oczko z narzutem . Wychodzi na to, że po pierwszym oczku musiałabym zrobić 2 narzuty?
21.01.2026 - 10:34
![]() AT wrote:
AT wrote:
Do you keep all the pieces on the needle as you knit each new one or store them on other yarn? I’m a bit confused! Also, does it matter which is RS? Aren’t they the same?
26.11.2025 - 19:45DROPS Design answered:
Hi AT, The easiest is to place the stitches of pieces that are not being worked on stitch holders/threads, while continuing other pieces. And, yes, it matters which are right and wrong side, both for keeping the textured pattern the same on all pieces and for shaping of the garment. Regards, Drops Team.
27.11.2025 - 06:47
![]() Kasia wrote:
Kasia wrote:
Moje pytanie - do rozmiaru L nabrałam 79 oczek następnie zostało 53 i przerabiając ściegiem angielskim mam 78 . Prułam już trzy razy i zawsze jest 78 a nie 79 oczek . Czy jest jakiś błąd?
15.11.2025 - 22:19DROPS Design answered:
Witaj Kasiu, gdy zaczynasz przerabiać ścieg angielski masz 53 oczka i tyle samo oczek jest cały czas w ściegu angielskim, ponieważ narzuty nie są liczone we wzorze jako oczka - tak więc z narzutami będzie 78 oczek na drutach, czyli tyle ile jest na Twoich drutach. Pozdrawiamy!
15.11.2025 - 22:48
![]() Olga Pacheco wrote:
Olga Pacheco wrote:
No entiendo la parte que dice: " recoger 1 pt nuevo detrás de cada uno de los 7 pts de la cenefa", lo leo y lo leo pero nada más no sé como hacerlo, tenéis algún vídeo donde pueda ver como se hace? Gracias
06.10.2024 - 20:03
![]() Diana Péter wrote:
Diana Péter wrote:
A magyar fordításban az összeáállításnál kétszer lett ugyanaz leírva az ujjakkal kapcsolatban, de az oldalvarrásról nincs információ. :(
27.09.2024 - 10:30
|
|
My Muse#mymusesweater |
|
 |
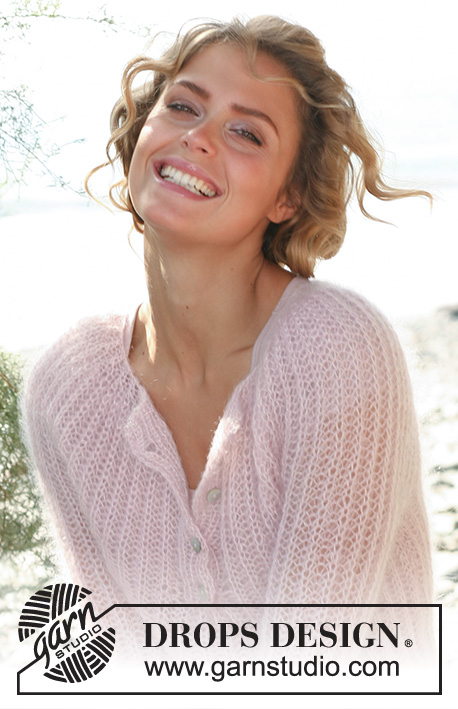 |
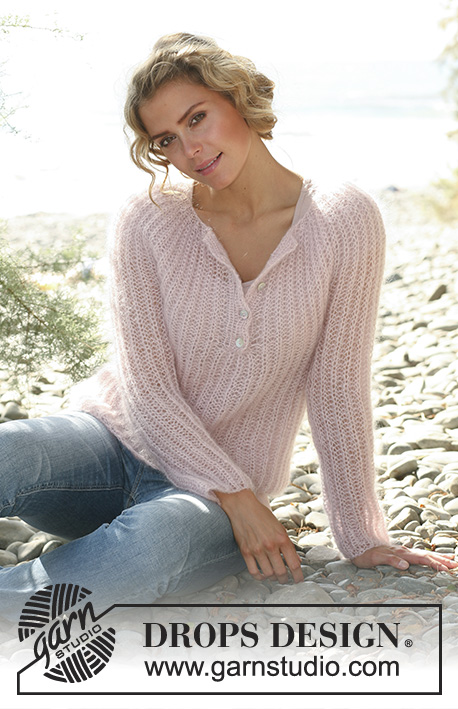
DROPS sweater in English rib in 2 threads ”Kid-Silk”. Size: XS - XXL.
DROPS 127-1 |
|
|
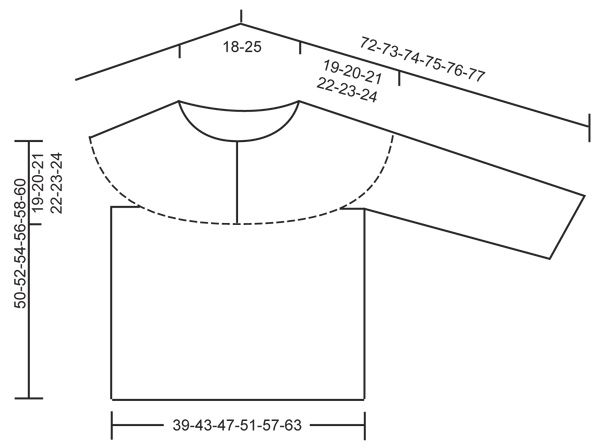
GARTER ST (back and forth on needle): K all rows. INCREASE TIP: Inc 1 st inside 1 edge st in garter st each side. Inc 1 st by making 1 YO, on next row work YO twisted (i.e. work in the back loop of st instead front). Work the inc sts in the pattern. PATTERN (back and forth on needle): ROW 1 (= RS): 1 edge st in garter st, * K 1, 1 YO, slip 1 st as if to P *, repeat from *-* until 2 sts remain and finish with K 1 and 1 edge st in garter st. ROW 2 (= WS): 1 edge st in garter st, * 1 YO, slip 1 st as if to P, K tog YO and slipped st *, repeat from *-* until 2 sts remain, finish with 1 YO, slip 1 st as if to P and 1 edge st in garter st. ROW 3 (= RS): 1 edge st in garter st, * K tog YO and slipped st, 1 YO, slip 1 st as if to P *, repeat from *-* until 3 sts remain (1 YO + 2 sts), K tog YO and slipped st, finish with 1 edge st in garter st. Repeat 2nd and 3rd row upwards. SHORT ROWS FOR NECK SLIT: To avoid the band being worked too long mid front in neck slit when working pattern, work short rows in each side as follows: * start from RS and work 3 rows in pattern over all sts, turn piece. Work in pattern until 7 band sts remain, turn piece and work in pattern until 7 band sts remain in the other side - NOTE: Work first st after each turn a little tight to avoid holes in the transitions. Turn piece, work back over all sts (incl band) *, repeat from *-* up along the entire band until pattern is finished. Then work back and forth over all sts. BUTTON HOLES: Cast off for button holes on right front band. 1 BUTTON HOLE = P tog third and fourth st from edge and make 1 YO. Cast off for button holes when piece measures: SIZE XS: 2, 6, 11 and 15 cm. SIZE S: 2, 7, 12 and 17 cm. SIZE M: 2, 7, 12 and 17 cm. SIZE L: 2, 7, 13 and 18 cm. SIZE XL: 2, 7, 13 and 18 cm. SIZE XXL: 2, 8, 14 and 20 cm. I.e. approx. 3 to 5 cm remain until finished measurements after last button hole. -------------------------------------------------------- SWEATER: Worked in several pieces back and forth on circular needle. FRONT PIECE: Loosely cast on 61-67-73-79-88-97 sts (incl 1 edge st in garter st in each side) on circular needle size 7 mm with 2 threads Kid-Silk. Work first row from WS as follows: 1 edge st in GARTER ST - see explanation above -, * P 2 tog, K 1 *, repeat from *-* until 3 sts remain, finish with P 2 tog and 1 edge st in GARTER ST = 41-45-49-53-59-65 sts. Then work PATTERN - see explanation above (1st row = RS) - with 1 edge st in Garter st in each side. REMEMBER THE KNITTING TENSION! When piece measures 31-32-33-34-35-36 cm - adjust so that next row is worked from RS - cast off the first 3 sts at beg of the next 2 rows for armhole = 35-39-43-47-53-59 sts remain on needle. Cut the thread, put piece aside and work back piece. BACK PIECE: Cast on and work as front piece. SLEEVE: The sleeve is worked back and forth on circular needle. Cast on 37-40-43-43-40-43 sts (incl 1 edge st in garter st in each side) on circular needle size 7 mm with 2 threads Kid-Silk. Work first row from WS as follows: 1 edge st in garter st, * P 2 tog, K 1 *, repeat from *-* until 3 sts remain, finish with P 2 tog and 1 edge st in garter st = 25-27-29-29-27-29 sts. Then work PATTERN - see explanation above – with 1 edge st in garter st in each side (1st row = RS). When piece measures 8 cm, inc 1 st in each side - READ INCREASE TIP! Repeat inc every 10-10-10-10-5½-5½ cm a total of 4-4-4-4-6-6 times = 33-35-37-37-39-41 sts - NOTE: Remember to work the inc sts in the pattern. When piece measures 43-42-42-41-41-40 cm (NOTE! Shorter measurements in the larger sizes because of longer sleeve cap and broader shoulder width) - adjust so that next row is worked from RS - cast off the first 3 sts at the beg of the next 2 rows for armhole = 27-29-31-31-33-35 sts remain on needle. Put aside and knit the other sleeve. YOKE: Slip the first 14-16-18-20-23-26 sts at beg of row (from RS) on front piece on a stitch holder = 21-23-25-27-30-33 sts remain on needle. READ ALL OF THE FOLLOWING SECTION BEFORE CONTINUING! Work first row from RS as follows: K 1 (= YO + slipped st K tog), P 1, K 1 (= YO + slipped st K tog), P 1, K 1 (= YO + slipped st K tog), P 1 and K 1 (= YO + slipped st K tog) = 7 band sts, work in pattern (= 3rd row pattern), i.e. start with 1 YO and slip 1 st as if to P and continue with pattern as before over the remaining sts on front piece, continue over the sleeve, then over back piece, then over the other sleeve and then over the 14-16-18-20-23-26 sts from stitch holder on front piece and then knit up 1 new st behind each of the 7 band sts, AT THE SAME TIME in all transitions between body and sleeve, work last st (1 YO + K 1) before and first st after the transitions K tog (i.e. 4 sts dec on row) = 127-139-151-159-175-191 sts on needle. The pattern should now be correct around the entire piece. Continue in pattern back and forth as before but work the outermost 7 sts in each side (= bands) in rib, i.e. K 1, P 1, K 1, P 1, K 1, P 1 and K 1 mid front (seen from RS). AT THE SAME TIME work SHORT ROWS - see explanation above - so that the bands are the same length as the pattern. REMEMBER BUTTON HOLES ON RIGHT BAND - see explanation above. When yoke measures 17-18-19-20-21-22 cm (adjust so that next row is worked from RS), work rib (= K 1/P 1) over all sts (instead of pattern) - NOTE: I.e. on 1st row K tog YO and slipped st (= K 1), P next st. When 2 rows in rib have been worked, work an elevation in the back of neck as follows (1st row from RS): Work rib until 20 sts remain on needle, turn piece and work rib until 20 sts remain on needle in the other side. Turn piece and work rib until 40 sts remain on needle, turn piece and work rib until 40 sts remain on needle in the other side. Turn piece and work rib until 60-64-69-72-78-83 sts remain on needle, turn piece and work rib until 60-64-69-72-78-83 sts remain on needle in the other side. Turn piece and work the rest of the row, then work 1 row in rib over all sts from WS. Now work next row from RS as follows: 7 band sts as before, * P 2 tog, K 2 twisted (i.e. work in back loop of st instead of front) tog *, repeat from *-* until 8 sts remain and finish with P 1 and 7 band sts as before = 71-77-83-87-95-103 sts. Work 1 row with K over K and P over P. Then LOOSELY cast off with K over K and P over P, sweater measures approx. 50-52-54-56-58-60 cm up to shoulder. ASSEMBLY: Sew side seams tog edge to edge in front loop of outermost sts. Sew underarm seams tog edge to edge in front loop of outermost sts. Sew the opening under the sleeves. Sew on buttons. |
|
 |
|
Have you finished this pattern?Tag your pictures with #dropspattern #mymusesweater or submit them to the #dropsfan gallery. Do you need help with this pattern?You'll find 17 tutorial videos, a Comments/Questions area and more by visiting the pattern on garnstudio.com. © 1982-2026 DROPS Design A/S. We reserve all rights. This document, including all its sub-sections, has copyrights. Read more about what you can do with our patterns at the bottom of each pattern on our site. |
|


With over 40 years in knitting and crochet design, DROPS Design offers one of the most extensive collections of free patterns on the internet - translated to 17 languages. As of today we count 324 catalogues and 12290 patterns translated into English (UK/cm). 12290
We work hard to bring you the best knitting and crochet have to offer, inspiration and advice as well as great quality yarns at incredible prices! Would you like to use our patterns for other than personal use? You can read what you are allowed to do in the Copyright text at the bottom of all our patterns. Happy crafting!
Post a comment to pattern DROPS 127-1
We would love to hear what you have to say about this pattern!
If you want to leave a question, please make sure you select the correct category in the form below, to speed up the answering process. Required fields are marked *.