
Popular categories
Looking for a yarn?


Comments / Questions (29)
![]() Sarah Bada wrote:
Sarah Bada wrote:
Hallo, ich habe eine Frage zu dem Halsbündchen. Wird dies nur vorne in Hin- und Rückreihen gestrickt oder komplett um den ganzen Halsausschnitt herum. Wenn nur vorne, wie genau "halt" das Bündchen rechts und links? Muss ich es irgendwo annähen? Viele Grüße und danke für die Antwort. Ich hoffe, die Frage ist verständlich gestellt.
20.09.2022 - 22:43DROPS Design answered:
Liebe Frau Bada, die Halsblende wird in Runden gestrickt, dh die Maschenanzahl muss gerade sein (teilbar durch 2) dann stricken Sie 1 M re, 1 M li und ab der 2. Runde stricken Sie immer so (re über re und li über li). Hier zeigen wir, wie man so eine doppelte Halsblende faltet und festnäht (im Video sind es 2 re, 2 li gestrickt, aber die Technik wird mit 1 re, 1 li die gleiche sein). Viel Spaß beim stricken!
21.09.2022 - 09:20
![]() Richard wrote:
Richard wrote:
I am knitting this in size 'L' & have reached the 'cast-offs for the back & front. I have 82 sts, to proceed the instructions are:- 2 stitches 1-1-1-2-3-4 times and 1 stitch 0-2-3-4-6-7 times on both sides = 64-68-72-74-78-82 stitches. Is there an error with the calculations? I ask this, because, 1x3x2+6 (correct). But 2sts cast off x1 = 2. Therefore 6+2=8! To finish with 72sts, total must equal 10...
07.05.2022 - 12:03DROPS Design answered:
Dear Richard, first you decrease 2 stitches once on each side, so in total you have decreased 4 stitches (2 + 2). Then, you decrease 1 stitch 3 times on both sides = 6 stitches. So you have decreased 10 stitches. Happy knitting!
08.05.2022 - 19:48
![]() Liisa Myllys wrote:
Liisa Myllys wrote:
Hei, Olen kutonut puseron ja toisen hihan. Hihan kavennukset eivät onnistuneet. Päätin ensimmäiset 6, 2 ja 1 silmukkaa ohjeen mukaan. Sitten päätin 2 silmukkaa molemmissa reunoissa vain kerran ja jatkoin sileää, kunnes hiha oli 50 cm. Pyöriö näytti oudolta ja sitten ymmärsin, että 2 silmukkaa päätetään joka kerroksen alussa, kunnes hiha on 50 cm. Näin tehden hihan pyöriö on ihan liian pieni , ei riitä alkuunkaan hiha-aukkoon. Onnistuukohan pusero ollenkaan?
06.04.2022 - 09:56DROPS Design answered:
Hei, olethan tarkistanut neuletiheytesi? Jos neuletiheys on oikea, hihanpyöriöstä pitäisi tulla oikean kokoinen.
07.04.2022 - 17:28
![]() Nathalie wrote:
Nathalie wrote:
Hej. Jag sitter fast i stickningen där det står "Sätt de första 68-76-82-90-102-112 maskorna på en tråd, och sticka sedan över de sista 68-76-82-90-102-112 maskorna på bakstycket som förklarat nedan." Jag har fäst de första 76 maskorna (då jag gör M) på en tråd. Men enligt instruktionen hamnar mitt garn på sista avmaskan/framstycket. Och förstår inte hur jag ska kunna sticka bakstycket med det garnet då. Är tanken att man ska fästa och byta garn?
26.03.2022 - 13:16DROPS Design answered:
Hej Nathalie. Du kan lämna det garnet där och använda det senare när du ska sticka framstycket, och ta ett nytt nystan och använd till bakstycket. Mvh DROPS Design
30.03.2022 - 09:30
![]() Anne Sand wrote:
Anne Sand wrote:
Jeg strikker str.L og har 176 masker. Når jeg har lukket af som start på ærmehul ( 6 på den ene side og 6 på den anden har jeg 82 tilbage på forstykke og 82 på bagstykke. Når jeg så har foretaget resten af lukningerne skulle jeg have 72 masker tilbage. Men det får jeg ikke til at passe med det antal som skal lukkes.
27.01.2022 - 16:33
![]() Anne Sand wrote:
Anne Sand wrote:
Hej. Jeg har nu delt arbejdet i forstykke og bagstykke og jeg kan ikke forstå lukningen til ærmehul. Jeg skal sidde tilbage med 10 færre masker efter aflukning, men allerede efter aflukning med 2 masker ad gangen har jeg 24 færre masker. Derefter skal jeg lukke mange ganger med en maske ad gangen. Jeg kan ikke forstå denne aflukning.
27.01.2022 - 10:26DROPS Design answered:
Hej Anne, hvilken størrelse strikker du, hvor mange masker har du inden du begynder at lukke af til ærmegab ?
27.01.2022 - 15:50
![]() Julia Mair wrote:
Julia Mair wrote:
Wenn das Bündchen am Ende umgeklappt und angenäht wird soll die Naht elastisch sein. Gibt es dazu einen Tipp, wie man das macht? Also eine elastisch Naht?
26.01.2022 - 07:12DROPS Design answered:
Liebe Frau Mair, vielleicht kann Ihnen dieses Video helfen?
26.01.2022 - 09:08
![]() Wenche Hauan wrote:
Wenche Hauan wrote:
Hvor mye garn til str. S?
25.01.2022 - 13:10DROPS Design answered:
Hej Wenche. Det går åt 300 g (6 nystan) DROPS Air till storlek S. Mvh DROPS Design
25.01.2022 - 14:04
![]() Josefine wrote:
Josefine wrote:
Ermene er veldig store, hvordan kan man gjøre de mindre (nede med håndleddet) men samtidig gjøre at de passer "hullene" i bolen? Hvor mange masker økes og hvor ofte dersom man minsker antall masker man starter med?
24.01.2022 - 13:39DROPS Design answered:
Hei Josefine. Hvilken størrelse strikker du? Du kan evnt strikke vrangborden strammer, og så kan du øke litt oftere opp til ermhullet slik at du får det maskeantallet du skal ha i din størrelse. Mvh DROPS Design
25.01.2022 - 09:58
![]() Christine wrote:
Christine wrote:
I have worked the front and am ready to start casting off for the armholes. I’m stuck and not sure how many stitches to cast off? Thank u
22.01.2022 - 20:21DROPS Design answered:
Dear Christine, you cast off for the armhole at the beginning of every row on each side (both from RS and WS): 2 stitches 1-1-1-2-3-4 times (= cast off 2 sts at the beginning of next 2-2-2-4-6-8 rows) and 1 stitch 0-2-3-4-6-7 times (= 1 stitch at the beginning of next 0-4-6-8-12-14 rows) = 64-68-72-74-78-82 stitches. Happy knitting!
24.01.2022 - 09:15
|
|
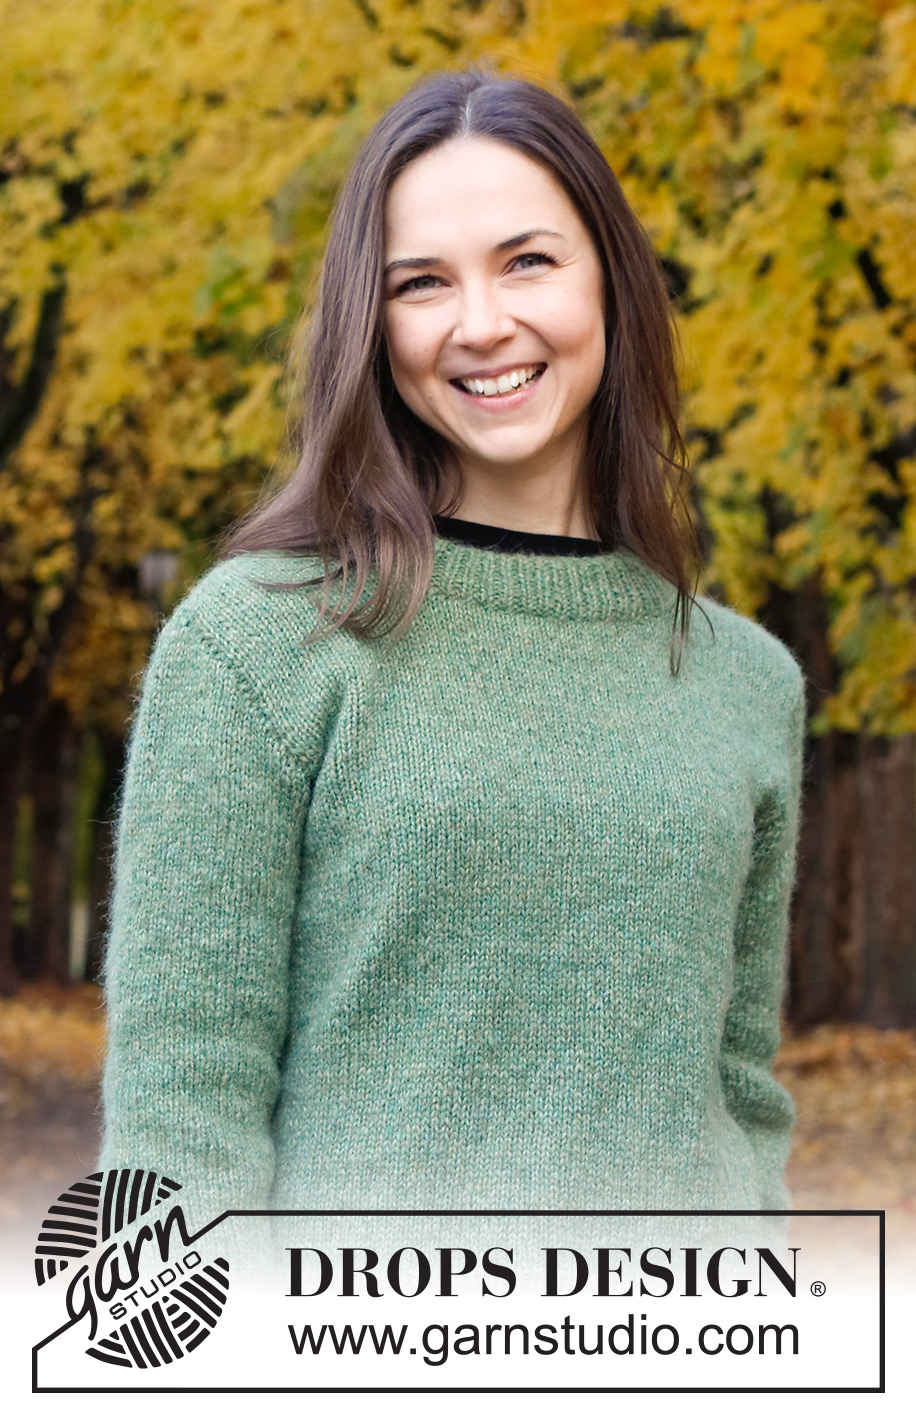
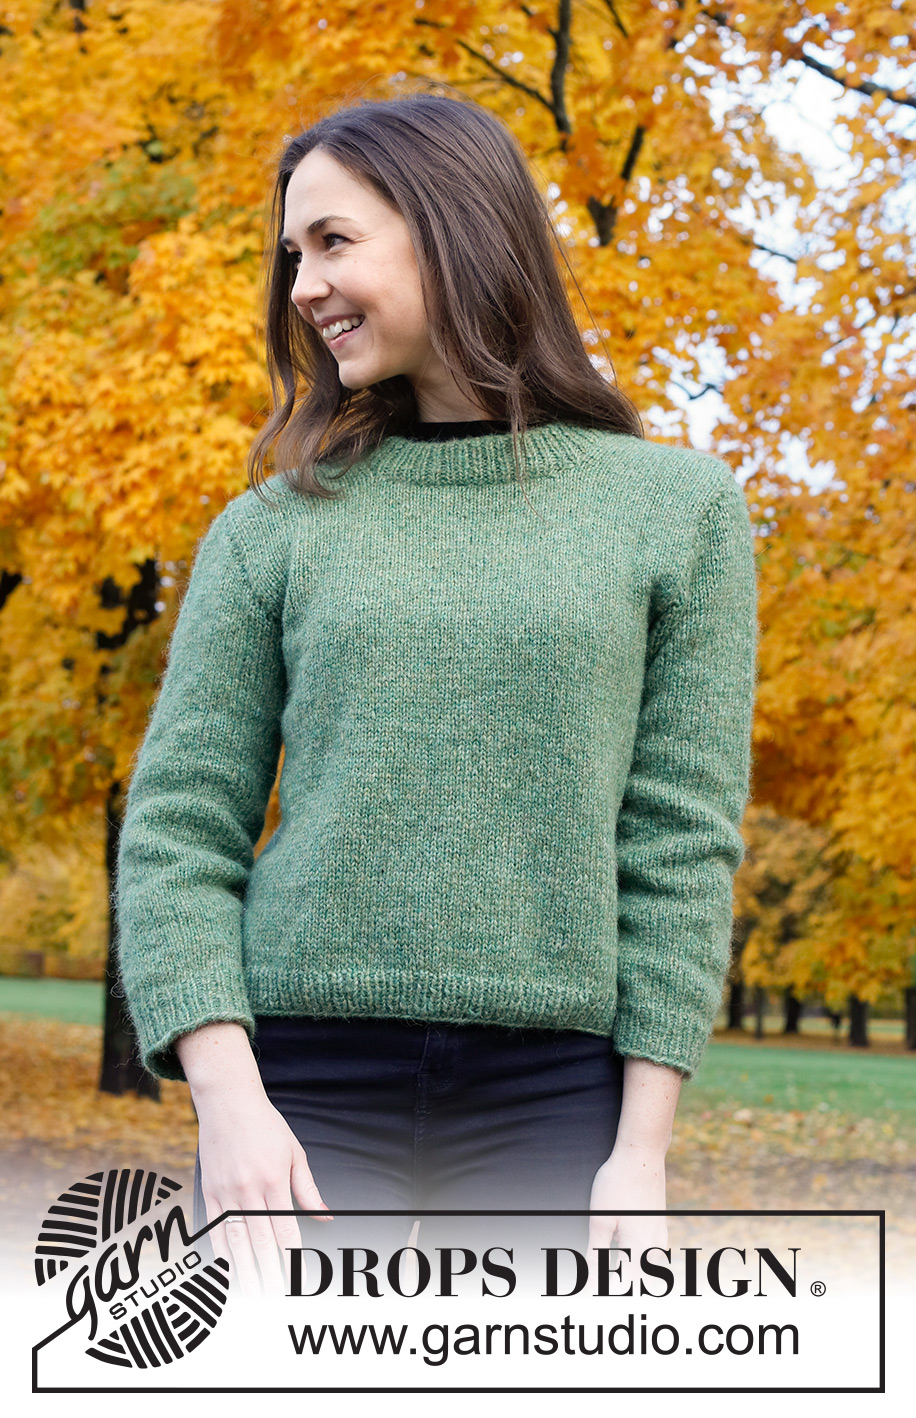
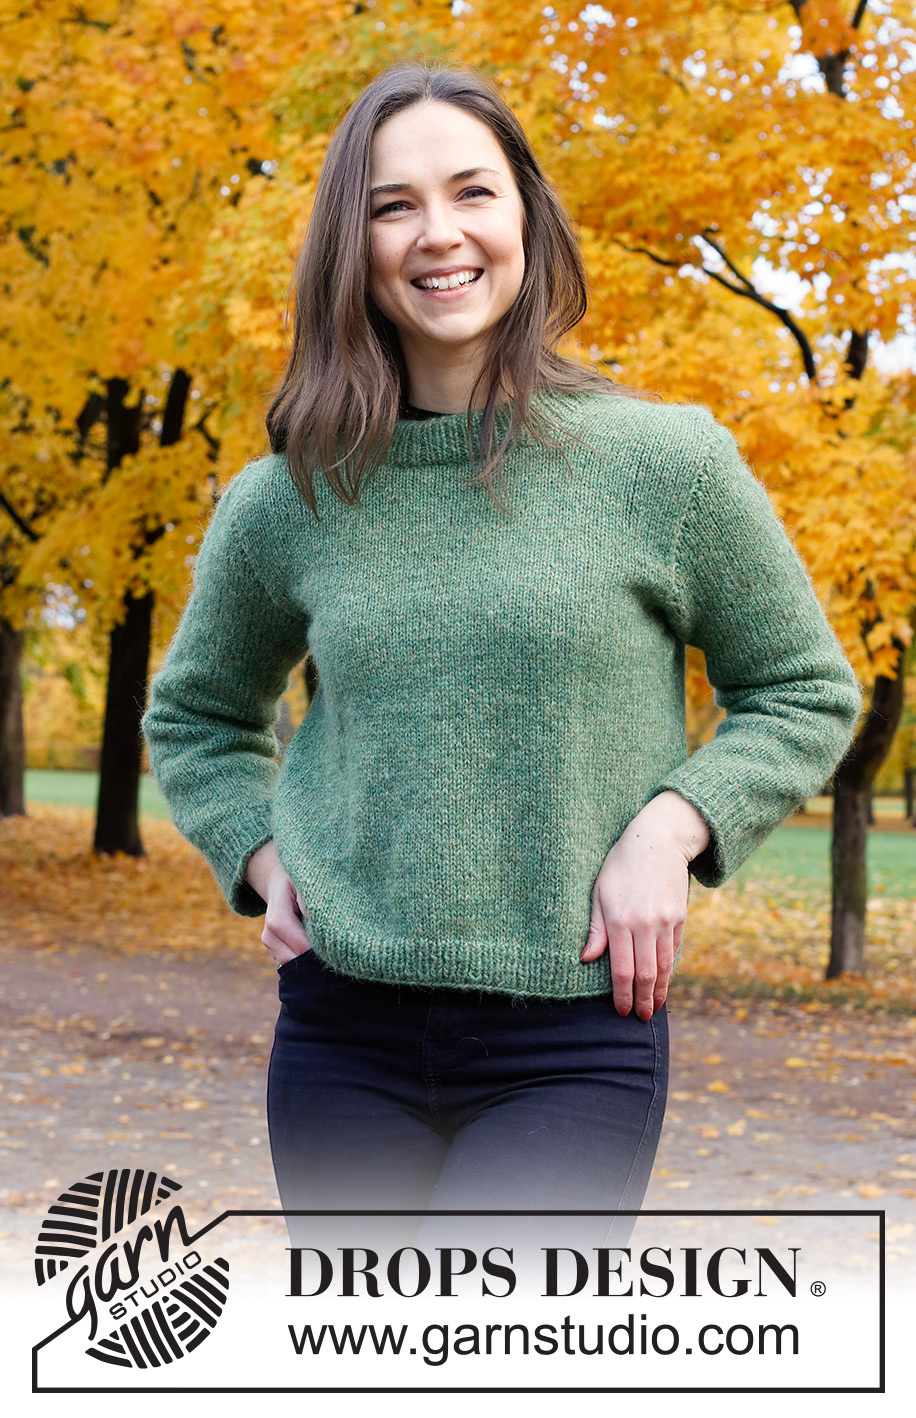
Serene Forest#sereneforestsweater |
|
 |
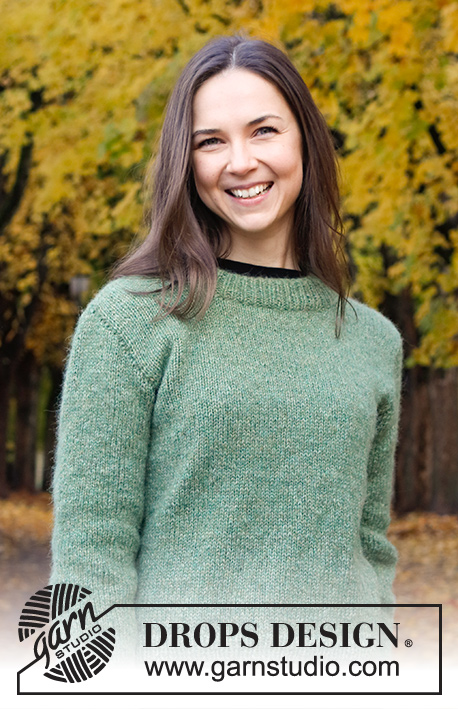 |
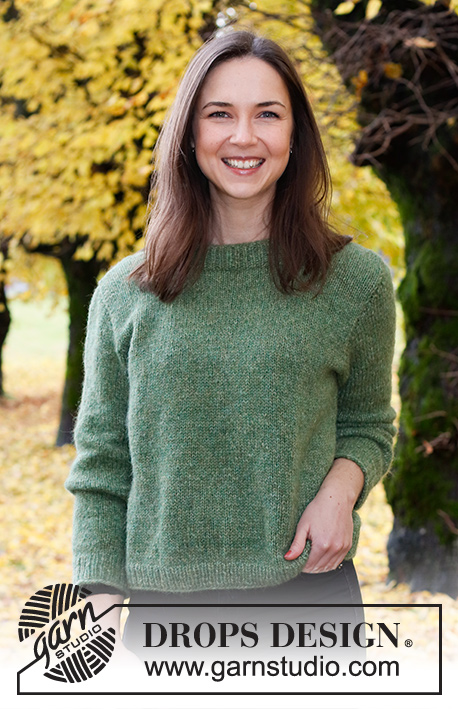
Knitted jumper in DROPS Air. The piece is worked in stocking stitch, with double neck. Sizes S - XXXL.
DROPS 226-28 |
|
|
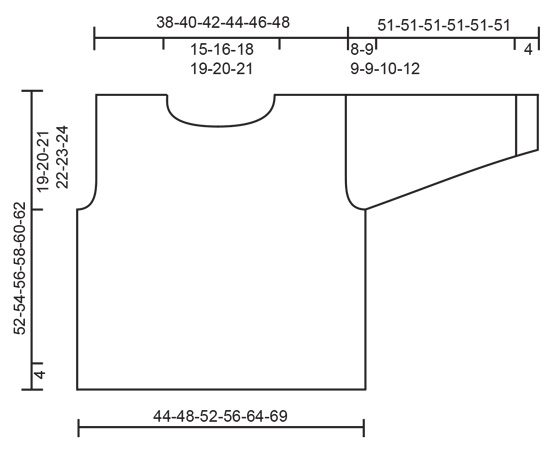
------------------------------------------------------- EXPLANATIONS FOR THE PATTERN: ------------------------------------------------------- INCREASE TIP: Work until there are 2 stitches left before the marker, make 1 yarn over, knit 4 (the marker sits in the middle of these 4 stitches), 1 yarn over. On the next round knit the yarn overs twisted to avoid holes. Then work the new stitches in stocking stitch (= 2 stitches increased). ------------------------------------------------------- START THE PIECE HERE: ------------------------------------------------------- JUMPER – SHORT OVERVIEW OF THE PIECE: The piece is worked in the round with circular needle as far as the armholes, then divided and the front and back pieces are finished separately. The sleeves are worked in the round, bottom up, with circular needle/double pointed needles. The sleeve cap is worked back and forth. BODY: Cast on 148-164-176-192-216-236 stitches with circular needle size 4 mm and DROPS Air. Knit 1 round then work rib in the round (knit 1, purl 1) for 4 cm, change to circular needle size 5 mm. Work stocking stitch over all stitches. REMEMBER THE KNITTING TENSION! When the piece measures 33-34-35-36-37-38 cm work the next round as follows – casting off for the armholes and then the front and back pieces are finished separately: Work 68-76-82-90-102-112 stitches, cast off 6 stitches, work 68-76-82-90-102-112 stitches, cast off 6 stitches. Place the first 68-76-82-90-102-112 stitches on a thread and continue working back and forth over the last 68-76-82-90-102-112 stitches (back piece). BACK PIECE: = 68-76-82-90-102-112 stitches. Work stocking stitch back and forth, AT THE SAME TIME cast off for the armholes at the beginning of each row: 2 stitches 1-1-1-2-3-4 times and 1 stitch 0-2-3-4-6-7 times on both sides = 64-68-72-74-78-82 stitches. When the piece measures 50-52-54-56-58-60 cm, cast off the middle 24-26-28-30-32-34 stitches for the neck and finish each shoulder separately. Cast off 1 stitch on the next row from the neck = 19-20-21-21-22-23 stitches on the shoulder. Continue with stocking stitch until the piece measures 52-54-56-58-60-62 cm (= 19-20-21-22-23-24 cm from the bottom of the armholes). Cast off. Work the other shoulder in the same way. FRONT PIECE: = 68-76-82-90-102-112 stitches. Work stocking stitch back and forth, AT THE SAME TIME cast off for the armholes at the beginning of each row: 2 stitches 1-1-1-2-3-4 times and 1 stitch 0-2-3-4-6-7 times on both sides = 64-68-72-74-78-82 stitches. When the piece measures 46-48-50-52-54-56 cm, place the middle 18-20-22-24-26-28 stitches on a thread for the neck and finish each shoulder separately. Cast off on each row from the neck as follows: Cast off 2 stitches 1 time and 1 stitch 2 times = 19-20-21-21-22-23 stitches on the shoulder. Continue with stocking stitch until the piece measures 52-54-56-58-60-62 cm (= 19-20-21-22-23-24 cm from the bottom of the armholes), cast off. Work the other shoulder in the same way. SLEEVES: The sleeves are worked bottom up, with double pointed needles/short circular needle. The sleeve is divided and then the sleeve cap is finished back and forth. Cast on 48-50-52-54-56-58 stitches with double pointed needles size 4 mm and Air. Knit 1 round, then work rib in the round (knit 1, purl 1) for 4 cm. Change to double pointed needles size 5 mm. Insert a marker at the beginning of the round = mid-under sleeve. Continue with stocking stitch, AT THE SAME TIME when the sleeve measures 8 cm, increase 1 stitch on each side of the marker – read INCREASE TIP. Increase like this every 10-8-6-4-3½-2½ cm a total of 4-5-6-8-9-11 times = 56-60-64-70-74-80 stitches. When the sleeve measures 43-42-42-42-41-39 cm, cast off 3 stitches on each side of the marker (= 6 stitches cast off under the sleeve) and work the sleeve cap back and forth. NOTE! Shorter measurements in larger sizes due to wider shoulders and longer sleeve cap. Cast off at the beginning of each row as follows: Cast off 2 stitches 3-3-3-3-3-4 times and 1 stitch 1-2-2-2-3-3 times on both sides. Then cast off 2 stitches on both sides until the sleeve measures 50 cm in all sizes, cast off 3 stitches 1 time on both sides and then cast off the remaining stitches. The sleeve measures approx. 51 cm in all sizes. Work the other sleeve in the same way. ASSEMBLY: Sew the shoulder seams. Sew in the sleeves. DOUBLE NECK: Start from the right side at the one shoulder seam. Using short circular needle size 4 mm, knit up 64 to 82 stitches around the neck, including the stitches on the thread in front (the number of stitches should be divisible by 2). Work rib in the round (knit 1, purl 1) for 8 cm. Cast off with knit over knit and purl over purl. Fold the neck double to the inside and sew down. To avoid the neck being tight and rolling outwards, it is important that the seam is elastic. |
|
 |
|
Have you finished this pattern?Tag your pictures with #dropspattern #sereneforestsweater or submit them to the #dropsfan gallery. Do you need help with this pattern?You'll find 28 tutorial videos, a Comments/Questions area and more by visiting the pattern on garnstudio.com. © 1982-2026 DROPS Design A/S. We reserve all rights. This document, including all its sub-sections, has copyrights. Read more about what you can do with our patterns at the bottom of each pattern on our site. |
|


With over 40 years in knitting and crochet design, DROPS Design offers one of the most extensive collections of free patterns on the internet - translated to 17 languages. As of today we count 324 catalogues and 12290 patterns translated into English (UK/cm). 12290
We work hard to bring you the best knitting and crochet have to offer, inspiration and advice as well as great quality yarns at incredible prices! Would you like to use our patterns for other than personal use? You can read what you are allowed to do in the Copyright text at the bottom of all our patterns. Happy crafting!
Post a comment to pattern DROPS 226-28
We would love to hear what you have to say about this pattern!
If you want to leave a question, please make sure you select the correct category in the form below, to speed up the answering process. Required fields are marked *.