
Popular categories
Looking for a yarn?


Comments / Questions (41)
![]() Marie Helene wrote:
Marie Helene wrote:
Je ne comprend pas comment intervient A1, vous ecrivez "de chaque coté" vous voulez dire a l'endroit et a l'envers ou de chaque coté du jete-maille endroit-jeté ?
06.04.2026 - 22:53DROPS Design answered:
Bonjour Marie-Hélène, quand on lit "1 m lisière au point mousse de chaque côté", on doit tricoter la 1ère et la dernière maille de chaque rang à l'endroit. Entre ces mailles, on tricote le diagramme A.1. On commence à tricoter A.1 quand on a tricoté 20 rangs. Si le nombre de mailles n'est pas suffisant pour faire la diminution avant la maille avec le marqueur et à la fin du rang (au 3ème et 9ème rang) tricotez les dernières mailles à l'endroit. Bon tricot!
08.04.2026 - 13:34
![]() Monique wrote:
Monique wrote:
Bonjour, Modèle 226_26 j’ai du mal à comprendre la partie A1. Sur les rgs 1 et 2 on tricote les augmentations et diminutions comme les rgs 3 et 4 Et au rgs 3 c.est le point ajoure??faut il faire les jetés de part et d’autre de la maille centrale Merci pour votre aide
20.03.2026 - 18:44DROPS Design answered:
Bonjour Monique, lorsque vous tricotez le rang 3 et le rang 9 de A.1 tout en augmentant, répétez A.1 comme indiqué jusqu'au marqueur, si vous ne pouvez pas terminez par (2 m ens à l'end, 1 jeté) car vous n'avez pas assez de mailles pour augmenter, tricotez ces mailles en jersey tout simplement, après le marqueur, reprenez A.1 au début (1 m end, 2 ms ens à l'end, 1 jeté) et si, à la fin du rang, vous ne pouvez pas terminer par (2 m ens à l'end, 1 jeté), tricotez les dernières mailles à l'endroit. Bon tricot!
23.03.2026 - 07:28
![]() Monika wrote:
Monika wrote:
Hallo, mir ist leider unklar, wie man zu- und abnimmt, wenn man die Reihen nach A. 1 Diagramm strickt? Wie passt man die Technik von Zu - und Abnehmen dem Muster im Diagramm an. Vielen Dank für die Hilfe! Monika
04.01.2026 - 18:07
![]() Pekonen Saara wrote:
Pekonen Saara wrote:
Erittäin epäselvä ohje. Tehdäänkö kavennukset myös A1 mallineuleen kohdalla oikealla ja myös vasemmalla sivussa, siis joka kierroksella myös MallineleA1 kohdalla. Onko mallineuleen ensimmäinen silmukka se silmukka joka on: lukuunottamatta joka kerroksen reunasilmukkaa. Myös työn selostus pitäisi olla tsrkempi.
24.09.2025 - 20:47
![]() Maria Lähteenmäki wrote:
Maria Lähteenmäki wrote:
Mallineule ja sen ohje on epämääräinen ja huono.
18.09.2025 - 22:14
![]() Nicole wrote:
Nicole wrote:
Bonjour, je viens de faire les 20 premiers rangs . Je suis rendue à intégrer A1. Je vais donc continuer les jetés autour de la maille centrale et la diminution d,une maille à la fi du rg endroit et la diminution sur le début du rg envers comme avant. On me demande de faire à chaque début de rg sur l’endroit une diminution en plus de 2 ou 3 mailles? La je ne comprends pas merci pour votre réponse
26.08.2025 - 16:06DROPS Design answered:
Bonjour Nicole, tricotez les augmentations et les diminutions exactement comme avant; et, en même temps, tricotez le point ajouré; la seule chose qui va "changer" c'est que lorsque vous tricotez les rangs 3 et 9 de A.1, si vous n'avez pas 2 mailles pour tricoter le point ajouré (2 m ens à l'end, 1 jeté), tricotez la maille restante à l'endroit (sinon vous allez modifier le nombre de mailles). Bon tricot!
27.08.2025 - 07:39
![]() AgataRz wrote:
AgataRz wrote:
Chciałabym zwiększyć liczbę oczek - czy całkowita liczba oczek musi być podzielna przez jakąś liczbę?
16.05.2025 - 20:09DROPS Design answered:
Witaj Agato, możesz zwiększyć liczbę oczek na większy szal. Pamiętaj tylko gdzie masz oczko środkowe, czyli to z markerem. Pozdrawiamy!
19.05.2025 - 12:16
![]() Martine De Smedt wrote:
Martine De Smedt wrote:
I love this pattern but I would like to make this shawl longer, is this possible? Not wider but longer would be great. Tips? Thanks! Greetings 😊
13.05.2025 - 10:26DROPS Design answered:
Dear Martine, to lengthen the shawl you will also need to widen the piece a bit, due to the decreases and the necessary shaping; otherwise the pattern can't be maintained. You can check other diagonal shawls, some of them longer, by clicking on the "diagonal-knit" tag, in the "You might also like..." section at the top. Happy knitting!
18.05.2025 - 14:10
![]() Erika Cronje wrote:
Erika Cronje wrote:
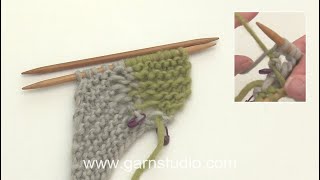
Thanks for whoever posted the video, it made it very clear and my leaf is starting to look really good!!!
23.04.2025 - 21:27
|
|||||||||||||
New Fern#newfernshawl |
|||||||||||||
 |
 |
||||||||||||
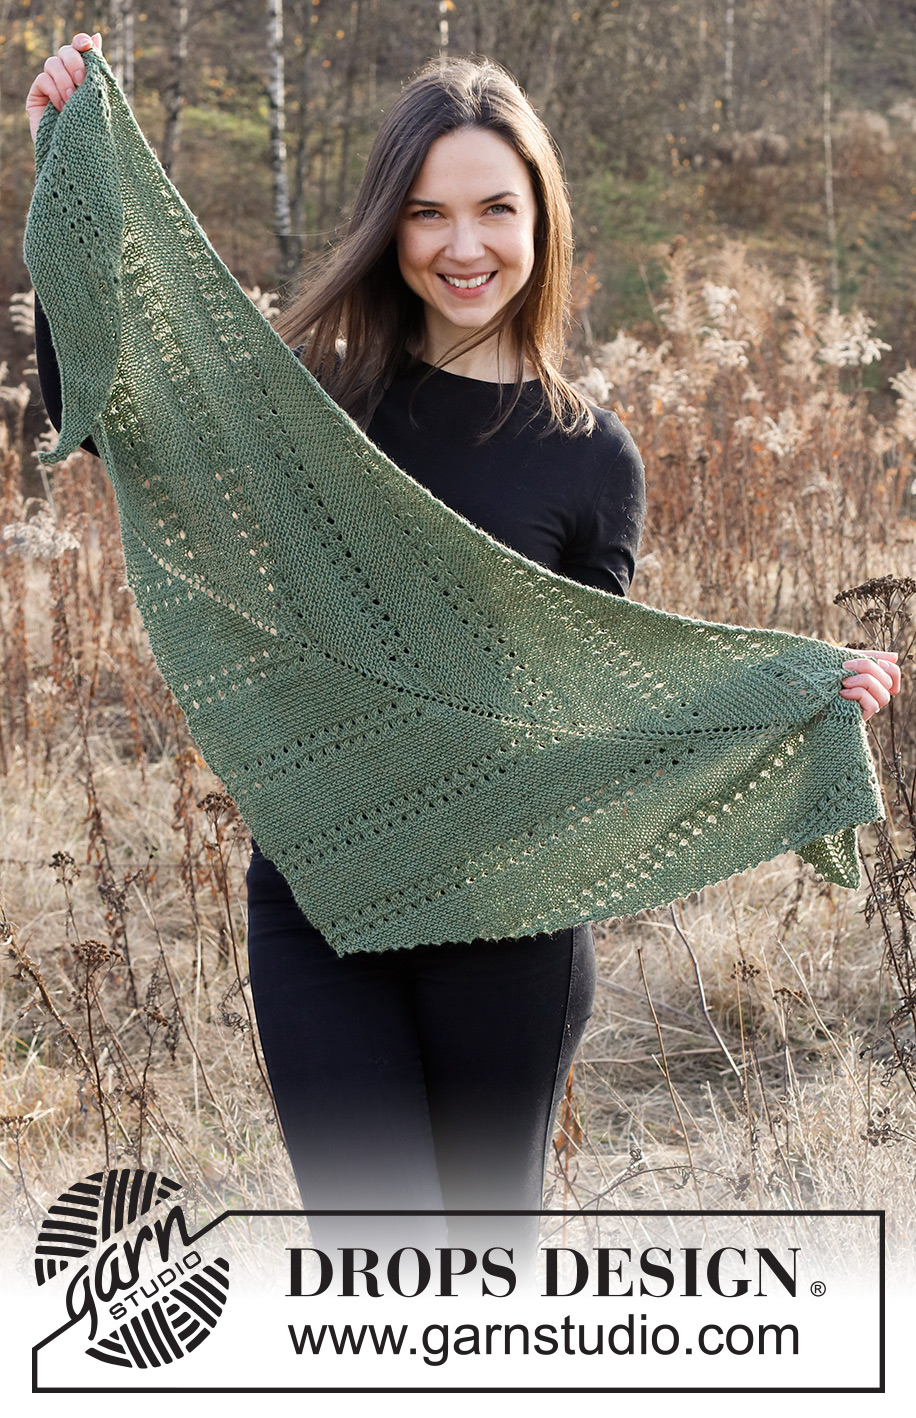
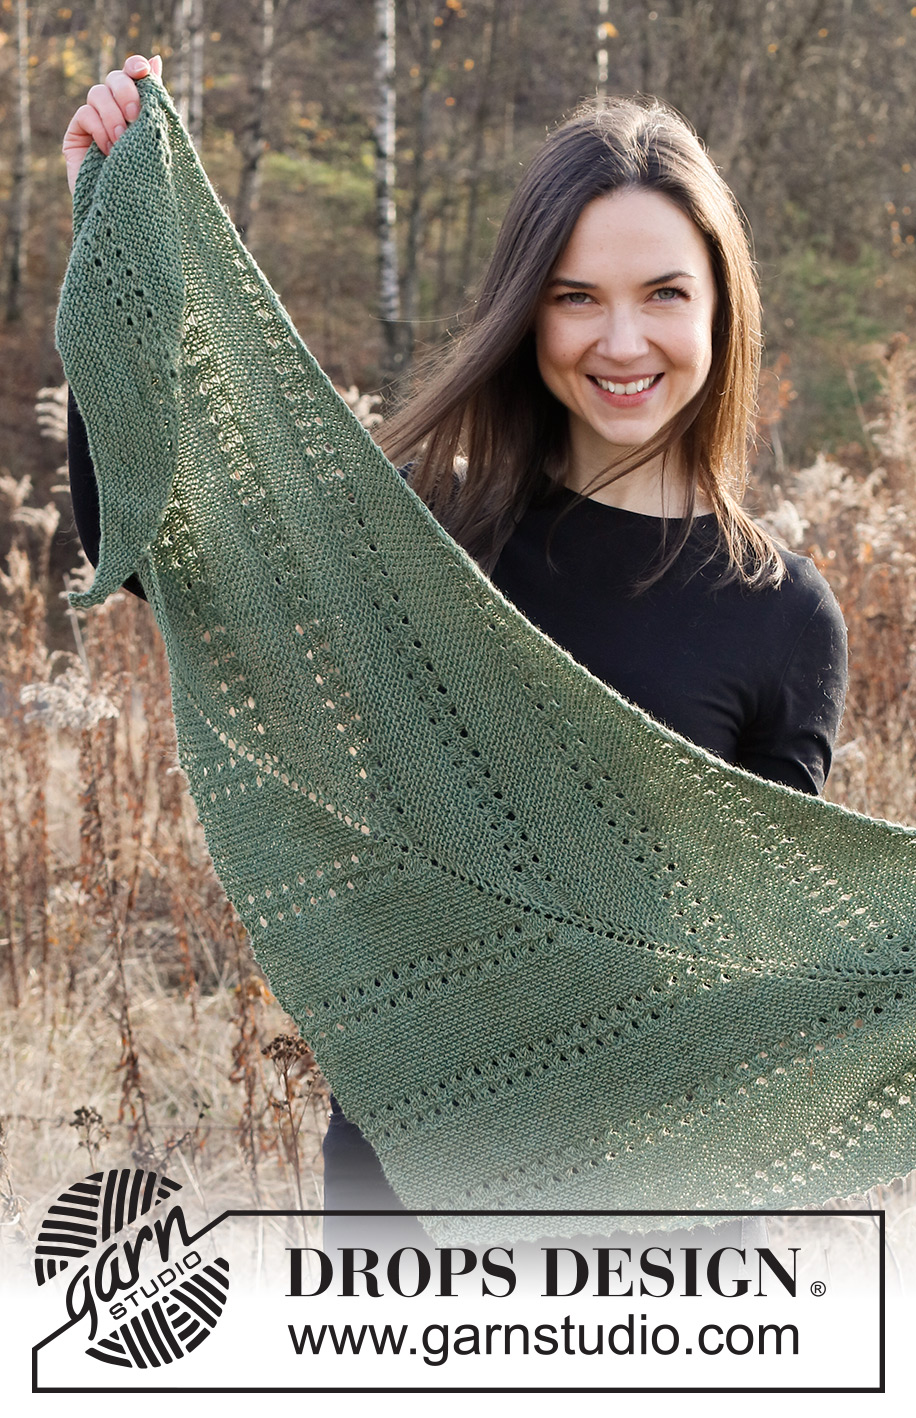
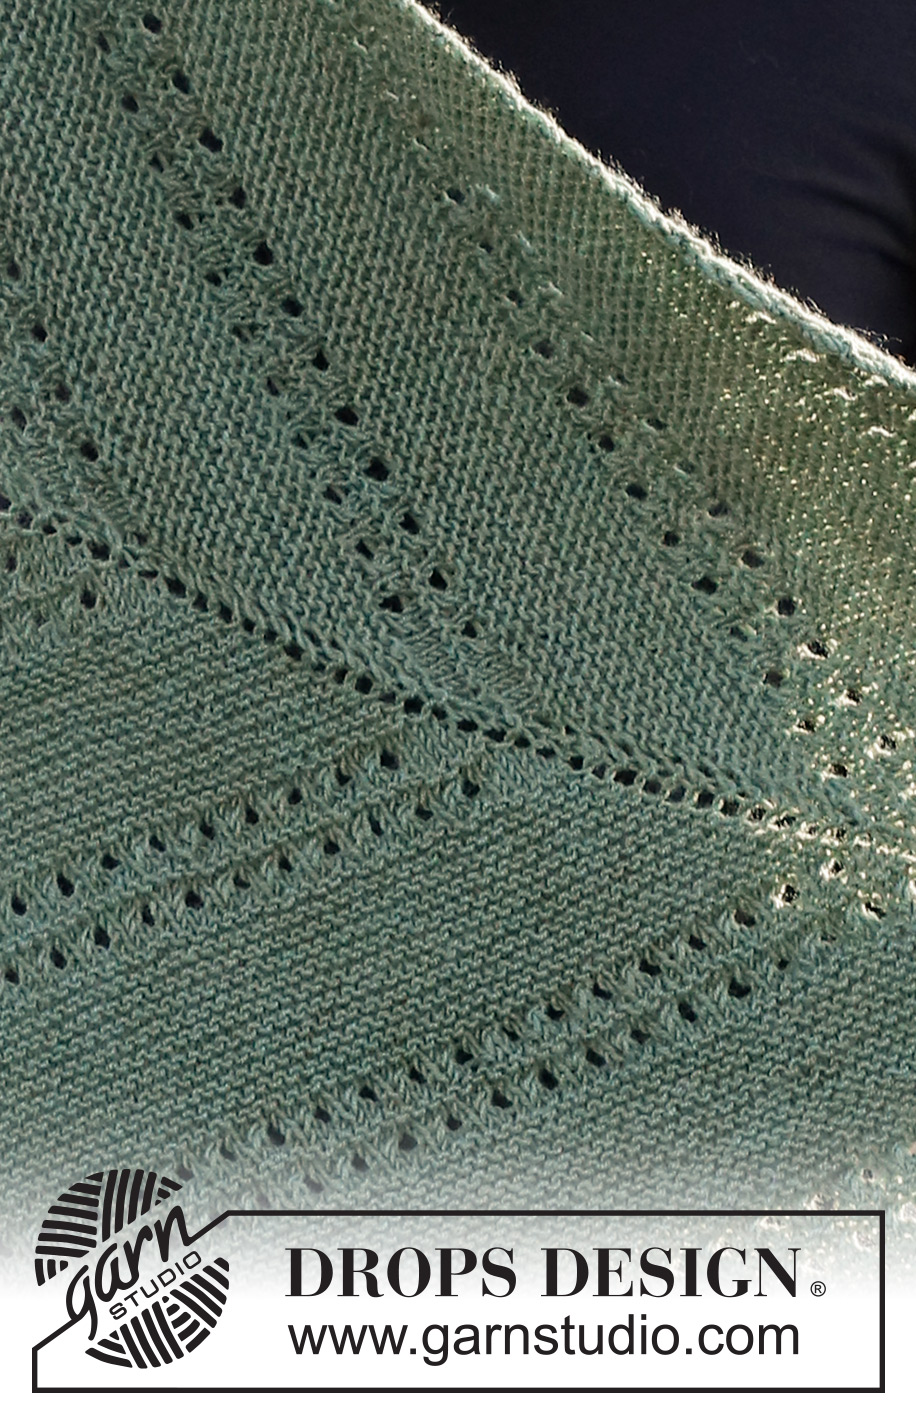
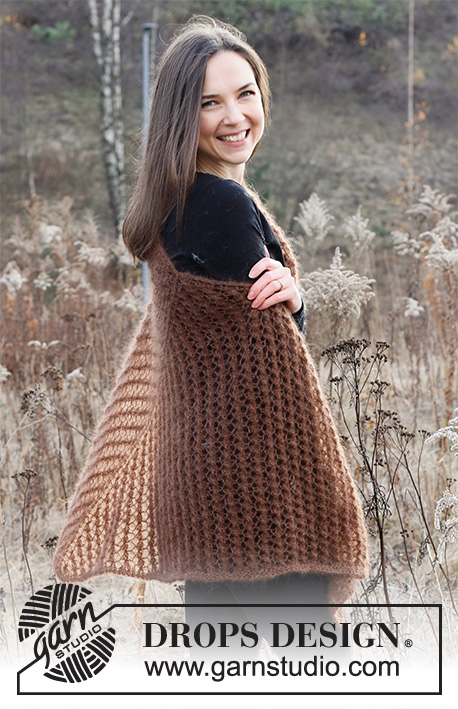
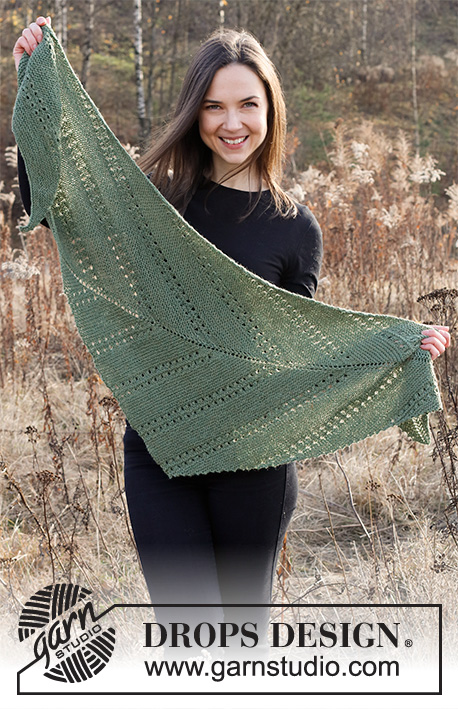
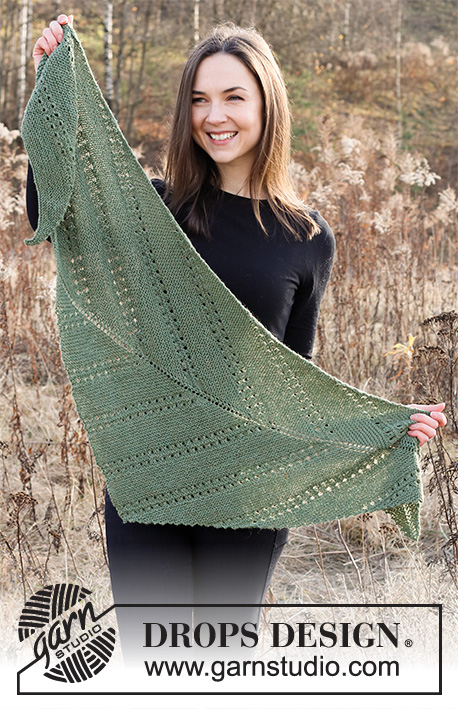
Knitted shawl in DROPS BabyMerino. The piece is worked at an angle with garter stitch and lace pattern.
DROPS 226-26 |
|||||||||||||
|
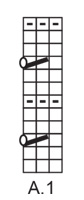
------------------------------------------------------- EXPLANATIONS FOR THE PATTERN: ------------------------------------------------------- RIDGE/GARTER STITCH (worked back and forth): Knit all rows. 1 ridge = knit 2 rows. PATTERN: See diagram A.1. The diagram shows all rows in the pattern from the right side. ------------------------------------------------------- START THE PIECE HERE: ------------------------------------------------------- SHAWL – SHORT OVERVIEW OF THE PIECE: The shawl is worked from the one short-side and across. Stitches are decreased on each side of the shawl and increased in the middle. SHAWL: Cast on 134 stitches with circular needle size 4.5 mm and DROPS Baby Merino. Knit 1 row from the right side. Insert a marker at the beginning of the next row – marks the right side. Now work as follows: ROW 1 (right side): Knit 1, 1 yarn over, knit 1 and insert a marker in this stitch (= mid-stitch), 1 yarn over, knit until there are 2 stitches left, knit 2 together = 135 stitches. ROW 2 (wrong side): Knit 2 together, knit to end of row = 134 stitches. ROW 3 (right side): Knit as far as the mid-stitch, 1 yarn over, knit 1 (= mid-stitch), 1 yarn over, knit until there are 2 stitches left, knit 2 together. ROW 4 (wrong side): Knit 2 together, knit to end of row. Repeat rows 3 and 4 onwards (i.e. on rows from the right side you increase 2 stitches and decrease 1 stitch, on rows from the wrong side you decrease 1 stitch; the number of stitches remains the same). When you have worked 20 rows (= 10 ridges), work pattern as follows: Work A.1 with 1 edge stitch in garter stitch on each side – if there are not enough stitches to work the decrease and the yarn over (on 3rd and 9th row in A.1), knit these stitches, AT THE SAME TIME, continue to increase and decrease as before. REMEMBER THE KNITTING TENSION! Continue with alternately 10 ridges and A.1 until you have increased 80 times on each side of the marker = 134 stitches (160 rows). Continue with the pattern (= alternately 10 ridges and A.1 1) decreasing and increasing as before, AT THE SAME TIME at the beginning of each row from the right side, casting off alternately 2 and 3 stitches. When you have worked a total of 7 repeats of A.1 in height finish the piece with garter stitch (continue to decrease at the beginning of each row from the right side). When there are 9 stitches left, cast off. Cut and fasten the strand. |
|||||||||||||
Diagram explanations |
|||||||||||||
|
|||||||||||||
 |
|||||||||||||
Have you finished this pattern?Tag your pictures with #dropspattern #newfernshawl or submit them to the #dropsfan gallery. Do you need help with this pattern?You'll find 15 tutorial videos, a Comments/Questions area and more by visiting the pattern on garnstudio.com. © 1982-2026 DROPS Design A/S. We reserve all rights. This document, including all its sub-sections, has copyrights. Read more about what you can do with our patterns at the bottom of each pattern on our site. |
|||||||||||||


With over 40 years in knitting and crochet design, DROPS Design offers one of the most extensive collections of free patterns on the internet - translated to 17 languages. As of today we count 325 catalogues and 12298 patterns translated into English (UK/cm). 12298
We work hard to bring you the best knitting and crochet have to offer, inspiration and advice as well as great quality yarns at incredible prices! Would you like to use our patterns for other than personal use? You can read what you are allowed to do in the Copyright text at the bottom of all our patterns. Happy crafting!
Post a comment to pattern DROPS 226-26
We would love to hear what you have to say about this pattern!
If you want to leave a question, please make sure you select the correct category in the form below, to speed up the answering process. Required fields are marked *.