
Popular categories
Looking for a yarn?


Comments / Questions (35)
![]() Loretta wrote:
Loretta wrote:
Buongiorno nel capitolo aumenti sullo sperone vi è un errore le maglie totali tra i due segnapunti per la taglia XL sono 58 e non 56 come indicato grazie per la Vostra risposta.
03.03.2026 - 14:46
![]() Yusayera Zafir wrote:
Yusayera Zafir wrote:
After the sleeve increases, I am not sure exactly where to move the 4 markers for the next Yoke increases. Can you clarify more? Do we move each marker 1 stitch over towards the inside of the sleeve sections? Thanks
27.11.2024 - 02:10DROPS Design answered:
Dear Mrs Zafir, the markers were before between 2 stitches, ie before the stitches for sleeve and after the stitches for sleeves, move them now in the first stitch and in the last stitch of both sleeves, ie not between stitches anymore but in the stitches. Happy knitting!
27.11.2024 - 07:23
![]() Saskia Havinga wrote:
Saskia Havinga wrote:
Nog een vraag: onder het kopje mouwmeerderingen staat als laatste zin: Ga verder door te minderen naar een kleine raglan, zoals beschreven hieronder. Echter, ik zie nergens staan dat er geminderd moet worden.
25.03.2024 - 17:24DROPS Design answered:
Dag Saskia,
De laatste zin is inderdaad wat verwarrend, want het lijkt daardoor of je iets kleiner moet maken doordat er een 'kleine raglan' staat. Je kunt dit negeren en gewoon verder gaan met de volgende paragraaf.
27.03.2024 - 12:40
![]() Saskia Havinga wrote:
Saskia Havinga wrote:
Ik ben net bij het lijf van het vest begonnen. Ik moet volgens het patroon beginnen met meerderen 6 cm vanaf de scheiding. Wat wordt bedoeld met de scheiding? Met vriendelijke groet, Saskia
24.03.2024 - 23:28DROPS Design answered:
Dag Saskia,
Hiermee wordt het punt bedoelt waarop je alleen het lijf breit en de mouwen laat rusten.
27.03.2024 - 13:45
![]() Mari wrote:
Mari wrote:
Vedr sadelskulderøkning. Det er 134 m (str M) og skal økes 12 ggr. (12x4=48) noe som gir 182m og ikke 230m som det står i oppskriften. 230m tilsier 24 økninger. Hva er riktig?
06.03.2024 - 20:21DROPS Design answered:
Hei Mari, Du øker 2 masker på begge sider av både for- og bakstykket. Da blir det 8 økte masker på hver pinne. 12 x 8 = 96. 134 + 96 = 230 masker. God fornøyelse!
11.03.2024 - 07:02
![]() Willemijn wrote:
Willemijn wrote:
Bij het meerderen voor de zadelschouder ontstaan er gaatjes vóór de eerste en de derde markeerdraad. Dat komt omdat de volgende steek averechts is. Hoe voorkom ik dit? Kan ik voor de laatste vier steken een omslag maken, dan drie steken breien, weer een omslag en de vierde steek normaal breien? Ik ben al drie keer opnieuw begonnen.
11.01.2024 - 16:02DROPS Design answered:
Dag Willemijn,
Doordat de volgende steek een averechte steek is wordt de omslag inderdaad automatisch groter, vandaar dat bij tip voor het meerderen ook staat aangegeven om extra strakke omslagen te maken. Heb je hier op gelet? Je zou daarnaast ook nog de volgende steek extra strak kunnen breien.
11.01.2024 - 18:44
![]() Martine RIBAULT wrote:
Martine RIBAULT wrote:
Sur votre conseil j'ai fait un échantillon avec une d'aig. n°5 pour obtenir 10x10 avec KARISMA. Je trouve que le tricot est plus aéré qu'avec une aig. n°4,5. L'échantillon avec aig. 4,5 la tension est 9,5x9,5 et un tricot plus resserré, qui me convient davantage. Dans le cas si je tricote avec 4,5, en rajoutant 2m à chaque bord des devants, est-ce-que j'obtiendrai les mêmes dimensions en largueur que sur le schéma représentant la veste ? Merci pour votre réponse.
03.01.2024 - 19:22DROPS Design answered:
Bonjour Mme Ribault, pensez également qu'un blocage aide parfois à obtenir la tension souhaitée, toutefois, si vous souhaitez conserver votre échantillon, il vous faudra recalculer les explications en vous basant sur votre propre tension car nous ne sommes malheureusement pas en mesure de pouvoir adapter chacun de nos modèles à chaque demande. Vous pouvez également consulter les différents modèles du groupe B avec la tension qui vous convient. Bon tricot!
04.01.2024 - 08:10
![]() Martine RIBAULT wrote:
Martine RIBAULT wrote:
Je ne suis pas parvenue à imprimer l'ensemble des réponses données aux questions posées par les différentes personnes, qui ont eu besoin de plus renseignement sur ce modèle. Serait-il possible de recevoir en P.J. par mail l'ensemble de ces pages avec traduction française si nécessaire, S.V.P. Avec fil KARISMA j'obtient 9,5x9,5 d'échantil. Si je rajoute 2m à chaque bande boutonnage, est-ce-que j'aurai les même dimensions que sur le schéma représentant le modèle ?
03.01.2024 - 19:07DROPS Design answered:
Bonjour Mme Ribault, pour obtenir les mesures finales telles qu'indiqué dans ce modèle, votre échantillon doit être de 20 mailles x 26 rangs jersey = 10 x 10 cm, si vous n'avez que 9,5 cm de côté, ré-essayez avec des aiguilles d'une demi-taille et/ou d'une taille au-dessus jusqu'à ce que vous ayez le bon échantillon, il vous faudra sinon recalculer les explications pour votre échantillon si vous souhaitez conserver une autre tension. Bon tricot!
04.01.2024 - 08:08
![]() RIBAULT Martine wrote:
RIBAULT Martine wrote:
J'ai fais un échantillon avec le fil KARISMA, aiguille circulaire 4,5 et j'ai obtenu un 9,5x9,5, pour 20 m en largeur et 26 rgs en hauteur. Il manque donc 0,5 cm en largeur et en hauteur pour le même nbre de mailles et rgs, soit 20 m et 26 rgs. Est-ce que je peux me risquer à faire ce cardigan en taille L, avec le fil KARISMA ? Je vous remercie pour votre réponse éventuelle. Cordialement.
02.01.2024 - 00:50DROPS Design answered:
Bonjour Mme Ribault, vous pouvez essayer de bloquer votre échantillon pour voir si ça peut changer quelque chose, sinon oui, essayez avec des aiguilles plus grosses pour obtenir le bon échantillon et ainsi les mesures finales (en hauteur et en largeur) comme indiqué dans le schéma. Bon tricot!
02.01.2024 - 12:26
![]() RIBAULT Martine wrote:
RIBAULT Martine wrote:
Est-ce que ce modèle Country Muse Cardigan est réalisable avec le fil KARISMA. Avec ce fil mon échantillon correspond à 21 m en larg. & 28 rg en haut. pour 10x10 cm, avec une aiguille circulaire 4,5. Si je peux me risquer à utiliser KARISMA pour ce modèle, je choisirais la taille L. Est-ce réalisable ? Le fil KARISMA a une longueur de 100m, un poids de 50grs tout comme le fil LIMA préconisé pour ce modèle. Merci pour votre réponse.
31.12.2023 - 21:18DROPS Design answered:
Bonjour Mme Ribault, tout à fait, Lima (ici) et Karisma sont du même groupe de fils B; la tension est ici de 20 mailles x 26 rangs, adaptez la taille de vos aiguilles pour avoir cet échantillon et ainsi les bonnes mesures finales correspondant à celles du schéma. Bon tricot!
02.01.2024 - 11:42
|
||||||||||||||||||||||
Country Muse Cardigan#countrymusecardigan |
||||||||||||||||||||||
 |
 |
|||||||||||||||||||||
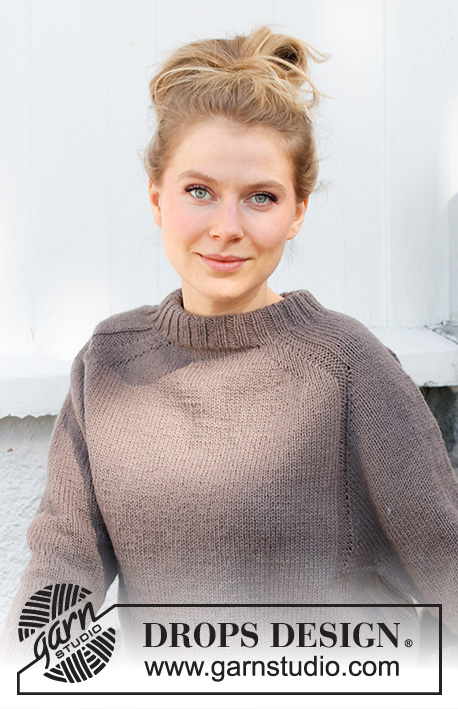
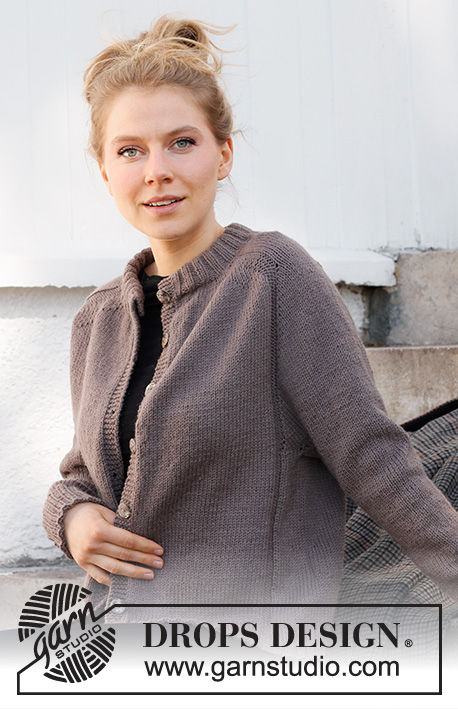
Knitted jacket in DROPS Lima. The piece is worked top down, with double neck and saddle shoulders. Sizes S - XXXL.
DROPS 216-39 |
||||||||||||||||||||||
|
------------------------------------------------------- EXPLANATIONS FOR THE PATTERN: ------------------------------------------------------- RIDGE/GARTER STITCH (worked back and forth): Knit all rows. 1 ridge in height = Knit 2 rows. PATTERN: See diagram A.1. Choose diagram for your size. The diagram shows all rows in the pattern from the right side. INCREASE/DECREASE TIP (evenly spaced): To work out how to increase/decrease evenly, count the total number of stitches on needle (e.g. 104 stitches), minus the bands (e.g. 10 stitches) and divide the remaining stitches by the number of increases/decreases to be made (e.g. 26) = 3.6. In this example, increase by making 1 yarn over after alternately each 3rd and 4th stitch. On the next row work the yarn overs twisted to avoid holes. When decreasing, knit together alternately each 2nd and 3rd stitch and each 3rd and 4th stitch (approx.). INCREASE TIP-1 (for saddle shoulder increase): All increases are worked from the right side! Increase 2 stitches on each side of the 26-26-26-30-30-30 shoulder stitches by making 1 yarn over as described below. On the next row (wrong side) purl the yarn overs twisted to avoid holes. Then work the new stitches in stocking stitch. NOTE: The number of shoulder-stitches stays the same – the increased stitches become part of the front/back pieces. BEFORE MARKER: Start 4 stitches before the marker, make 1 tight yarn over, work 4 stocking stitches, make 1 tight yarn over (= 2 stitches increased). AFTER MARKER: Make 1 tight yarn over, work 4 stocking stitches, make 1 tight yarn over (= 2 stitches increased). INCREASE TIP-2 (for sleeve increase): All increases are worked from the right side! BEFORE MARKER: Use left needle to pick up strand between 2 stitches from the row below, pick up strand from behind and knit stitch in front loop (= 1 stitch increased) AFTER MARKER: Use left needle to pick up strand between 2 stitches from the row below, pick up strand from the front and knit stitch in back loop (= 1 stitch increased) INCREASE TIP-3 (yoke increase): Start before the marker-stitch, use left needle to pick up strand between 2 stitches from the row below, pick up strand from behind and knit stitch in front loop, work marker-stitch in stocking stitch as before, use left needle to pick up strand between 2 stitches from the row below, pick up strand from the front and knit stitch in back loop (= 1 stitch increased on each side of the marker-stitch). Work the new stitches in stocking stitch. INCREASE TIP-4 (for sides of body): All increases are worked from the right side! Work until there are 3 stitches before the marker thread, make 1 yarn over, work 6 stitches in stocking stitch (the marker thread sits in the middle of these 6 stitches), make 1 yarn over (= 2 stitches increased). On the next row (wrong side) purl the yarn overs twisted to avoid holes. Then work the new stitches in stocking stitch. DECREASE TIP (for sleeves): Start 3 stitches before the marker thread, knit 2 together, knit 2 (the marker thread sits in the middle of these 2 stitches), slip 1 as if to knit, knit 1 and pass the slipped stitch over the knitted stitch (= 2 stitches decreased). BUTTONHOLES: Work buttonholes on the right band (when the garment is worn). Work from the right side when there are 3 stitches left on the row as follows: Make 1 yarn over, knit 2 together and knit 1. On the next row (wrong side), knit the yarn over to leave a hole. The first buttonhole is worked when the rib on the neck measures 2 cm, the next when the neck measures 7 cm. These 2 buttonholes will match when the neck is folded double. Then work the other 6-6-6-7-7-7 buttonholes with approx. 8-8-8½-8-8-8½ cm between each one. KNITTING TIP (for rib at bottom of body): Work rib with knit 2 / purl 2 over all stitches as explained in pattern, and with 5 band stitches in garter stitch in each side towards mid front as before. If you want the 4 purled stitches (seen from right side) from A.1 to continue all the way down in the rib, you must adjust this when increasing stitches evenly before working rib. Make sure to knit 2 stitches on each side of the 4 purled stitches. CASTING-OFF TIP: To avoid the cast-off edge being tight you can cast off with a larger size needle. If the edge is still tight, make 1 yarn over after approx. each 8th stitch at the same time as casting off; the yarn overs are cast off as normal stitches. ------------------------------------------------------- START THE PIECE HERE: ------------------------------------------------------- JACKET – SHORT OVERVIEW OF THE PIECE: The neck and yoke are worked back and forth with circular needle from mid front and top down. Stitches are increased for the saddle shoulders, then for the sleeves and then for yoke. The yoke is divided for body and sleeves and the body continued back and forth. The sleeves are worked in the round with short circular needle/double pointed needles, top down. NECK: Cast on 104-108-112-116-120-124 stitches (including 5 band stitches on each side) with circular needle size 3.5 mm and Lima. Purl 1 row (= wrong side). The next row is worked as follows from the right side: 5 band stitches in GARTER STITCH – read description above, * knit 2, purl 2 *, work from *-* until there are 7 stitches left, knit 2 and 5 band stitches in garter stitch. Continue this rib for 9 cm – remember BUTTONHOLES on the right band – read description above. When the rib is finished, knit 1 row from the right side where you increase 26-26-30-38-38-42 stitches evenly spaced – read INCREASE/DECREASE TIP = 130-134-142-154-158-166 stitches. Purl 1 row from the wrong side (yarn overs purled twisted and bands knitted). Now work yoke as described below: YOKE: Change to circular needle size 4.5 mm. Insert 1 marker after the band at the beginning of the row. The yoke is measured from this marker! In addition insert 4 new markers as described below – these markers are inserted without working the stitches, and each marker is placed between 2 stitches. These markers are used when increasing for saddle shoulder and should be of a different colour to the marker on the neck. Start mid front, count 22-23-25-26-27-29 stitches (= front piece), insert marker 1 before the next stitch, count 26-26-26-30-30-30 stitches (= shoulder), insert marker 2 before the next stitch, count 34-36-40-42-44-48 stitches (= back piece), insert marker 3 before the next stitch, count 26-26-26-30-30-30 stitches (= shoulder), insert marker 4 before the next stitch. There are 22-23-25-26-27-29 stitches left after the last marker. Allow these markers to follow your work onwards; they will be used when increasing. SADDLE SHOULDER-INCREASE: Read the whole section before continuing! The piece is continued with stocking stitch on the front/back pieces, 5 band stitches in garter stitch on each side and with A.1 over the 26-26-26-30-30-30 stitches on each shoulder (between markers 1 and 2 and between markers 3 and 4) – remember BUTTONHOLES on the right band – read description above. AT THE SAME TIME on the first row from the right side, increase 8 STITCHES for the saddle shoulders as follows: Increase 2 stitches BEFORE markers 1 and 3 (i.e. before A.1), and increase 2 stitches AFTER markers 2 and 4 (i.e. after A.1) – read INCREASE TIP-1. Remember there are only increases on front pieces and back piece and number of shoulder stitches remains the same. Continue this pattern and increase like this every 2nd row (i.e. each row from the right side) a total of 10-12-13-14-16-17 times = 210-230-246-266-286-302 stitches. REMEMBER THE KNITTING TENSION! After the last increase, the piece measures approx. 8-9-10-11-12-13 cm from the marker on the neck. Now increase for the sleeves as follows: SLEEVE-INCREASES: Move the 4 markers from saddle shoulder-increase, so they are now on each side of the middle 18-18-18-22-22-22 stitches in A.1 on each shoulders – see arrows in A.1. Continue with stocking stitch, 5 band stitches in garter stitch on each side towards mid front and A.1 over A.1 as before. AT THE SAME TIME on the next row from the right side increase 4 stitches for the sleeves as follows: Increase 1 stitch AFTER markers 1 and 3 and increase 1 stitch BEFORE markers 2 and 4 – read INCREASE TIP-2. Remember there are only increases on sleeves and number of stitches in A.1 is increasing, but number of stitches on front piece and back piece remains the same – the increased stitches are knitted from right side and purled from wrong side. Increase like this every 2nd row (i.e. each row from the right side) a total of 15-16-16-18-19-19 times = 270-294-310-338-362-378 stitches. After the last increase, the piece measures approx. 11-12-12-13-14-14 cm from where the sleeve-increases started. Continue by increasing to a small raglan as described below. YOKE INCREASE: Move the 4 markers from the sleeves, and insert them in the outermost stitches on each side of both sleeves. There are 46-48-48-56-58-58 stitches between the markers on each sleeve. Continue with stocking stitch, 5 band stitches in garter stitch on each side towards mid front and 4 purled stitches (seen from the right side) from A.1 which should continue down the front pieces and back piece as before. AT THE SAME TIME, on the next row from the right side, increase 8 stitches for yoke increase as follows: Increase 1 stitch on each side of the 4 marker-stitches – read INCREASE TIP-3 (= 8 stitches increased). Increase like this every 2nd row (i.e. each row from the right side) a total of 5-5-6-7-7-8 times = 310-334-358-394-418-442 stitches. Continue working without further increases until the piece measures 16-17-18-19-20-21 cm from where the sleeve-increase started after saddle shoulder increase. The piece now measures approx. 24-26-28-30-32-34 cm from the marker by the neck. On the next row divide the yoke for the body and sleeves as follows: Work the first 50-54-57-62-67-72 stitches as before (= front piece), place the next 60-64-70-78-80-82 stitches on 1 thread for the sleeve, cast on 6-6-8-8-10-12 new stitches on the needle (in side under sleeve), work 90-98-104-114-124-134 stitches as before (= back piece), place the next 60-64-70-78-80-82 stitches on 1 thread for the sleeve, cast on 6-6-8-8-10-12 new stitches on the needle (in side under sleeve), work the last 50-54-57-62-67-72 stitches as before (= front piece). Remove all markers. Body and sleeves are finished separately. THE PIECE IS NOW MEASURED FROM HERE! BODY: = 202-218-234-254-278-302 stitches. Insert 1 marker thread 53-57-61-66-72-78 stitches in from each side (= sides of body). There are 96-104-112-122-134-146 stitches between threads on the back piece. Allow the threads to follow your work onwards – they will be used when increasing in the sides. Work stocking stitch back and forth with 5 band stitches in garter stitch on each side and 4 purled stitches (seen from the right side) which continue the line down the front and back pieces as before. When the piece measures 6 cm from the division, increase 1 stitch on each side of both marker threads – read INCREASE TIP-4 (= 4 stitches increased). Increase like this every 6 cm a total of 3 times on each side = 214-230-246-266-290-314 stitches. Continue working until the piece measures 23-23-23-22-22-22 cm from the division. There is approx. 4 cm left to finished length; try the jacket on and work to desired length. Purl 1 row from wrong side (work band stitches in garter stitch) and AT THE SAME TIME increase 50-54-58-66-70-78 stitches evenly spaced – read INCREASE/DECREASE TIP = 264-284-304-332-360-392 stitches. NOTE: Increase to prevent rib from contracting and pulling the piece together. Change to circular needle 3,5 mm. Work next row as follows from right side – read KNITTING TIP: Work 5 band stitches in garter stitch, * knit 2, purl 2 *, work from *-* until there are 7 stitches remaining on needle, knit 2 and finish with 5 band stitches in garter stitch. Continue this rib with garter stitch over garter stitch, knit over knit and purl over purl for 4 cm. Cast off with knit over knit, garter stitch over garter stitch and purl over purl – read CASTING-OFF TIP! The jacket measures approx. 56-58-60-62-64-66 cm from the shoulder down. SLEEVE: Place the 60-64-70-78-80-82 stitches from the thread on the one side of the piece on double pointed needles size 4.5 mm and knit up 1 stitch in each of the 6-6-8-8-10-12 stitches cast on under the sleeve = 66-70-78-86-90-94 stitches. Insert a marker thread in the middle of the 6-6-8-8-10-12 stitches under the sleeve; allow the thread to follow your work onwards; it will be used when decreasing under the sleeve. Start the round at the marker thread and work stocking stitch in the round. When the piece measures 2 cm from the division, decrease 1 stitch on each side of the marker thread – read DECREASE TIP. Decrease like this every 2-2-1½-1-1-1 cm a total of 7-8-11-14-15-16 times = 52-54-56-58-60-62 stitches. Continue working until the sleeve measures 36-35-33-32-31-29 cm from the division. There is approx. 6 cm left to finished length; try the jacket on and work to desired length (NOTE: shorter measurements in larger sizes due to broader shoulders and longer yoke). Knit 1 round where you decrease 4-6-4-6-4-6 stitches evenly spaced = 48-48-52-52-56-56 stitches. Change to double pointed needles size 3.5 mm and work rib (= knit 2, purl 2) for 6 cm. Cast off with knit over knit and purl over purl – remember CASTING-OFF TIP. The sleeve measures approx. 42-41-39-38-37-35 cm from the division. Work the other sleeve in the same way. ASSEMBLY: Fold the neck double to the wrong side. Sew down but, to avoid the neck being tight and rolling outwards, it is important the seam is elastic – make sure the 2 buttonholes on the neck match each other. Sew the openings on each side of the neck with small stitches. Sew the buttons onto the left band. |
||||||||||||||||||||||
Diagram explanations |
||||||||||||||||||||||
|
||||||||||||||||||||||
 |
||||||||||||||||||||||
 |
||||||||||||||||||||||
 |
||||||||||||||||||||||
Have you finished this pattern?Tag your pictures with #dropspattern #countrymusecardigan or submit them to the #dropsfan gallery. Do you need help with this pattern?You'll find 34 tutorial videos, a Comments/Questions area and more by visiting the pattern on garnstudio.com. © 1982-2026 DROPS Design A/S. We reserve all rights. This document, including all its sub-sections, has copyrights. Read more about what you can do with our patterns at the bottom of each pattern on our site. |
||||||||||||||||||||||


With over 40 years in knitting and crochet design, DROPS Design offers one of the most extensive collections of free patterns on the internet - translated to 17 languages. As of today we count 324 catalogues and 12290 patterns translated into English (UK/cm). 12290
We work hard to bring you the best knitting and crochet have to offer, inspiration and advice as well as great quality yarns at incredible prices! Would you like to use our patterns for other than personal use? You can read what you are allowed to do in the Copyright text at the bottom of all our patterns. Happy crafting!
Post a comment to pattern DROPS 216-39
We would love to hear what you have to say about this pattern!
If you want to leave a question, please make sure you select the correct category in the form below, to speed up the answering process. Required fields are marked *.