
Popular categories
Looking for a yarn?





























Comments / Questions (74)
 Beate Bera wrote:
Ich verstehe die Raglanzunahmen nicht, kann mir auch nicht vorstellen, wie das aussehen soll. Kann mir jemand ein Detail- Foto von den Zunahmen senden? Vielleicht auch ein Foto vom fertigen Produkt, in dem man das Muster an den Ärmeln sehen kann? Ich bedanke mich im Voraus!
25.04.2015 - 23:05DROPS Design answered:
Liebe Beate, an dieser Stelle können wir Ihnen kein weiteres Foto bieten. Aber wenn Sie sagen, welche Größe Sie stricken, kann ich Ihnen vielleicht genauer erklären, wie Sie die Raglanzunahmen stricken müssen.
26.04.2015 - 21:06
Senta wrote:
In der Anleitung zum Ärmel steht: "Alle M im Muster A.5 str." das soll doch bestimmt A.3 heißen, wie für den Rumpfabschluss?
15.04.2015 - 09:56DROPS Design answered:
Ja, das ist richtig, es wird gleich geändert, danke für den Hinweis!
15.04.2015 - 09:58
 Mareka Krentner wrote:
Encore une question, les 8 augmentations du raglan se font du côté des manches tous les 2 tours, 2 augmentations après le marqueur de la manche et 2 augmentations juste avant le dernier marqueur de la manche. Le devant et dos pas d'augmentation toujours les 45 mailles du début (taille s) jusqu'au manche . Merci de votre aide.
13.04.2015 - 19:26DROPS Design answered:
Bonjour Mme Krentner, à chaque tour d'augmentation, on a 2 m en plus pour chaque pièce (manches, dos, devant), les jetés se tricotent à l'endroit et augmentent le nombre de mailles de chaque partie. Bon tricot!
14.04.2015 - 09:37
Mareka Krentner wrote:
Bonjour, j'ai encore un problème, pour le raglan (taille S) quand vous dites augmenter 2 mailles à chaque marqueur, les 2 premières augmentations se situent juste après le 1er marqueur, là où il y a 45 mailles et où on commence le diagramme A2 ensuite. J'aimerai bien que vous me le confirmiez, merci de votre patience.
13.04.2015 - 15:45DROPS Design answered:
Bonjour Mme Krentner, on augmente 2 m à chaque marqueur avec 1 jeté avant (1 m torse à l'end, 1 m end, 1 m torse à l'end) et 1 jeté après ces 3 m. Ces jetés sont les augmentations du raglan et "appartiennent" à la pièce concernée, le marqueur doit rester en place avant le jeté et vous conservez ainsi ces 3 m tricotées les unes au-dessus des autres. A.2 doit rester centré et on a 1 m en + de chaque côté à chaque augmentation. Bon tricot!
14.04.2015 - 09:29
 Vibeke wrote:
Når jeg skal dele efter udtagningerne til raglan, skal der så tælles masker fra første mærkning i starten af arbejdet? Hvis ja, ligger raglanudtagningerne jo skæve!! Altså, forstykket starter v/ raglan, tæller til forstykket (her 103), slutter 14 masker Før venstre raglans udtagninger, derefter skal der tælles til ærmet........Dette kan jeg ikke forstå!! Please help me!
10.04.2015 - 19:11DROPS Design answered:
Hej Vibeke. Du taeller fra starten af pinden ikke fra start af raglan.
17.04.2015 - 15:34
Mareka Krentner wrote:
Bonjour, une confirmation, quand on tricote le diagramme A2, c'est bien à droite que l'on commence, et pas à gauche ? Merci de votre patience
08.04.2015 - 09:26Mareka Krentner answered:
Excusez-moi je n'avais pas encore la réponse sur mon ordinateur, maintenant je l'ai Merci beaucoup. Bonne journée printanière.
08.04.2015 - 09:28
Mareka Krentner wrote:
Merci pour vos conseils, juste une confirmation quand on commence le diagramme A2 , on le lit bien de droite à gauche? et pas l'inverse. Merci de votre réponse
08.04.2015 - 08:33DROPS Design answered:
Bonjour Mme Krentner, tout à fait, les diagrammes se lisent de droite à gauche tous les rangs (= on tricote ici en rond), en commençant en bas à droite (1 case = 1 m x 1 rang). Bon tricot!
08.04.2015 - 09:16
Mareka Krentner wrote:
Bonjour, j'ai plusieurs interrogations concernant ce top en taille S, concernant le point fantaisie A2 on commence bien en bas du schéma à gauche et on remonte (38rg). une fois les 16 augmentations et la pose des 4 marqueurs on commence le 1er raglan et ensuite on fait 14 m et on commence le point fantaisie A2 mais quand j'arrive au 2ème marqueur je m’aperçois que le motif n'est pas du tout centré il reste plus de mailles. Merci de votre patience Bonne journée;
06.04.2015 - 14:54DROPS Design answered:
Bonjour Mme Krentner, on tricote A.2 en même temps que l'on augmente pour le raglan. Après chaque tour d'augmentations pour le raglan, on a 2 m en plus pour chaque pièce (dos, devant, manches), alignez bien les mailles des raglans et continuez A.2. Bon tricot!
07.04.2015 - 09:46
Krentner wrote:
Merci pour votre réponse, mais c'est pour le raglan que j'ai un soucis que veut dire "ne pas tricoter les jetés torses au tour suivant" qu'es ce qu'un jeté torse?merci de votre réponse
04.04.2015 - 10:18DROPS Design answered:
Bonjour Mme Krennter, tricoter un jeté torse signifie le tricoter dans le brin arrière (cf vidéo ci-dessous), quand on ne doit pas le tricoter torse, on va le tricoter normalement, dans le brin avant, pour former un trou (jour). Bon tricot!
07.04.2015 - 08:40
 Jan Mumma wrote:
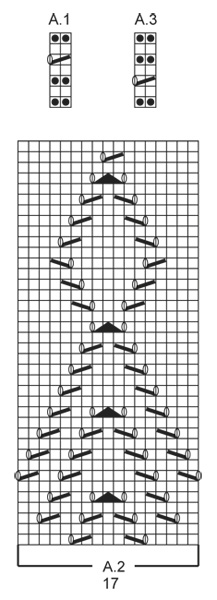
Not sure how to read the A-1 diagram. When I read the instructions starting with the yoke (and the explanation to start from the lower right side of the chart) it says to work A.1 (=2 st.) over all the sts. I'm not sure if I should do 2 p. rows and then do the slip 1 st, etc. row and then do another p row? I'm just confused. I consider myself an intermediate knitter, but just wasn't understanding how to read the chart correctly.
01.04.2015 - 23:20DROPS Design answered:
Dear Mrs Mumma, repeat the 2 sts in diagram over all sts on needle, ie on round 1, P all sts, on round 2, K all sts, round3, P all sts, round4, K all sts, on round 5 work (K2 tog, YO) around, then on round 6, K all sts and on round 7 P all sts. Happy knitting!
02.04.2015 - 09:52
|
|||||||||||||||||||
Serene Spring |
|||||||||||||||||||
 |
 |
||||||||||||||||||
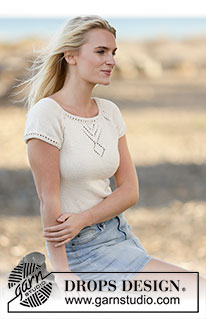
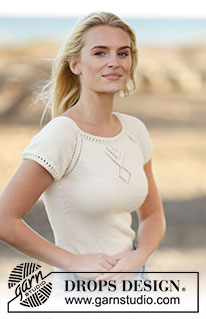
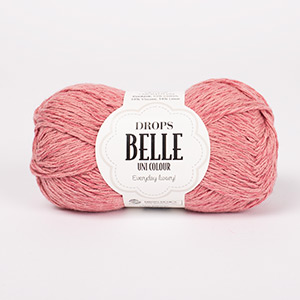
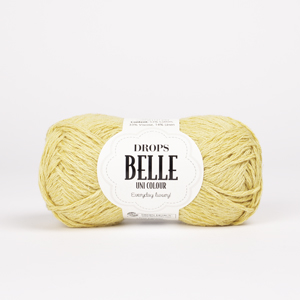
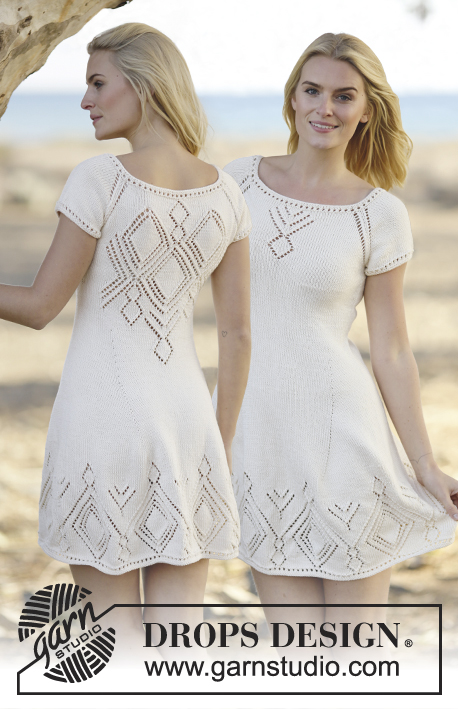
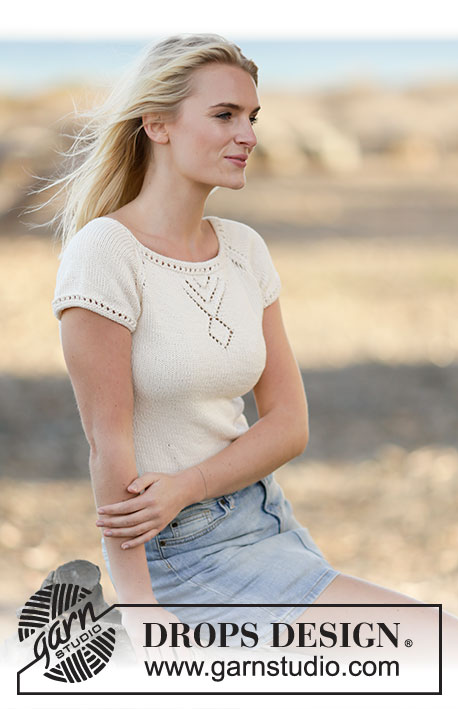
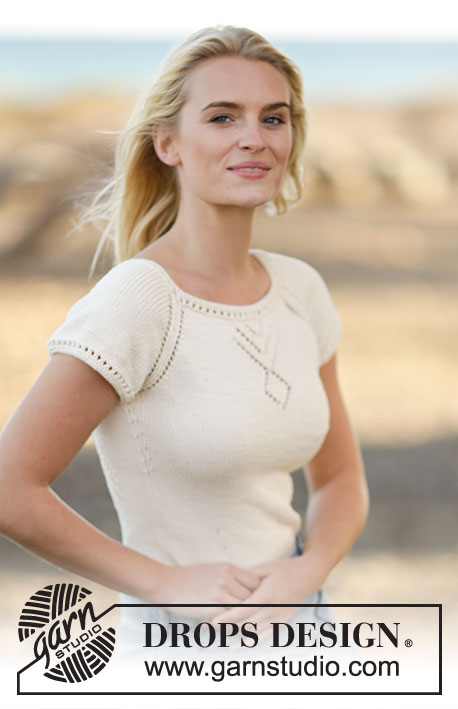
Knitted DROPS top with lace pattern and raglan in ”Belle”. Worked top down. Size: S - XXXL.
DROPS Extra 0-1104 |
|||||||||||||||||||
|
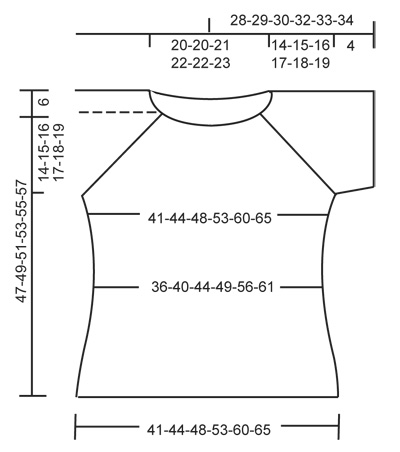
PATTERN: See diagrams A.1 to A.3. DECREASE TIP: Dec 1 st before marker as follows: Work until 2 sts remain before marker, slip 1 st as if to K, K 1, psso. Dec 1 st after marker as follows: K 2 tog. RAGLAN: Inc differently for raglan in the different sizes: SIZE S-M: Inc 1 sts each side of each marker (= 8 sts inc in total) as follows: 1 YO, K 1 twisted, K 1 (= st with marker), K 1 twisted, 1 YO. Do not work YOs twisted on next round, they should make holes, repeat inc every other round 17-19 more times. NOTE: The inc on each side of 1st marker (= in the last st on round) is worked as follows: at beginning of round, K 1 twisted, 1 YO. At the end of round: 1 YO, K 1 twisted, K.1 (= st with marker) SIZE L-XL-XXL-XXXL: Inc 2 sts on each side of eash marker (= 16 sts inc in total) as follows: 1 YO,K 1, 1 YO, K 1 twisted, K 1(= st with marker), K 1 twisted, 1 YO, K 1, 1 YO (first and last YO K twisted on next round, they should not make holes, the 2 sts in the middle should make holes). Repeat inc on every other round 1-1-1-3 more times. NOTE: The inc on each side of 1st marker(= in the last st on round) is worked as follows: at beginning of round, K 1 twisted, 1 YO, K 1, 1 YO. At the end of round: 1 YO, K 1, 1 YO, K 1 twisted, K.1 (= st with marker) Then inc like this: Inc 1 sts on each side of each marker (= 8 sts inc in total) as follows: 1 YO, K 1 twisted, K 1(= st with maker), K 1 twisted, 1 YO. Do not K YOs twisted on next round, they should make holes. Repeat inc every other round 19-20-22-21 more times in total. INCREASE TIP: Beg 1 st before marker and inc as follows: 1 YO, K 2 (marker is between these 2 sts), 1 YO. On next round K YOs twisted to avoid holes. ---------------------------------------------------------- TOP: Worked in the round on circular needle, top down. YOKE: Cast on 134-134-140-144-144-148 sts on circular needle size 3.5 mm with Belle. Work A.1 (= 2 sts) over all sts. When A.1 has been worked 1 time vertically, switch to circular needle size 4 mm. On next round K all sts and inc 16-20-14-22-42-46 sts evenly = 150-154-154-166-186-194 sts. On next round insert 4 markers as follows: Insert 1st marker in last st on last round, K 45-47-49-55-65-71 sts (= front piece), K 1 st and insert 2nd marker in this st, K 28-28-26-26-26-24 sts (= sleeve), K 1 st and insert 3rd marker in this st, K 45-47-49-55-65-71 sts (= back piece), K 1 st and insert 4th marker in this st, K 28-28-26-26-26-24 sts (= sleeve). REMEMBER THE KNITTING TENSION Then work as follows - AT THE SAME TIME inc for RAGLAN - see explanation above. Work half the raglan inc for 1st marker (see explanation above) K 14-15-16-19-24-27 sts, A.2 (= 17 sts), K until 1-1-2-2-2-2 st remains before 2nd marker, work RAGLAN - see explanation above, K until 1-1-2-2-2-2 sts remain before 3rd marker, work raglan, K until 1-1-2-2-2-2 st remain before 4th marker, work raglan, K until 1-1-2-2-2-2 sts remain before 1st marker, work raglan. Work inc sts in stocking st. When A.2 has been worked 1 time vertically, work in stocking st over all these sts. After all inc are done there are 294-314-338-358-394-426 sts on needle. Piece measures approx. 14-15-16-17-18-19 cm. Continue with stocking st and work as follows: Work the first 81-87-95-103-117-129 sts (= front piece), slip the next 66-70-74-76-80-84 sts on a stitch holder for sleeve, cast on 6-6-6-8-8-8 sts under sleeve (insert a marker in the middle of the new sts), work the next 81-87-95-103-117-129 sts (= back piece), slip the next 66-70-74-76-80-84 sts on a stitch holder for sleeve, cast on 6-6-6-8-8-8 sts under sleeve (insert a marker in the middle of the new sts) = 174-186-202-222-250-274 sts remain on needle. Insert 1 marker in piece, NOW MEASURE PIECE FROM HERE. BODY: Continue in stocking st. When piece measures 3 cm, dec 1 st on each side of each markers in the sides (= 4 sts dec) - READ DECREASE TIP! Repeat dec every 2½-4-4-4-4-4 cm 5-3-3-3-3-3 more times = 150-170-186-206-234-258 sts. When piece measures 20 cm in all sizes, inc 1 st on each side of each marker in the sides (= 4 sts inc) - READ INCREASE TIP. Repeat inc every 2-4-4-4-4-4 cm 5-3-3-3-3-3 more times = 174-186-202-222-250-274 sts. When piece measures 31-32-33-34-35-36 cm, switch to circular needle size 3.5 mm. Work A.3 (= 2 sts) over all sts. Cast off. SLEEVE: Worked in the round on double pointed needles. Slip sts from stitch holder back on double pointed needles size 4 mm and cast on 6-6-6-8-8-8 sts under sleeve = 72-76-80-84-88-92 sts. Work in stocking st for 2 cm, on next round dec 8 sts evenly = 64-68-72-76-80-84 sts. Switch to double pointed needles size 3.5 mm. Work A.3 over all sts. Cast off. Work the other sleeve the same way. |
|||||||||||||||||||
Diagram explanations |
|||||||||||||||||||
|
|||||||||||||||||||
 |
|||||||||||||||||||
 |
|||||||||||||||||||
Have you finished this pattern?Tag your pictures with #dropspattern or submit them to the #dropsfan gallery. Do you need help with this pattern?You'll find 13 tutorial videos, a Comments/Questions area and more by visiting the pattern on garnstudio.com. © 1982-2026 DROPS Design A/S. We reserve all rights. This document, including all its sub-sections, has copyrights. Read more about what you can do with our patterns at the bottom of each pattern on our site. |
|||||||||||||||||||






With over 40 years in knitting and crochet design, DROPS Design offers one of the most extensive collections of free patterns on the internet - translated to 17 languages. As of today we count 333 catalogues and 12525 patterns translated into English (UK/cm). 12525
We work hard to bring you the best knitting and crochet have to offer, inspiration and advice as well as great quality yarns at incredible prices! Would you like to use our patterns for other than personal use? You can read what you are allowed to do in the Copyright text at the bottom of all our patterns. Happy crafting!
Post a comment to pattern DROPS Extra 0-1104
We would love to hear what you have to say about this pattern!
If you want to leave a question, please make sure you select the correct category in the form below, to speed up the answering process. Required fields are marked *.