
Popular categories
Looking for a yarn?


Comments / Questions (34)
![]() Frederike wrote:
Frederike wrote:
Ik heb het grootste deel van dit giletje nu klaar, maar alles krult vreselijk om. Ik heb het rugdeel 4 dagen lang opgespannen laten zitten en meerdere keren nat gemaakt, maar het haalt niets uit. Daarom verwacht ik dat strijken ook wel niets zal doen. Ik zie in de eerdere opmerkingen dat omhaken ook niet helpt. Wat kan ik nog doen? Het gilet is zo niet te dragen. Heel zonde van al het werk.
21.11.2015 - 14:42DROPS Design answered:
Hoi Frederike. Ik kan niet veel meer voorstellen, dan wat ook in de vorige reactie staat. Probeer te blokken (vastzetten met spelden) en strijken.
01.12.2015 - 16:56
![]() Kathleen O'Leary wrote:
Kathleen O'Leary wrote:
How do I overcome the curl on the bottom edge? I like this pattern but edges are severely rolling!
31.03.2014 - 01:35DROPS Design answered:
Dear mrs O'Leary, you can block it on final measurements, and also work a crochet edge if you like to. Happy knitting!
31.03.2014 - 09:39
![]() Ute wrote:
Ute wrote:
Stimmen die Angaben nicht? Ich stricke die Weste in XL. Beim Abnehmen der Abnäher sind am Ende viel weniger Maschen als angegeben auf der Nadel
25.02.2014 - 17:50DROPS Design answered:
Liebe Ute, ich habe es gerade durchgerechnet und kann keinen Fehler finden. Pro Armausschnitt nehmen Sie insgesamt 21 M ab, d.h. beim Rückenteil 42 M für beide Armausschnitte. Pro Vorderteil nehmen Sie nach den Blenden-M insgesamt 14 M für den V-Ausschnitt ab.
25.02.2014 - 21:37
![]() Ludivine wrote:
Ludivine wrote:
Bonjour, Pouvez vous m'aider à comprendre cela : lorsqu'il est question de diminuer tous les 4,6, 7 voire 9 rangs, comment fait on pour savoir le nombre de rangs qui ne seront pas diminuer J'ai bien compris pour ce gilet mais en général quelle est le repère ? Merci à vous. :-)
27.01.2014 - 13:16DROPS Design answered:
Bonjour Ludivine, si on doit diminuer/augmenter tous les 3 rangs, on tricote ainsi: *1 rang avec dim/augm, 2 rangs sans dim/augm* on répète ces 3 rangs le nombre de fois indiqué - le principe est le même quelque soit le nombre de rangs. Vous pouvez placer un fil marqueur les rangs de dim/augm pour mieux vous repérer. Bon tricot!
27.01.2014 - 14:03
![]() Ludivine wrote:
Ludivine wrote:
Merci à vous ! Enfin, concernant les marqueurs à placer dois je placer les 4 marqueurs sur le même rang ? ou 2 marqueurs à l'endroit (2 et 12 m) et 2 à l'envers (2 et 12 m)? Merci
12.01.2014 - 22:43DROPS Design answered:
Bonjour Ludivine, les marqueurs se placent sur le même rang, à 2 et à 12 m des bords (à droite et à gauche, c'est-à-dire au début et à la fin du rang). Bon tricot!
13.01.2014 - 09:37
![]() Ludivine wrote:
Ludivine wrote:
Merci de votre réponse. Donc, lorsque ensuite il faudra diminuer "1 fois une maille tous les 4 rangs" Dos(taille S) ce sera le même principe, je rabat 1m sur l'end. puis 1m sur l'env. ? Merci encore de votre gentillesse.
10.01.2014 - 13:58DROPS Design answered:
Bonjour Ludivine, c'est tout à fait exact. vous *rabattrez 1 m en début de rang sur l'endroit, 1 m en début de rang sur l'envers, tricoterez encore 2 rangs sur toutes les mailles* et répéterez ces 4 rangs (de *-*). Bon tricot !
10.01.2014 - 14:54
![]() Ludivine wrote:
Ludivine wrote:
Bonjour, Pour les diminutions aux emmanchures à tous les rangs de chaque côté. Dois je diminuer au début du rang endroit, tourner mon travail, revenir au rang envers sans diminuer et diminuer au prochain rang endroit ? Dans le cas de diminutions pour les emmanchures tous les 4 rangs, il y aurait donc 3 rangs sans diminutions ? Merci de votre aide car je débute au tricot :-)
09.01.2014 - 23:15DROPS Design answered:
Bonjour Ludivine, pour former les emmanchures, vous rabattez sur l'end les 4-10 premières m (cf taille), au rang suivant sur l'env les 4-10 premières m, et ainsi de suite, vous rabattez les mailles au début de chaque rang, 1 fois sur l'end, 1 fois sur l'env., soit tous les 2 rangs end et tous les 2 rangs env. Bon tricot!
10.01.2014 - 09:13
![]() Ineke Van Der Vlies wrote:
Ineke Van Der Vlies wrote:
Dit gilet heb ik veel langer gemaakt maar nu krult alles om. De onderrand heb ik naar binnen geslagen en gezoomd, de randen aan de voorpanden, 2 st. recht, blijven omkrullen. Hebben al onder een natte lap gelegen, helpt niet. ook omhaken geeft geen verbetering. heeft u nog een idee hoe dit op te lossen?
20.03.2013 - 10:19DROPS Design answered:
Probeer de rand te strijken als die onder die natte lap ligt of opspannen. Dwz, maak het vestje nat en laat deze plat drogen en zet de randen vast met spelden om deze zo vast te houden en zo laten drogen.
20.03.2013 - 15:43Aysegül Girgin wrote:
Where do we place markers to increase after 15cm on the back piece? On the 2nd and 12nd stitches from both ends again?
18.03.2013 - 19:24DROPS Design answered:
Dear Mrs Girgin, the inc should be made over the dec done before, markers should stay in place after dec, so that you first dec before/after the markers then inc before/after the same markers. Happy knitting!
19.03.2013 - 09:51
![]() Gabriele Hager wrote:
Gabriele Hager wrote:
Hei, tror det hjelper bare å hekle rundt vesten, jeg er nesten ferdig med vesten og skal gjøre det , det ruller forferdelig, men delvis er det fint og tilhører til denne typen vesten, altformye er ikke greit og da hjelper bare å hekle rundt
14.11.2012 - 15:16
|
|
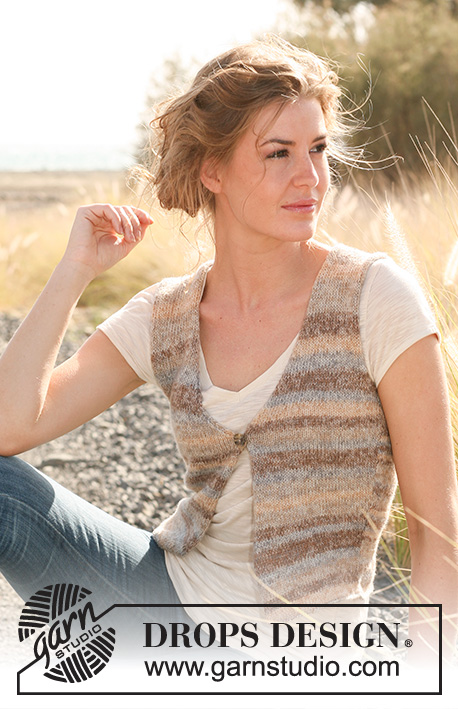
Country Soil#countrysoilvest |
|
 |
 |
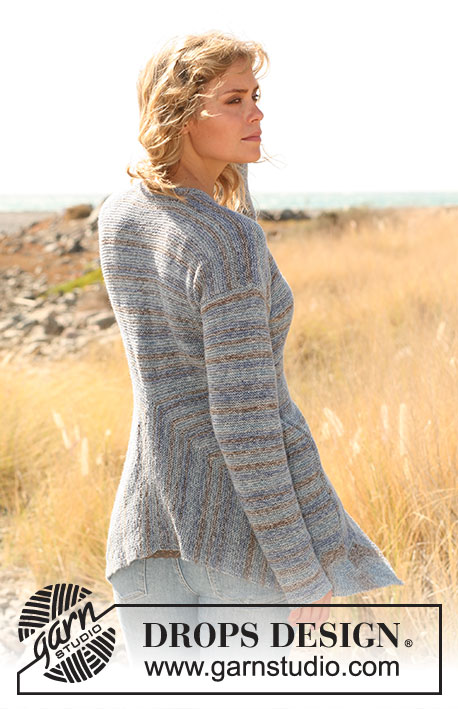
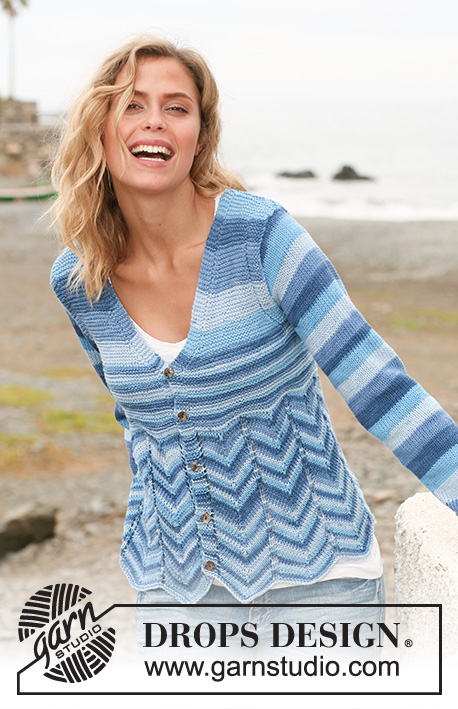
Knitted DROPS vest in ”Fabel”. Size: S - XXXL.
DROPS 128-15 |
|
|
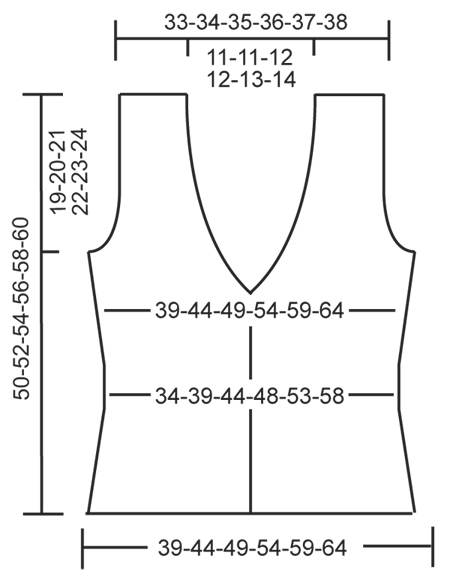
GARTER ST (back and forth on needle): K all rows. DECREASE TIP (applies to waist front and back): All dec are done from RS. Dec as follows after 1st and 2nd marker: Slip 1 st as if to K, K 1, psso. Dec as follows before 3rd and 4th marker: K 2 tog. INCREASE TIP (applies to waist front and back): All inc are done from RS. Inc 1 st by picking up a st from previous row and K this st. Inc 1 st after 1st and 2nd marker and 1 st before 3rd and 4th marker. BUTTON HOLE: Cast off for button hole on right front band. 1 button hole = K 2 edge sts, 1 YO, K 2 tog. --------------------------------------------------------- BACK PIECE: Cast on 90-100-112-124-136-146 sts on needle size 3 mm with Fabel and P 1 row from WS. Switch to needle size 3.5 mm and work in stocking st. Insert 4 markers in the piece; after 2 and 12 sts in from each side. When piece measures 3 cm, dec 4 sts - see DECREASE TIP above. Repeat dec a total of 3-3-3-4-4-4 times every 3-3-3-2-2-2 cm = 78-88-100-108-120-130 sts. REMEMBER THE KNITTING TENSION! Continue to work until piece measures 13-14-15-15-15-16 cm. On next row inc 4 sts - see INCREASE TIP above. Repeat inc every 6-6-6-5-5-5 cm until there are 90-100-112-124-136-146 sts on the needle again. Continue to work until piece measures 31-32-33-34-35-36 cm. Then cast off for armholes at the beg of every row in each side as follows: 4-5-7-7-9-10 sts 1 time, 3 sts 0-1-1-1-2-3 times, 2 sts 1-1-2-4-2-1 time, 1 st 1-2-2-1-3-4 times, and dec 1 st on every 4th row 1-1-2-2-4-5 times = 74-74-76-82-84-86 sts remain after all cast offs and dec. Continue as before but work 1 st in GARTER ST - see explanation above - in each side towards armholes. When piece measures 49-51-53-55-57-59 cm, cast off the middle 22-22-24-26-26-30 sts with P for neck and finish each shoulder separately = 26-26-26-28-28-28 sts on each shoulder. On next row dec 1 st towards the neck = 25-25-25-27-27-27 sts remain on each shoulder. Cast off when piece measures 50-52-54-56-58-60 cm. LEFT FRONT PIECE: Cast on 45-50-56-62-68-73 sts (incl 2 band sts) on needle size 3 mm with Fabel. P 1 row from WS. Switch to needle size 3.5 mm and work in stocking st with 2 band sts in garter st towards mid front. Insert 2 markers in the piece; after 2 and 12 sts in from the side and continue to work with dec and inc as on back piece. When piece measures 23-24-25-26-27-28 cm, dec 1 st from RS on the inside of the 2 band sts for neck by K 2 tog. Repeat dec on every other row a total of 10 times and then on every 4th row 2-2-3-4-5-6 times. AT THE SAME TIME when piece measures 31-32-33-34-35-36 cm, cast off and dec in the side for armhole as on back piece = 25-25-25-27-27-27 sts remain after all cast offs and dec. Continue as before with 1 st in garter st towards the armhole. Cast off when piece measures 50-52-54-56-58-60 cm. RIGHT FRONT PIECE: Cast on and work as left front piece but reversed. NOTE: When piece measures 22-23-24-25-26-27 cm, cast off for 1 BUTTON HOLE inside 2 band sts - see explanation above. ASSEMBLY: Sew side seams. Sew the shoulder seams. Sew on button. |
|
 |
|
Have you finished this pattern?Tag your pictures with #dropspattern #countrysoilvest or submit them to the #dropsfan gallery. Do you need help with this pattern?You'll find 17 tutorial videos, a Comments/Questions area and more by visiting the pattern on garnstudio.com. © 1982-2026 DROPS Design A/S. We reserve all rights. This document, including all its sub-sections, has copyrights. Read more about what you can do with our patterns at the bottom of each pattern on our site. |
|


With over 40 years in knitting and crochet design, DROPS Design offers one of the most extensive collections of free patterns on the internet - translated to 17 languages. As of today we count 324 catalogues and 12290 patterns translated into English (UK/cm). 12290
We work hard to bring you the best knitting and crochet have to offer, inspiration and advice as well as great quality yarns at incredible prices! Would you like to use our patterns for other than personal use? You can read what you are allowed to do in the Copyright text at the bottom of all our patterns. Happy crafting!
Post a comment to pattern DROPS 128-15
We would love to hear what you have to say about this pattern!
If you want to leave a question, please make sure you select the correct category in the form below, to speed up the answering process. Required fields are marked *.