
Popular categories
Looking for a yarn?


Comments / Questions (25)
![]() Ulla Nieminen wrote:
Ulla Nieminen wrote:
Jos teen neuleen ohjeen mukaan, tule kaarrokkeesta ihan liian korkea. Jos on tarkoitus, että kuvio alkaa ennen hihojen kiinnitystä, kertokaa se ohjeessa!
08.07.2025 - 12:31
![]() Ulla Nieminen wrote:
Ulla Nieminen wrote:
Ohjeen mukaan kuvio alkaa vasta hihojen kiinnityksen jälkeen. Mallikuvan sekä kerrosten määrän perusteella kuvio alkaa jo ennen hihojen kiinnitystä. Miten on?
03.07.2025 - 13:05DROPS Design answered:
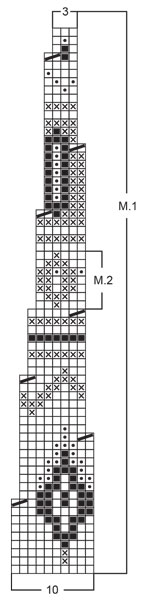
Hei, piirroksen M.2 kuviot neulotaan sekä miehustassa että hihoissa ennen kuin osat otetaan samalle pyöröpuikolle. Tämän jälkeen kaikilla silmukoilla neulotaan mallineuletta piirroksen M.1 mukaan.
03.07.2025 - 17:51
![]() Malou wrote:
Malou wrote:
Hejsa, bliver m.1 først startet efter at armene er blevet tilføjet fordi så bliver armhulehullet mega stort og armhullet ville starte halvvejs gennem sweateren. Skal man starte på noget af mønstret før man laver armhulen?
28.10.2024 - 13:17DROPS Design answered:
Hej Malou, hvis du strikker i DROPS Alaska og holder strikkefastheden, så vil du få målene i måleskitsen nederst i opskriften, hvis du følger forklaringen og diagrammet i opskriften :)
29.10.2024 - 13:36
![]() Ines Opitz wrote:
Ines Opitz wrote:
Fehlt die Anleitung für das Vorderteil ? Nach wieviel Zentimetern beginne ich mit dem Muster?
07.10.2024 - 19:12DROPS Design answered:
Liebe Frau Opitz, der Pullover wird von unten nach oben gestrickt, zuerst strickt man Rumpfteil in der Runde (mit Muster M.2 nach Bündchen) bis zu den Armlöchern, dann strickt man die 2 Ärmel und dann die Passe mit allen Teilen zusammen und dazu Muster M.1 (einschl. die Abnahmen). Viel Spaß beim Stricken!
08.10.2024 - 07:30
![]() Ulrike Bruk wrote:
Ulrike Bruk wrote:
Ich komme mit den Muster nicht ganz zurecht. Bei M2 wie geht der Mustersatz weiter?
02.08.2024 - 11:36DROPS Design answered:
Liebe Frau Bruk, ganz am Anfang Rumfpteil und Ärmel wird man nur die 7 Reihen M.2 gestrickt, dann wird es weiter glatt rechts gestrickt; bei der Passe stricken Sie dann M.1 von oben nach unten; es wird in jedem M.1 von 10 bis 3 Maschen abgenommen. Viel Spaß beim Stricken!
02.08.2024 - 14:38
![]() Kerstin wrote:
Kerstin wrote:
Liebes Drops Team, ich habe nun Ärmel und Rumpf fertiggestellt und möchte nun alles auf eine Rundnadel legen. Wo befindet sich nun der Rundenbeginn? Liebe Grüße
06.03.2024 - 08:34DROPS Design answered:
Liebe Kertin, Passe können Sie entweder zwischen Ärmel und Rückenteil oder in der hinteren Mitte beginnen. Viel Spaß beim stricken!
06.03.2024 - 11:43
![]() Mme Raoul wrote:
Mme Raoul wrote:
Description du diagramme M3 : 6 mailles (dessinées) alors qu'il en faut 7 et sur le schéma M2 pareil... Merci de me venir en aide :)
19.09.2023 - 10:32DROPS Design answered:
Bonjour Mme Raoul, effectivement, il faut lire 6 au lieu de 7 à chaque fois: il vous reste 6 mailles dans chaque A.1 quand le diagramme est terminé (et non 7), vous répétez les 6 mailles de M.2 puis vous tricotez M.3 en répétant les 6 mailles du diagramme (il en reste 3 quand M.3 est terminé). La correction va être faite, merci pour votre retour. Bon tricot!
20.09.2023 - 07:17
![]() Margareta wrote:
Margareta wrote:
Vad menas med iver el. liver på bål mönstret
31.03.2022 - 18:10DROPS Design answered:
Hej Margareta, det skall stå över. Vi skall få det ändrat :)
04.04.2022 - 11:43
![]() Susanne L wrote:
Susanne L wrote:
Hvor på omgangen starter jef mønster, når jeg har samlet kropnog ærmer?
13.10.2021 - 20:10
![]() Inge Trier wrote:
Inge Trier wrote:
Opskriften angiver 9 nøgler bundfarve til str XL. Ved bullen og 1.5 ærme er bundfarve brugt op. Strikkefasthed overholdt. Der må være en alvorlig fejl i opskriften.
12.06.2021 - 16:34
|
||||||||||||||||
Candlelight |
||||||||||||||||
|
|
||||||||||||||||
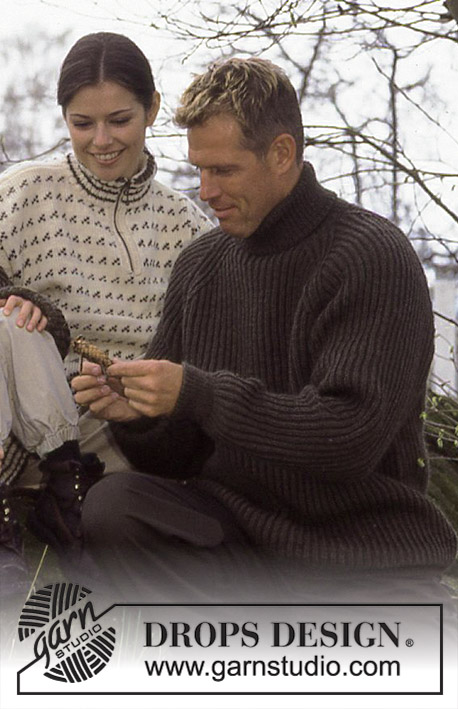
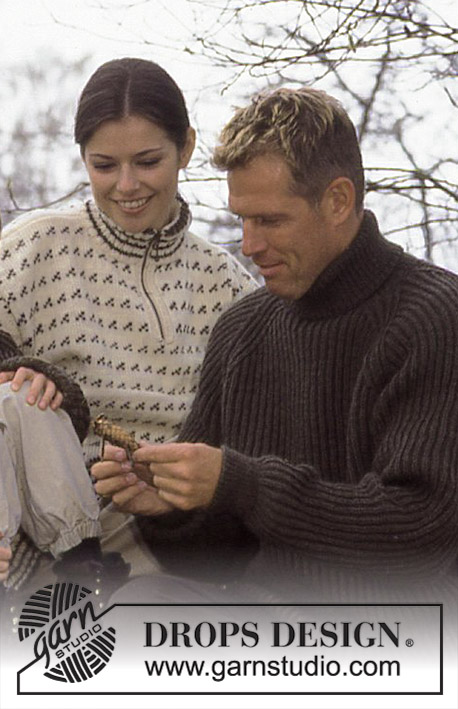
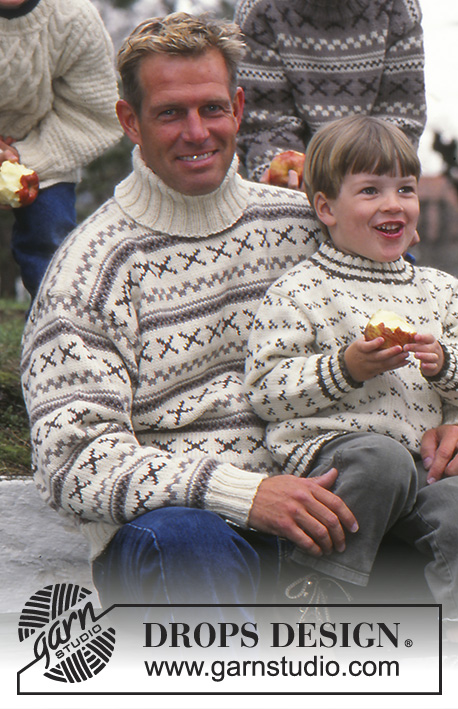
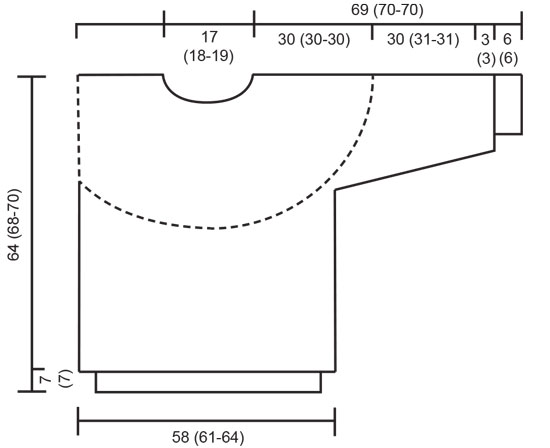
Knitted sweater in DROPS Alaska. Piece is worked with round yoke and Nordic pattern. Size S – XL.
DROPS 59-11 |
||||||||||||||||
|
------------------------------------------------------- EXPLANATION FOR THE PATTERN: ------------------------------------------------------- GARTER STITCH (worked in the round): 1 ridge in height = 2 rounds; Knit 1 round and purl 1 round. RIB: * knit 1 / purl 1 *. Repeat from *-*. PATTERN: See diagram M.1 . The whole pattern is worked in stocking stitch. ------------------------------------------------------- START THE PIECE HERE: ------------------------------------------------------- Body: Cast on 198 (204-216) sts on smaller circular needles with coal grey; join and place a marker at the join. Knit 2 rows garter st, 7 cm rib. Change to larger circular needles and knit 1 row stockinette st, then Pattern 2 once. Change to coal grey and knit stockinette st, increasing 0 (4-2) sts evenly distributed on the first row = 198 (208-218) sts. When the work measures 34 (38-40) cm , knit the next row as follows: bind off 2 sts for armhole, 95 (100-105) sts for the front, bind off 4 sts for armhole, 95 (100-105) sts for the back, bind off 2 sts for armhole. Put the work aside. Sleeves: Cast on 42 (48-48) sts on smaller double pointed needles with coal grey; join and place a marker at the join. Knit 2 rows garter st, 6 cm rib. Change to larger double-pointed needles and knit 1 row rib, then Pattern 2 once. Change to coal grey and stockinette st, increasing 1 (2-2) sts evenly distributed across the first row = 43 (50-50) sts. After Pattern 2, inc 1 st each side of marker 18 (17-17) times: Size S S/M: every 3rd row Sizes M/L + XL: alternately every 3rd and 4th row = 79 (84-84) sts. When the work measures 39 (40-40) cm , bind off 2 sts each side of marker = 75 (80-80) sts. Put the work aside. Yoke: Put all sts on the same circular needles, putting the sleeves in over the 4 bound-off sts at each side = 340 (360-370) sts. Knit M.1 over all sts - make decreases as indicated on the chart. After the last decrease, 102 (108-111) sts remain. Put sts on smaller double pointed needles and knit 4 rows garter st and at the same time, on size XL, dec 1 st so that the number of sts is divisible by 2 sts. Now knit rib for 10 cm . Bind off loosely in rib. Assembly: Sew the underarm seams. |
||||||||||||||||
Diagram explanations |
||||||||||||||||
|
||||||||||||||||
 |
||||||||||||||||
 |
||||||||||||||||
Have you finished this pattern?Tag your pictures with #dropspattern or submit them to the #dropsfan gallery. Do you need help with this pattern?You'll find 23 tutorial videos, a Comments/Questions area and more by visiting the pattern on garnstudio.com. © 1982-2026 DROPS Design A/S. We reserve all rights. This document, including all its sub-sections, has copyrights. Read more about what you can do with our patterns at the bottom of each pattern on our site. |
||||||||||||||||


With over 40 years in knitting and crochet design, DROPS Design offers one of the most extensive collections of free patterns on the internet - translated to 17 languages. As of today we count 324 catalogues and 12290 patterns translated into English (UK/cm). 12290
We work hard to bring you the best knitting and crochet have to offer, inspiration and advice as well as great quality yarns at incredible prices! Would you like to use our patterns for other than personal use? You can read what you are allowed to do in the Copyright text at the bottom of all our patterns. Happy crafting!
Post a comment to pattern DROPS 59-11
We would love to hear what you have to say about this pattern!
If you want to leave a question, please make sure you select the correct category in the form below, to speed up the answering process. Required fields are marked *.