
Popular categories
Looking for a yarn?



































Comments / Questions (54)
 Monika wrote:
Kan jag stick den här tröjan nerifrån och upp
31.10.2026 - 11:46DROPS Design answered:
Hei Monika. Da må du finne en lignende måte å felle, istedenfor å øke til raglamn i patent. Men les godt igjennom oppskriften og se hvor du må gjøre forandringene ( f.eks økninger/fellinger, diagrammene, målene). mvh DROPS Design
02.11.2026 - 11:56
 Monika wrote:
Hallo, bei der Einteilung der Maschen für Ärmel, Vorder-/Rückenteil und Raglan sind für Größe M je 13 Maschen für die Ärmel und je 23 Maschen für Vorder-/Rückenteil angegeben, also eine Differenz von 10 Maschen. Wie kommt lt. Anleitung am Ende der ersten 7 Zunahmerunden eine Differenz von 16 Maschen (Ärmel 41 Maschen, Vorder/rückenteil 57 Maschen) zustande, wenn ich in jeder Runde für beide Teile die gleiche Maschenzahl zunehme?
29.10.2026 - 12:19DROPS Design answered:
Liebe Monika, das liegt rechnerisch daran, dass die Raglanmaschen nach den Zunahmen zum Vorderteil/Rückenteil gerechnet werden. Ohne die Raglanmaschen kommen Sie auf 51 Maschen nach den 7 Zunahme-Runden pro Vorderteil/Rückenteil, wenn Sie dann noch beidseitig vom Vorderteil und vom Rückenteil je 3 Raglanmaschen dazurechnen (also 6 Maschen pro Vorderteil/Rückenteil), kommen Sie auf 57 Maschen. Später bei der Aufteilung für das Rumpfteil und die Ärmel werden die Raglanmaschen dem Rumpfteil zugeteilt, aber hier schon dazugerechnet. Viel Spaß beim Stricken!
29.10.2026 - 21:34
 Vuokko Pakarinen wrote:
Hei, toistetaanko tuossa A1 ohjeessa siis kahta eri krs. vuorotellen. saadakseni aikaan mallitilkun?
22.10.2026 - 15:48DROPS Design answered:
Kyllä, toista piirroksen kahta kerrosta.
23.10.2026 - 18:56
 Donna Pike wrote:
I have been trying to do this pattern for over a period of six months or more. I see there are two or three corrections to the pattern already. I do not know if I am doing it wrong or right. Is it possible I could have a video of how to do the three stitches of the raglan . If I do english rib I end uo with more than three stitches.
17.10.2026 - 18:42DROPS Design answered:
Hi Donna, If you click on "Videos" under the title, we have a video showing you how to increase for raglan while working English rib. Regards, Drops Team.
18.10.2026 - 11:04
Claudia wrote:
Hallo, ich versuche die Raglanzunahmen zu verstehen: man soll mit den Zunahmen in der ersten Runde von Muster A1 beginnen. Die erste Runde von A1 sind Linksmaschen. Und aus der Reihe mit Linksmaschen sollen die Zunahmen rechts gestrickt werden? Das sieht komisch aus. Auch wird in den Hinweisen erklärt, dass in der Folgerunde links gestrickt wird - das wäre lt. A1 aber rechts? Ich bin verwirrt, können Sie mir bitte an dieser Stelle helfen?
30.09.2026 - 22:51
 Donna Pike wrote:
I am trying to figure out how to do the increases for the raglan sleeves in English rib. I have been trying to knit this sweater for months and can’t get it right. I have bought from drops design for seven sweaters in the last few months and didn’t have a problem. This one has me completely confused and frustrated! Is it possible to get a video on this part of the pattern?
21.08.2026 - 18:21DROPS Design answered:
Dear Mrs Pike, the increases are worked as shown in this video but when working the further increases, you will increase in the knit stitch / English rib stitch next to the raglan, not in the middle stitch as in the video, so remember to increase in the knit stitch on each side of the raglan sttiches. Happy knitting!
24.08.2026 - 07:35
 Cathrine wrote:
Fant ut at jeg hadde gjort en feil, så da trenger dere ikke svare på spørsmålet. Beklager.
19.08.2026 - 10:04
Cathrine wrote:
Når jeg skal starte med patentstrikket på oppskriften til Casual Lines Sweater så får jeg det ikke til å gå opp. Skal man lese mønsteret fra venstre til høyre? Forvirringen kommer når jeg ser på instruksjonsvideoen for patentstrikk. Da ser det ut som omgang 2 starter med å strikke kastet og den løse masken vrang sammen. Men mønsteret starter, hvis man skal lese det fra høyre mot venstre, med: lage et kast om pinnen, ta 1 maske løs av pinnen som om den skulle strikkes vrang.
19.08.2026 - 08:49DROPS Design answered:
Hej Cathrine, første pind med udtagninger og patent er forklaret i opskriften (modsvarer 1.omg i videoen). Efter den strikker du ifølge første pind (nederste) i MØNSTER A.1 og den modsvarer 2.omgang forklaret i videoen - Prøv at lave en lille strikkeprøve på rundpind, så du kommer ind i mønsteret, det er ret enkelt når man kommer ind i det - God fornøjelse! :)
20.08.2026 - 11:57
Donna Pike wrote:
Is there a video on how to increase in the raglan sleeve and how to knit the raglan sleeves in english. I have made several attemps on this sweater and cant get it right. There has to be something not right abiut the pattern as i hve no problem with any of the other patterns I have bought from this company. Hoping you can help!
17.08.2026 - 21:42DROPS Design answered:
Dear Mrs Pike, you can find a video on how to increase in English rib here but note that the next increase will not be worked here in the middle stitch but in the knit stitch next to the raglan just as explained in the written pattern. Hope it can help. Happy knitting!
18.08.2026 - 09:59
 Marie-Laure wrote:
Merci beaucoup. Je vais pouvoir poursuivre mon tricot.
17.08.2026 - 08:51
|
||||||||||
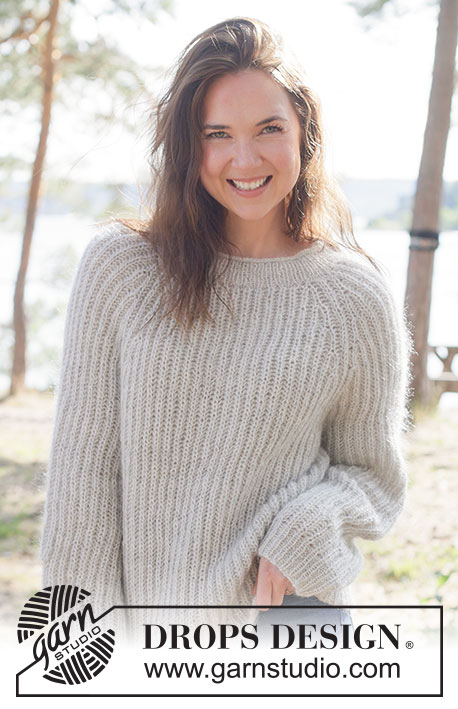
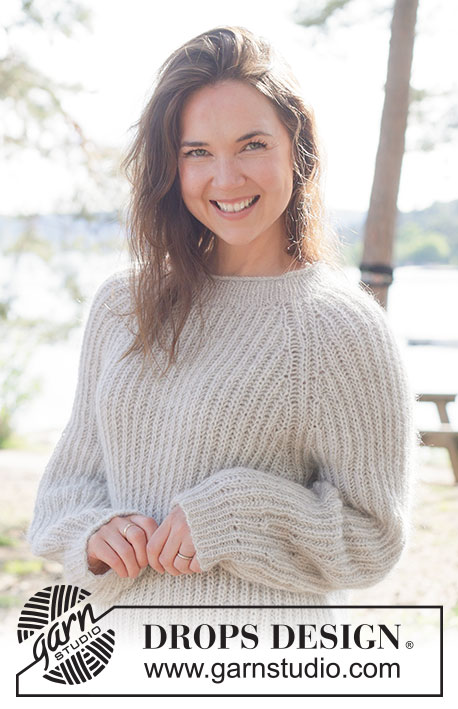
Casual Lines Sweater#casuallinessweater |
||||||||||
 |
 |
|||||||||
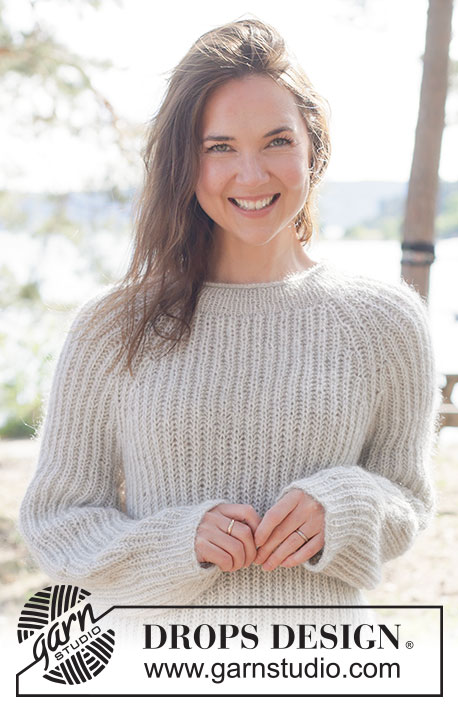
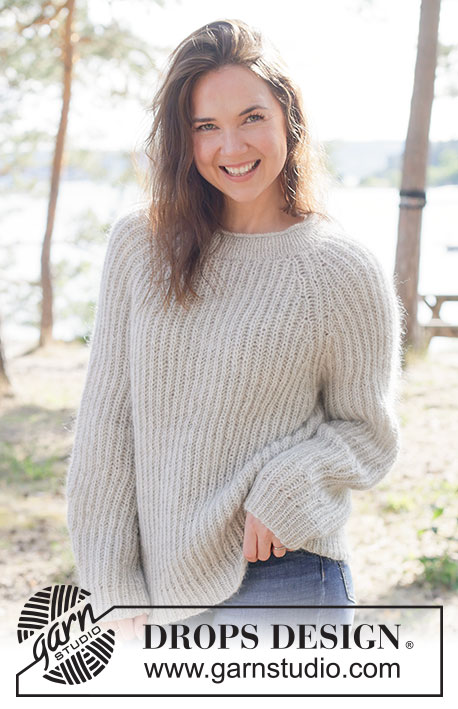
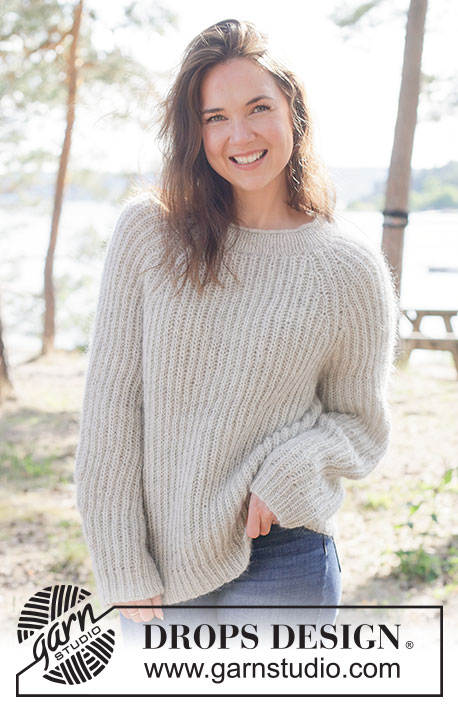
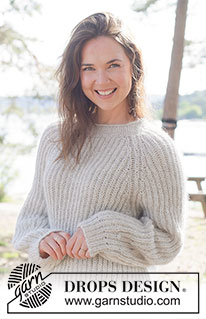
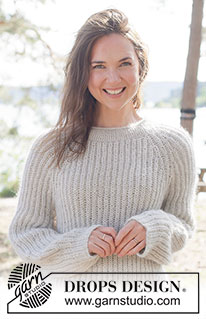
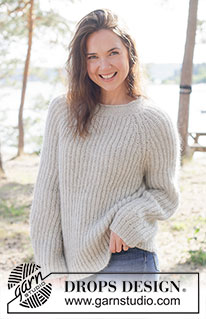
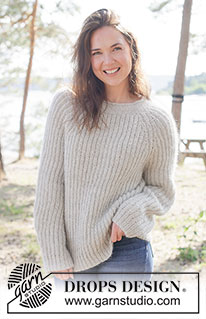
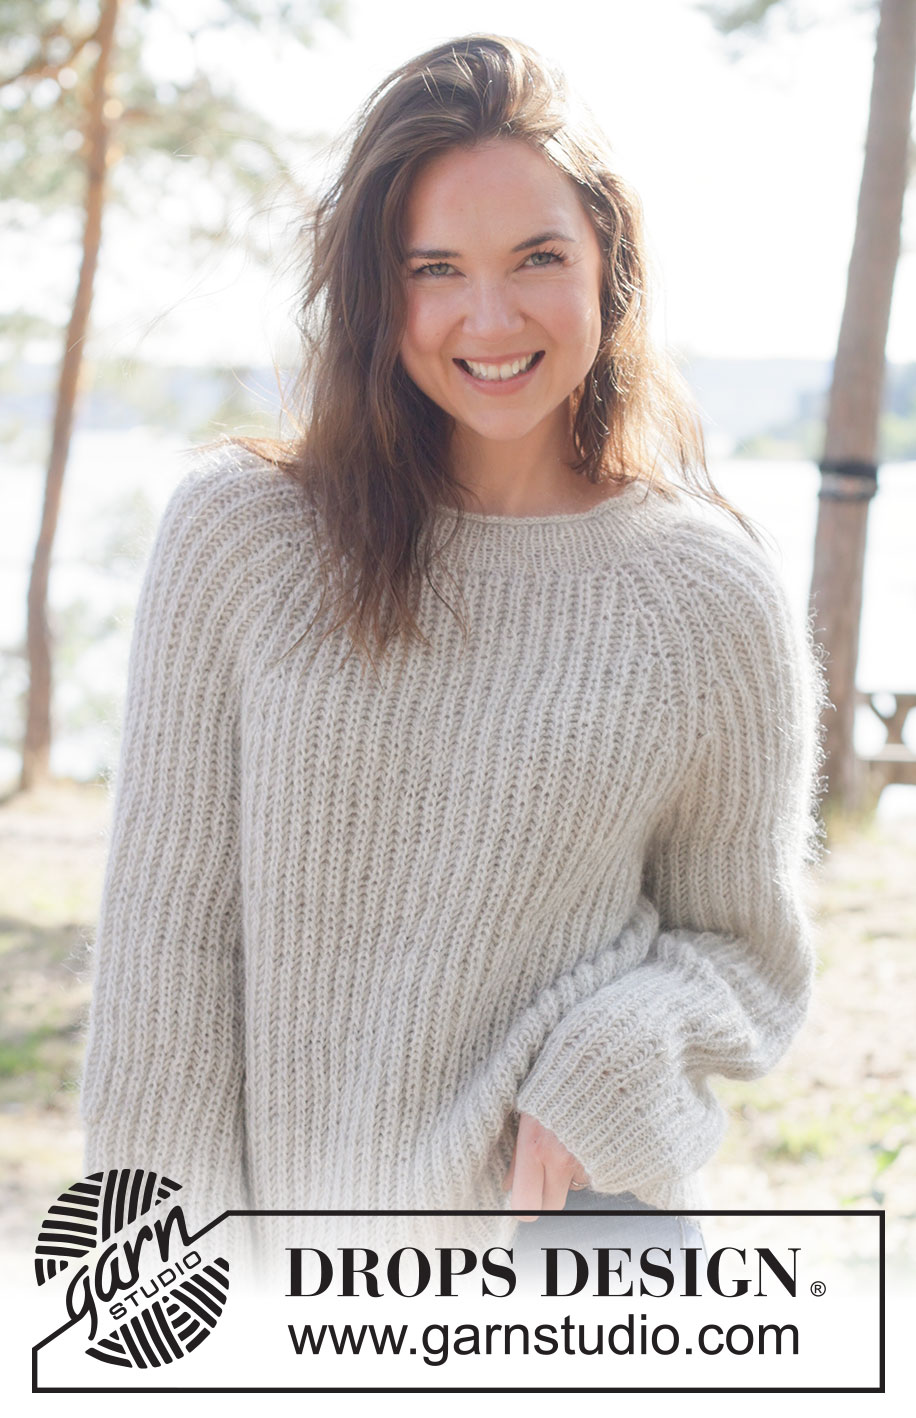
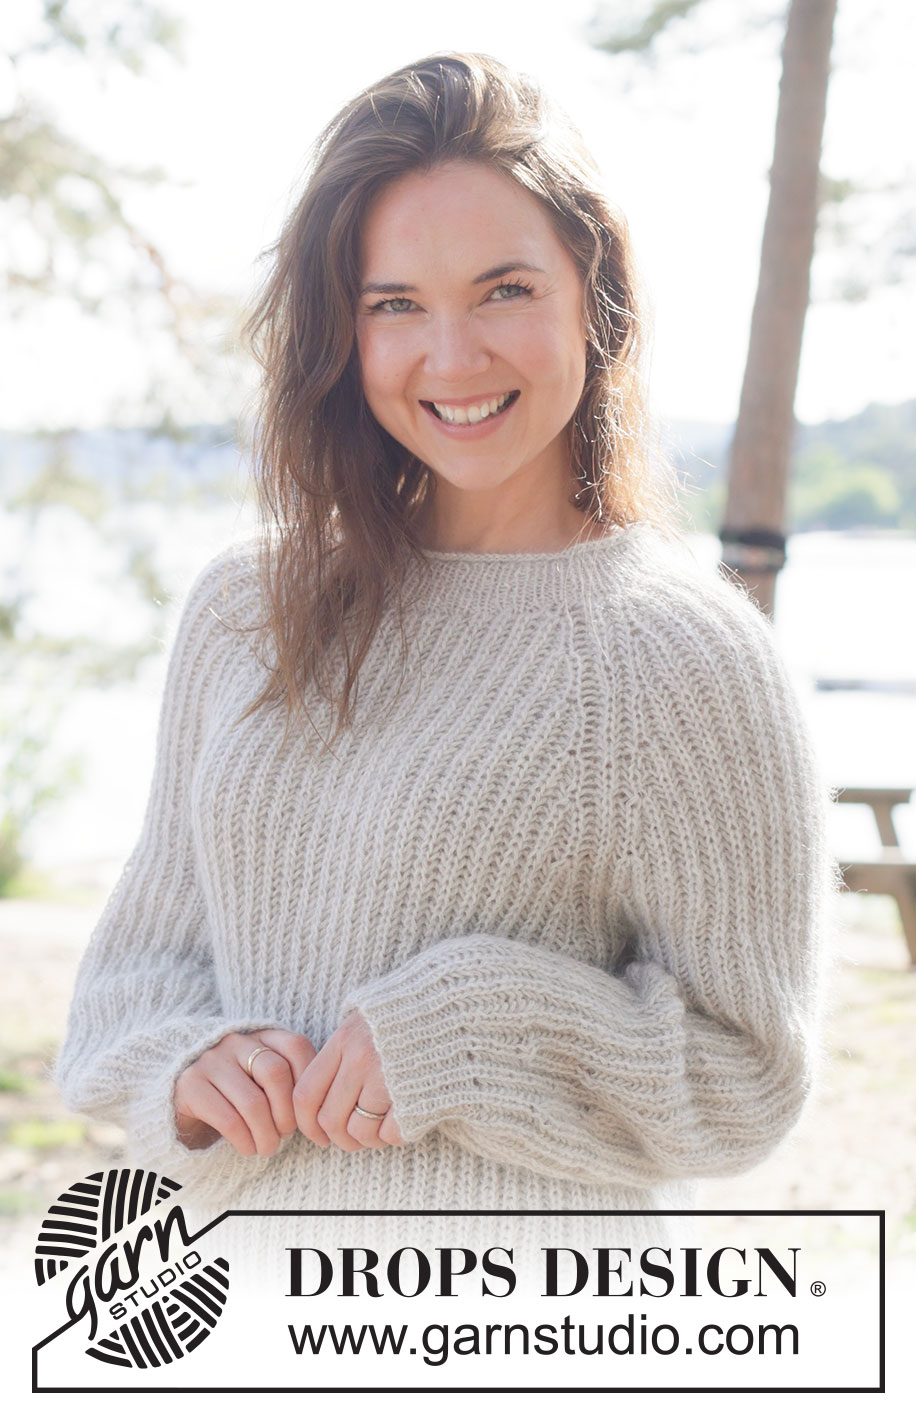
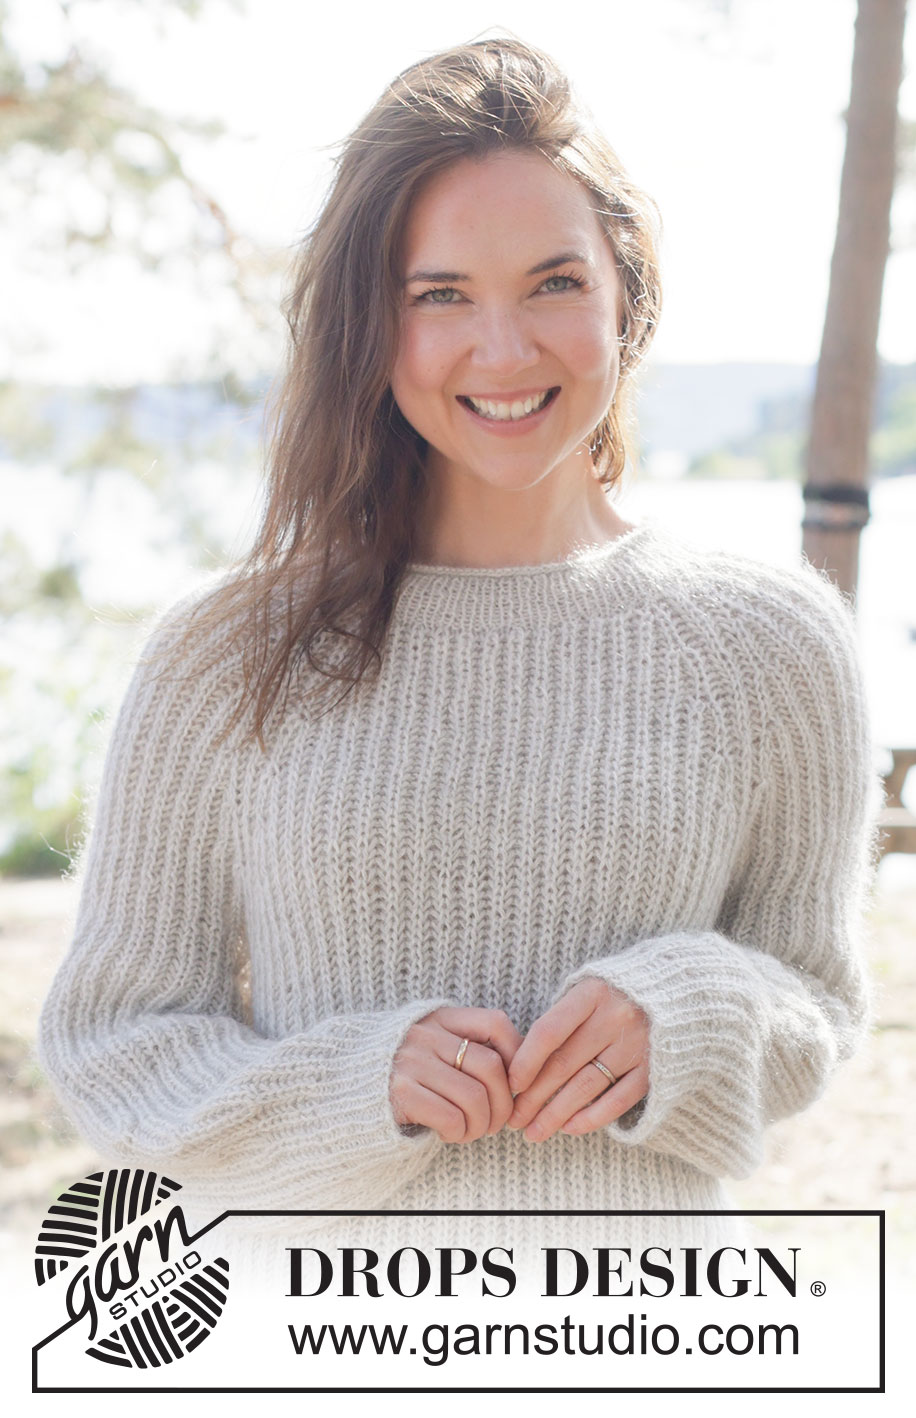
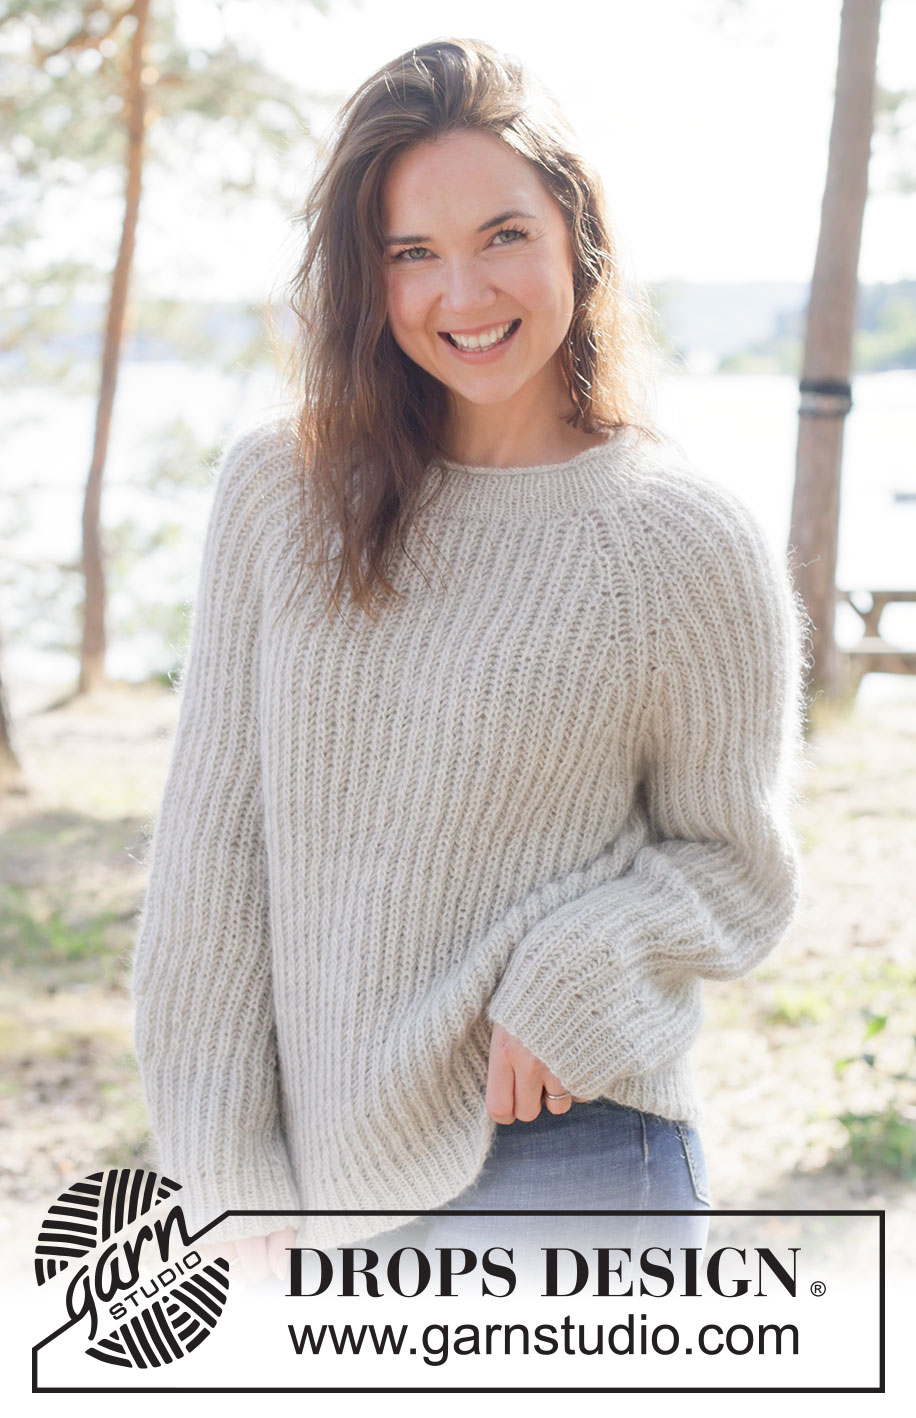
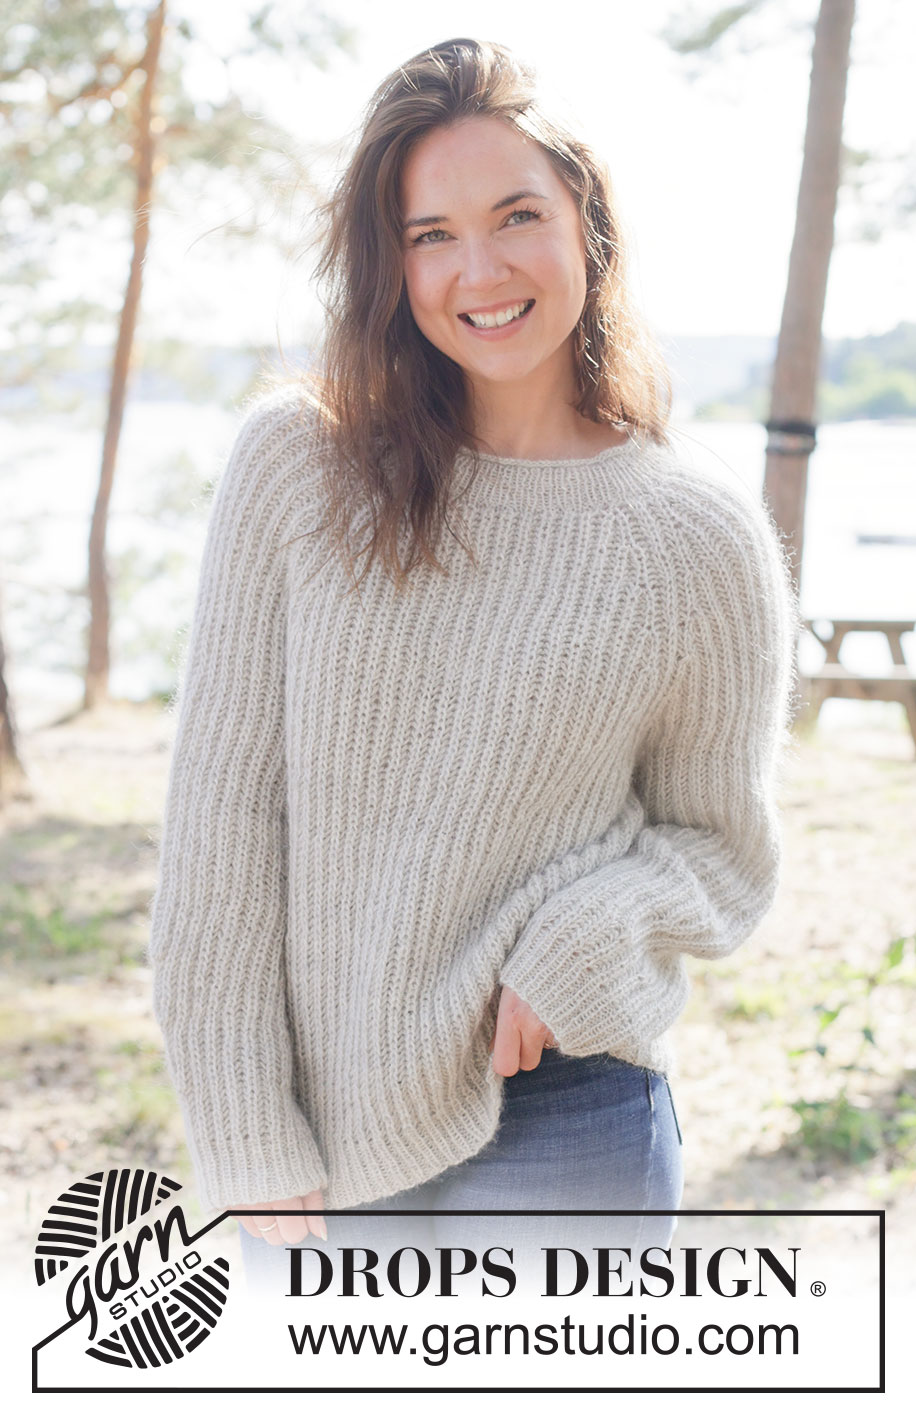
Knitted jumper in DROPS Alpaca and DROPS Kid-Silk. The piece is worked top down with raglan and English rib. Sizes XS - XXXL.
DROPS 263-3 |
||||||||||
|
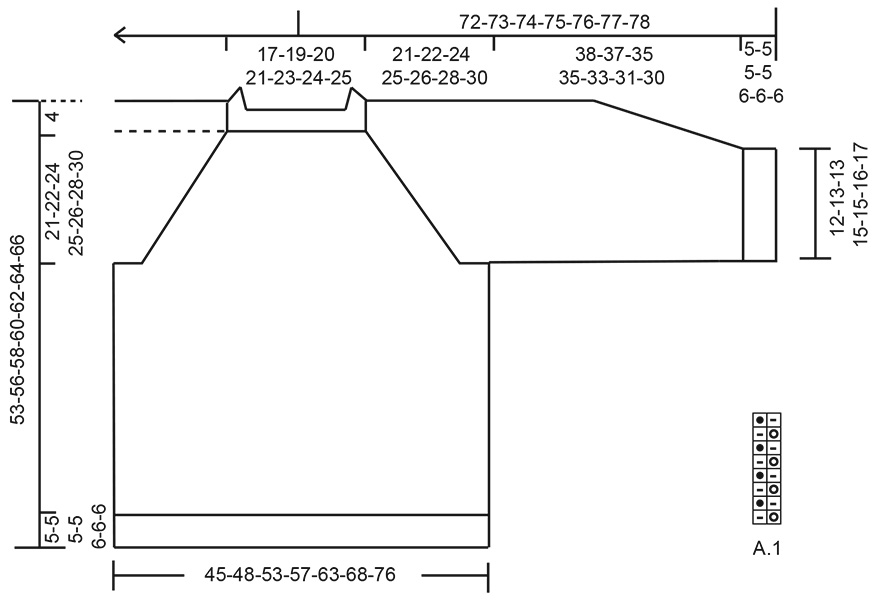
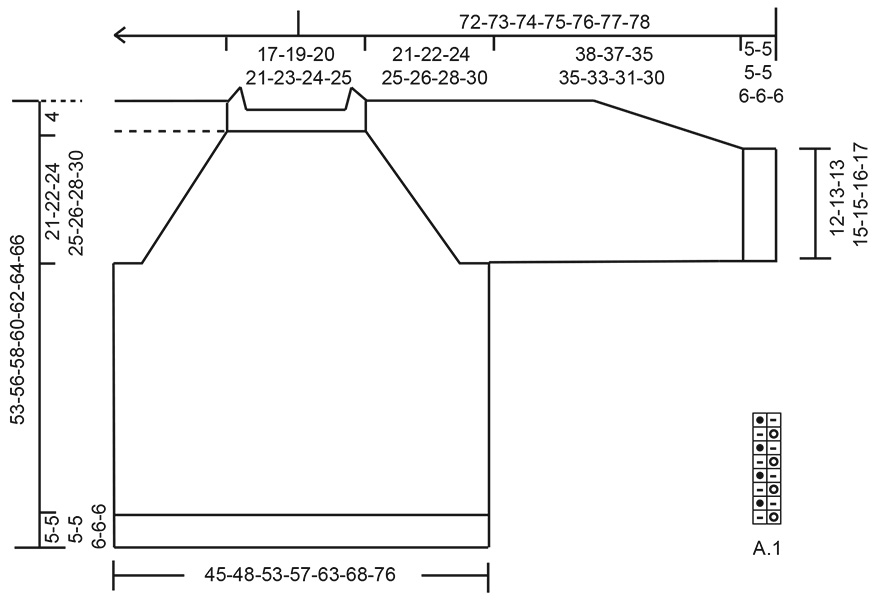
------------------------------------------------------- EXPLANATIONS FOR THE PATTERN: ------------------------------------------------------- PATTERN: See diagram A.1. RAGLAN: Increase for raglan on each side of 3 raglan-stitches, i.e., increase in the knitted stitch + yarn-over before and after the 3 raglan-stitches with marker). There are always 3 English rib stitches on the raglan-line. Increase 2 stitches in the knitted stitch + yarn-over as follows: Knit together the knitted stitch + yarn-over but do not slip them off the left needle, make 1 yarn-over the right needle, knit together the same knitted stitch + yarn-over one more time, and slip them off the left needle (2 increased stitches). Work the new stitches into the English rib (A.1) but be aware that on the round after increasing, the purled stitches in the increases are purled without yarn-overs as the yarn-overs have not yet been worked. SLEEVE TIP: When knitting up stitches under the sleeve, you can get a small hole in the transition between stitches on the body and sleeve. This hole can be closed by picking up the strand between 2 stitches and working this strand twisted together with the first stitch between body and sleeve. DECREASE TIP (on top of sleeve): Decrease 4 stitches on top of sleeve. All decreases are worked on a round where the knitted stitches and yarn-overs are knitted together! DECREASE 2 STITCHES TOWARDS THE LEFT: Work until 4 stitches remain before the stitch with the marker in. Slip the next knitted stitch + yarn-over onto the right needle as if to knit together, knit together the next 2 stitches (i.e., 1 purled stitch + knitted stitch + yarn-over), pass the slipped stitch + yarn-over over the knitted together stitches (2 decreased stitches). DECREASE 2 STITCHES TOWARDS THE RIGHT: Work 1 stitch after the stitch with the marker in. Slip the first knitted stitch + yarn-over onto the right needle as if to knit together, purl 1, pass the slipped stitch + yarn-over over the purled stitch, slip the stitch back onto the left needle, pass the next knitted stitch + yarn-over over the replaced stitch, slip the remaining stitch onto the right needle (2 decreased stitches). ------------------------------------------------------- START THE PIECE HERE: ------------------------------------------------------- JUMPER – SHORT OVERVIEW OF THE PIECE: The pattern uses both long and short needles; start with the length which fits the number of stitches and change when necessary. The neck and yoke are worked in the round with circular needle, top down and from the right back shoulder. When the yoke is finished, it is divided for the body and sleeves and the body continued in the round, while the sleeves wait. The sleeves are worked top down, in the round. If there is a «0» in your chosen size, skip the information and go straight to the next instruction. NECK: Cast on 92-100-106-110-114-120-126 stitches with circular needle size 3 mm, 1 strand DROPS Alpaca and 1 strand DROPS Kid-Silk. Knit 3 rounds. Then work rib in the round (knit 1, purl 1) for 4-4-4-4-5-5-5 cm. Knit 1 round and decrease 16-20-22-22-22-24-26 stitches evenly on the round = 76-80-84-88-92-96-100 stitches. The round begins on the right back shoulder. Insert 1 marker after the first 28-30-31-33-33-34-35 stitches (approx. mid-front). The piece is now measured from here. YOKE: Insert 8 markers, without working the stitches, on each side of 3 stitches (raglan-stitches), increases for raglan are worked on each side of the raglan-stitches. The markers are inserted between stitches. The raglan-stitches are worked in English rib (A.1), as are all the other stitches. Insert marker-1 at the beginning of the round, count 3 stitches (= raglan-stitches), insert marker-2 before the next stitch, count 11-13-13-13-13-13-13 stitches (= sleeve), insert marker-3 before the next stitch, count 3 stitches (= raglan-stitches), insert marker-4 before the next stitch, count 21-21-23-25-27-29-31 stitches (= front piece), insert marker-5 before the next stitch, count 3 stitches (= raglan-stitches), insert marker-6 before the next stitch, count 11-13-13-13-13-13-13 stitches (= sleeve), insert marker-7 before the next stitch, count 3 stitches (= raglan-stitches), insert marker-8 before the next stitch, there are 21-21-23-25-27-29-31 stitches left after the last marker (= back piece). Change to circular needle size 4.5 mm. Work the next round as follows: * Purl 1, make 1 yarn-over, slip 1 stitch purl-wise*, work from *-* to end of round. Work PATTERN A.1 – read explanation above, and begin increasing for RAGLAN on round-1 of the pattern, increasing on each side of the raglan-stitches – read explanation above for how to increase. NOTE: At the beginning of the round increase after marker-2 and at the end of the round before marker-1. Continue A.1 and repeat the increases every 10th-8th-8th-8th-6th-6th-6th round (i.e., every 5th-4th-4th-4th-3rd-3rd-3rd round with visible English rib stitches), on each side of the 3 raglan-stitches a total of 7-7-7-8-9-9-10 times (16 increased stitches per increase-round) = 188-192-196-216-236-240-260 stitches. There are 39-41-41-45-49-49-53 stitches for each sleeve and 55-55-57-63-69-71-77 stitches for front/back piece . Remember to maintain the knitting tension. The increases now continue but no further increases on the sleeves. Increase after markers 4 and 8 and before markers 5 and 1, 1-2-3-3-3-4-5more times (= 8 increased stitches per increase-round) every 10th-8th-8th-8th-6th-6th-6th round as before. A total of 8-9-10-11-12-13-15 increases in height on the front and back pieces and 7-7-7-8-9-9-10 increases in height on the sleeves = 196-208-220-240-260-272-300 stitches. Continue the pattern without further increases until the piece measures 21-22-24-25-26-28-30 cm from the marker mid-front. Now divide for the body and sleeves. DIVIDE FOR BODY AND SLEEVES: Work the first 3 stitches as before (raglan-stitches which belong to the back piece), place the next 39-41-41-45-49-49-53 stitches on a stitch holder/thread for the sleeve, cast on 9-9-11-11-13-15-17 stitches (mid-under the sleeve), work 59-63-69-75-81-87-97 stitches as before (= front piece), place the next 39-41-41-45-49-49-53 stitches on a stitch holder/thread for the sleeve, cast on 9-9-11-11-13-15-17 stitches (mid-under the sleeve), work the last 56-60-66-72-78-84-94 stitches as before (= rest of back piece). The body and sleeves are finished separately. BODY: = 136-144-160-172-188-204-228 stitches. Continue A.1 until the piece measures 44-47-49-51-52-54-56 cm from the marker mid-front, with the last round a round where knitted stitches and yarn-overs are knitted together. Change to circular needle size 3 mm. Work rib as follows: Knit the knitted stitch, purl 1 in yarn-over, purl 1 in purled stitch (= knit 1, purl 2) = 204-216-240-258-282-306-342 stitches. When the rib measures 5-5-5-5-6-6-6 cm cast off slightly loosely with rib. The jumper measures approx. 49-52-54-56-58-60-62 cm from the marker mid-front and 53-56-58-60-62-64-66 cm from top of shoulder. SLEEVES: Place the 39-41-41-45-49-49-53 sleeve-stitches from one stitch holder/thread on circular needle size 4.5 mm and knit up 1 stitch in each of the 9-9-11-11-13-15-17 stitches cast on under the sleeve, starting in the middle stitch and knitting up the first 5-5-6-6-7-8-9 stitches – read SLEEVE TIP, then work across the sleeve-stitches as before and finish by knitting up the remaining 4-4-5-5-6-7-8 stitches under the sleeve = 48-50-52-56-62-64-70 stitches. Insert a marker-thread in the middle of the 9-9-11-11-13-15-17 stitches under the sleeve- the round starts by the marker-thread – work the new stitches mid under sleeve in A.1 on first round. Work A.1 in the round as before - AT THE SAME TIME, when the sleeve measures 23-22-20-20-18-16-12 cm from the division, insert 1 marker in the middle stitch on top of the sleeve (a knitted stitch). Decrease now 4 stitches on mid top on sleeve as follows/ Work A.1 in the round and decrease on top of sleeve - read DECREASE TIP . Decrease like this every 18th-18th-18th-18th-14th-14th-14th round (i.e., each 9th-9th-9th-9th-7th-7th-7th round with visible English rib stitches) a total of 3-3-3-3-4-4-5 times = 36-38-40-44-46-48-50 stitches. Continue working until the sleeve measures 38-37-35-35-33-31-30 cm from the division, with the last round a round where knitted stitches and yarn-overs are knitted together. Change to double pointed needles size 3 mm. Work rib as follows: Knit the knitted stitch, purl 1 in yarn-over, purl 1 in purled stitch (= knit 1, purl 2) = 54-57-60-66-69-72-75 stitches. When the rib measures 5-5-5-5-6-6-6 cm, cast off slightly loosely with rib. The sleeve measures approx. 43-42-40-40-39-37-36 cm from the division. |
||||||||||
Diagram explanations |
||||||||||
|
||||||||||
 |
||||||||||
 |
||||||||||
Have you finished this pattern?Tag your pictures with #dropspattern #casuallinessweater or submit them to the #dropsfan gallery. Do you need help with this pattern?You'll find 17 tutorial videos, a Comments/Questions area and more by visiting the pattern on garnstudio.com. © 1982-2026 DROPS Design A/S. We reserve all rights. This document, including all its sub-sections, has copyrights. Read more about what you can do with our patterns at the bottom of each pattern on our site. |
||||||||||






With over 40 years in knitting and crochet design, DROPS Design offers one of the most extensive collections of free patterns on the internet - translated to 17 languages. As of today we count 333 catalogues and 12532 patterns translated into English (UK/cm). 12532
We work hard to bring you the best knitting and crochet have to offer, inspiration and advice as well as great quality yarns at incredible prices! Would you like to use our patterns for other than personal use? You can read what you are allowed to do in the Copyright text at the bottom of all our patterns. Happy crafting!
Post a comment to pattern DROPS 263-3
We would love to hear what you have to say about this pattern!
If you want to leave a question, please make sure you select the correct category in the form below, to speed up the answering process. Required fields are marked *.