
Popular categories
Looking for a yarn?


Comments / Questions (5)
![]() Elizabeth-Anne wrote:
Elizabeth-Anne wrote:
Bonjour, Si je le fais en Melody (groupe D), donc avec un fil D, combien de pelotes je devrais prendre ? Merci.
24.10.2025 - 13:42DROPS Design answered:
Bonjour, Vous avez notre convertisseur de fils qui vous permet de savoir combien de pelotes de Melody il vous faudra pour ce modèle. Vous pouvez accèder au convertisseur dans le lien ci-dessous: https://www.garnstudio.com/yarn-calculator.php?cid=8 Bons tricots!
24.10.2025 - 14:36
![]() Katleen wrote:
Katleen wrote:
Kan Drops Melody of twee draden brushed alpaca Silk ook gebruikt worden voor deze trui ? Met 4 draden brei ik niet graag.
25.02.2025 - 00:39DROPS Design answered:
Dag Katleen,
Je kunt een garen uit garengroep D kiezen, dus DROPS Melody is daar inderdaad geschikt voor. Brushed Alpaca Silk valt in garen garencategorie C en is iets de dun hiervoor.
02.03.2025 - 10:45
![]() Laila Møller wrote:
Laila Møller wrote:
Glem mit spørgsmål har læst opskriften igen og det er mig der ikke læste rigtigt. Nu er jeg med. Men tak for svar
21.02.2025 - 15:31
![]() Christin wrote:
Christin wrote:
Finde die Anleitung sehr gut und mit dem Diagramm gelingt der Pullover.
15.02.2025 - 11:10
![]() Laila Møller wrote:
Laila Møller wrote:
Hvorfor er der forskel på hvor langt man skal strikke efter maske udtagning ved armegæbet?
15.02.2025 - 01:04DROPS Design answered:
Hej Laila, hvor er du i opskriften og hvilken størrelse strikker du?
18.02.2025 - 11:04
|
|
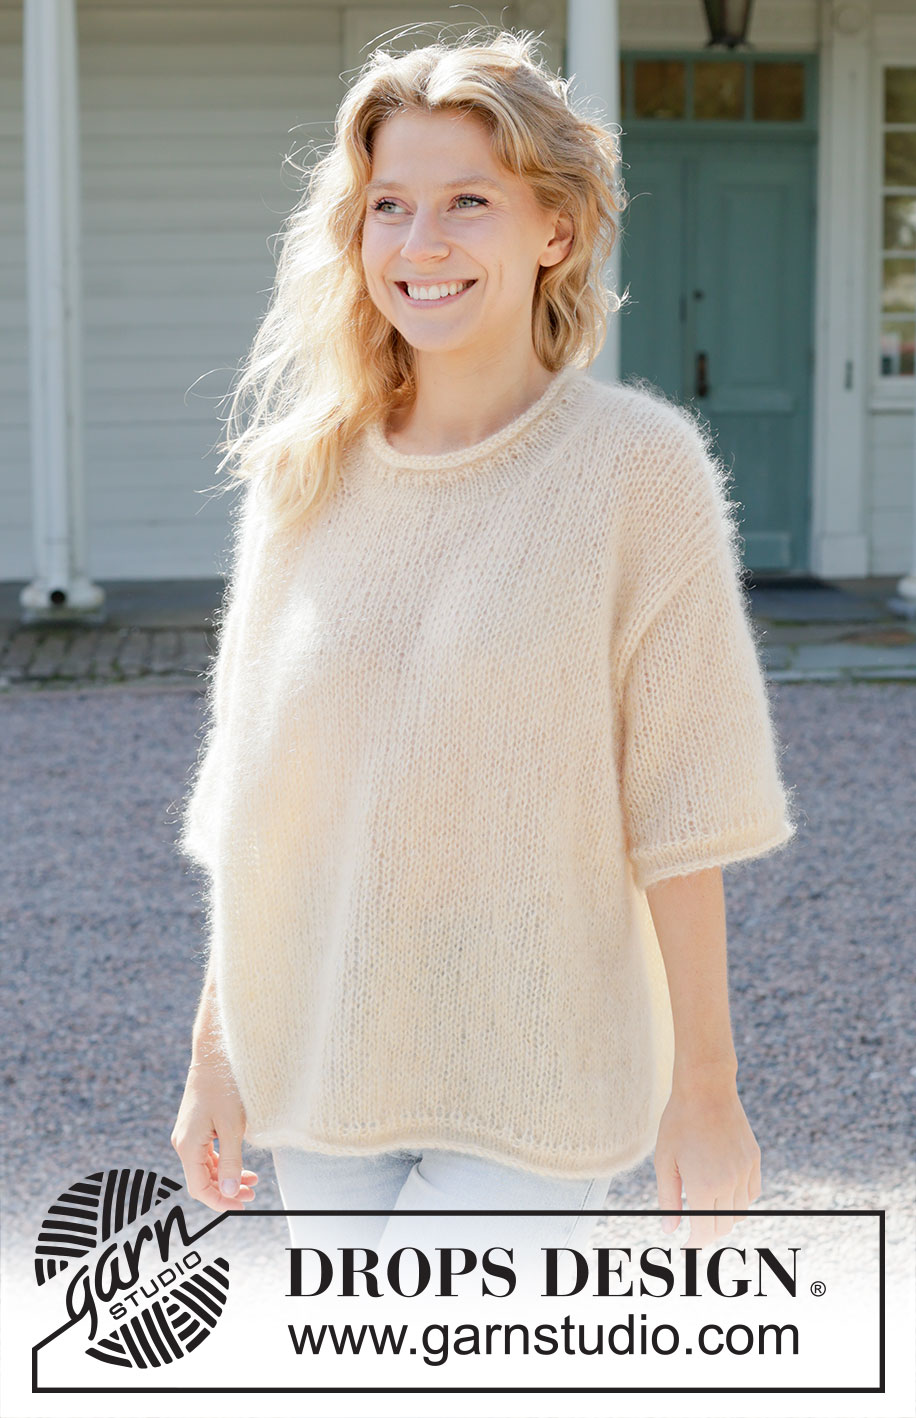
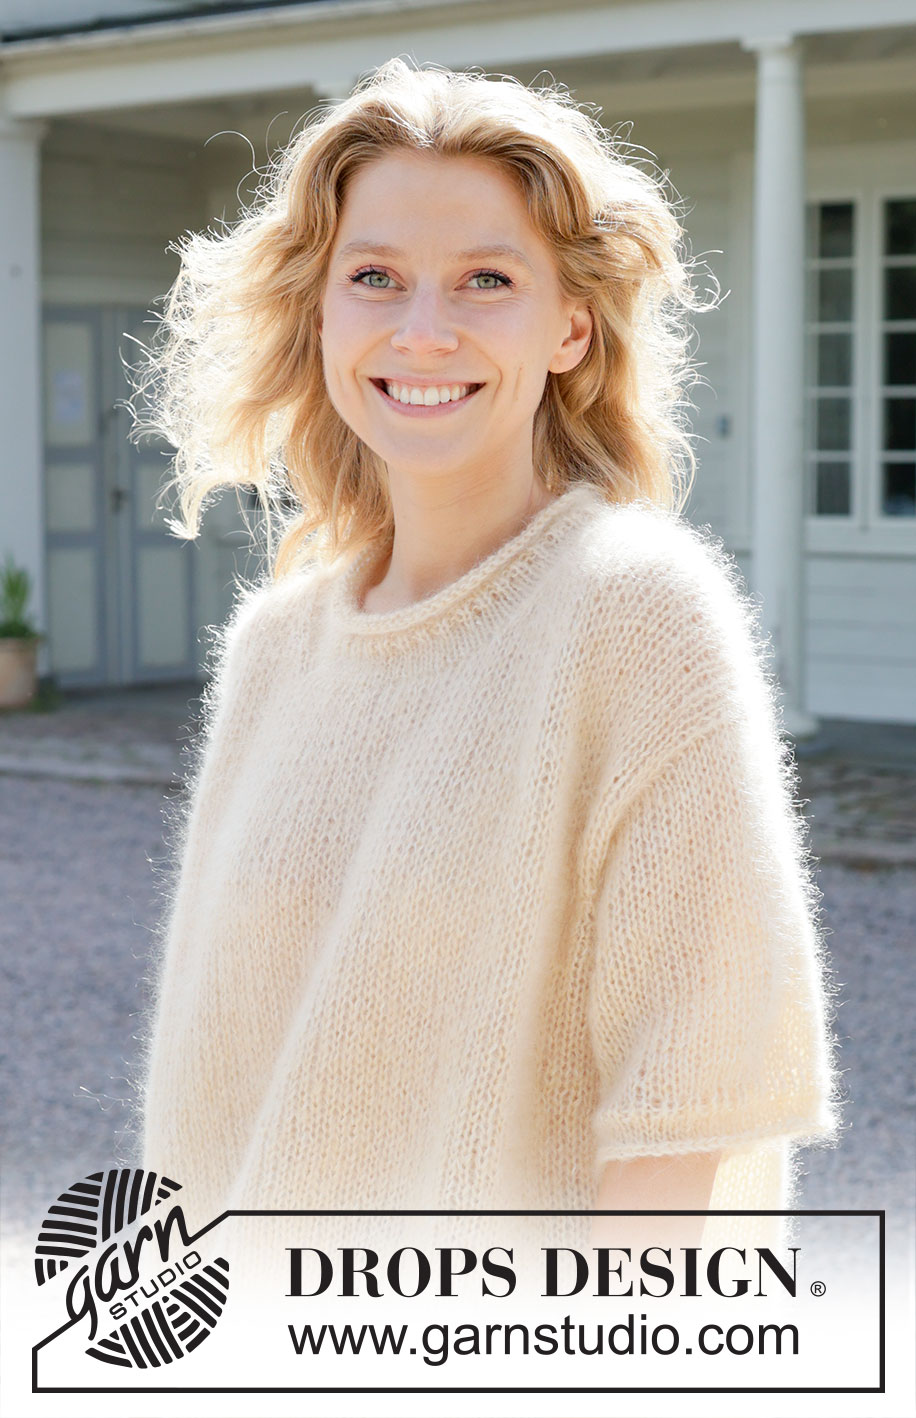
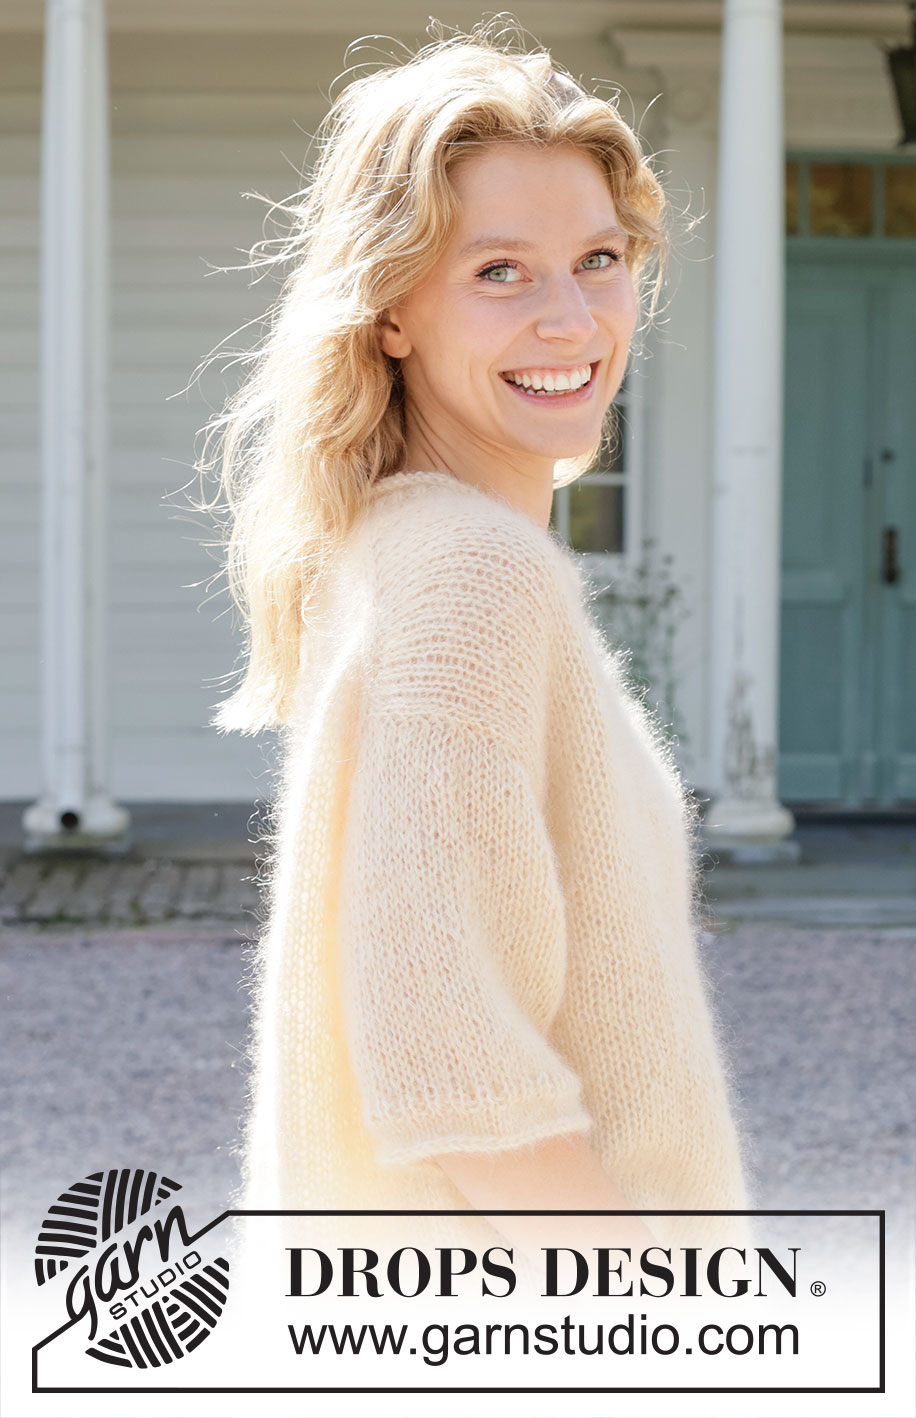
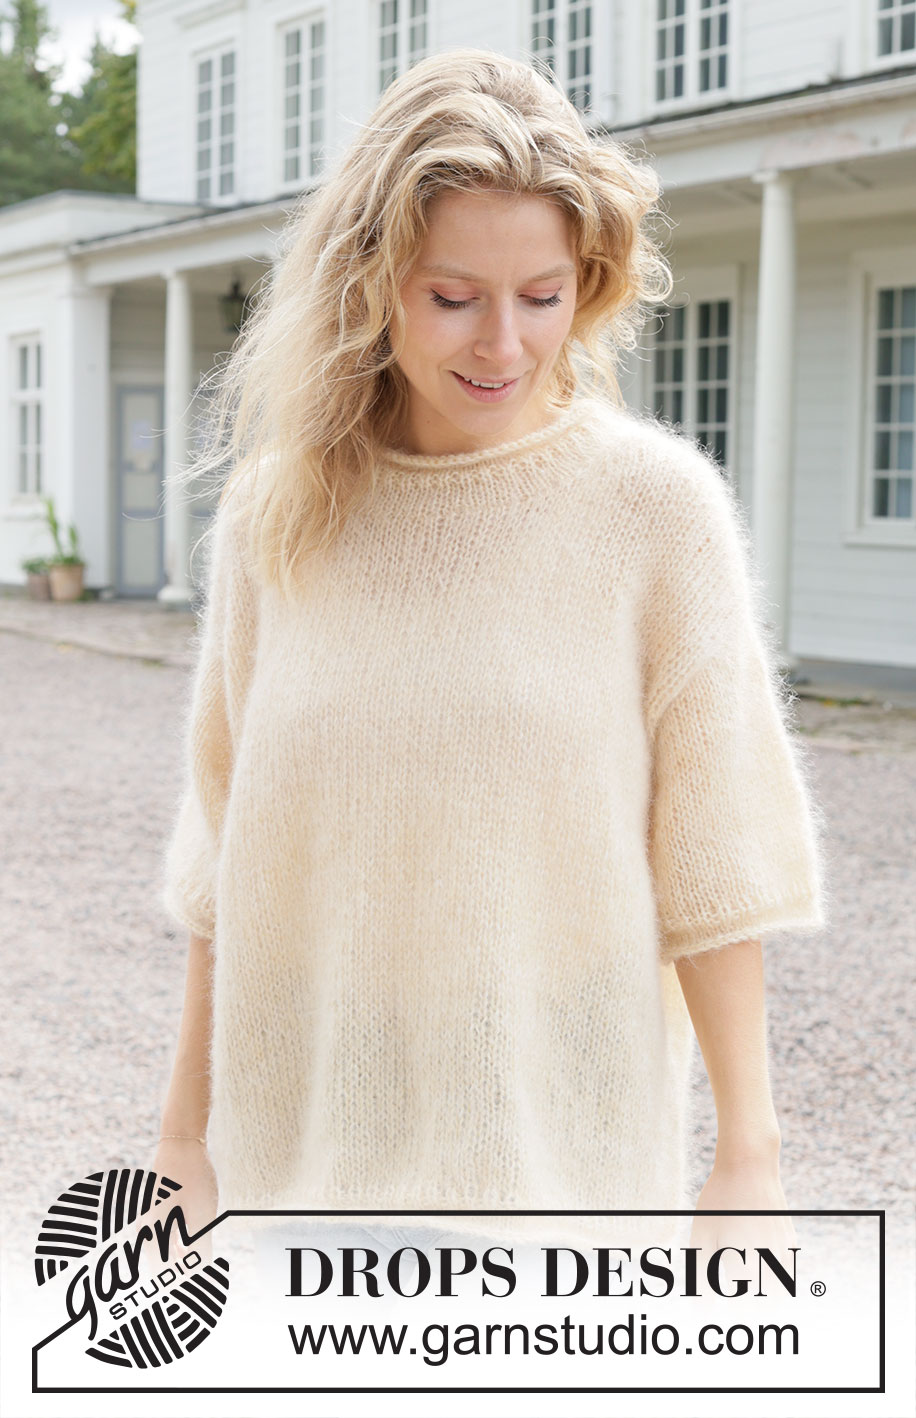
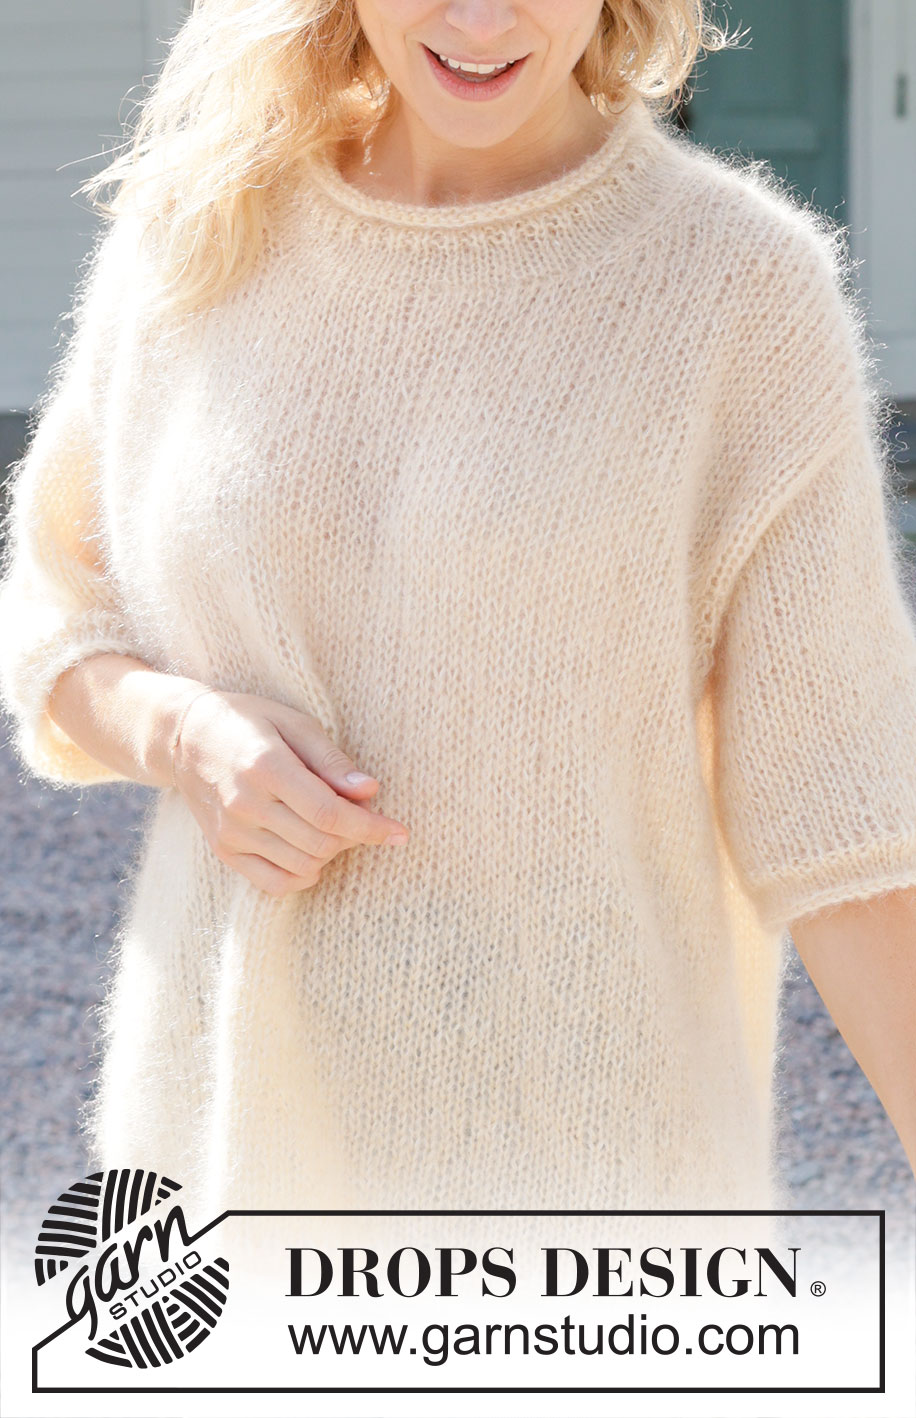
Easy Going#easygoingsweater |
|
 |
 |
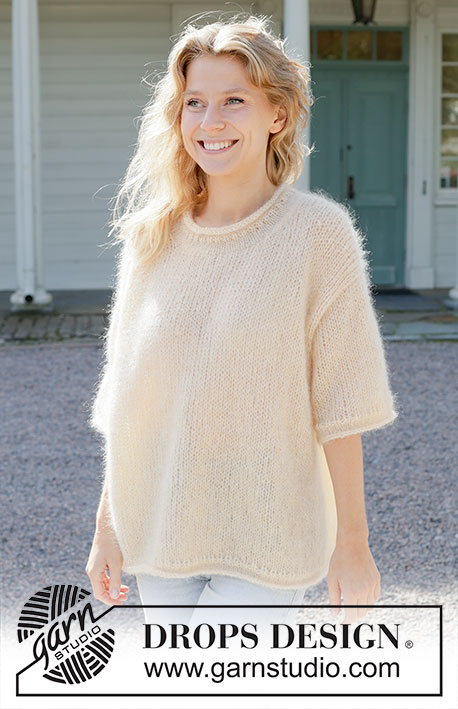
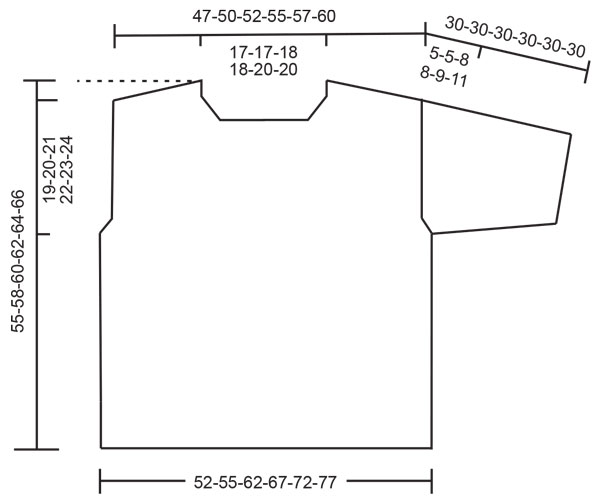
Knitted oversized jumper in 4 strands DROPS Kid-Silk. Piece is knitted top down with European shoulder / diagonal shoulder, short sleeves and rolling edges. Size XS – XXL.
DROPS 258-12 |
|
|
---------------------------------------------------------- EXPLANATION FOR THE PATTERN: ---------------------------------------------------------- INCREASE TIP-1: INCREASE 1 STITCH TOWARDS THE LEFT - from RIGHT SIDE: Use left needle to pick up yarn between 2 stitches from row below, pick up yarn from the front and knit in the stitch loop that is on the back of the needle. INCREASE 1 STITCH TOWARDS THE RIGHT - from RIGHT SIDE: Use left needle to pick up yarn between 2 stitches from row below, pick up yarn from the back and knit in the stitch loop that is on the front side of the needle. . INCREASE TIP-2: INCREASE 1 STITCH TOWARDS THE RIGHT - from WRONG SIDE: Use left needle to pick up yarn between 2 stitches from row below, pick up yarn from the back and purl in the stitch loop that is on the front side of the needle. INCREASE 1 STITCH TOWARDS THE LEFT - from WRONG SIDE: Use left needle to pick up yarn between 2 stitches from row below, pick up yarn from the front and purl in the stitch loop that is on the back side of the needle. DECREASE TIP: Decrease 1 stitch on each side of marker thread as follows: Work until 3 stitches remain before marker thread and knit 2 together, knit 2 (marker thread is in the middle of these 2 stitches), slip 1 stitch knitwise, knit 1, pass slipped stitch over stitch worked (= 2 stitches decreased). KNITTING TIP: When working short row there will be a small hole when turning the piece - the hole can be closed by tightening the yarn or using the technique German Short Rows as follows: Slip first stitch purlwise. Place strand over right needle and tighten well at the back (should lead to two loops on needle). Work these loops together on next row. ------------------------------------------------------- JUMPER - SHORT OVERVIEW OF THE PIECE: In this pattern needles of different length have been used, begin with fitting length for number of stitches and switch as needed. First work piece back and forth on circular needle. Begin by casting on stitches in the back of neck. Then work back piece downwards while AT THE SAME TIME increasing in each side of piece until number of stitches for shoulder width is reached. Back piece has a slight diagonal shoulder. Then work down to armholes. Now put back piece a side and work the front piece. Front piece is first worked in 2 parts. Begin by picking up stitches along one shoulder from back piece, work in stocking stitch while increasing towards the neck. Repeat on the other shoulder. Put right and left front piece together when increases for neck are done. Then work front piece down to armholes. Now slip front piece and back piece on to same circular needle and work body downwards in the round on circular needle. Pick up stitches for sleeves around the armholes and work sleeves downwards. First work back and forth with short rows to form a sleeve cap, then work sleeves downwards in the round on needle. Finish by picking up stitches around the neck, and work a neck edge. If 0 is given for the chosen size, it means that you skip the information until next information. BACK PIECE: Work piece back and forth on circular needle. Cast on 22-22-24-24-26-26 stitches on circular needle size 8 mm with 4 strands DROPS Kid-Silk (2 strands in colour vanilla, 1 strand in colour off white and 1 strand in colour marzipan. ROW 1 (= wrong side): Purl all stitches. ROW 2 (= right side): Read INCREASE TIP-1 and knit 3, increase 1 stitch towards the left, knit until 3 stitches remain, increase 1 stitch towards the right, knit 3. ROW 3 (= wrong side): Read INCREASE TIP-2 and purl 3, increase 1 stitch towards the right, purl until 3 stitches remain, increase 1 stitch towards the left, purl 3. AFTER 3RD ROW: Repeat 2nd and 3rd ROW until there are = 56-60-62-66-68-72 stitches on needle, 17-19-19-21-21-23 rows have been worked and last row worked is from right side. Insert 1 marker in the side. Now measure piece from here! Continue in stocking stitch - remember to follow the knitting tension - until piece measures 13-14-13-11-12-12 cm measured from the marker at the edge along armhole. Now increase in each side for armholes. INCREASE FOR ARMHOLES: ROW 1 (= right side): Remember INCREASE TIP-1 and knit 3, increase 1 stitch towards the left, knit until 3 stitches remain, increase 1 stitch towards the right, knit 3. ROW 2 (= wrong side): Purl all stitches. Work 1st and 2nd ROW 2-2-4-5-5-6 times in total = 60-64-70-75-78-84 stitches on needle. Work until piece measures 16-17-18-18-19-20 cm, measured from marker along armhole, finish with a row from wrong side. Cut the yarn, slip stitches on a thread or stitch holder, now work left front piece along the left shoulder as explained below. LEFT FRONT PIECE: Find left shoulder on back piece as follows: Place back piece flat with right side up, place back piece so that stitches on thread/stitch holder is towards you, left side of piece = left shoulder. Now pick up stitches along left diagonal shoulder on back piece - begin from right side at the neck and pick up stitches out towards the shoulder as follows: Pick up 1 stitch in every worked row inside outermost stitch = 18-20-20-22-22-24 stitches. All length measurements on front piece are done from pick up edge. Work in stocking stitch (work first row from wrong side). When piece measures 7-8-9-10-11-12 cm, increase stitches towards the neck as follows: ROW 1 (= right side): Remember INCREASE TIP-1 and knit 3, increase 1 stitch towards the left, work the rest of row. ROW 2 (= wrong side): Purl all stitches. Work 1st and 2nd ROW 3 times in total (= 6 rows worked) = 21-23-23-25-25-27 stitches (next row is worked from right side). Cut the yarn, slip stitches on a thread or stitch holder, now work right front piece along the shoulder – read explanation below. RIGHT FRONT PIECE: Now pick up stitches along left diagonal shoulder on back piece - begin from right side at the shoulder and pick up stitches out towards the neck as follows: Pick up 1 stitch in every worked row inside outermost stitch = 18-20-20-22-22-24 stitches. All length measurements on front piece are done from pick up edge. Work in stocking stitch (work first row from wrong side). When piece measures 7-8-9-10-11-12 cm, increase stitches towards the neck as follows: ROW 1 (= right side): Work until 3 stitches remain, increase towards the right, knit 3 – remember INCREASE TIP-1. ROW 2 (= wrong side): Purl all stitches. Work 1st and 2nd ROW 3 times in total (= 6 rows worked) = 21-23-23-25-25-27 stitches (next row is worked from right side). Then place the front pieces together as explained below. FRONT PIECE (right and left part together): Work first row as follows from right side: Work the 21-23-23-25-25-27 stitches from right front piece, cast on 14-14-16-16-18-18 stitches for neck at the end of this row, then work the 21-23-23-25-25-27 stitches from left front piece = 56-60-62-66-68-72 stitches on needle. Work stocking stitch back and forth until piece measures 19-20-19-19-20-20 cm. Now increase in each side for armholes. INCREASE FOR ARMHOLES: ROW 1 (= right side): Remember INCREASE TIP-1 and knit 3, increase 1 stitch towards the left, work until 3 stitches remain, increase 1 stitch towards the right, knit 3. ROW 2 (= wrong side): Purl all stitches. Work 1st and 2nd ROW 2-2-4-5-5-6 times in total (= 4-4-8-10-10-12 rows have been worked) = 60-64-70-76-78-84 stitches on needle. Work until piece measures 22-23-24-26-27-28 cm, finish with a row from wrong side. Now put front piece and back piece together for body as explained below. Now measure the piece from here. BODY: Work the 60-64-70-76-78-84 stitches from front piece, cast on 2-2-4-4-8-8 new stitches at the end of this row (= in the side mid under sleeve), work the 60-64-70-76-78-84 stitches from back piece and cast on 2-2-4-4-8-8 new stitches on row (= in the side mid under sleeve) = 124-132-148-160-172-184 stitches on needle. Then work in the round on needle. Work until piece measures approx. 33-35-36-37-38-39 cm from armhole. Switch to circular needle size 5.5 mm and work 2 rounds rib (= knit 1/purl 1). Work 3 rounds in stocking stitch. Use needle size 8 mm and cast off somewhat loosely so that the edge can roll. Jumper measures approx. 55-58-60-62-64-66 cm, measured furthest in towards neck. SLEEVES: Sleeve is worked from the armhole and down. Place piece flat and insert 1 marker at the top of armhole = mid on top shoulder (NOTE! Mid on top shoulder is not same place as stitches were picked up for front piece but approx. 6-8 cm down on front piece). Pick up stitches around armhole, use circular needle size 5.5 mm, begin in the middle of the new stitches cast on under sleeve - pick up 44-46-50-54-60-64 stitches - adjust to pick up same number of stitches on each side of marker along armhole. Switch to circular needle size 8 mm. Now work in stocking stitch back and forth with short rows over sleeve cap to get a better shape on sleeve, begin round mid under sleeve as follows: ROW 1 (= right side): Work 5-5-6-6-7-8 stitches past marker on top of shoulder, turn piece – read KNITTING TIP. ROW 2 (= wrong side): Work 5-5-6-6-7-8 stitches past marker, turn piece. ROW 3 (= right side): Work 4-4-3-3-3-3 stitches past where the previous turn was, turn piece. ROW 4 (= wrong side): Work 4-4-3-3-3-3 stitches past where the previous turn was, turn piece. Repeat ROWS 3 and 4. Work until 8-8-12-12-14-16 turns have been done in total (= 4-4-6-6-7-8 times in each side and last row is worked from wrong side). AFTER LAST TURN: The last time 4th row is worked finish row by turning piece, then work from right side until beginning of round (mid under sleeve). Insert 1 marker thread mid under sleeve, this is used when decreasing stitches under sleeve. Move marker thread upwards when working. Now work in the round in stocking stitch over all stitches while AT THE SAME TIME decreasing under sleeve, read DECREASE TIP and decrease like this: When sleeve measures 1-1-1-1-1-1 cm measured mid under sleeve decrease 2 stitches 0-0-1-1-2-2 times on every other round, then decrease 2 stitches every 8-8-6-6-4-4 cm 3-3-3-3-3-3 times in total = 38-40-42-46-50-54 stitches on row. Work until piece measures 27 cm from mid on top of shoulder in all sizes. Switch to circular needle size 5.5 mm and work 2 rounds rib (= knit 1/purl 1). Work 3 rounds in stocking stitch. Use needle size 8 mm and cast off somewhat loosely so that the edge can roll. Sleeve measures approx. 30 cm from mid on top of shoulder in all sizes. NECK EDGE: Use circular needle size 5.5 mm and 4 strands DROPS Kid-Silk. Begin from right side at one shoulder line and pick up 74-76-80-82-88-90 stitches inside 1 stitch, knit 1 round while adjusting number of stitches - number of stitches must be divisible by 2. Work in stocking stitch until neck measures 3-3-3-4-4-4 cm. Switch to circular needle size 5.5 mm and work 2 rounds rib (= knit 1/purl 1). Work 3 rounds in stocking stitch. Use needle size 8 mm and cast off somewhat loosely so that the edge can roll. |
|
 |
|
Have you finished this pattern?Tag your pictures with #dropspattern #easygoingsweater or submit them to the #dropsfan gallery. Do you need help with this pattern?You'll find 31 tutorial videos, a Comments/Questions area and more by visiting the pattern on garnstudio.com. © 1982-2026 DROPS Design A/S. We reserve all rights. This document, including all its sub-sections, has copyrights. Read more about what you can do with our patterns at the bottom of each pattern on our site. |
|


With over 40 years in knitting and crochet design, DROPS Design offers one of the most extensive collections of free patterns on the internet - translated to 17 languages. As of today we count 324 catalogues and 12290 patterns translated into English (UK/cm). 12290
We work hard to bring you the best knitting and crochet have to offer, inspiration and advice as well as great quality yarns at incredible prices! Would you like to use our patterns for other than personal use? You can read what you are allowed to do in the Copyright text at the bottom of all our patterns. Happy crafting!
Post a comment to pattern DROPS 258-12
We would love to hear what you have to say about this pattern!
If you want to leave a question, please make sure you select the correct category in the form below, to speed up the answering process. Required fields are marked *.