
Popular categories
Looking for a yarn?
























Comments / Questions (20)
 Pia-Marie Wichmann wrote:
Hej, Jag har problem redan i början av mönstret, en magisk ring och 3 luftmaskor och nio stolpar när jag sen fortsätter ser det inte rätt ut, buktar sig pga de 9 stolparna...
29.07.2026 - 15:56DROPS Design answered:
Hei Pia-Marie. Man starter sjalet med 6 luftmasker som settes sammen til en ring med en kjedemaske i den første luftmasken (ingen magisk ring/3 luftmasker). De 9 stavene skal rette seg når man har heklet noen rader. mvh DROPS Design
10.08.2026 - 12:01
Sandra wrote:
Ska man inte virka i de yttersta stolparna/luftmaskorna??
30.06.2026 - 20:54DROPS Design answered:
Hei Sandra. De 3 ytterste luftmaskene i hver side i diagram A + B som er tegnet over hverandre = 1 stav, hekles det kun i der du ser det er tegnet i diagrammet. F.eks 6. rad og 10. rad til høyre (1 stave i 4. loddrette luftmaske fra forrige rad). mvh DROPS Design
06.07.2026 - 11:52
Sandra wrote:
Går det här mönstret att få i klartext? Jag förstår inte alls diagrammet.
16.06.2026 - 02:25DROPS Design answered:
Hei Sandra. Denne oppskriften fins bare slik du ser den på nett. Men ta gjerne en titt under TIPS & HJELP - DROPS Lektioner - Läs ett mönster - Hur man läser virkdiagram. Se også på de ulike hjelpevideoene som ligger til oppskriften, og du kan alltid sende oss spørsmål om du står fast. mvh DROPS Design
22.06.2026 - 08:30
 Elgamal wrote:
Bonjour, Pourriez-vous nous préciser la manière de faire la bordure de finition ? D’avance merci Sally
03.07.2025 - 03:04DROPS Design answered:
Bonjour Mme Elgamal, il n'y a pas de bordure particulière ajoutée à la fin de ce châle, les "démarcations" que vous voyez sur la photo correspondent aux augmentations de part et d'autre du châle. Mais vous pouvez volontiers ajouter une bordure si vous le souhaitez; retrouvez-en quelques unes dans nos vidéos. Bon crochet!
03.07.2025 - 16:52
 Reidun Marie wrote:
Heklet denne i gammelrosa - ble helt supertopp! Jeg kan lite om hekling, men prøvde meg fram. Siste raden forstod jeg plutselig hvordan man skulle gjøre fastmasker. Ble et fint sjal likevel. :D Jeg kan anbefale et slikt gjentagende mønster for andre nybegynnere. Fint dere har flere bilder av produktene fra ulike vinkler, for da kan jeg se noe av det jeg ikke helt klarer å lese i oppskriften.
10.11.2024 - 00:27
Carola wrote:
Bonjour Je ne comprends pas le passage de la partie B à la partie C : à combien dois je faire commencer le motif de fleur à partir du début du rang. J’ai essayé avec 7 bridés mais ça décale la fleur du centre
25.06.2024 - 21:16DROPS Design answered:
Bonjour Carola, lorsque vous commence un nouveau motif, augmentez comme dans B, par ex au 1er rang du motif, crochetez 7 mailles en l'air pour tourner, 1 bride dans la 5ème maille en l'air à partir du crochet, 1 bride dans chacune des 4 brides suivantes (= 6 brides au total) et commencez le 1er motif ajouré en commençant directement par les 3 mailles en l'air du 1er motif; répétez les motifs et terminez par 6 brides à la fin du rang, tournez avec 7 mailles en l'air et crocheté le rang suivant. Bon crochet!
26.06.2024 - 07:48
 Belinda wrote:
Hallo, allereerst bedankt voor het patroon. Ik wil er een deken mee maken, kan u mij zeggen wat ik moet opzetten? Daarmee bedoel ik een meervoud van hoeveel steken? Alvast bedankt
08.02.2024 - 19:57DROPS Design answered:
Dag Belinda,
Helaas is het voor ons niet mogelijk om een patroon aan te passen naar persoonlijke wensen. Je kunt de steken tellen van een herhaling van het onderste telpatroon en op basis hiervan het juiste aantal steken opzetten.
28.02.2024 - 20:49
 Stephanie Bemis wrote:
In section c, do I maintain chaining 8 for each row?
25.09.2023 - 03:38DROPS Design answered:
Dear Mrs Bemis, when working C section of the diagram, continue increasing as shown on each side of A and B, this means start each row with 8 chains and work dc as before with lace pattern inbetween. Happy crocheting!
25.09.2023 - 10:52
Stephanie Bemis wrote:
I'm having trouble understanding the stitch count in the beginning of each row. Some chain 3's are not included in the row count. I also am understanding the amount of stitches before beginning a new flower.
24.09.2023 - 22:54DROPS Design answered:
Dear Stephanie, in the first round after the magic ring we work 3 chain stitches and 9 double crochets. After this, we work 7 chain stitches and we start the new row in the 5th chain stitch from the hook. Work 12 double crochets (1 in each stitch) and at the end of the row work 7 chain stitches again. Start the new row in the 5th chain stitch from the hook, as before. In chart B there should be 7 double crochets between the flowers. Happy crochetting!
24.09.2023 - 23:57
 Sabine wrote:
Jetzt habe ich es verstanden, danke für die Info.
23.07.2021 - 14:49
|
|||||||||||||||||||||||||
Marion's Garden#marionsgardenshawl |
|||||||||||||||||||||||||
 |
 |
||||||||||||||||||||||||
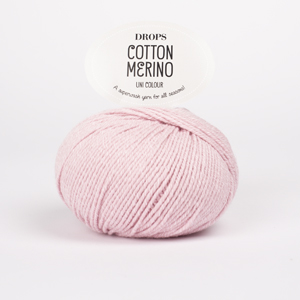
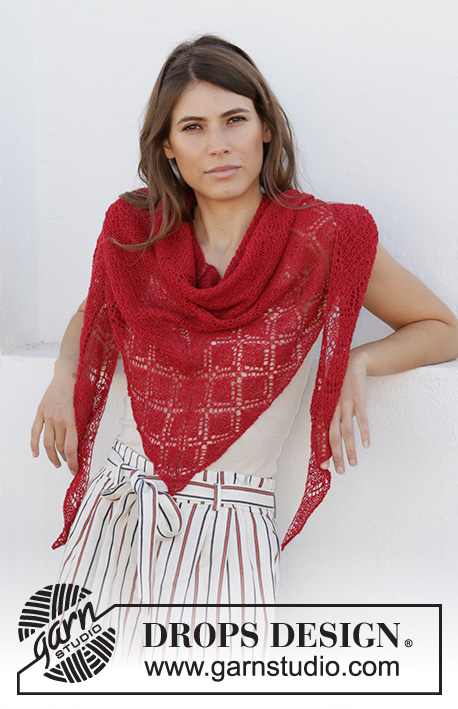
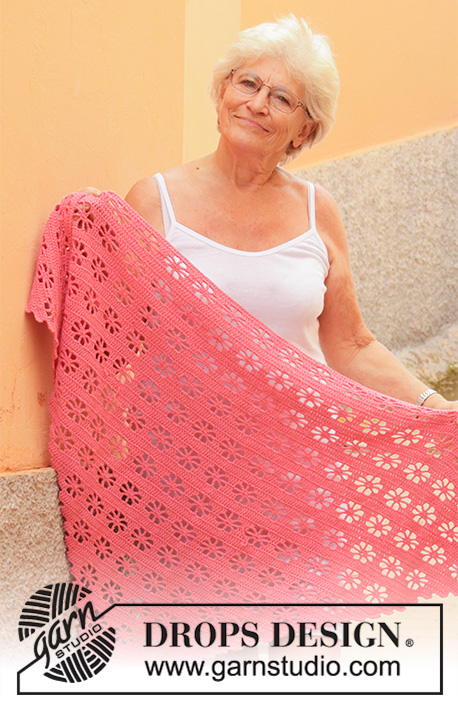
Crocheted shawl in DROPS Cotton Merino with clover pattern.
DROPS 202-16 |
|||||||||||||||||||||||||
|
---------------------------------------------------------- EXPLANATION FOR THE PATTERN: ---------------------------------------------------------- PATTERN: See diagram A. to C. ---------------------------------------------------------- START THE PIECE HERE: ---------------------------------------------------------- SHAWL - SHORT OVERVIEW OF THE PIECE: Work shawl from tip at the bottom and up while casting on new stitches in each side. SHAWL: The entire pattern is drawn in diagram. Begin at the star - be careful not to tighten chain stitches - 1 chain stitch should be as long as a treble crochet is wide. First work according to diagram A. Then work upwards by repeating diagram B with increases in the side and 2 new clover flowers for every repetition vertically. Diagram C show clover pattern without increase. Finish piece after a whole repetition when it measures 155-165 cm at the top edge. Cut and fasten the yarn. |
|||||||||||||||||||||||||
Diagram explanations |
|||||||||||||||||||||||||
|
|||||||||||||||||||||||||
 |
|||||||||||||||||||||||||
 |
|||||||||||||||||||||||||
Have you finished this pattern?Tag your pictures with #dropspattern #marionsgardenshawl or submit them to the #dropsfan gallery. Do you need help with this pattern?You'll find 7 tutorial videos, a Comments/Questions area and more by visiting the pattern on garnstudio.com. © 1982-2026 DROPS Design A/S. We reserve all rights. This document, including all its sub-sections, has copyrights. Read more about what you can do with our patterns at the bottom of each pattern on our site. |
|||||||||||||||||||||||||






With over 40 years in knitting and crochet design, DROPS Design offers one of the most extensive collections of free patterns on the internet - translated to 17 languages. As of today we count 333 catalogues and 12525 patterns translated into English (UK/cm). 12525
We work hard to bring you the best knitting and crochet have to offer, inspiration and advice as well as great quality yarns at incredible prices! Would you like to use our patterns for other than personal use? You can read what you are allowed to do in the Copyright text at the bottom of all our patterns. Happy crafting!
Post a comment to pattern DROPS 202-16
We would love to hear what you have to say about this pattern!
If you want to leave a question, please make sure you select the correct category in the form below, to speed up the answering process. Required fields are marked *.