
Popular categories
Looking for a yarn?




























Comments / Questions (327)
 Debra wrote:
I am sorry my previous question was so confusing! I have worked all rows down to where the ALL SIZES section begins. This is where I am lost as to where to join the yarn! I just cannot understand what is written. My stitch counts were correct up to this point in the pattern! I am about to just give up ...
25.10.2026 - 02:35
Debra wrote:
I'm very confused about placing the markers. I've been crocheting over 50 yrs and am so confused when it comes to where to begin after finishing off the main body! You don't mention where to join the yarn to start the lapels or the segments where there are 11dc, ch 1, 12 dc! I'm completely lost!! Please help me!
21.10.2026 - 04:47DROPS Design answered:
Dear Debra, the yarn is not cut after you have worked the 25th round, you just continue in pattern as before, skipping stitches that you will replace by chain stitches for armholes - then on next round continue pattern as before so that there are the same number of stitches over chain spaces as between (as if you wouldn't have skipped stitches). Can this help?
21.10.2026 - 10:52
 Petra wrote:
Hallo, Sie haben mich falsch verstanden. Ich meine die Reihe 27 mit den Luftmaschenketten. wo genau ist der Beginn und das Ende der jeweiligen Luftmaschenkette. Wenn ich es so häkle wie beschrieben sind die Ärmelauslässe oben eben unterschiedlich. Rechter Ärmel beginnt die Kette unmittelbar nach den Stäbchen und endet in der Mustergruppe. Links genauso. So ist der Ärmelauslass aber nicht Spiegelgleich. Ich könnte zur besseren Verständlichkeit auch Fotos schicken was ich meine.
14.10.2026 - 11:18DROPS Design answered:
Liebe Petra, das können Sie so arrangieren, damit die Armlöcher spiegelgleich sind, so häkeln Sie 1 MusterGruppe vor den Luftmaschen und überspringen Sie 22 stb, 1 MusterGruppe, 22 Stb, 1 MusterGruppe. Viel Spaß beim Häkeln!
15.10.2026 - 16:22
Petra wrote:
Hallo! Ich hänge beim Kreis Reihe 27.Gr. L/XL. Ich habe wie folgt gehäkelt: 22 Stb, 1 Mustergruppe 22 Stb, dann 54 LM, (überspringen von 1 MG 22 Stb, 1 MG, 22 Stb,) LM-Kette mit MG verbunden, dann weiter im Muster bis 22 Stb. Dann wieder 54 LM (überspringen von 1 MG, 22 Stb. 1 MG, 22 Stb.) LM-Kette mit Mustergruppe verbunden, dann weiter mit Muster. So ist aber der obere Teil der Ärmel nicht Spiegelgleich. Der rechte Arm endet mit Stäbchen, der linke mit Mustergruppe. Richtig?
13.10.2026 - 22:39
Petra wrote:
Hallo! Ich hänge beim Kreis Reihe 27.Gr. L/XL. Ich habe wie folgt gehäkelt: 22 Stb, 1 Mustergruppe 22 Stb, dann 54 LM, (überspringen von 1 MG 22 Stb, 1 MG, 22 Stb,) LM-Kette mit MG verbunden, dann weiter im Muster bis 22 Stb. Dann wieder 54 LM (überspringen von 1 MG, 22 Stb. 1 MG, 22 Stb.) LM-Kette mit Mustergruppe verbunden, dann weiter mit Muster. So ist aber der obere Teil der Ärmel nicht Spiegelgleich. Der rechte Arm endet mit Stäbchen, der linke mit Mustergruppe. Richtig?
13.10.2026 - 22:37DROPS Design answered:
Liebe Petra, das Muster häkeln Sie weiter nach den Ärmeln, genauso wie zuvor, die Ärmel werden später mit Stäbchen gehäkelt, so wird alles richtig sein. Viel Spaß beim Häkeln!
14.10.2026 - 07:26
Zuzana wrote:
Hello. I wanted to ask if I can make the pattern smaller by starting the armhole sooner than on row 25. I have used yarn that is slightly bigger without realizing and I have 15 DC between pattern groups and I am alredy on 20 cm from the middle. How should I proceed with the pattern now Thank you
13.10.2026 - 08:59DROPS Design answered:
Dear Zuzana, yes, it's more important to have the right measurements than to follow the pattern. You can now start working the armhole, as you have reached the correct length, but you will need to recalculate the other sections according to the number of dc that you have in between the pattern sections. So the number of dc in between pattern groups will change from the ones in the pattern to the ones you get from the lower number of dc. Happy crochetting!
18.10.2026 - 19:03
Jeannine wrote:
Hallo, ich komme mit Reihe 26 nicht zurecht. Ich bin in der Hin Reihe. Mein Muster beginnt dann im Arm Ausschnitt mit einer Mustergruppe und dann Stäbchen. Oder habe ich einen Fehler? Viele Grüße
26.09.2026 - 15:30DROPS Design answered:
Liebe Jeannine, die 26. Reihe stricke Sie genauso wie zuvor mit Mustergruppe und Stäbchen, nun in de 50 Luftmaschen für die Armausschnitt häkeln Sie weiter wie zuvor, damit das Muster vom Kreis forsetzt; Sie sollen genausoviele Stäbchen zwischen jeder Mustergruppe und genauso viele Mustergruppe wie zuvor haben. Viel Spaß beim Häkeln!
28.09.2026 - 08:29
 Hedwig wrote:
Hallo! Ik ben bijna toe aan het zetten van de steekmarkeerders. Waarom moet ik afhechten tussen de toer waarin deze geplaatst worden en de toer ervoor? Is dat omdat ik anders niet op de goede kant van het werk haak? Kan het zijn dat ik doordat ik linkshandig ben door kan haken zonder afhechten?
31.08.2026 - 21:46
 Corinne wrote:
Votre modèle est pas simplement expliqué comme on le crocheté dsle la preuve de tant de messages c est pas normal
09.08.2026 - 10:17
Corinne wrote:
Pouvez vous revoir chaque début de rand qui sont très mal expliqué heureux que je ne sois pas une débutante et que je sache lire les images car dire de réplique le rang 8 et 9 la personne qui va le faire va se planter rang8. 3bides et un mo tif rang 9 .4 bride et un motif alors qu ils faut répéter le rang en ajoutant un maille a chaque gr de bride et chaque rang jusqu au 22 rg merci
09.08.2026 - 09:56
|
|
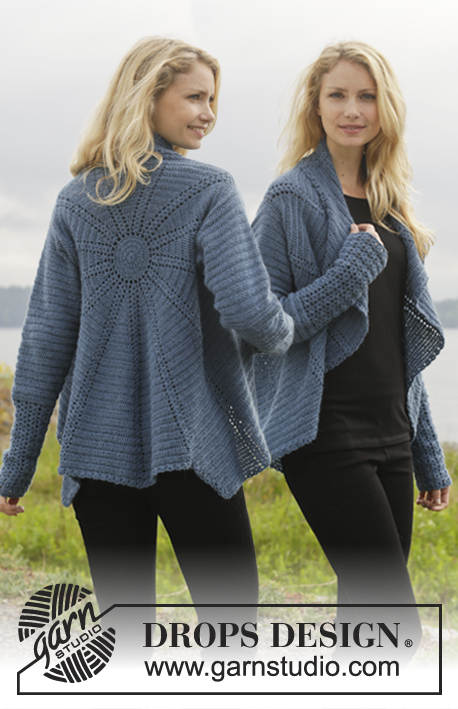
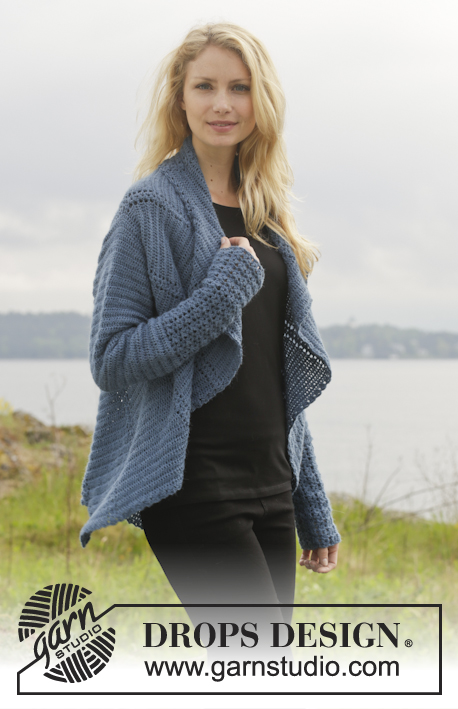
Winter Solstice#wintersolsticecardigan |
|
 |
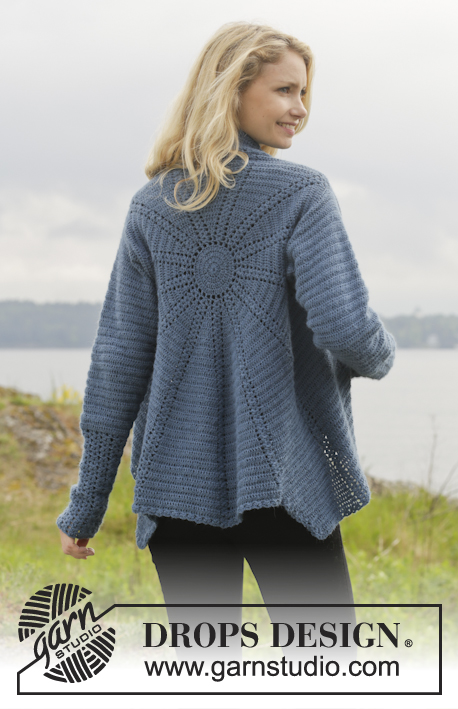 |
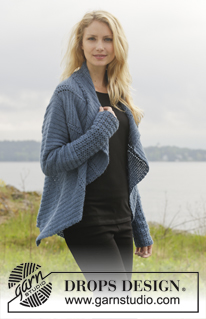
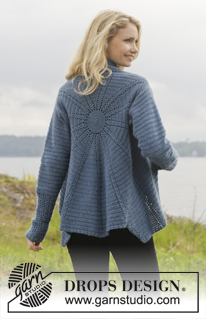
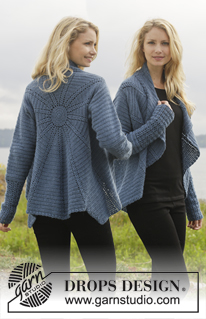
Crochet DROPS jacket worked in a circle in "Alpaca". Size: S - XXXL.
DROPS 158-10 |
|
|
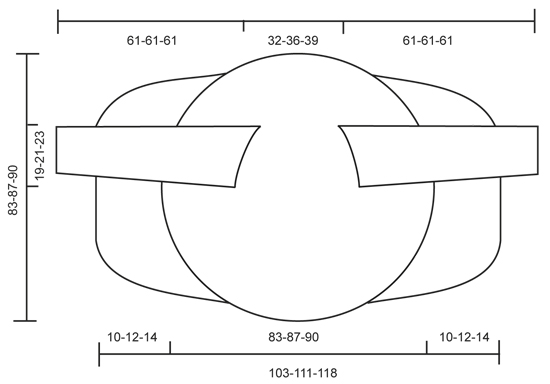
CROCHET INFO: Beg every round/row with 3 ch that replace 1st tr and finish every round/row with 1 sl st in 3rd ch from beg of round/row. PATTERN GROUP: Each pattern group consists of: 1 ch, 2 TR WORKED TOG - see explanation below, 2 ch, 2 tr worked tog and 1 ch. TR WORKED TOG: * Make 1 YO, insert hook in ch-space, get yarn, make a YO, pull through 2 of the sts on hook *, repeat from *-* one more time, make 1 YO and pull yarn through all 3 sts on hook. CROCHET 3 TR TOG: Work 3 tr into 1 tr at beg of row as follows: Work 2 ch (= replace 1 tr), work 1 tr, but wait with last pull through (= 2 strands on hook), then work next tr but on last pull through, pull yarn through all sts on hook. DECREASE TIP (applies to sleeves): Dec at beg of row by working 1 sl st over the tr to be dec. Dec at end of row by working until 1 tr to be dec remains, turn piece. -------------------------------------------------------- CIRCLE: Work 5 ch on hook size 3.5 mm with Alpaca and form a ring with 1 sl st in first ch. READ CROCHET INFO. ROUND 1: Work 13 tr in ch-ring. ROUND 2: Work * 2 tr in every tr*, repeat from *-* the entire round = 26 tr. ROUND 3: Work * 2 tr in first tr, then 1 tr in next tr *, repeat from *-* the entire round = 39 tr. ROUND 4: Work * 2 tr in first tr, then 1 tr in each of the next 2 tr *, repeat from *-* the entire round = 52 tr. ROUND 5: Work * 1 tr in next tr, then 2 ch, skip 1 tr *, repeat from *-* the entire round = 26 ch-spaces and 26 tr. REMEMBER THE CROCHET TENSION! ROUND 6: In first tr work PATTERN GROUP - see explanation above, * 1 tr in next tr, 1 pattern group in next tr *, repeat from *-* until 1 tr remains, 1 tr in last tr = 13 pattern groups with 1 tr between each. Then work piece back and forth. Work every row tog at the end of row with 1 sl st in first st on row. Turn piece. ROW 7 (= from WS): 2 tr in first tr, * 1 pattern group in next pattern group, 2 tr in next tr (= tr-group) *, repeat from *-* until 1 pattern group from previous row remains, 1 pattern group = 13 pattern groups with 13 tr-groups between each. Turn piece. ROW 8: 1 pattern groups in first pattern group, * 2 tr in first tr, 1 tr in each of the next tr in tr-group, 1 pattern group in next pattern group *, repeat from *-* until 1 tr-group remains, 2 tr in first tr, 1 tr in each of the next tr in tr-group = 13 groups with 3 tr between each. Turn piece. ROW 9: 2 tr in first tr, 1 tr in each of the next tr in tr-group, * 1 pattern group in pattern group, 2 tr in first tr of tr-group, 1 tr in each of the next tr *, repeat from *-* until 1 pattern group from previous row remains, 1 pattern group = 13 groups with 4 tr between each. Turn piece. Then repeat 8th and 9th row until 6 rounds + 18-20-22 rows have been worked (= 19-21-23 tr between every pattern group) = 247-273-299 tr and 13 pattern group. Piece measures approx. 20-22-23 cm from centre and outwards. Now work armholes as follows in the different sizes: SIZE S/M: ROW 25 (= from WS): Inc in every group with tr as before. Work 20 tr, 1 pattern group, 20 tr, work 50 loose ch (= right armhole), skip 2 tr-groups and 2 pattern groups. Then work tr-groups and pattern groups as before over the next 114 tr, work 50 loose ch (= left armhole), skip 2 tr-groups and 2 pattern groups, work as before the rest of row, finish with 1 sl st in first tr on row = 180 tr and 100 ch. Turn piece. ROW 26: Continue with pattern and inc as before but work first ch-row (= left armhole) as follows: 10 tr, skip 1 ch, 11 tr, skip 1 ch, 1 pattern group, skip 1 ch, 11 tr, skip 1 ch, 10 tr, skip 1 ch, 1 pattern group and skip 1 ch. I next ch-row (= right armhole) work the same way but in opposite order, i.e. beg by skipping 1 ch, 1 pattern group and finish with tr = 273 tr. ROW 27-50: Work pattern as before but now inc only on even numbered rows until 50 rows have been worked in total = 429 tr (33 tr in every tr-group). Piece measures approx. 42 cm from centre and outwards. SIZE L/XL: ROW 27 (= from WS): Inc in every group with tr as before. Work 22 tr, 1 pattern group, 22 tr, work 54 loose ch (= right armhole), skip 2 tr-groups and 2 pattern groups. Then work pattern as before over the next 126 tr, work 54 loose ch (= left armhole), skip 2 tr-groups and 2 pattern groups, work as before the rest of row, finish with 1 sl st in first tr on row = 198 tr and 108 ch. Turn piece. ROW 28: Continue with pattern and inc as before but work first ch-row (= left armhole) as follows: 11 tr, skip 1 ch, 12 tr, skip 1 ch, 1 pattern group, skip 1 ch, 12 tr, skip 1 ch, 11 tr, skip 1 ch, 1 pattern group and skip 1 ch. I second ch-row (= right armhole) work the same way but in opposite order, i.e. beg by skipping 1 ch, 1 pattern group and finish with tr = 299 tr. ROW 29-52: Work pattern as before but now inc only on even numbered rows until 52 rows have been worked in total = 455 tr (35 tr in every tr-group). Piece measures approx. 43 cm from centre and outwards. SIZE XXL/XXXL: ROW 29 (= from WS): Inc in every group with tr as before. Work 24 tr, 1 pattern group, 24 tr, work 58 loose ch (= right armhole), skip 2 tr-groups and 2 pattern groups. Then work pattern as before over the next 138 tr, work 58 loose ch (= left armhole), skip 2 tr-groups and 2 pattern groups, work as before the rest of row, finish with 1 sl st in first pattern group on row = 216 tr and 116 ch. Turn piece. ROW 30: Continue with pattern and inc as before but work first ch-row (= left armhole) as follows: 12 tr, skip 1 ch, 13 tr, skip 1 ch, 1 pattern group, skip 1 ch, 13 tr, skip 1 ch, 12 tr, skip 1 ch, 1 pattern group and skip 1 ch. I second ch-row (= right armhole) work the same way but in opposite order, i.e. beg by skipping 1 ch, 1 pattern group and finish with tr = 325 tr. ROW 31-54: Work pattern as before but now inc only on even numbered rows until 54 rows have been worked in total = 481 tr and 37 tr in every tr-group. Piece measures approx. 45 cm from centre and outwards. ALL SIZES: Insert 4 markers in the piece as follows from WS: Work 16-17-18 tr, insert 1st marker here, work 17-18-19 tr, * 1 pattern group, 33-35-37 tr *, repeat from *-* 3 more times, insert 2nd marker here (1st-2nd marker = right front piece). Work 1 pattern group, 33-35-37 tr, 1 pattern group, 33-35-37 tr and 1 pattern group, insert 3rd marker here. * Work 33-35-37 tr, 1 pattern group *, repeat from *-* 3 more times, 17-18-19 tr, insert 4th marker. (3rd-4th marker = left front piece). Work the rest of row. Sts between 1st and 4th marker are up towards neck. Cut the yarn and fasten. RIGHT FRONT PIECE: Now work right front piece between 1st and 2nd marker, beg from 2nd marker (i.e. from RS) = 149-158-167 tr and 4 pattern groups. Continue inc on every row in tr-groups as before BUT do not inc in tr-groups in each side of front piece - AT THE SAME TIME dec 2 tr at beg of every row by CROCHET 3 TR TOG - see explanation above. Continue to work until 12-14-16 rows have been worked over front piece. Cut the yarn and fasten. LEFT FRONT PIECE: Work left front piece between 3rd and 4th marker the same way as right front piece, beg from 4th marker (i.e. from RS). SLEEVES: Work back and forth from armhole and down, work every row tog with 1 sl st at the end of row. Use hook size 3.5 mm and Alpaca. Beg by working 86-94-102 tr around the opening for sleeve, beg of row should be under sleeve. Then work 3 rows with 1 tr in every tr. Continue with 1 tr in every tr - AT THE SAME TIME dec in the different sizes as follows: READ DECREASE TIP! SIZE S/M: Dec 1 st in each side of piece every other row 4 times and then every 3rd row 12 times (= 16 times in total) = 54 tr. SIZE L/XL: Dec 1 st in each side of piece alternately every 3rd and 2nd row 18 times in total = 58 tr. SIZE XXL/XXXL: Dec 1 st in each side of piece every other row 17 times and then every 3rd row 4 times (= 21 times in total) = 60 tr. Then work pattern groups as follows: ROW 1: 2 tr, 1 ch * work the next 2 tr tog, 1 ch *, repeat from *-* and finish with 2 tr. ROW 2: Work 2 tr, * in next ch work 1 pattern group, skip 1 ch *, repeat from *-*, and finish with 1 tr in each of the last 2 tr. Turn piece. ROW 3: Work 2 tr, 1 pattern group in each of the next pattern groups until 2 tr remain, work 1 tr in each of these. Turn piece. Repeat 3rd row until piece measures approx. 61 cm in all sizes. Cut the yarn and fasten. CROCHET EDGE: Work 1 round with around the entire jacket as follows: * 1 pattern group, skip 2 tr/1 row *, repeat from *-* the entire round. |
|
 |
|
Have you finished this pattern?Tag your pictures with #dropspattern #wintersolsticecardigan or submit them to the #dropsfan gallery. Do you need help with this pattern?You'll find 8 tutorial videos, a Comments/Questions area and more by visiting the pattern on garnstudio.com. © 1982-2026 DROPS Design A/S. We reserve all rights. This document, including all its sub-sections, has copyrights. Read more about what you can do with our patterns at the bottom of each pattern on our site. |
|






With over 40 years in knitting and crochet design, DROPS Design offers one of the most extensive collections of free patterns on the internet - translated to 17 languages. As of today we count 333 catalogues and 12532 patterns translated into English (UK/cm). 12532
We work hard to bring you the best knitting and crochet have to offer, inspiration and advice as well as great quality yarns at incredible prices! Would you like to use our patterns for other than personal use? You can read what you are allowed to do in the Copyright text at the bottom of all our patterns. Happy crafting!
Post a comment to pattern DROPS 158-10
We would love to hear what you have to say about this pattern!
If you want to leave a question, please make sure you select the correct category in the form below, to speed up the answering process. Required fields are marked *.