
Popular categories
Looking for a yarn?


Comments / Questions (84)
Yu-Chi wrote:
您好,請問在第十二排(Round 2)的總針數是否因為跳過短針的關係少於85?如果是這樣的話,那麼下一排怎麼加六針後會是91針呢?還請幫忙解惑,謝謝!
25.09.2018 - 15:50DROPS Design answered:
Dear Yu-Chi, we can only answer in English - hope this will be okay for you. When you work first round following diagram, you will have 85 sts in 1st size or 91 sts in 2nd size - you repeat A.2 a total of 13 times in the round in the first size and a total of 14 times in the round in the 2nd size. Happy crocheting!
25.09.2018 - 15:55
![]() Annabelle wrote:
Annabelle wrote:
Bonjour, je trouvais ce chapeau très fin et joli, mais, je suis déçue. Je le trouve trop haut sur la tête, il ne tombe pas bien (j\'ai pensé que j\'aurais dû ajouter un rang au niveau du lien), pourtant, toutes mes mesures étaient ok et je ne fais que 55 de tour de tête. Le point fantaisie est raffiné. Je ne comprends pas pourquoi ça ne rend pas alors que sur la photo, c\'est superbe, si il y a d\'autres personnes qui l\'ont fait, je veux bien votre témoignage....Merci
09.09.2018 - 17:36DROPS Design answered:
Bonjour Annabelle, aviez-vous bien le bon échantillon? soit 18 brides x 9 rangs = 10 x 10 cm? Avez-vous pu conserver cette tension tout le long de la réalisation de votre chapeau? En fonction de la morphologie de chacune, le résultat peut être différent, vous pouvez volontiers rajouter/supprimer des rangs pour obtenir l'effet souhaité. N'hésitez pas à contacter votre magasin DROPS, on saura vous aider et vous renseigner si besoin. Bon crochet!
11.09.2018 - 09:46
![]() Yvonne wrote:
Yvonne wrote:
Hallo, ich bin mir nicht sicher, ob ich die 8. und 9. Runde richtig verstehe. Soll ich in jeder dieser Runden jeweils 5 Stäbchen zusätzlich aufnehmen, jedoch einzeln verteilt? Oder was ist mit 5 (1) gemeint? Habe ich am Ende der 9. Runde dann 85 oder 91 Stäbchen? Dankeschön Yvonne
15.05.2018 - 23:42DROPS Design answered:
Liebe Yvonne, wenn Sie die erste Größe häkeln, folgen Sie die Anleitung vor den Klammern und wenn Sie die 2. Größe häkeln folgen Sie die Anleitung in Klammern. Viel Spaß beim häkeln!
16.05.2018 - 09:22
![]() Lisa wrote:
Lisa wrote:
Hej igen, nu har jag färdigställt hatten, men precis som för flera andra som kommenterat före mig, så blir inte hatten som på bilden. Hatten blir överdrivet bred nedtill och liknar snarare en solhatt med sitt vågiga och mjuka brätte, än den hatt som syns på modellbilden. Har följt mönstret till punkt och pricka och är en van virkare. Kan inte komma fram till vad jag kan ha missförstått. Hjälp?! Är det något som lämnats bort i mönstret som man borde veta om?
27.04.2018 - 16:30
![]() Rachael Page wrote:
Rachael Page wrote:
Sorry to be a pain. Thanks for answering last question. On the brim. Rounds 2-5. I’ve increased the numbers on dtr for every round. So R2 - 8 dtr R3 - 9 dtr R4 - 10 dtr R5 - 11 dtr Is this wrong? Should all of these last round have been fans/clusters of 8 dtr? This might explain why my hat isn’t the right shape. I may have interpreted the pattern wrong
25.04.2018 - 09:59DROPS Design answered:
Dear Mrs Page, you inc 1 dtr in each fan so that you will have 11 dtr in each fan on last row of the brim. Happy crocheting!
25.04.2018 - 10:45
![]() Rachael Page wrote:
Rachael Page wrote:
Hello I’ve finished this hat and found the pattern good to work with however my hat isn’t as flat. Do I need to block it to make it look the same as picture. Mine is a bit more textured. Not blocked before. Would you fully wet it and pin or iron with steam?
25.04.2018 - 00:06DROPS Design answered:
Dear Mrs Page, you can block it fully wet and pin, making sure to keep correct measurements. Enjoy!
25.04.2018 - 08:38
![]() Lisa wrote:
Lisa wrote:
Hej! Jag hakar upp mig på varv 8 när jag ska virka. Det står att man ska öka 5 stolpar, utöver de 10 man ökar per varv, men var ska de placeras? Tack på förhand!
16.04.2018 - 21:06DROPS Design answered:
Hej, dessa 5 stolpar ska ökas jämnt fördelat, du kan göra ökningarna i vartannat mellanrum mellan de övriga ökningarna.
24.04.2018 - 13:59
![]() Frøydis wrote:
Frøydis wrote:
Jeg mener å ha forstått oppskriften og diagrammet. Men hatten får feil fasong, og blir altfor kort. Utifra bildet kan jeg heller ikke se at jeg gjør feil i mønsteret.
13.07.2017 - 21:32DROPS Design answered:
Hei Frøydis. Har du målt din heklefasthet? Du skal ha 9 rader med staver for å få 10 cm i høyden. Det er fort gjort å hekle for stramt og da blir hatten for kort.
07.08.2017 - 11:07
![]() Carole Gencay wrote:
Carole Gencay wrote:
It would be so helpful to see a full video of someone doing this entire Glimpse of Spring Cloche hat. I really needed it for the crown.
11.07.2016 - 20:43DROPS Design answered:
Dear Mrs Gencay, video in the previous answer should help you to work the diagram. Happy crocheting!
12.07.2016 - 09:47
![]() Femke wrote:
Femke wrote:
Ik wil dit hoedje graag voor mijn nichtje maken (2 1/2 jaar oud). Heeft u een tip hoe ik het patroon van dit hoedje het beste aan kan passen?
06.07.2016 - 16:41DROPS Design answered:
Hoi Femke. Ik zou beginnen zoals het patroon en dan minder toeren stk haken voordat het patroon begint. Als het kan pas de hoed aan je nichtje zodat je weet wanneer je kan beginnen met het telpatroon en brem. Of meet ongeveer hoe hoog de hoed moet zijn
07.07.2016 - 17:12
|
||||||||||||||||
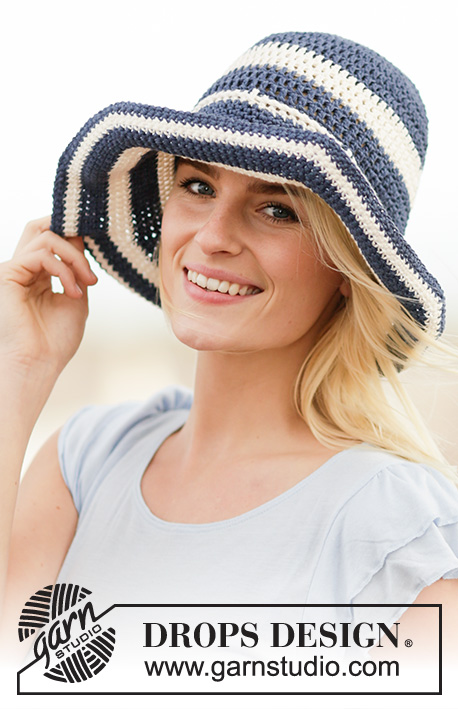
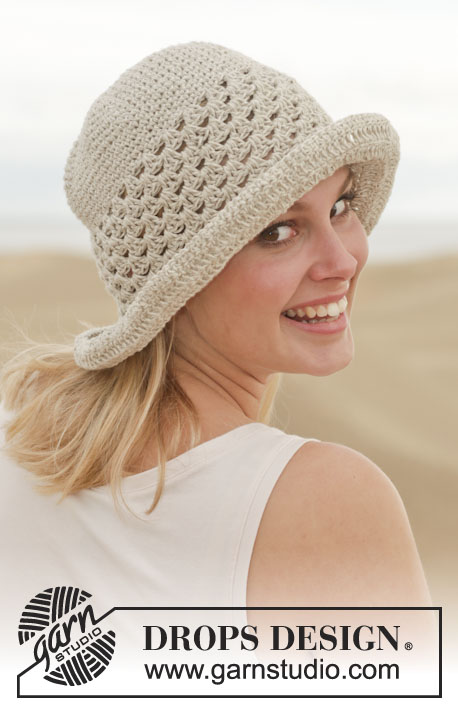
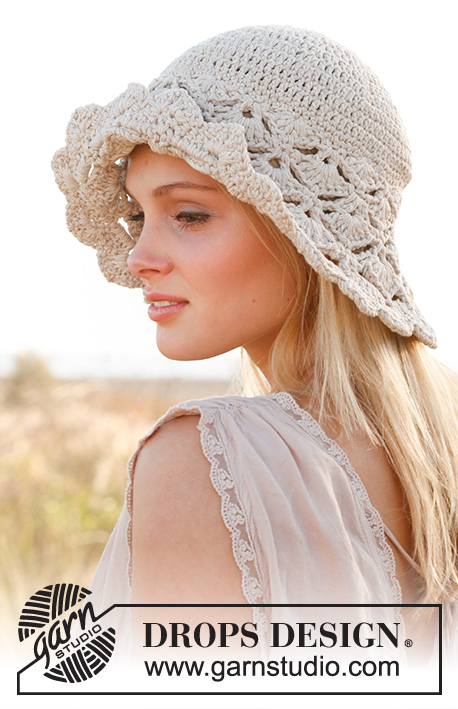
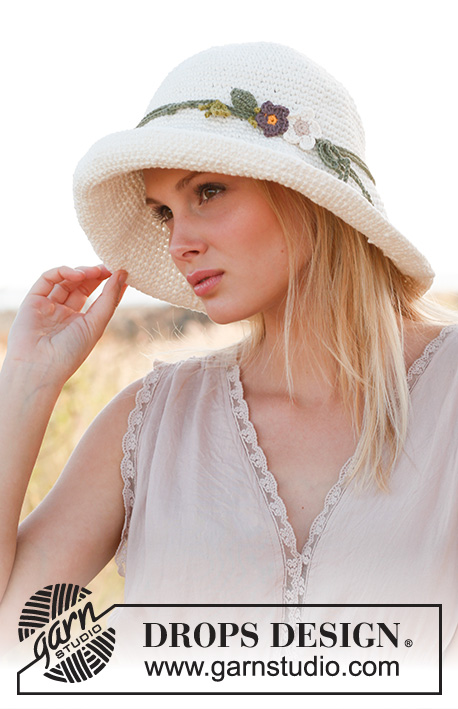
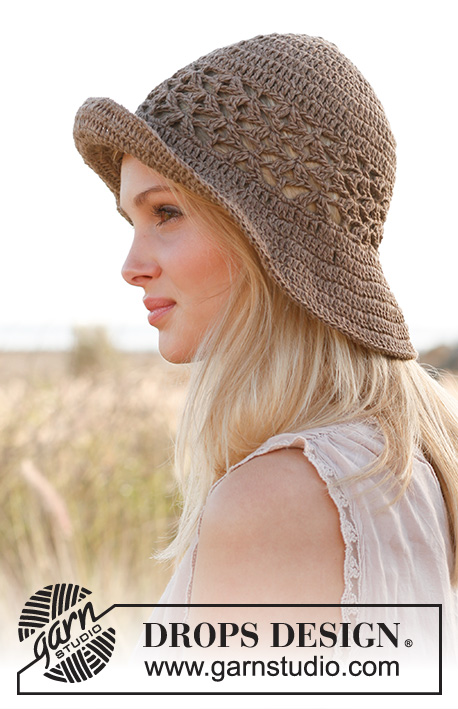
Glimpse of Spring#glimpseofspringhat |
||||||||||||||||
|
|
||||||||||||||||
Crochet DROPS hat in "Muskat".
DROPS 153-36 |
||||||||||||||||
|
CROCHET INFO: Replace first tr at beg of a tr round with 3 ch. Finish every tr round with 1 sl st in 3rd ch from beg of round (= in first tr). Replace first dc at beg of a dc round with 1 ch. Finish every dc round with 1 sl st in ch from beg of round. INCREASE TIP: Inc 1 tr or 1 dc by working 2 tr/dc in same st. PATTERN: See diagrams A.1 to A.3. ---------------------------------------------------------- HAT: Crochet 5 ch on hook size 4 mm with 1 strand Muskat and form a ring with 1 sl st in first ch. READ CROCHET INFO! ROUND 1: Work 10 (10) tr in ch-ring. ROUND 2: Work 2 tr in every tr = 20 (20) tr. ROUND 3: * 1 tr in first tr, 2 tr in next tr *, repeat from *-* = 30 (30) tr. ROUND 4: * 1 tr in each of the first 2 tr, 2 tr in next tr *, repeat from *-* = 40 (40) tr. ROUND 5-8 (5-9): Continue inc the same way, i.e. inc 10 tr on every round, inc the same place as on previous round, i.e. 1 tr more between every inc on every round. Inc as before by working 2 tr in 1 tr, AT THE SAME TIME on round 8 (9) inc in addition 5 (1) tr evenly – READ INCREASE TIP = 85 (91) tr. Piece measures 9 (10) cm. ROUND 9-10 (10-11): Then work PATTERN as follows: Work A.1, then work A.2 13 (14) times in total, and finish with A.3. On next round work as follows: ROUND 1: Work 1 dc in first dc from previous round, skip 1 dtr, 1 dc in each of the next 2 dtr, * 1 dc in each of the next 3 dtr, skip 1 dtr, 1 dc in next dc, skip 1 dtr, 1 dc in each of the next 2 dtr*, repeat from *-* until 4 dtr remain on round, 1 dc in each of the last 4 dtr = 85 (91) dc on round. ROUND 2: Work 1 ch, * 1 dc in next dc, 1 ch, skip 1 dc *, repeat from *-* the entire round and finish with 1 sl st in 1st ch from beg of round. ROUND 3: Work 1 dc in next ch, * 1 dc in next dc, 1 dc in next ch *, repeat from *-* the entire round, at the same time inc 6 (12) dc evenly on round = 91 (103) dc. Finish with 1 sl st in 1 dc from beg of round. BRIM: Continue to crochet the brim as follows: ROUND 1: Then work PATTERN as follows: Work A.1, then work A.2 14 (16) times in total, and finish with A.3. ROUND 2-5: Continue with pattern A.1, A.2 and A.3, AT THE SAME TIME inc 1 dtr in every dtr-group (i.e. on 2nd round work 8 dtr in dtr-groups). Continue the same way and inc 1 dtr in every dtr-group on every round. When 5th round of brim has been worked, work 1 dc in every dtr from previous round. Fasten off. TWINED STRING: Cut 8 lengths of 3 metres each. Twine the strands tog until they resist, fold the string double so that it twines again. Tie a knot in one end, thread the string without knot up and down between the small holes worked on 2nd round after first section with tr-groups. Adjust the length of string to desired length and tie a knot in other end. |
||||||||||||||||
Diagram explanations |
||||||||||||||||
|
||||||||||||||||
 |
||||||||||||||||
Have you finished this pattern?Tag your pictures with #dropspattern #glimpseofspringhat or submit them to the #dropsfan gallery. Do you need help with this pattern?You'll find 11 tutorial videos, a Comments/Questions area and more by visiting the pattern on garnstudio.com. © 1982-2026 DROPS Design A/S. We reserve all rights. This document, including all its sub-sections, has copyrights. Read more about what you can do with our patterns at the bottom of each pattern on our site. |
||||||||||||||||


With over 40 years in knitting and crochet design, DROPS Design offers one of the most extensive collections of free patterns on the internet - translated to 17 languages. As of today we count 324 catalogues and 12290 patterns translated into English (UK/cm). 12290
We work hard to bring you the best knitting and crochet have to offer, inspiration and advice as well as great quality yarns at incredible prices! Would you like to use our patterns for other than personal use? You can read what you are allowed to do in the Copyright text at the bottom of all our patterns. Happy crafting!
Post a comment to pattern DROPS 153-36
We would love to hear what you have to say about this pattern!
If you want to leave a question, please make sure you select the correct category in the form below, to speed up the answering process. Required fields are marked *.