
Popular categories
Looking for a yarn?





























Comments / Questions (78)
 Marchois wrote:
En faite il me reste 17 mailles en relisant bien
01.09.2026 - 21:13
Marchois wrote:
Non pas 50 mailles 40 mailles
01.09.2026 - 15:57
Marchois wrote:
Je viens de terminer une manche pour la taille L Et après les diminution je termine à peu près avec 50 mailles que je rabat est-ce bon ?
01.09.2026 - 15:53DROPS Design answered:
Bonjour Mme Marchois, le nombre de mailles à la fin des manches dépend de votre tension en hauteur, la tête de manche doit mesurer 11 cm, c'est plus important que le nombre de mailles restant, si votre tension est juste en largeur, la manche viendra se placer joliment dans l'emmanchure. Bon tricot!
02.09.2026 - 17:34
Marchois wrote:
Est ce que le point m 2 est correct faut il prendre en compte la modification de 2009 pour le 4 e rang ?
10.08.2026 - 17:42DROPS Design answered:
Bonjour Mme Marchois, la correction ne s'applique que si vous aviez imprimé les explications avant cette date, sinon les explications en ligne sont déjà corrigées. Bon tricot!
11.08.2026 - 09:48
Marchois wrote:
Je pense faire le dessin m2 à part avec les 58 mailles ce sera plus pratique que de reprendre les mailles qu en pensez vous ?
10.08.2026 - 11:38DROPS Design answered:
Bonjour Mme Marchois, je trouve personnellement plus simple de relever les mailles pour éviter une couture, mais à vous de voir comment vous voulez procéder. Bon tricot!
10.08.2026 - 16:25
Marchois wrote:
Puis faire le dessin m2 a part et le coudre après sur les 24 mailles rabattues car j ai du mal a comprendre en relevant 58 mailles
10.08.2026 - 09:50
Marchois wrote:
D accord mais faut relever les 58 mailles à gauche ou à droite du devant gauche car je me retrouve avec les 24 mailles rabattues
10.08.2026 - 09:37
Marchois wrote:
Le dessin m2 se fait sur les 24 mailles ?
09.08.2026 - 19:12DROPS Design answered:
Bonjour Mme Marchois, le point fantaisie 2 se tricote sur un nombre de mailles de 8 + 2 , autrement dit en relevant 58 m on va tricoter: 1 m lisière, 7 fois le motif (de *à*) et 1 m lisière. Bon tricot!
10.08.2026 - 08:47
Carole Marchois wrote:
Ok je fais le dessin m2 et c est apres que je relève les 58 mailles j avoue que j ai du mal a comprendre
07.08.2026 - 22:03DROPS Design answered:
Bonjour Mme Marchois, les 58 mailles sont à relever le long des devants, à partir des 24 mailles rabattues pour l'encolure jusqu'à l'épaule; on tricote le point fantaisie-2 verticalement au devant, les 12 cm seront ensuite cousus en bas du devant, le long des 24 mailles rabattues. Bon tricot!
10.08.2026 - 07:27
Marchois wrote:
Bonjour faut il relever les 58 mailles à partir du bas du gilet ?
07.08.2026 - 15:02DROPS Design answered:
Bonjour Mme Marchois, les 58 mailles sont relevées à droite du devant droit sur l'endroit et à gauche du devant gauche sur l'endroit aussi; autrement dit, commencez pour le devant droit sur la longueur à partir des 24 mailles rabattues (on tricote le point fantaisie-2 à partir du devant vers la bordure /l'ouverture du gilet). Bon tricot!
07.08.2026 - 16:09
|
|||||||
Pauline |
|||||||
|
|
|||||||
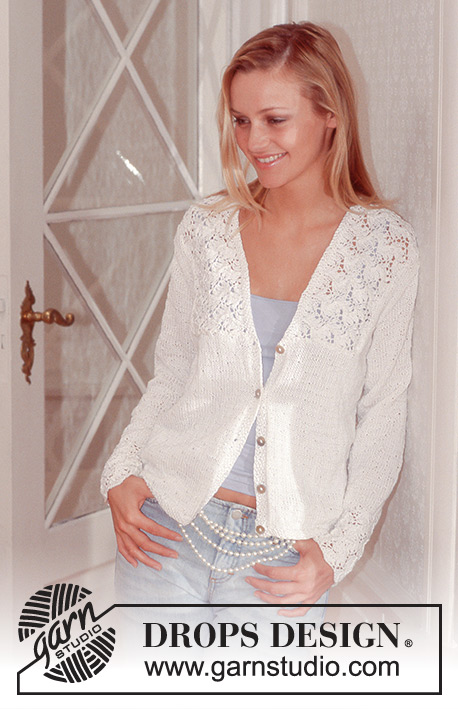
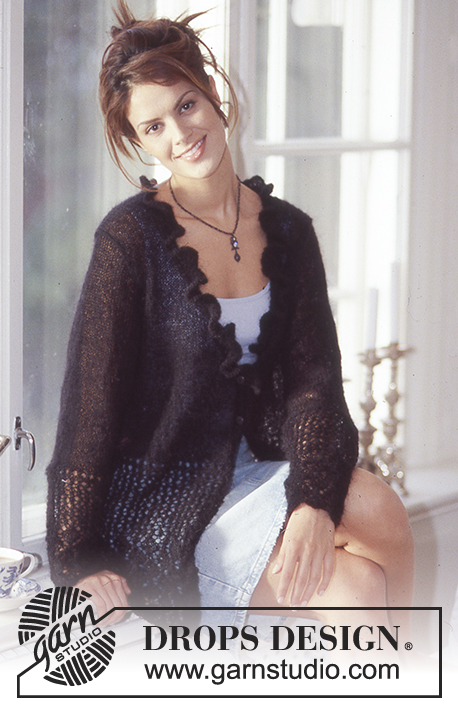
DROPS Cardigan in Muskat
DROPS 74-21 |
|||||||
|
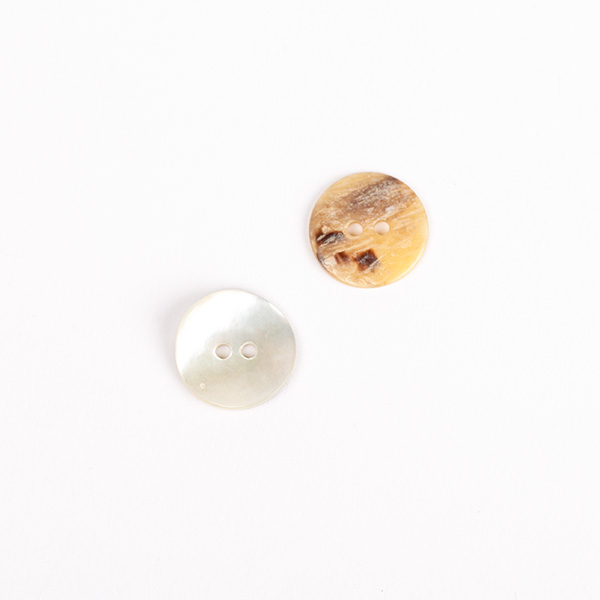
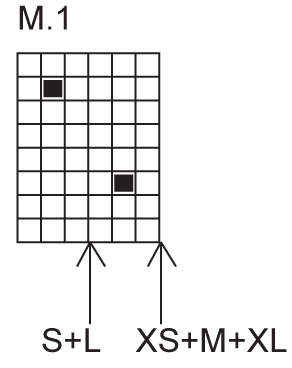
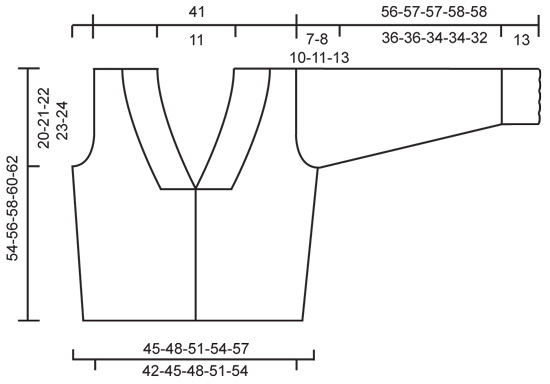
Gauge: 20 sts x 26 rows = 10 x 10 cm on larger needles in stockinette st. Seed Stitch (on an even number of sts): Row 1: * K 1, P 1 * Row 2: * P 1, K 1 * Repeat Rows 1-2. Pattern 1: See chart. The pattern is seen from the right side. Arrows indicate the starting point for different sizes for the right front only – the chart is the same for all sizes for the back and left front. Pattern 2: divisible by 8 + 2 sts (1 edge st each side) Row 1 (right side row): K 1 (edge st), * yo, K 1 through back of st, yo, sl 1, K 1, psso, K 5 *, repeat from * - *, K 1 (edge st). Row 2 (wrong side row): P 1 (edge st), * P 4, P 2 tog through back of sts, P 3 *, repeat from * - *, P 1 (edge st). Row 3: K 1, * yo, K 1 through back of st, yo, K 2, sl 1, K 1, psso, K 3 *, repeat from * - *, K 1. Row 4: P 1, * P 2, P 2 tog through back of sts, P 5*, repeat from * - *, P 1. Row 5: K 1, * K 1 through back of st, yo, K 4, sl 1, K 1, psso, K 1, yo *, repeat from * - *, K 1. Row 6: P 1, * P 1, P 2 tog through back of st, P 6 *, repeat from * - *, P 1. Row 7: K 1, * K 5, K 2 tog, yo, K 1 through back of st, yo *, repeat from * - *, K 1. Row 8: P 1, * P 3, P 2 tog, P 4 *, repeat from * - *, P 1. Row 9: K 1, * K 3, K 2 tog, K 2, yo, K 1 through back of st, yo *, repeat from * - *, K 1. Row 10: P 1, * P 5, P 2 tog, P 2 *, repeat from * - *, P 1. Row 11: K 1, * yo, K 1, K 2 tog, K 4, yo, K 1 through back of st *, repeat from * - *, K 1. Row 12: P 1, * P 6, P 2 tog, P 1 *, repeat from * - *, P 1. Repeat rows 1-12. ------------------------------------------------------------------ Back: Cast on 86-92-98-104-110 sts on smaller needles. Knit 5 rows seed st, change to larger needles and Pattern 1 - start pattern at lower right corner on chart for all sizes, but do not knit 1 edge st at each side in the pattern. When the piece measures 7 cm inc 1 st at each side every 8 cm a total of 3 times = 92-98-104-110-116 sts - the increased sts are knit in the pattern as you go along. When the piece measures 34-35-36-37-38 cm bind off for armhole at each side every other row: 3 sts 1 time, 2 sts 0-1-2-3-4 times and 1 st 2-3-4-5-6 times = 82 sts remain for all sizes. When the piece measures 52-54-56-58-60 cm bind off the center 20 sts for the neck. On the next row dec 1 st at each neck edge = 30 sts remain on each shoulder. Bind off when the piece measures 54-56-58-60-62 cm. Right front: Cast on 44-47-50-53-56 sts on smaller needles. Knit 5 rows seed st, change to larger needles and Pattern 1, starting from center front edge at appropriate arrow on the chart (1 edge st at each side is not knit in the pattern). When the piece measures 7 cm inc 1 st at the side edge every 8 cm a total of 3 times = 47-50-53-56-59 sts - the increased sts are knit in the pattern as you go along. Read the entire next section before knitting: Neckband: When the piece measures 30-32-34-36-38 cm bind off 24 sts at center front edge for neck. Then dec 1 st for the neck on alternately every 4th and 5th row a total of 13 times. Armhole: At the same time when the piece measures 34-35-36-37-38 cm bind off for armhole at the side as on back. After all armhole and neck shaping is complete 5 sts remain on each shoulder. Bind off when the piece measures 54-56-58-60-62 cm. Left front: Cast on and knit the same as the right - start Pattern 1 at lower right corner so that the pattern will be the same on each side at the center front – for armhole and neck reverse all shaping. Sleeve: Cast on 42-42-50-50-50 sts on smaller needles. Knit Pattern 2 for 13 cm. Change to larger needles and Pattern 1, increasing 8-8-6-6-6 sts evenly distributed on the 1st row = 50-50-56-56-56 sts. When the piece measures 16 cm inc 1 st at each side every 7-6-6-5-4 rows a total of 12-14-13-15-17 times = 74-78-82-86-90 sts - the increased sts are knit in the pattern as you go along. When sleeve measures 49-49-47-47-45 cm bind off for sleeve cap at each side every other row: 4 sts 1 time, 3 sts 1 time, 2 sts 3 times, 1 st 0-0-4-5-8 times, then bind off 2 sts at each side until the piece measures 55-56-56-57-57 cm and then bind off 3 sts 1 time. The piece measures approx. 56-57-57-58-58 cm, bind off the remaining sts. Assembly: Right collar: Pick up 58 sts on smaller needles along left neck edge and knit approx. 12 cm of Pattern 2 - see instructions above, put all sts on a st holder. Left collar: knit the same as the right collar. Sew shoulder seams. Right button band and neckband: Pick up on smaller circular needles approx. 62-76 sts along right button band, then put 58 sts from right collar back on needles and pick up approx. 12 sts to center back = 132 -146 sts. Knit 2 rows seed st. On the next row make 5 buttonholes evenly distributed along button bands - the bottom should be approx. 1 cm from bottom edge and the top should be just before the collar starts. 1 buttonhole = K 2 tog, yo. Knit 1 row seed st more, then bind off sts around back of the neck and along the collar in seed st. Continue with 3 rows seed st along button bands – K 2 tog the 2 sts at the top of button bands every row so that there will be a smooth transition from neckband. After these 3 rows bind off the remaining sts in seed st. Left button band and neckband: Knit the same as the right, reversing all shaping and without buttonholes. Sew in sleeves. Sew sleeve and side seams using edge sts as a seam allowance. Sew on buttons. |
|||||||
Diagram explanations |
|||||||
|
|||||||
 |
|||||||
 |
|||||||
Have you finished this pattern?Tag your pictures with #dropspattern or submit them to the #dropsfan gallery. Do you need help with this pattern?You'll find 12 tutorial videos, a Comments/Questions area and more by visiting the pattern on garnstudio.com. © 1982-2026 DROPS Design A/S. We reserve all rights. This document, including all its sub-sections, has copyrights. Read more about what you can do with our patterns at the bottom of each pattern on our site. |
|||||||






With over 40 years in knitting and crochet design, DROPS Design offers one of the most extensive collections of free patterns on the internet - translated to 17 languages. As of today we count 333 catalogues and 12525 patterns translated into English (UK/cm). 12525
We work hard to bring you the best knitting and crochet have to offer, inspiration and advice as well as great quality yarns at incredible prices! Would you like to use our patterns for other than personal use? You can read what you are allowed to do in the Copyright text at the bottom of all our patterns. Happy crafting!
Post a comment to pattern DROPS 74-21
We would love to hear what you have to say about this pattern!
If you want to leave a question, please make sure you select the correct category in the form below, to speed up the answering process. Required fields are marked *.