
Popular categories
Looking for a yarn?


Comments / Questions (9)
![]() Lenia wrote:
Lenia wrote:
Hello, I would like to ask you, if I could change the yarn and use Drops Paris (C) instead of Drops Muscat for Medium size. Thank you.
13.04.2026 - 13:44DROPS Design answered:
Dear Lenia, not exactly as Muskat belongs to yarn group B and cannot be replaced by a yarn group C; use the yarn converter to see alternatives and new matching amount of yarn. Happy knitting!
13.04.2026 - 16:16
![]() Heidi wrote:
Heidi wrote:
Hvor måles der fra på kanten i bølgemønster? Fra bølgen der er oppe eller nede? Jeg er ved at gentage mønster A2 og skal fortsætte med mønster A3, når arbejdet måler 20 cm?
01.04.2026 - 08:27DROPS Design answered:
Hej Heidi, du skal måle fra nederste punkt :)
08.04.2026 - 15:12
![]() Cathy Luhm wrote:
Cathy Luhm wrote:
Just curious...is there a written version of this pattern? I tend to do better with written instructions. Thank you.
18.06.2025 - 07:21DROPS Design answered:
Dear Mrs Luhm, there is only diagrams to this pattern, but this lesson could help you understanding how to read diagrams. Happy knitting!
19.06.2025 - 11:18
![]() Sonia wrote:
Sonia wrote:
Bonjour. Peut-on réaliser ce modèle entièrement en aller-retour? Si oui, auriez-vous des conseils à me donner pour que ce soit plus facile? Aussi, est-il possible de trouver vos fils à tricoter au Canada, spécifiquement au Québec? Merci.
06.05.2025 - 06:48DROPS Design answered:
Bonjour Sonia, cette leçon pourra vous aider à adapter les explications pour tricoter en allers et retours. Retrouvez ici la liste des revendeurs DROPS au Canada. Bon tricot!
06.05.2025 - 11:38
![]() Fegyveresi Anikó wrote:
Fegyveresi Anikó wrote:
Üdv mindenkinek! Azt szeretném kérdezni, hogy a diagramoknál ennél a mintánál a mintasorok között kell-e fordított sorokat kötni? Az A1 diagramnál nem jelzi ezt külön, és elbizonytalanodtam. Előre is köszönöm a választ!
24.04.2025 - 20:43DROPS Design answered:
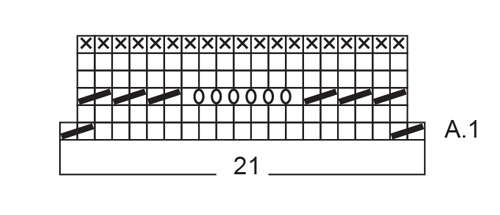
Kedves Anikó, a diagram mintája minden sort, minden szemet úgy mutat, ahogy azt a színe oldal felől látjuk (ennek a darabnak a testrészét körben kötjük). Az A.1 jelű mintában az 1. körben fogyasztások, a második körben a SZO felől sima szemek, a 3. sorban összekötött szemek és ráhajtások vannak, a 4-5. körben sima szemek. A 6. körben fordított szemek. Sikeres kézimunkázást!
06.05.2025 - 12:40
![]() FRANÇOISE LELARGE wrote:
FRANÇOISE LELARGE wrote:
Bonsoir je suis arrivé au deux tours de A2 et j'ai l'impression que mon tricot c'est torsadé . pourtant je fait suivre mon tricot normalement et mon tour de montage était bon je vais tout redéfaire pour essayé à nouveau. je ne comprend pas pourquoi merci de m'aider à nouveau bonne soirée
08.04.2025 - 17:26DROPS Design answered:
Bonjour Mme Lelarge, pour éviter de vriller l'ouvrage, avant de joindre au tout début, veillez à ce que toutes les mailles du montage soit bien à l'intérieur, vous pouvez aussi tricoter les premiers rangs en allers et retours (il faudra les coudre ensuite), et ne joindre qu'après, ainsi vous visualisez mieux le début de l'ouvrage en évitant de le vriller. Votre magasin connaît peut être d'autres astuces, n'hésitez pas à lui demander conseil, même par mail ou téléphone. Bon tricot!
09.04.2025 - 08:15
![]() Annikki wrote:
Annikki wrote:
Hei, Kuinka aloitan aina oikein neuleen? Ensimmäinen silmukka neulomatta tai neulotaanko oikein? Mitä kautta lanka, että reunasta tulisi tasainen? Terv. Anki
08.04.2025 - 10:41DROPS Design answered:
Aloita ainaoikeinneule neulomalla ensimmäinen silmukka oikein.
09.04.2025 - 15:54
![]() FRANÇOISE LELARGE wrote:
FRANÇOISE LELARGE wrote:
J'ai fais deux fois le motif A2 comme prescrit et je n'atteint pas les 20 cm de hauteur avant de faire A3. Faut il que je continue A2 jusqu'à ce que j'arrive a 20 cm. Merci pour votre réponse et bonne fin de journée.
06.04.2025 - 15:38DROPS Design answered:
Bonjour Mme Lelarge, tout à fait, continuez à répéter A.2 en hauteur jusqu'à ce que l'ouvrage mesure 20 cm; veillez à bien avoir terminé A.2 avant de tricoter A.3. Bon tricot!
07.04.2025 - 08:49
![]() Vicki S wrote:
Vicki S wrote:
How much ease is recommended?
22.03.2025 - 14:45DROPS Design answered:
Dear Vicki, the measurements in the size chart at the bottom of the pattern are the final measurements of the garment, not of the wearer. The desired ease will depend on the wearer's preference; if you prefer tighter garments you will work the size that has the most similar (but, of course, larger) measurements to your own; if you like looser garments you can work 1 size larger. We recommend you compare the garment's measurements to those of your usual clothes to see your usual ease. Happy knitting!
23.03.2025 - 20:34
|
|||||||||||||
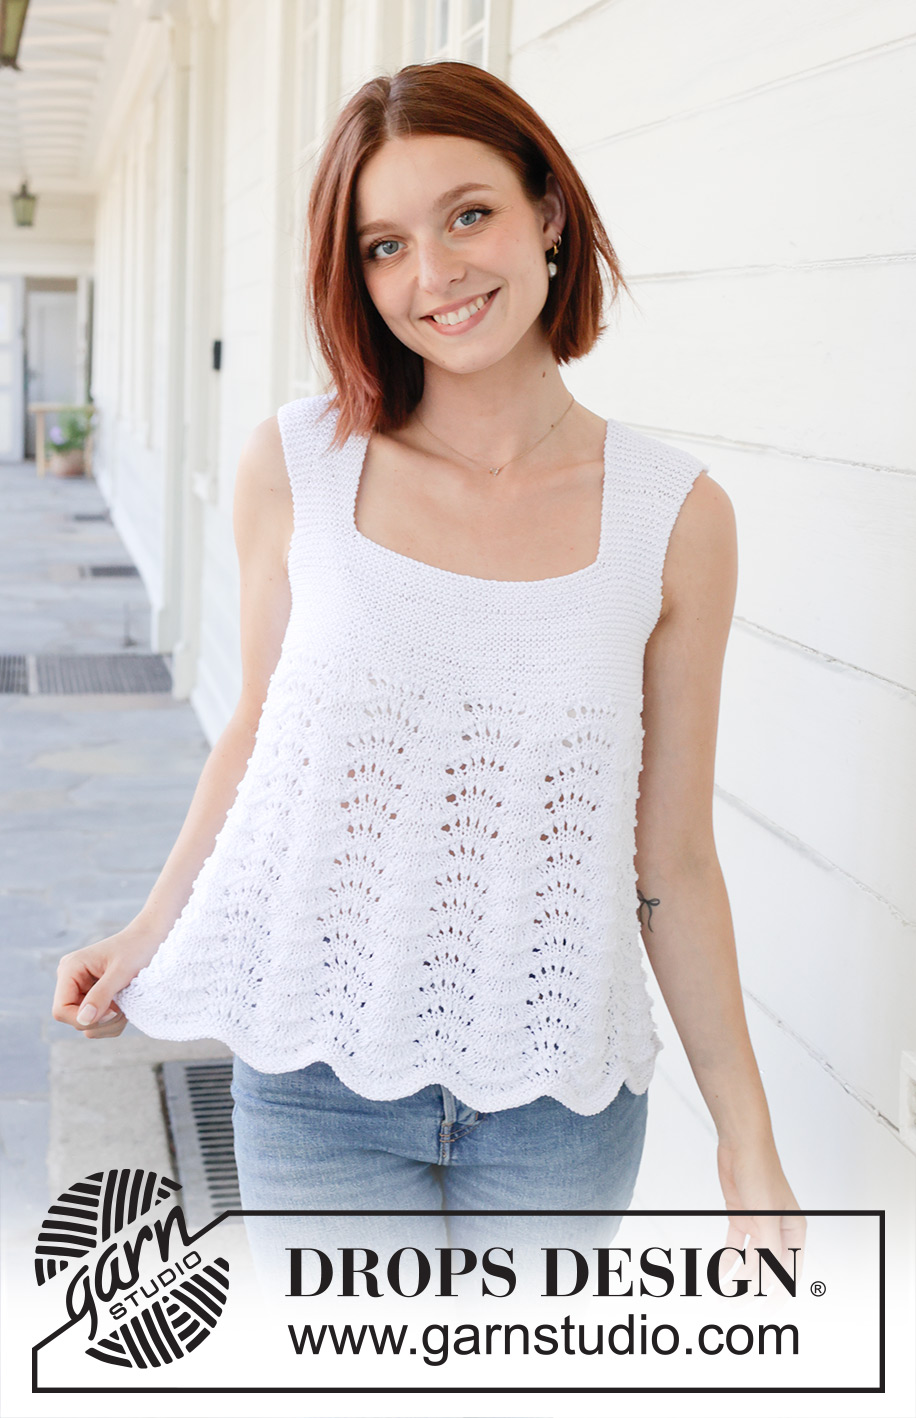
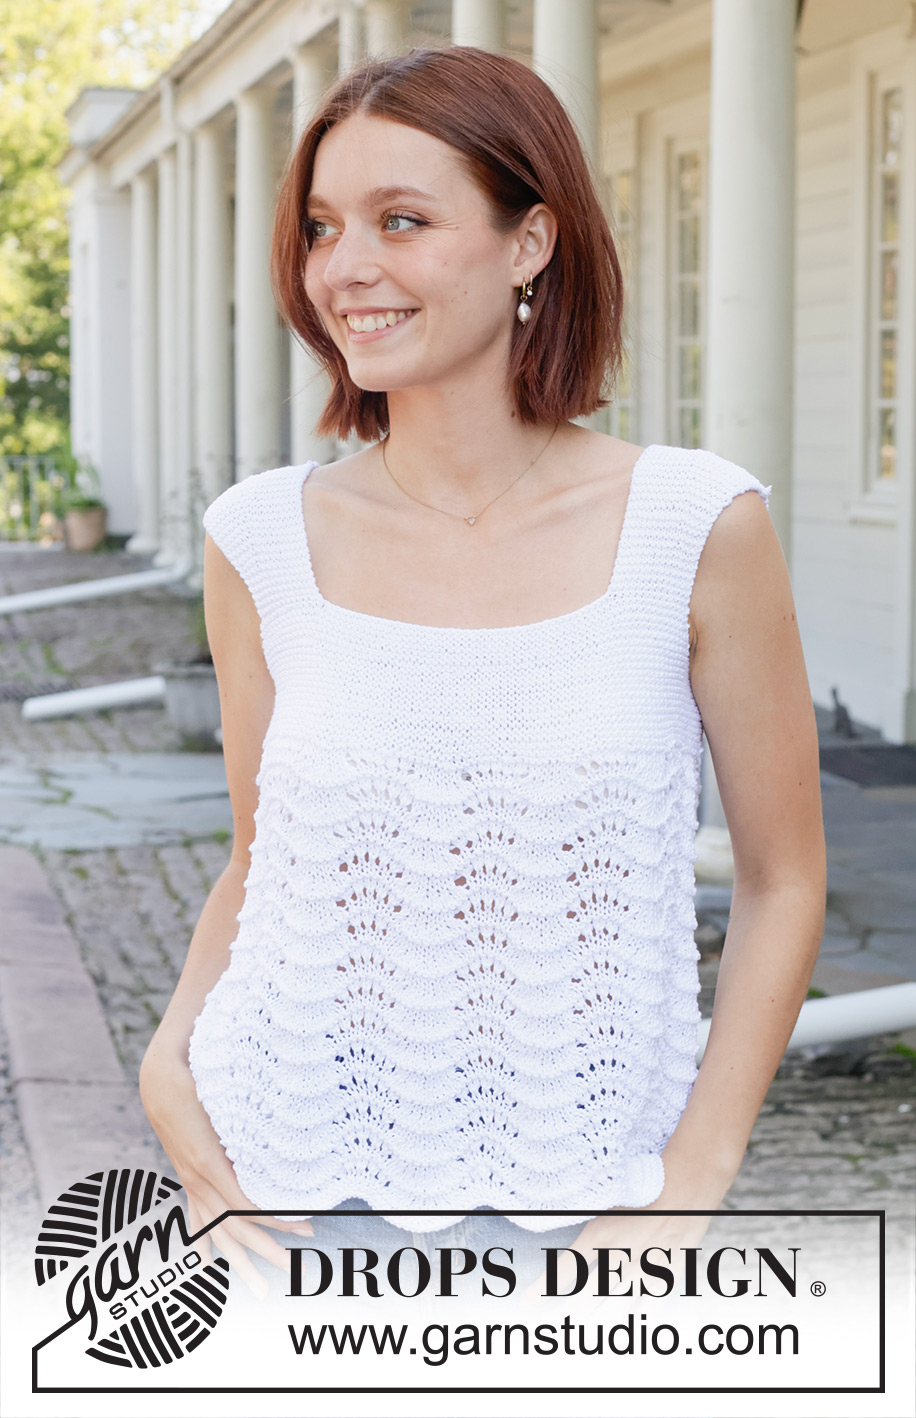
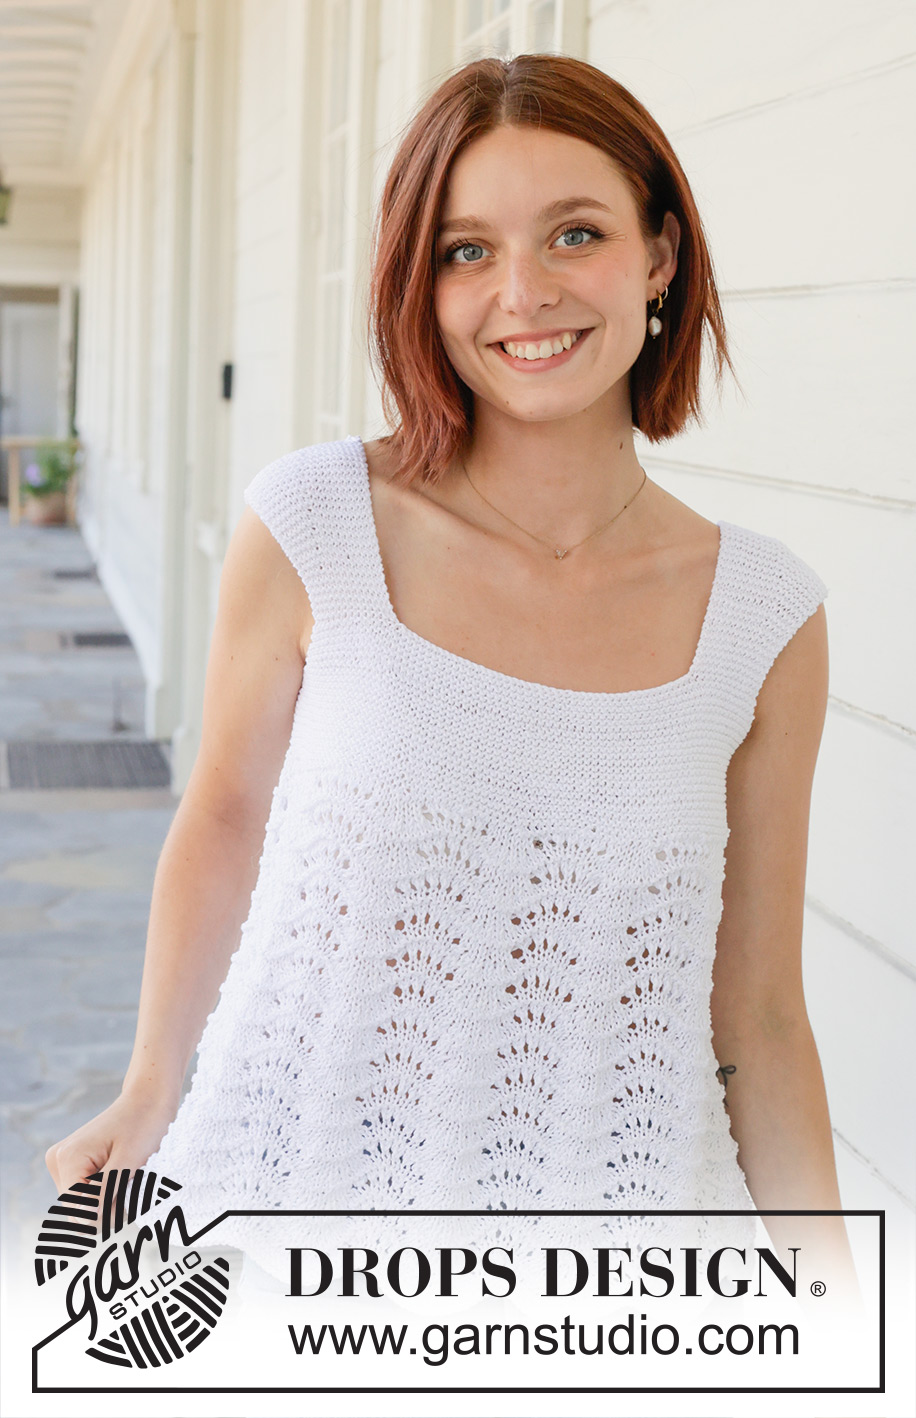
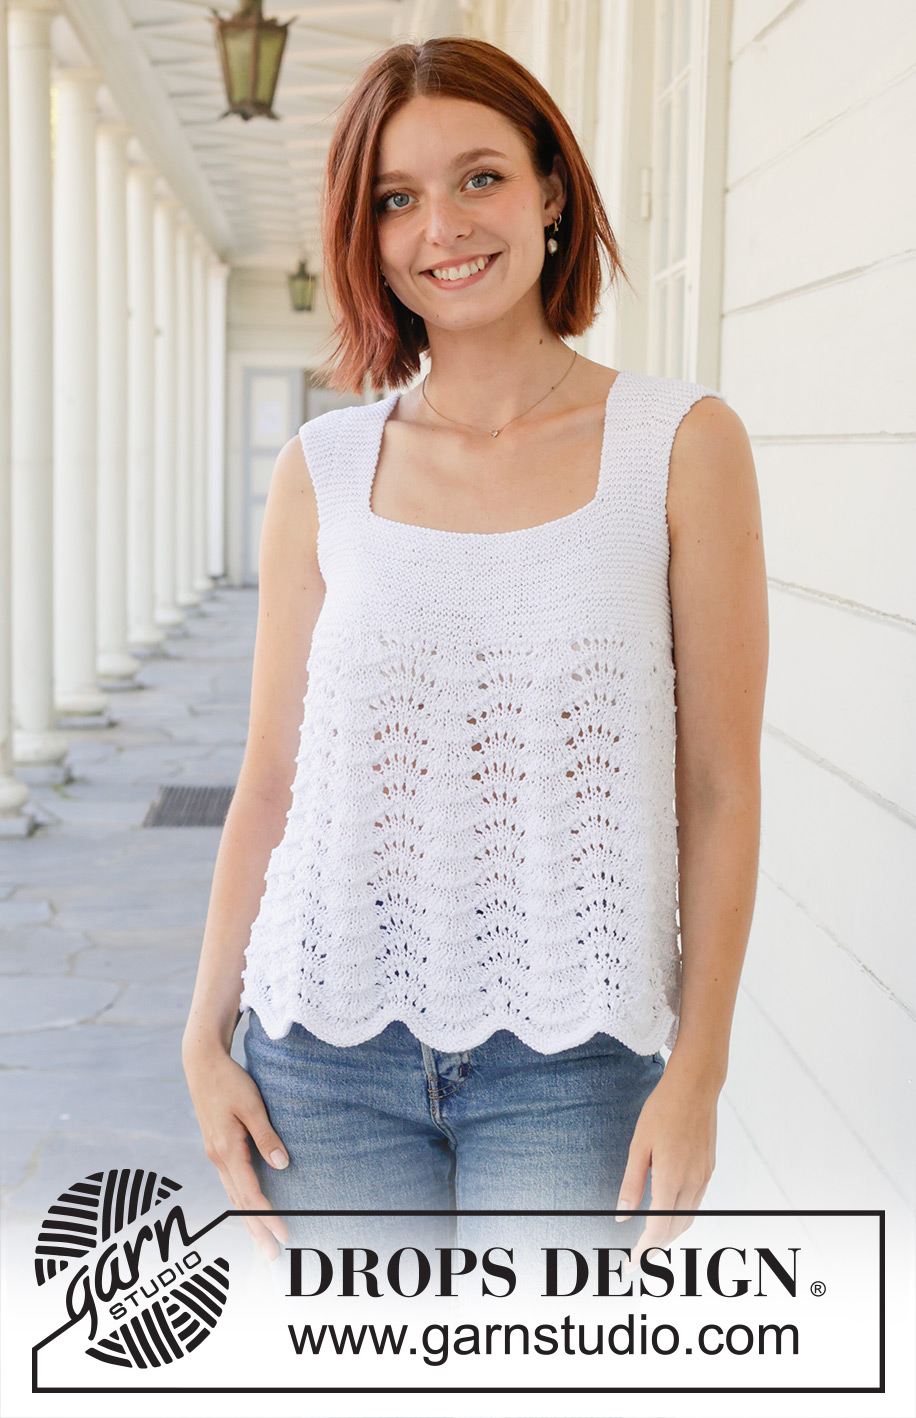
Seashell Waves#seashellwavestop |
|||||||||||||
 |
 |
||||||||||||
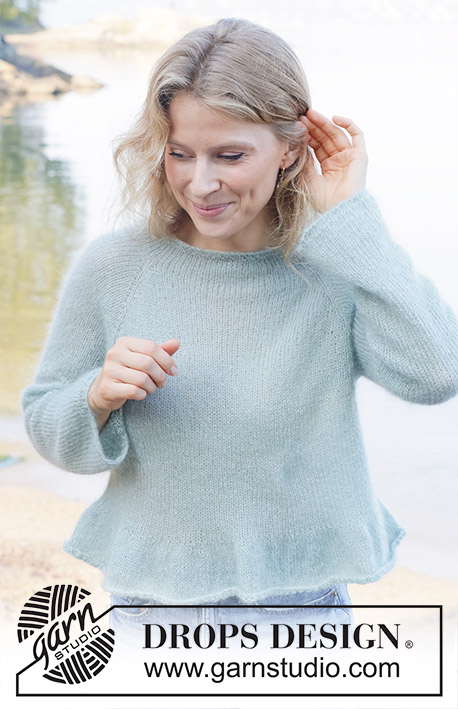
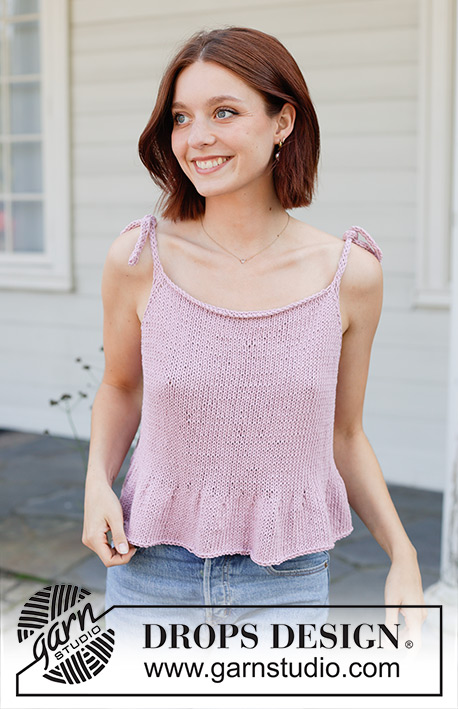
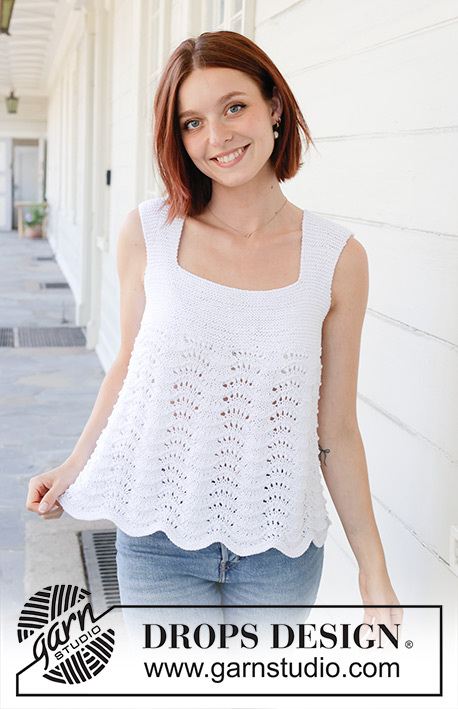
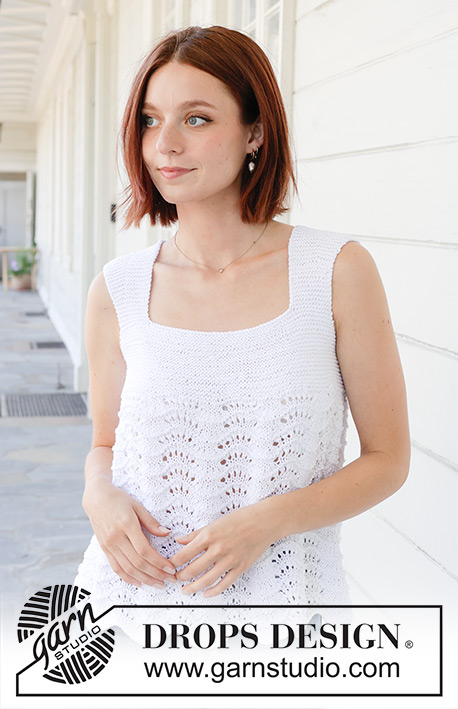
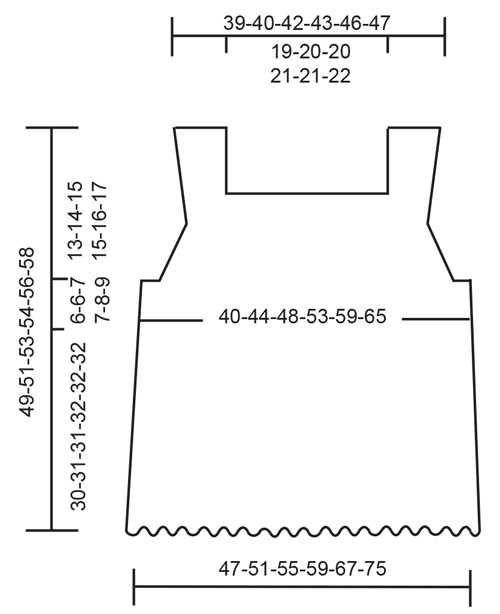
Knitted top in DROPS Muskat. Piece is knitted bottom up with wave pattern, garter stitch. Size: S - XXXL.
DROPS 258-22 |
|||||||||||||
|
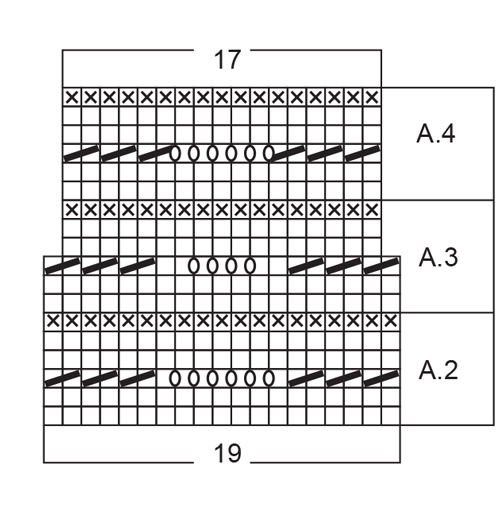
---------------------------------------------------------- EXPLANATION FOR THE PATTERN: ---------------------------------------------------------- GARTER STITCH (when working in the round): Alternately knit 1 round and purl 1 round. 1 ridge vertically = 2 rounds. GARTER STITCH (when working back and forth): Knit on all rows, i.e. knit from right side and knit from wrong side. 1 ridge vertically = knit 2 rows. PATTERN: See diagrams A.1 to A.4. ---------------------------------------------------------- START THE PIECE HERE: ---------------------------------------------------------- TOP - SHORT OVERVIEW OF THE PIECE: Piece is worked in the round on circular needle, from the bottom and up to armholes. Decrease for armhole and work each part back and forth separately until finished measurements. BODY: Cast on 252-273-294-315-357-399 stitches on circular needle size 4 mm with DROPS Muskat. Work 2 ridges in GARTER STITCH in the round - read explanation above. Then work A.1 over all stitches. When A.1 has been worked 1 time vertically, there are 228-247-266-285-323-361 stitches on needle. Then work A.2 over all stitches in A.1. Repeat A.2 upwards. When piece measures 20 cm, work A.3 over all stitches. When A.3 has been worked, there are 204-221-238-255-289-323 stitches on needle. Continue with A.4 until piece measures 30-31-31-32-32-32 cm, measured from the lowest point on cast-on edge. Switch to circular needle size 3.5 mm, then work the piece in the round in garter stitch. On first round in garter stitch decrease 28-29-26-23-29-35 stitches evenly = 176-192-212-232-260-288 stitches. Work in garter stitch in the round for 6-6-7-7-8-9 cm, finish with a purl round. Remember to follow the knitting tension! Piece now measures 36-37-38-39-40-41 cm in total from cast-on edge. DECREASE FOR ARMHOLES: On next round decrease for armholes, work the round as follows: Cast off the first 6-8-10-10-14-16 stitches at the beginning of round for armhole, work the next 76-80-86-96-102-112 stitches, cast off the next 12-16-20-20-28-32 stitches for armhole, work the next 76-80-86-96-102-112 stitches, cast off the last 6-8-10-10-14-16 stitches for armhole. Cut the yarn. Now work each part back and forth separately, slip stitch on back piece on a thread, and work over stitches on front piece. FRONT PIECE: = 76-80-86-96-102-112 stitches. Work in GARTER STITCH - read explanation above - back and forth over these stitches, at the same time decrease for armhole on every other round as follows: Decrease 1 stitch in each side 3-4-5-9-8-12 times in total, decrease inside 4 stitches in each side by knitting 2 stitches together = 70-72-76-78-86-88 stitches. When piece measures 3-4-5-4-5-6 cm from where piece were divided for armholes (9-10-12-11-13-15 cm in garter stitch in total), decrease for neck and work straps. Work the first 14-14-16-16-20-20 stitches on needle, turn and work over these 14-14-16-16-20-20 stitches. The remaining 56-58-60-62-66-68 are resting on the needle or slipped on a thread. Work in garter stitch back and forth over the first 14-14-16-16-20-20 stitches, at the same time when working 3 ridges vertically, begin increases for strap. Increase on every 4th row, increase from the right side when 10 stitches remain on strap (for every increase there is 1 stitch more towards the side, there are always 10 stitches after the increase towards mid front). Increase by making a yarn over which is knitted twisted on next row and increase 8 times in total = 22-22-24-24-28-28 stitches on strap. Continue in garter stitch until piece measures 13-14-15-15-16-17 cm from the bottom of armhole. Cast off and cut the yarn. NOTE! Because of the weight of the garment the armhole will be approx. 16-17-18-19-20-21 cm when used, and the garment approx. 3-3-3-4-4-4 cm longer than on chart. Slip the 56-58-60-62-66-68 stitches from thread back on needle, cast off the first 42-44-44-46-46-48 stitches for neck, keep the last 14-14-16-16-20-20 stitches on needle for strap. Work in garter stitch back and forth over the last 14-14-16-16-20-20 stitches, at the same time when working 3 ridges vertically, begin increases for strap. Increase on every 4th row, increase from the right side when 10 stitches have been worked on strap (for every increase there is 1 stitch more towards the side, there are always 10 stitches before the increase towards mid front). Increase by making a yarn over which is knitted twisted on next row and increase 8 times in total = 22-22-24-24-28-28 stitches on strap. Continue in garter stitch until piece measures 13-14-15-15-16-17 cm from the bottom of armhole. Cast off. NOTE! Because of the weight of the garment the armhole will be approx. 16-17-18-19-20-21 cm when used, and the garment approx. 3-3-3-4-4-4 cm longer than on chart. BACK PIECE: Slip the 76-80-86-96-102-112 stitches from thread back on needle, and work the same way as front piece. ASSEMBLY: Sew together straps on each shoulder. |
|||||||||||||
Diagram explanations |
|||||||||||||
|
|||||||||||||
 |
|||||||||||||
 |
|||||||||||||
 |
|||||||||||||
Have you finished this pattern?Tag your pictures with #dropspattern #seashellwavestop or submit them to the #dropsfan gallery. Do you need help with this pattern?You'll find 21 tutorial videos, a Comments/Questions area and more by visiting the pattern on garnstudio.com. © 1982-2026 DROPS Design A/S. We reserve all rights. This document, including all its sub-sections, has copyrights. Read more about what you can do with our patterns at the bottom of each pattern on our site. |
|||||||||||||


With over 40 years in knitting and crochet design, DROPS Design offers one of the most extensive collections of free patterns on the internet - translated to 17 languages. As of today we count 324 catalogues and 12290 patterns translated into English (UK/cm). 12290
We work hard to bring you the best knitting and crochet have to offer, inspiration and advice as well as great quality yarns at incredible prices! Would you like to use our patterns for other than personal use? You can read what you are allowed to do in the Copyright text at the bottom of all our patterns. Happy crafting!
Post a comment to pattern DROPS 258-22
We would love to hear what you have to say about this pattern!
If you want to leave a question, please make sure you select the correct category in the form below, to speed up the answering process. Required fields are marked *.