
Popular categories
Looking for a yarn?


Comments / Questions (19)
![]() Tze Moi wrote:
Tze Moi wrote:
I cannot get the increase to reach 60 stitches. From 12 stitches if every round increase by 8 stitches, I cant reach 60 stitches? Is there something wrong in my understanding of the pattern? Thanks.
18.02.2026 - 18:34DROPS Design answered:
Hi Tze, You have 12 stitches after round 2. Then you increase 8 stitches every 2nd round either 4 or 5 times depending on the size you are working. 4 x 8 = 32 and 5 x 8 = 40. Smaller size = 44 stitches, larger size = 52 stitches. After this you increase every 3rd round 2-1 more times = 44 + 16 = 60 stitches or 52 + 8 = 60 stitches. Hope this helps. Regards, Drops Team.
19.02.2026 - 06:26
![]() Alice wrote:
Alice wrote:
Salve, Ho seguito il pattern e sono attivata al penultimo giro di aumenti ma non capisco perché il lavoro sembra essere a punta al centro (dove c'è il buco di inizio giro)e non piatto. Cosa posso aver sbagliato o devo cambiare? Grazie
04.02.2026 - 15:56DROPS Design answered:
Buonasera Alice, se ha seguito correttamente le spiegazioni, il procedimento è corretto. Buon lavoro!
26.04.2026 - 13:32
![]() Françoise wrote:
Françoise wrote:
Bonjour Concerne le bonnet grand lac Je vous remercie de votre réponse et regrette de devoir abandonner. Faire propre avec des grosses aiguilles, de la laine mèche et 6 mailles, je ne sais pas faire. Cordialement
29.01.2026 - 09:31
![]() Françoise wrote:
Françoise wrote:
Concerne: bonnet grand lake Bonjour Je n' arrive pas à tricoter en rond avec seulement 6 ou même 12 mailles. Pourriez vous m aider svp Merci Cordialement
28.01.2026 - 11:23DROPS Design answered:
Bonjour Françoise, retrouvez ici, en vidéo un exemple de début d'ouvrage tricoté en rond avec peu de mailles (8 dans la vidéo, avec 6, vous pouvez en placer 2 par aiguille et tricoter avec la 4ème aiguille). Vous pouvez aussi essayer de tricoter en magic loop sur aiguille circulaire si vous êtes plus à l'aise; ou bien adapter les explications (cf. icipour tricoter en allers retours. Bon tricot!
29.01.2026 - 08:38
![]() Françoise wrote:
Françoise wrote:
Bonjour, Concerne: Bonnet grand lake 1/ on monte 6 mailles Puis 1m endroit et un jeté Comment arriver à 12 mailles alors su il n y a sur 5 intervalles. Doit on faire un jeté en fin de rang? Et dans de cas, pourquoi pas une augmentation ? 2/ Après, on doit mettre 4 marqueurs entre 3 mailles! Or, si on met un marqueur entre 3 mailles, on ne peut pas en mettre 4 puisqu on a 12 mailles. Merci de votre aide Cordialement
27.01.2026 - 12:19DROPS Design answered:
Bonjour Françoise, le bonnet se tricote en rond, on va ainsi augmenter 1 m après chaque maille, et terminer le 1er tour par 1 jeté. Vous avez 12 mailles, vous placez 4 marqueur espacés de 3 mailles chacun, par ex ainsi; 1 marqueur, 3 m, 1 marqueur, 3 m, 1 marqueur, 3 m, 1 marqueur, 3 m = vous avez 4 marqueurs toutes les 3 m pour 12 m au total. Ces marqueurs sont bien placés entre 2 mailles et pas dans une maille. Bon tricot!
28.01.2026 - 08:31
![]() ALESSANDRO wrote:
ALESSANDRO wrote:
"Risvoltare il berretto e continuare dal rovescio del lavoro", Facendo così con i ferri circolari il filo del lavoro si sposta dalla parte opposta. Non capisco come dovrei fare e non trovo video o suggerimenti al riguardo. Passo la maglia col filo dal ferro sinistro e quello destro e ricomincio a lavorare? grazie
18.01.2026 - 22:53DROPS Design answered:
Buonasera Alessandro può seguire il giro così com'è. Buon lavoro!
01.02.2026 - 20:38
![]() ALESSANDRO wrote:
ALESSANDRO wrote:
Buongiorno, non comprendo ancora il suggerimento degli aumenti, forse è la traduzione in italiano che non facilità. "Maglia ritorta verso destra" e "maglia ritorta a sinistra". Mi sbaglio o il dritto ritorto è unico, non c'è distinzione fra destra e sinistra
11.01.2026 - 16:15DROPS Design answered:
Buonasera Alessandro, le maglie sono ritorte ma con un'"inclinazione" a destra o sinistra. Buon lavoro!
12.01.2026 - 22:20
![]() ALESSANDRO wrote:
ALESSANDRO wrote:
Buongiorno, non comprendo chiaramente i suggerimenti, per gli aumenti, in particolare il ferro dopo i gettati, prima e dopo il segnapunti. Inoltre cosa si intende per "Risvoltare il berretto e continuare dal rovescio del lavoro", facendo così non ci si trova il filo sulla parte invertita? Inoltre tale operazione comporta di proseguire il lavoro all'inverso? non mi è chiara la tecnica, grazie
10.01.2026 - 17:22DROPS Design answered:
Buongiorno Alessandro, il suggerimento per gli aumenti spiega come lavorare i gettati a ritorto sul ferro successivo. Per quanto riguarda l'altra domanda, deve risvoltare il cappello e proseguire sul rovescio del lavoro. Buon lavoro!
11.01.2026 - 14:01
![]() Louise wrote:
Louise wrote:
Jag följer mönstret med rätt garn men stickar nerifrån och upp. Hur många cm slätstickning blir det innan jag påbörjar minskning?
26.11.2025 - 11:39DROPS Design answered:
Hi Louise, the best way to find it out is to try on the hat. Happy knitting!
30.11.2025 - 19:51
![]() Charlene wrote:
Charlene wrote:
Wie soll der Umschlag vor dem Markierungsfaden abgehoben und verschränkt auf die Nadel zurück gehoben werden?
08.12.2024 - 13:10DROPS Design answered:
Liebe Charlene, schauen Sie mal in diesem Video, wir zeigen, wie man solche Umschläge strickt (im Video für einen Raglanpullover) Viel Spaß beim Stricken!
09.12.2024 - 08:50
|
|
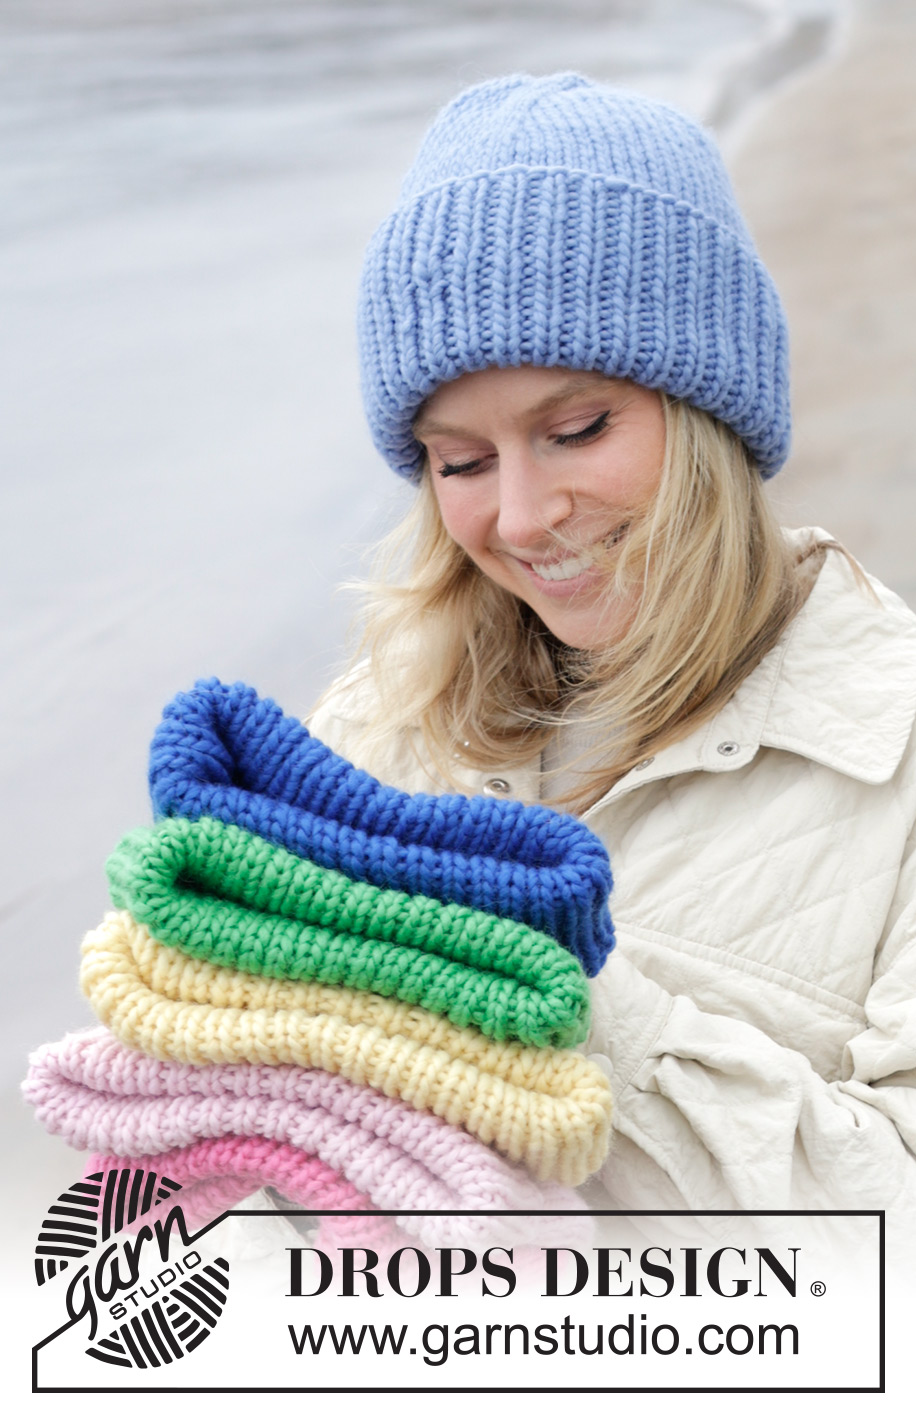
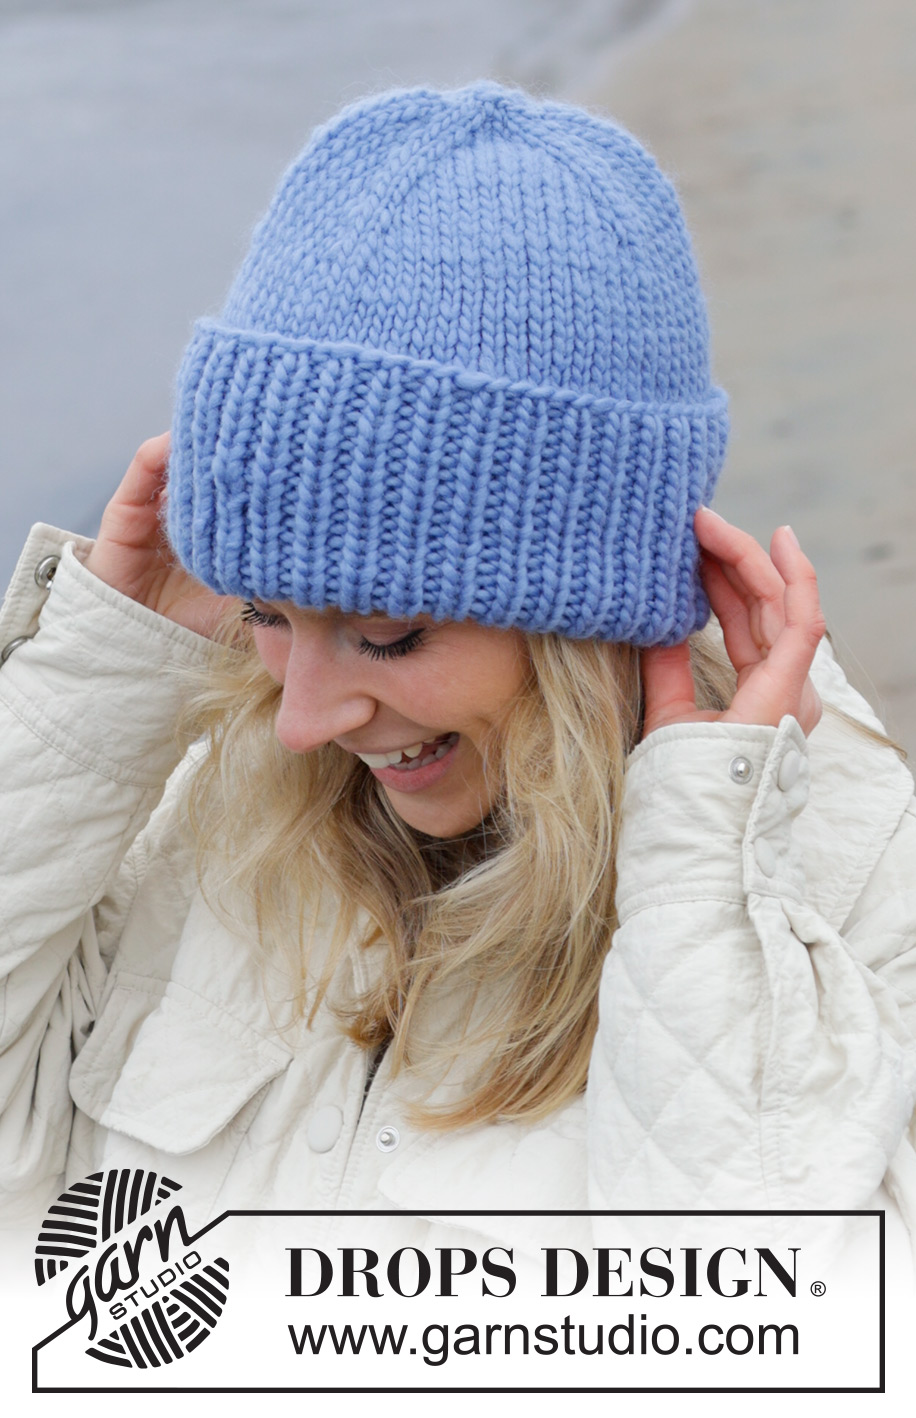
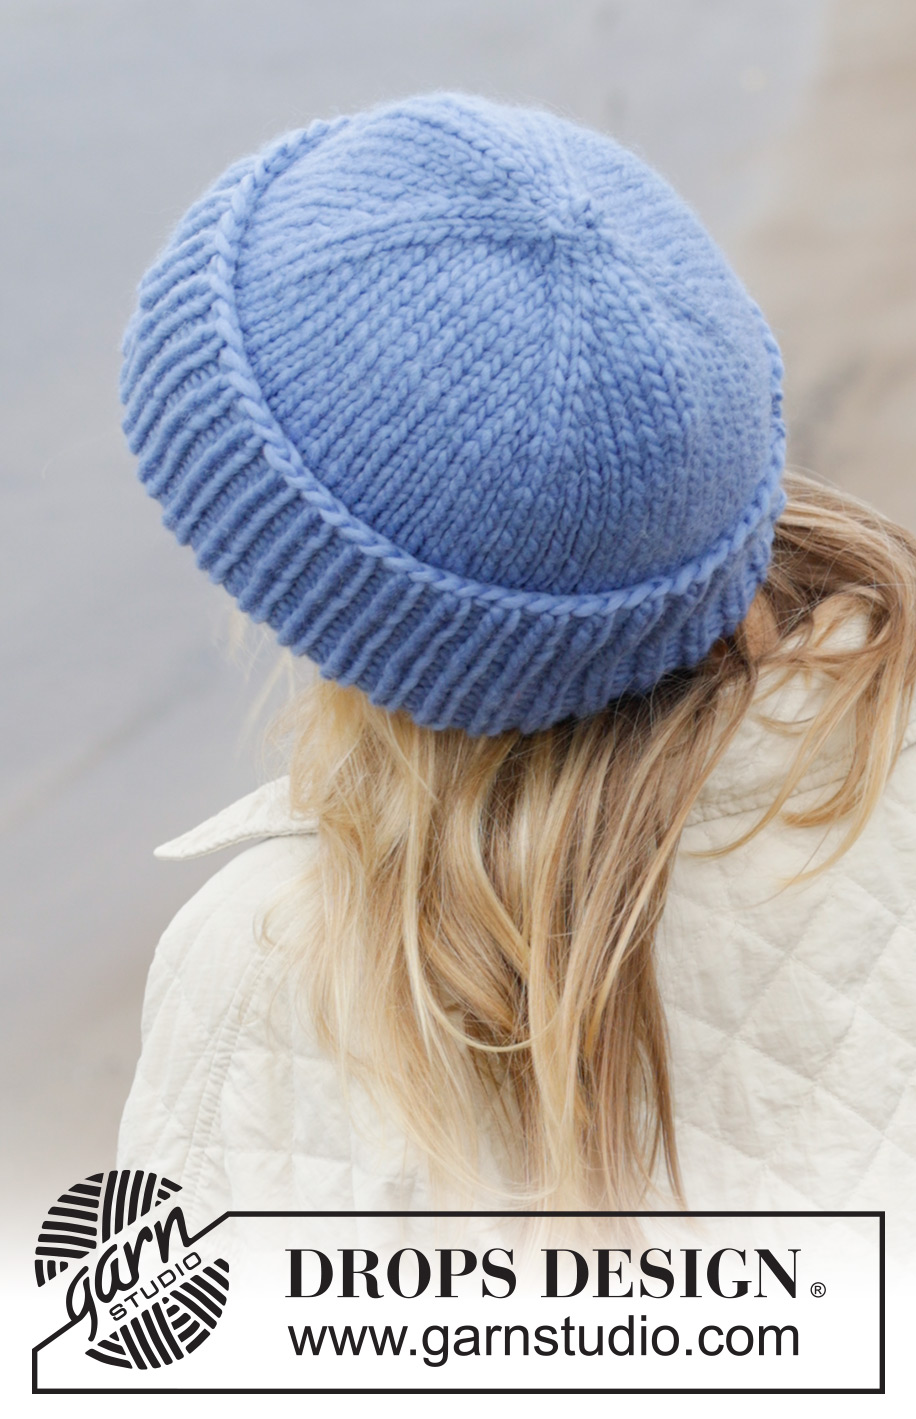
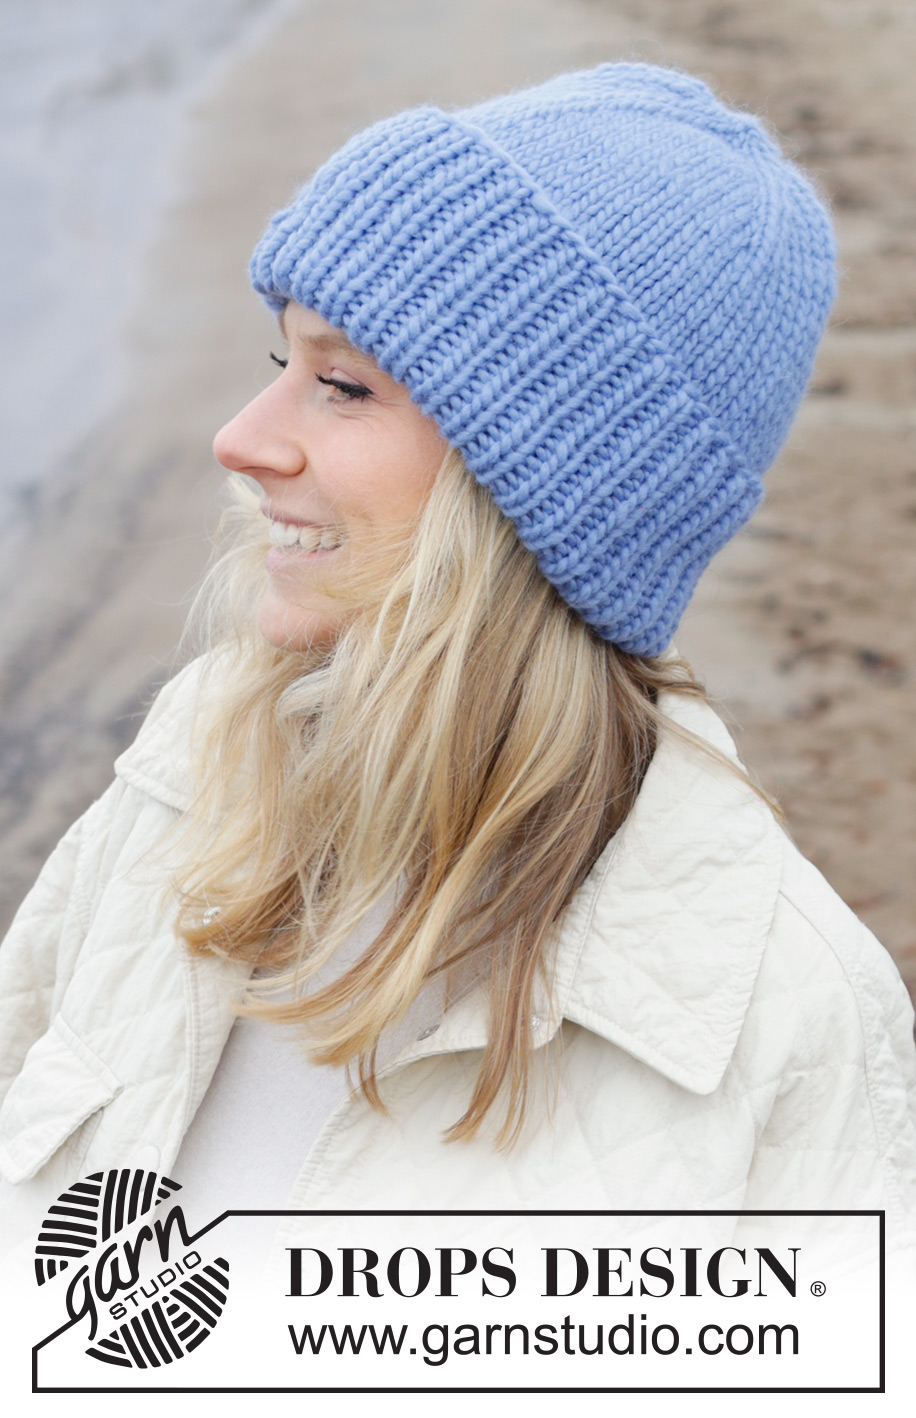
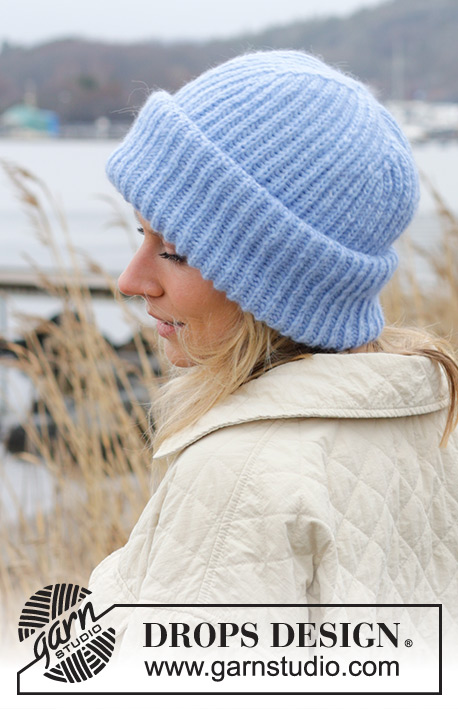
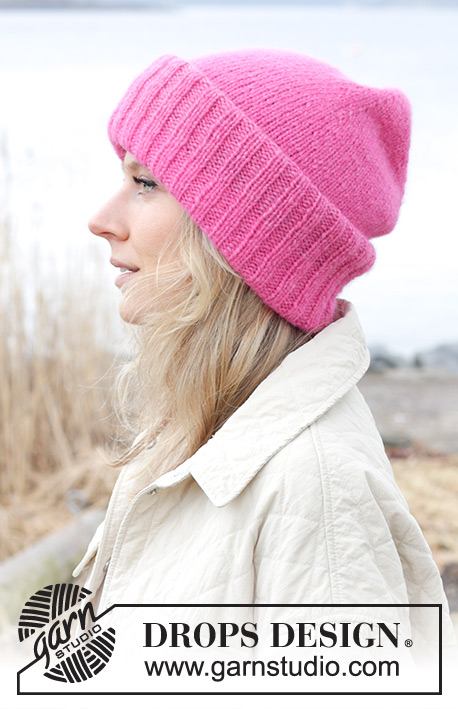
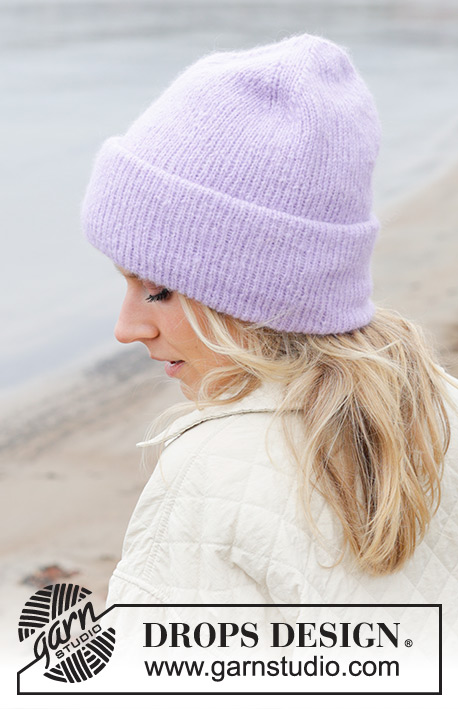
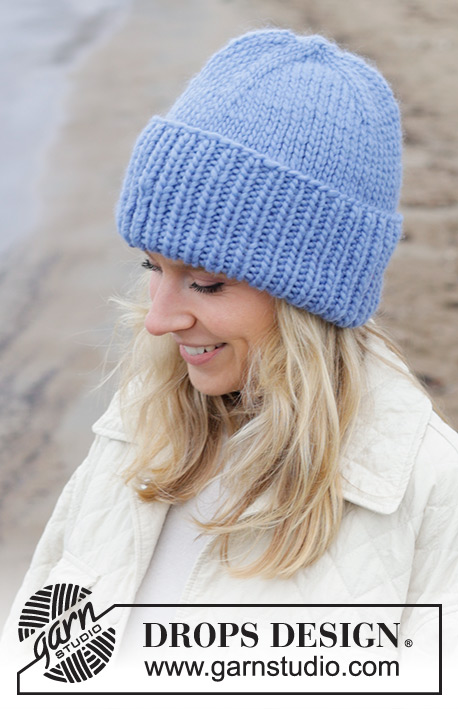
Grand Lake Hat#grandlakehat |
|
 |
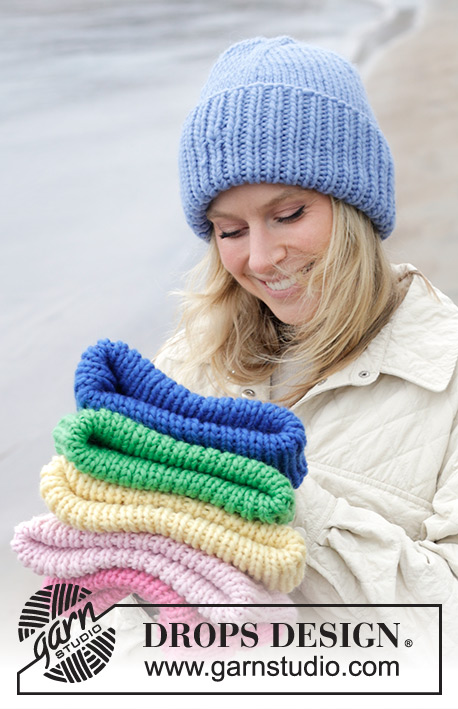 |
Knitted hat / hipster hat in DROPS Snow. The piece is worked top down, with stocking stitch and ribbed edge.
DROPS 242-46 |
|
|
------------------------------------------------------- EXPLANATIONS FOR THE PATTERN: ------------------------------------------------------- INCREASE TIP: Work until there is 1 stitch left before the marker thread, make 1 yarn over, knit 2 (marker-thread sits between these 2 stitches), 1 yarn over. Repeat at each marker-thread. On the next round work the yarn overs as follows: BEFORE the marker-thread: Slip the yarn over and place it back on the left needle the other way round, work the front loop – the stitch twists to the right. AFTER marker-thread: Work the back loop - the stitch twists to the left. ------------------------------------------------------- START THE PIECE HERE: ------------------------------------------------------- HAT – SHORT OVERVIEW OF THE PIECE: The piece is worked in the round, top down, with double pointed needles. Change to circular needle, when necessary, as you increase. HAT: Cast on 6 stitches with double pointed needles size 7 mm and DROPS Snow. ROUND 1: * Knit 1, make 1 yarn over *, work from *-* to end of round. ROUND 2: Knit; the yarn overs knitted twisted = 12 stitches. Insert 4 marker-threads in the piece, each between 2 stitches and with 3 stitches between each marker-thread. Continue with stocking stitch and increase 1 stitch on each side of each marker-thread – read INCREASE TIP. Increase like this every 2nd round 3-4 more times, then every 3rd round 2-1 times = 60 stitches. REMEMBER THE KNITTING TENSION! The increases are finished in size S/M. SIZES M/L: Knit 2 more rounds without increasing, then 1 round where you increase on each side of 2 of the marker-threads = 64 stitches. ALL SIZES: = 60-64 stitches. Continue with stocking stitch until the piece measures 20-21 cm. Turn the hat inside out and continue from the wrong side. Knit 1 round and increase 4 stitches evenly spaced = 64-68 stitches. Change to circular needle size 6 mm. Work rib (knit 1, purl 1) for 13-14 cm. Cast off with knit over knit and purl over purl. The hat measures approx. 33-35 cm from the cast-on edge. Turn the hat back to the right side and fold the bottom 9 cm up twice to the right side. Thread a strand through the cast-on stitches, tighten and fasten well. |
|
Have you finished this pattern?Tag your pictures with #dropspattern #grandlakehat or submit them to the #dropsfan gallery. Do you need help with this pattern?You'll find 15 tutorial videos, a Comments/Questions area and more by visiting the pattern on garnstudio.com. © 1982-2026 DROPS Design A/S. We reserve all rights. This document, including all its sub-sections, has copyrights. Read more about what you can do with our patterns at the bottom of each pattern on our site. |
|


With over 40 years in knitting and crochet design, DROPS Design offers one of the most extensive collections of free patterns on the internet - translated to 17 languages. As of today we count 324 catalogues and 12290 patterns translated into English (UK/cm). 12290
We work hard to bring you the best knitting and crochet have to offer, inspiration and advice as well as great quality yarns at incredible prices! Would you like to use our patterns for other than personal use? You can read what you are allowed to do in the Copyright text at the bottom of all our patterns. Happy crafting!
Post a comment to pattern DROPS 242-46
We would love to hear what you have to say about this pattern!
If you want to leave a question, please make sure you select the correct category in the form below, to speed up the answering process. Required fields are marked *.