
Categorías populares
¿Buscas un hilo?


Comentarios / Preguntas (28)
![]() Linda Aulenti escribió:
Linda Aulenti escribió:
I started and finished this hat 3 times, but....... Following the pattern and increasing along the way as instructed, how then did I end up with a 17.5 in. hat instead of the 22.25? All stitches were counted along the way and are correct. I am using a 6mm needle as required. Help please!
11.03.2017 - 14:55DROPS Design respondió:
Dear Mrs Aulenti, did you also checked your crochet tension? you should have 12 dc x 5 rows = 10 x 10 cm. Happy crocheting!
13.03.2017 - 09:56
![]() Eva escribió:
Eva escribió:
Ich find die Anleitung Klasse. Hab ihn auch schon zweimal gemacht, mit unterschiedlicher wolle. Und NS 6. Aber weder komm ich auf die Bildgröße noch ist meine Kampe so abstehend. Was könnte denn falsch sein bei mir? Liegt das tatsächlich an meiner wolle? (einmal für 8-10 und einmal 6-8 getestet) Lg Eva
21.09.2015 - 10:47DROPS Design respondió:
Am besten ist natürlich immer, wenn Sie die Originalwolle verwenden. Außerdem ist es ganz wichtig und maßgeblich, dass Sie die Maschenprobe einhalten. Wenn Sie die Maschenprobe mit Nadel 6 nicht einhalten, müssen Sie eine etwas größere Nadel verwenden (ich vermute, Ihr Hut ist zu klein?) und so lange probieren, bis Sie die Maschenprobe erhalten.
28.09.2015 - 10:07
![]() Francesca escribió:
Francesca escribió:
Grazie per la risposta, in realtà non ho fatto un campione, ma con una lana così grossa pensavo di poter stare tranquilla, anzi temevo venisse troppo grande...invece è successo il contrario! La prossima volta lo farò, sperando che la lana basti...comunque ho fatto molti dei vostri modelli usando altre lane e mi sono sempre venuti bene perché le vostre spiegazioni sono chiarissime e facili da seguire, anche quando ho dovuto usare aghi o uncinetti di misura diversa. Grazie siete magnifici!
21.01.2015 - 10:35DROPS Design respondió:
Buonasera Francesca, in realtà il campione è necessario per tutti i tipi di filato; magari per il suo modo di lavorare sarebbe stato necessario utilizzare una misura in più di uncinetto...in ogni caso buon lavoro!
21.01.2015 - 21:46
![]() Francesca escribió:
Francesca escribió:
Ho realizzato il cappello utilizzando la lana indicata e l'uncinetto della misura giusta nella taglia più grande e sono rimasta molto sorpresa perché è veramente piccolo, va bene per mia figlia che ha 4 anni. Ho aggiunto una riga dopo la nona perché era anche corto, ma con i due gomitoli consigliati non sarebbe possibile ingrandirlo ulteriormente, forse bisognerebbe lavorarlo con un uncinetto più grosso, ma come ho detto la lana non basterebbe...peccato
20.01.2015 - 11:17DROPS Design respondió:
Buonasera Francesca, siamo dispiaciute per questo risultato, ma il suo campione corrispondeva a quello indicato? Buon lavoro!
20.01.2015 - 18:41
![]() Gasperini Patrizia escribió:
Gasperini Patrizia escribió:
Quali sono le indicazioni per la taglia 56/58? Grazie
19.12.2014 - 16:28DROPS Design respondió:
Buonasera Patrizia. Per la taglia 56/58 deve prendere come riferimento il secondo numero indicato. P.es, al 5° giro, deve aumentare 4 m.a. In questo modo le maglie diventano in tutto 48. Buon lavoro!
19.12.2014 - 16:53
![]() Christine MANNINI escribió:
Christine MANNINI escribió:
Super modèle mais, bien que mon échantillon était bien j'ai du faire 3 rangs de plus (au niveau des "paquets" de 3 brides) car il était bien trop court avec la bordure qui partait plus haut que les oreilles
25.03.2014 - 10:32
![]() Marit escribió:
Marit escribió:
Jeg har heklet denne på pinne 7 (den største hatten), og jeg synes den ble liten,- til meg, hvertfall. Nå skal jeg prøve en til, og øke 7 masker i stedet for 4. Går det bra, tror dere?
13.03.2014 - 22:22DROPS Design respondió:
Hei Marit. Det kan du pröve, husk at kontrollere din heklefasthed.
14.03.2014 - 16:36
![]() Kat escribió:
Kat escribió:
I have made this hat and it is another great pattern from DROPS that turns out beautifully. It is now one of my favorite hat patterns ! I have made it in smaller and larger sizes, dependent on the needle size, and it always turns out great.
04.08.2013 - 05:57
![]() Susan escribió:
Susan escribió:
Very easy hat to make. But as the other person said, too small. I had exact gauge but I believe the slip stitch between the brim and crown, although it gives the hat definition, makes it too tight. Cannot it be made without? I have a large size head (23 1/2") and the 22" larger one would have fit had it not had that slip stitching.
19.12.2012 - 02:54DROPS Design respondió:
Dear Susan, you can try to skip row 10 and go from row 9 to 11, or make some sl st here and there on row 10 so that this round doesn't tighten too much the hat to fit your head. Happy crocheting!
20.12.2012 - 14:51
![]() Keri escribió:
Keri escribió:
I'm new to making hats. This pattern was so easy. The problem is it's way to small. How can I make it bigger to fit?
10.12.2012 - 02:46DROPS Design respondió:
Hi Keri, so nice that you started making hats. It is very important that you have the exact gauge. Try to use a bigger needle in order to get the exact number of stitches per 10 cm / 4’’ And did you see that there are two different sizes?
10.12.2012 - 08:56
|
|
Fenella#fenellahat |
|
 |
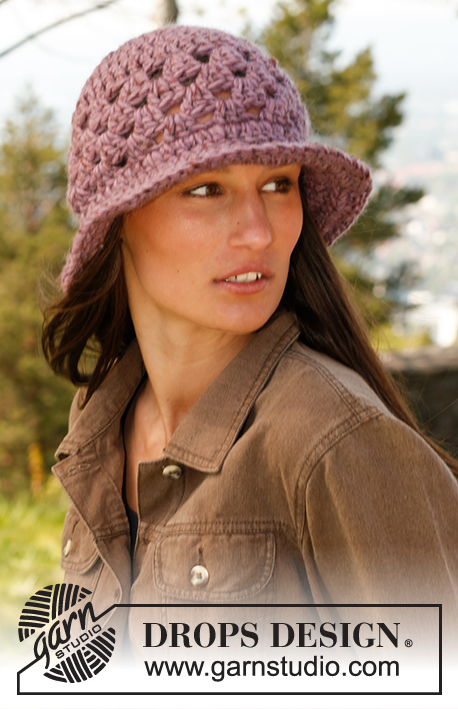 |
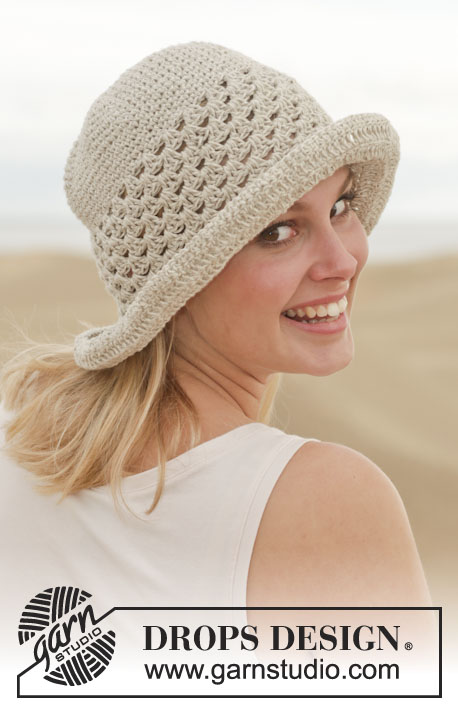
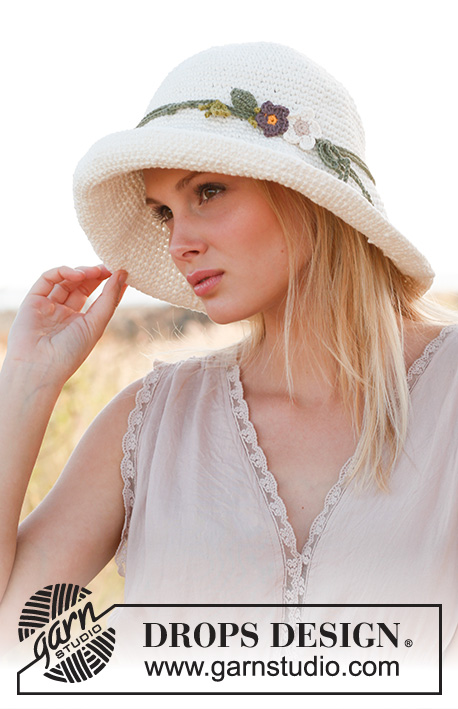
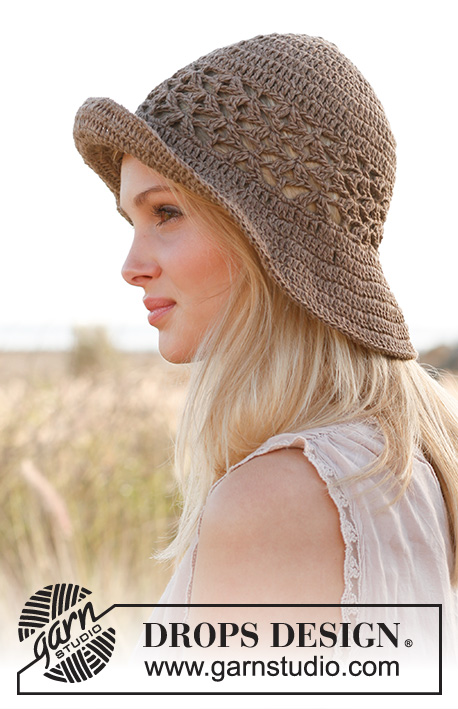
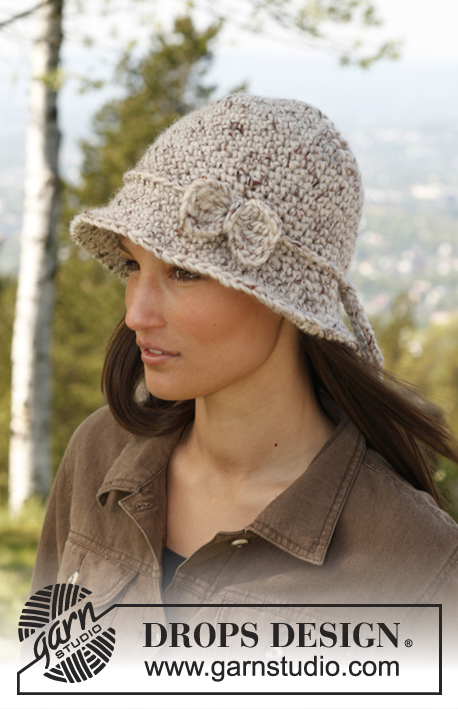
Gorro DROPS en ganchillo, en “Snow”.
DROPS 140-19 |
|
|
INFORMACIÓN PARA LA ELABORACIÓN DEL TEJIDO: Las vueltas 1-6 y 11-13 empiezan con 3 cad que sustituyen al primer p.a., y terminar cada vta con 1 p.bjs en la 3ª cad del inicio de la vta. TIP PARA AUMENTO: Aum 1 pt haciendo 2 p.a. en el mismo pt. ------------------------------------------------------ GORRO: La pieza es tejida de arriba para abajo. Mon 4 cad en ag de ganchillo tamaño 6 mm con Snow y formar un anillo con 1 p.bjs en la 1ª cad. VUELTA 1: LEER TIP PARA LA ELABORACIÓN DEL TEJIDO! Hacer 11-11 p.a. en el anillo de cad. VUELTA 2: Hacer 2 p.a. en cada p.a. en toda la vta = 22-22 p.a. VUELTA 3: * 1 p.a. en el primer p.a., 2 p.a. en el p.a. sig *, repetir de *a* en toda la vta = 33-33 p.a. VUELTA 4: * 1 p.a. en cada uno de los 2 p.a. sig, después 2 p.a. en el p.a. sig *, repetir de *a* en toda la vta = 44-44 p.a. VUELTA 5: Hacer 1 p.a. en cada p.a. – AL MISMO TIEMPO aum – leer TIP PARA AUMENTO, 1-4 p.a. distribuidos equitativamente en la vta = 45-48 p.a. VUELTA 6: Hacer 3 p.a. en el primer p.a., * saltar 2 p.a. y hacer 3 p.a. en el p.a. sig *, repetir de *a* en toda la vta = 15-16 grupos de p.a. VUELTA 7- 9: Hacer 3 cad, saltar el primer grupo de p.a. de la vta anterior, * hacer 3 p.a. entre los 2 grupos de p.a. sig *, repetir de *a* en toda la vta y terminar con 2 p.a. después del último grupo de p.a. y 1 p.bjs en la 3ª cad del inicio de la vta. VUELTA 10: Hacer 1 cad y 1 p.bjs en cada p.a. en toda la vta = 45-48 p.bjs y terminar con 1 p.bjs en la 1ª cad del inicio de la vta. VUELTA 11: NOTA: Esta vta es trabajada insertando la ag en los pts de la 9ª vta, es decir, trabajar alrededor de la 10ª vta. Trabajar de la manera sig: * 1 p.a. en cada uno de los 2 p.a. sig, después 2 p.a. en el p.a. sig *, repetir de *a* = 60-64 p.a. VUELTA 12: * 1 p.a. en cada uno de los 3 p.a. sig, después 2 p.a. en el p.a. sig *, repetir de *a* = 75-80 p.a. VUELTA 13: Hacer 1 p.a. en cada p.a. en toda la vta. Cortar y asegurar el hilo. |
|
¿Terminaste este patrón?Entonces, etiqueta tus fotos con #dropspattern #fenellahat o envíalas a la galería #dropsfan. ¿Necesitas ayuda con este patrón?Encontrarás 4 videos tutoriales, un espacio para comentarios/preguntas y más visitando la página del patrón en garnstudio.com © 1982-2026 DROPS Design A/S. Todos los derechos reservados. Este documento, incluyendo todas sus sub-secciones, está protegido por los derechos de autor (copyright). Lee más acerca de lo que puedes hacer con nuestros patrones en la parte de abajo de cada patrón de nuestro sitio. |
|


Con más de 40 años en el diseño de modelos de punto y de ganchillo, DROPS Design ofrece una de las más vastas colecciones de patrones gratuitos en el internet - traducidos en 17 idiomas. Al día de hoy, contamos con 324 catálogos y 12290 patrones - de los cuales 11673 están traducidos en español.
Nosotros trabajamos con mucho esmero para brindarte lo mejor que las labores de punto y ganchillo tienen para ofrecer,inspiración y consejos, así como hilos de magnífica calidad a precios increíbles! Te gustaría usar nuestros patrones para otro fin además del uso personal? Puedes leer acerca de lo que estás permitida a hacer en el texto de Copyright en la parte de abajo de todos nuestros patrones. Felices labores!
Escribe un comentario sobre DROPS 140-19
¡Nos encantaría saber qué piensas acerca de este patrón!
Si quieres escribir una pregunta referente al patrón, por favor asegúrate de elegir la categoría correcta en el formulario debajo, para acelerar el proceso de respuesta. Los campos obligatorios están marcados con un *.