
Categorías populares
¿Buscas un hilo?


Comentarios / Preguntas (102)
![]() Silje escribió:
Silje escribió:
Ville bare spørre om overstykket betyr den korte eller lange siden? :)
02.12.2012 - 13:56DROPS Design respondió:
Oversiden af ryggstk er den brede kant af firkanten. Se ogsaa tegning paa mönstret. Du begynder med at haekle rundt fra her.
03.12.2012 - 15:45
![]() Charlotte escribió:
Charlotte escribió:
Jag undrar över ökningen i kantstycket. Man ska öka med 34 m 3 ggr men är det bara under varvet med fm? Virkar man varv ett och två och sen ökning i tredje varvet 3 ggr?
06.08.2012 - 14:09DROPS Design respondió:
Ja, der skal ökas 34 m 3 ggr - bara under varvet med fm.
01.05.2013 - 16:56
![]() Johanna escribió:
Johanna escribió:
Ich verstehe die Anweisung für die Kante nicht. Erst heißt es man solle "über dem Rückenteil je ein Stb in jedes Stb" häkeln, dann kommt bei Gr. s/m 56 Maschen raus - aber ich habe doch 62 (steht im Text).
03.08.2012 - 16:45DROPS Design respondió:
Sie häkeln 1 Stb in jedes Stb und dann 56-58-60-64 Lm = Luftmaschen. Dies ergibt die Armlöcher.
06.08.2012 - 21:01DeeDee Watson escribió:
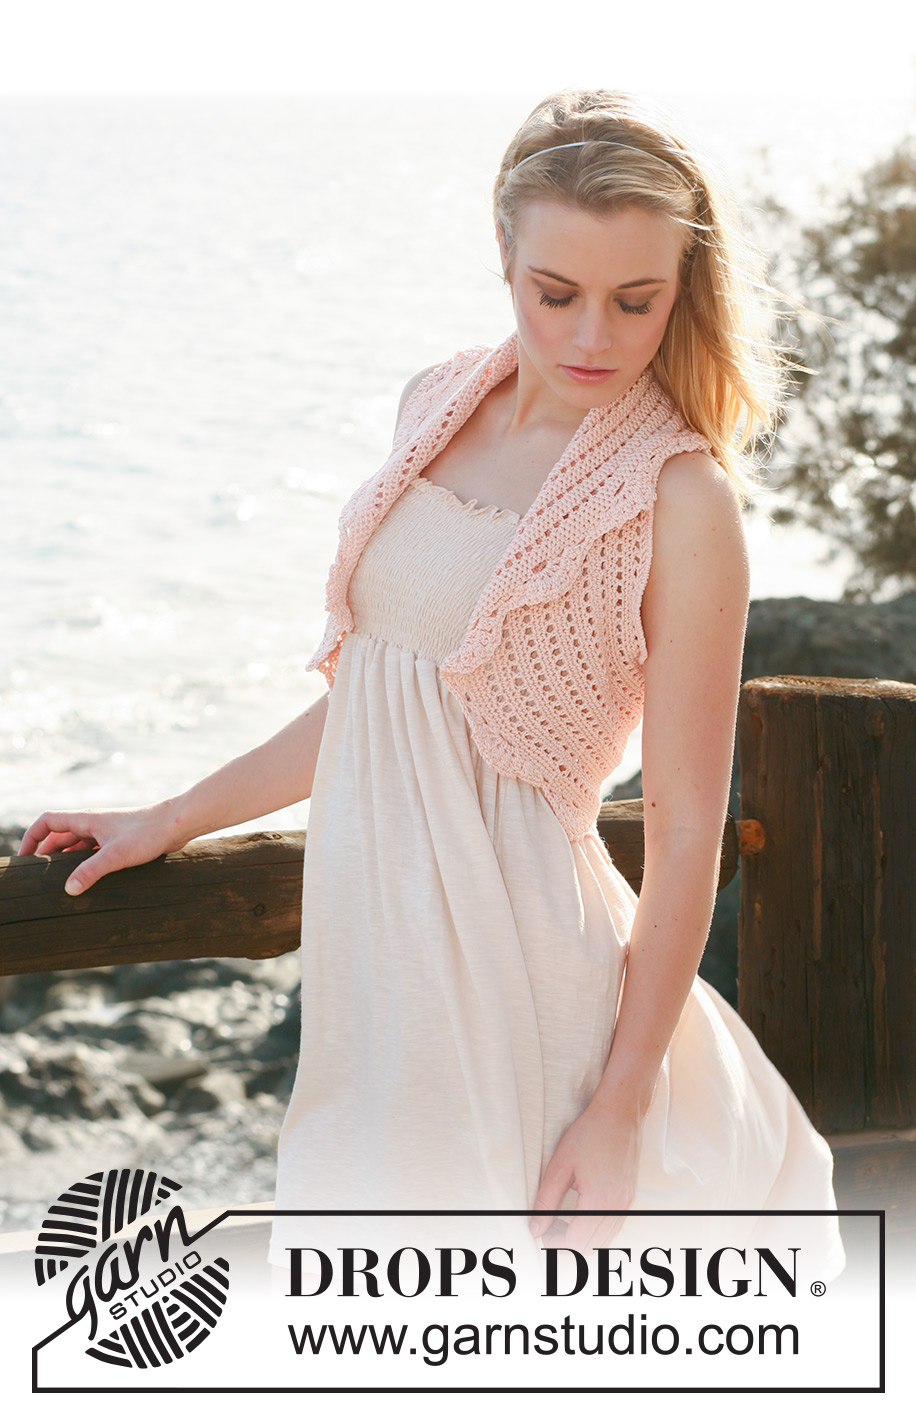
Hi, as it written in the description that I make a double crochet above each double crochet from the first row! and then continue the same way, but when I reach 7 cm it doesn't give me squares like the picture! there are squares made and above them looks like a double crochet! How did that happen? How can I make mine looks the same? Is that a different way to do it? Please help it's really depressing me :(
26.06.2012 - 23:14DROPS Design respondió:
Dear Mrs Watson, back piece is worked in dc rows. "Empty squares" as you can see on the picture are done with the edge piece, in the round afterwards. Happy crocheting !
06.12.2012 - 14:50
![]() Josephine Angeles escribió:
Josephine Angeles escribió:
Hi Can you explain this, i don't know how to do it. I am just a beginner. "Crochet 1 tr in each tr along top of back piece, crochet 56-58-60-64 ch, 1 tr in each tr along bottom of back piece, crochet 56-58-60-64 ch and finish with 1 sl st in first tr on the top of back piece. Now crochet 1 tr in each tr from back piece and around each ch band crochet 42-44-46-48 tr = 204-220-236-248 tr in total."
01.06.2012 - 12:46
![]() Sheila escribió:
Sheila escribió:
I am having a difficult time following the M.1 instructions. Do I complete the mofit then cut thread and join back to the main piece? Where? The repeat shown does not show this. Or do I sc x-number of times, ch 4, then sc x-number of times and ch 4 all the way around? This is not clear on the diagram.
28.05.2012 - 04:36
![]() Marie escribió:
Marie escribió:
Bonjour!Pour un modèle S au niveau de la bordure:comment crocheter 42B dans les 56 ml de la chainette?Faut-il les répartir le long de la chainette ou laisser 7ml de chaque côté?Très joli modèle j'ai hâte de le terminer!
12.05.2012 - 10:08DROPS Design respondió:
Bonjour Marie, il faut répartir les brides sur la chaînette et donc sauter des ml à espaces réguliers. Bon crochet !
14.05.2012 - 10:59
![]() Janice escribió:
Janice escribió:
I am making a size LG. On the edge you start with 220 dc in the round and then when piece measures 4" you increase 34 dcs on the round and the pattern says you should then have 322 dcs? How?
02.05.2012 - 03:05DROPS Design respondió:
Pattern tells you to inc 34 SC when edge measures 2", 4" and at 6" - not only at 4".
04.05.2012 - 00:36Dimitra escribió:
Please help me with this: BACK PIECE 1.in the start and after i crochet the ch i want how mane ch i have to make just to turn the piece (ch3?) 2.When piece measures 7 cm / 2¾'' inc 1 dc each side. i will inc 2sc in each dc? and then how mane ch i have to make to turn my piece? then i have to inc again each sc with 2sc each? thank you!!!
05.04.2012 - 14:45DROPS Design respondió:
1. the number of ch you make includes the ch to turn with, as you can see it say to turn and crochet in the 4th ch from hook, so 3 ch are included already. 2. Inc 1 dc each side of work by working 2 dc in first and last dc on row. Repeat at 15 cm/ 6". 3. For turning your rows - replace first dc on each row with 3 ch.
13.04.2012 - 00:32
![]() Soumya escribió:
Soumya escribió:
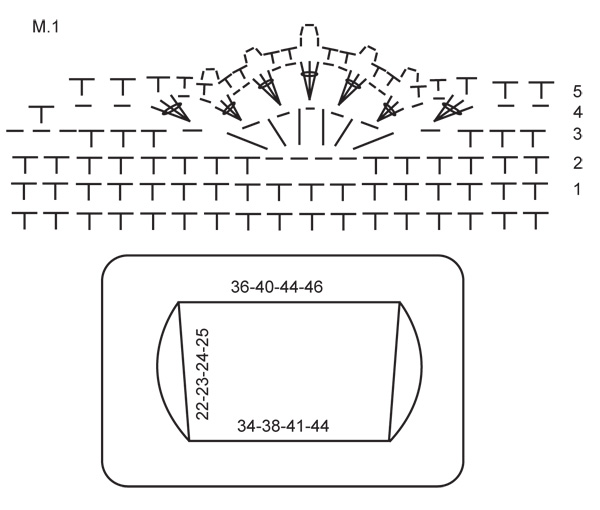
1. line 2 in M.1 is little confusing. after how many dc's are the chains? 2.the 3rd line of the diagram shows a measure of 3 dc, 3 chain, 6tr, 3dc and then 3ch...so is this how we continue throughout?
19.03.2012 - 17:15DROPS Design respondió:
1. 6 dc (US sc) and then ch 4. 2. UK version: 3 dc, ch1, 1tr, 1ch, 1tr, 1ch, 1tr, 1ch, 1tr, 1ch, 1tr, 1ch,1 tr, ch1, 3 dc, ch3 - repeat! Chart is giving you 1 repetition of the pattern.
20.03.2012 - 17:27
|
|||||||||||||
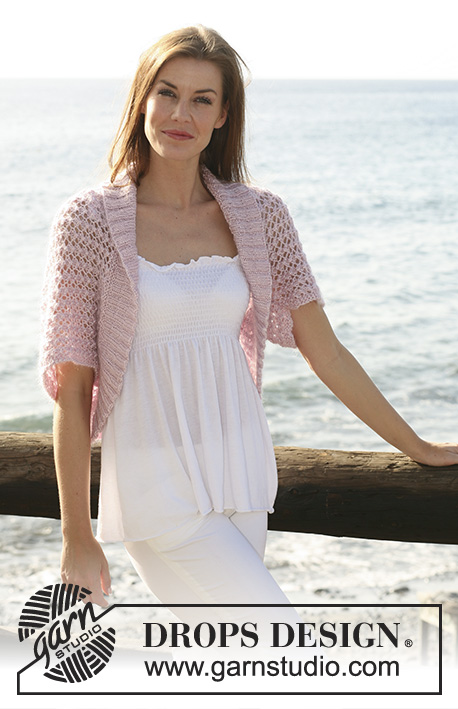
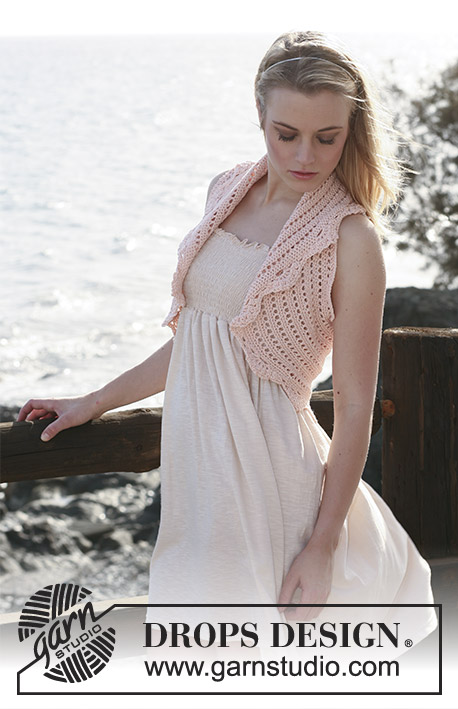
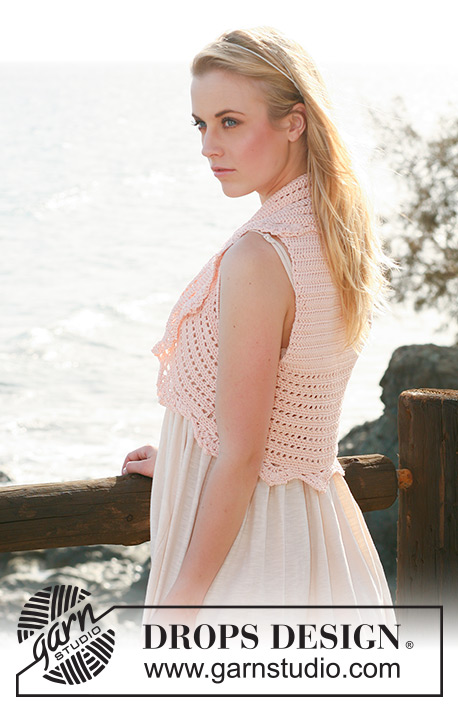
Peach Perfection#peachperfectionbolero |
|||||||||||||
 |
 |
||||||||||||
Chaleco DROPS, en ganchillo, en “Muskat”. Talla: S – XXXL.
DROPS 119-22 |
|||||||||||||
|
INFORMACIÓN PARA LA ELABORACIÓN DEL TEJIDO: Pieza de la espalda: Sustituir el primer p.a. de cada hilera con 3 cad. Pieza de la orilla: Sustituir el primer p.b. de cada vta con 1 cad. Terminar cada vta con 1 p.bjs en la última cad del inicio de la vta anterior. Sustituir el primer p.a. de cada vta con 3 cad. Terminar cada vta con 1 p.bjs en la última cad del inicio de la vta anterior. TIP PARA AUMENTO: Aum haciendo 2 pts en 1 pt. ------------------------------------------------------ ------------------------------------------------------ ESPALDA: Mon flojamente 78-86-94-99 cad con ag de ganchillo tamaño 4 mm y Muskat. Hacer 1 p.a. en la 4ª cad a partir de la ag, * 1 p.a. en cada una de las 3 cad sig, saltar 1 cad *, repetir de *a* y terminar con 1 p.a. en cada una de las últimas 2-2-2-3 cad = 58-64-70-74 p.a. Continuar con 1 p.a. en cada p.a. Cuando la pieza mida 7 cm, aum 1 p.a. en cada lado – ver TIP PARA AUMENTO, y repetir los aum cuando la pieza mida 15 cm = 62-68-74-78 p.a. Continuar hasta que la pieza mida 22-23-24-25 cm. ORILLA: Hacer 1 p.a. en cada p.a. a lo largo de la parte de arriba de la pieza de la espalda, hacer 56-58-60-64 cad, 1 p.a. en cada p.a. a lo largo de la parte de abajo de la pieza de la espalda, hacer 56-58-60-64 cad y terminar con 1 p.bjs en el primer p.a. de la parte de arriba de la pieza de la espalda. Ahora hacer 1 p.a. en cada p.a. de la pieza de la espalda y en cada hilera de cad hacer 42-44-46-48 p.a. = 204-220-236-248 p.a. en total. Continuar en redondo de la manera sig: VUELTA 1: 1 p.a. en el primer p.a., * 1 cad, saltar 1 p.a., 1 p.a. en el p.a. sig *, repetir de *a* y terminar con 1 cad, saltar 1 p.a. y 1 p.bjs en el p.a. del inicio de la vta. VUELTA 2: 1 p.b. en cada p.a. y 1 p.b. en cada cad. VUELTA 3: 1 p.b. en cada p.b. Repetir estas 3 vtas y, AL MISMO TIEMPO, cuando la orilla mida 5, 10 y 15 cm (ajustar a una hilera de p.b.) aum 34-34-34-36 p.b. distribuidos equitativamente en la vta – ver TIP PARA AUMENTO = 306-322-338-356 p.b. Cuando la orilla mida 17-18-19-20 cm (ajustar para que la hilera sig sea una hilera de p.b.) hacer 1 hilera con p.b. y, AL MISMO TIEMPO, aum 0-1-2-1 p.b. distribuidos equitativamente = 306-323-340-357 p.b. Ahora continuar en M.1. NOTA! Empezar en la hilera marcada con 1 en el diagrama. Hacer 1 repetición vertical de M.1, cortar y asegurar el hilo. |
|||||||||||||
Explicaciones del diagrama |
|||||||||||||
|
|||||||||||||
 |
|||||||||||||
¿Terminaste este patrón?Entonces, etiqueta tus fotos con #dropspattern #peachperfectionbolero o envíalas a la galería #dropsfan. ¿Necesitas ayuda con este patrón?Encontrarás 8 videos tutoriales, un espacio para comentarios/preguntas y más visitando la página del patrón en garnstudio.com © 1982-2026 DROPS Design A/S. Todos los derechos reservados. Este documento, incluyendo todas sus sub-secciones, está protegido por los derechos de autor (copyright). Lee más acerca de lo que puedes hacer con nuestros patrones en la parte de abajo de cada patrón de nuestro sitio. |
|||||||||||||


Con más de 40 años en el diseño de modelos de punto y de ganchillo, DROPS Design ofrece una de las más vastas colecciones de patrones gratuitos en el internet - traducidos en 17 idiomas. Al día de hoy, contamos con 324 catálogos y 12290 patrones - de los cuales 11675 están traducidos en español.
Nosotros trabajamos con mucho esmero para brindarte lo mejor que las labores de punto y ganchillo tienen para ofrecer,inspiración y consejos, así como hilos de magnífica calidad a precios increíbles! Te gustaría usar nuestros patrones para otro fin además del uso personal? Puedes leer acerca de lo que estás permitida a hacer en el texto de Copyright en la parte de abajo de todos nuestros patrones. Felices labores!
Escribe un comentario sobre DROPS 119-22
¡Nos encantaría saber qué piensas acerca de este patrón!
Si quieres escribir una pregunta referente al patrón, por favor asegúrate de elegir la categoría correcta en el formulario debajo, para acelerar el proceso de respuesta. Los campos obligatorios están marcados con un *.