
Categorías populares
¿Buscas un hilo?


Comentarios / Preguntas (35)
![]() Sharon Hunt-Edwards escribió:
Sharon Hunt-Edwards escribió:
Hello Am working on the neck of this sweater and I have taken it out one and restarted it but am still not sure 🤔 I understand the instructions. The 17 sts for the front I have bound off am I supposed to pick up sts in these sts? Also says to sew edge to edge from right side. Does this the bottom of the collar?
08.12.2023 - 21:35DROPS Design respondió:
Dear Sharon, you pick up the stitches around the neck, but not at the bottom of the neckline, where you have cast off the 17 stitches. When you finished knitting the edge/corral, it will have an edge, that you should sew to the bottom of the neckline, to the cast off stitches. I hope this helps. Happy Knitting!
10.12.2023 - 21:15
![]() Sharon Hunt escribió:
Sharon Hunt escribió:
Collar: Starting at the left side of the 17 bound-off sts at center front, pick up approx. 127-163 sts (divisible by 3 + 1) on smaller circular needles around the neck, …. Dos the 125-163 included the stitches cast off for back avd from. I did not bind off these stitches because i thought the would be picked up later. Read a reply to a question which said to put the front sts on a string so I did same for the back??? S
28.11.2023 - 01:01DROPS Design respondió:
Hi Sharon, Yes, the stitch count includes knitting up (or including the stitches on the stitch holder) mid-back of neck. Happy knitting!
28.11.2023 - 06:44
![]() Sharon Hunt escribió:
Sharon Hunt escribió:
Hi the armhole on the above sweater is not long enough it is shorter than on the schematic. The armhole on the sweater I like is 28 cm. Do I just knit longer after neck and shoulder shaping. Sharon
25.11.2023 - 13:39DROPS Design respondió:
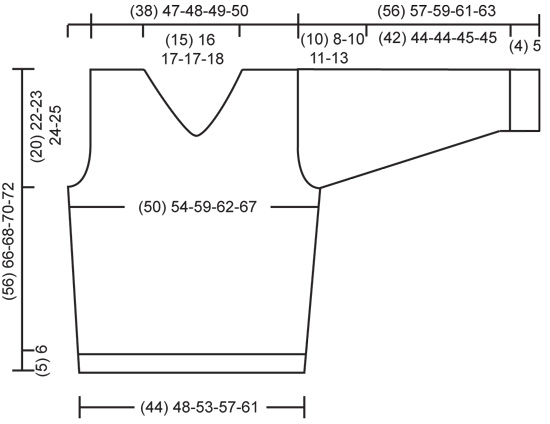
Dear Sharon, the armhole on the schematic starts when the piece measures approx. 36 cm from the bottom of the piece (for the shortest size). After that, it should be an armhole of approx. 20cm for the smallest size. Please check the measurements in the schematic below; if you wish to make a longer armhole you will need to bind off for the armhole earlier in the piece. You can't continue working after the neck and shoulder shaping, since you will displace the shaping. That is why it's more difficult to adjust the measurements when you are working from the bottom up. Also take into account that the model is usually wearing an M size. Happy knitting!
26.11.2023 - 22:17
![]() Sharon Hunt escribió:
Sharon Hunt escribió:
Hi the armhole on the above sweater is not long enough it is shorter than on the schematic. The armhole on the sweater I like is 28 cm. Do I just knit longer after neck and shoulder shaping. Sharon
25.11.2023 - 13:20DROPS Design respondió:
Dear Sharon, the armhole on the schematic starts when the piece measures approx. 36 cm from the bottom of the piece (for the shortest size). After that, it should be an armhole of approx. 20cm for the smallest size. Please check the measurements in the schematic below; if you wish to make a longer armhole you will need to bind off for the armhole earlier in the piece. You can't continue working after the neck and shoulder shaping, since you will displace the shaping. That is why it's more difficult to adjust the measurements when you are working from the bottom up. Also take into account that the model is usually wearing an M size. Happy knitting!
26.11.2023 - 22:17
![]() Sharon Hunt escribió:
Sharon Hunt escribió:
Hi drops, i need help her. Am making size large , pullover. I have knitted up to the armhole and I have 109 sts and I have not cast off for the neck. When do I start casting off for the neck.
22.11.2023 - 20:07DROPS Design respondió:
Dear Mrs Hunt, in size L you start binding off for neck when piece measures 44 cm and you start to cast off for armhole when piece measures 44 cm, this means you first divide piece for neck in this size, then cast off for neck at the beg of every row from the side/armhole + decrease for neck. Happy knitting!
23.11.2023 - 08:32
![]() Sharon Hunt - Edwards escribió:
Sharon Hunt - Edwards escribió:
Hi am making size 46- the size that has a cast on of 113 sts. An I not supposed to cast off for the shoulders at the same time as I cast off 17 sts for the front? How many sts should i have for the shoulders. My count is not the same on both sides of the middle. Thanks
22.11.2023 - 10:31DROPS Design respondió:
Dear Mrs Hunt-Edwards, in size L you cast off for armhole on each side 3 sts 1 time + 2 sts 2 times + 1 stitch 5 times, at the same time, cast off the middle 17 sts for neck then decrease for neck 1 stitch 9 ganger = 125 sts (before armhole) - 24 sts (armhole, ie 12 sts on each side) = 101 sts - 17 sts for neck = 42 sts for each front piece - 9 sts decreased for neck = 33 sts remain for shoulder. Cast off when piece measures 68 cm. Happy knitting!
23.11.2023 - 08:23
![]() Sharon Hunt escribió:
Sharon Hunt escribió:
Hei drops! Making the pullover, instruction says: Neck opening: At the same time when the piece measures 36-44-44-46-46 cm bind off the center 17 sts separately. I have already cast off 3 sts on each side. I cast off 2 sts about to cast off 17 middle sts. How many should I have between these 17 sts . Right side is facing me and I have allready cast off the first 3 sts on RS and WS. I have casted off 2 sts . So the RS is facing with 2 sts cast off. Thanks for a quick reply.
22.11.2023 - 07:28DROPS Design respondió:
Dear Mrs Hunt, not sure even from your previous questions which size you are working, but casting off for armhole on each side (then only towards armhole after dividing for neck) and dividing + decreasing for neck will give you 24-33-33-34-34 sts left for shoulder. Happy knitting!
22.11.2023 - 09:15
![]() Sharon Hunt escribió:
Sharon Hunt escribió:
Hi Drops will be travelling and need to know the answer to this question. I would like yo knit this sleeve top down by picking up for the sleeve cap and following the pattern as written. Is this an impossible task. I know I could knit bottom up but want to avoid seeing. Thanks for responding. Sharon
17.11.2023 - 08:30DROPS Design respondió:
Dear Mrs Hunt, you can probably adapt the pattern to work the sleeve top down, but we are unfortunately not able to adjust every pattern to every single request, do not hesitate to contact your yarn store for any further assistance. Thanks for your comprehension. Happy knitting!
17.11.2023 - 08:50
![]() Sharon Hunt escribió:
Sharon Hunt escribió:
Hi, am aking the pullover size 46,5 snd it states: Pullover): When the piece measures 36-44-45-46-47 cm bind off for armhole at each side every other row: 3 sts 1 time, 2 sts 3-1-2-4-5 times and 1 st 5-3-5-4-6 times. Question was how to decrease 3 sts? Thanks for responding Sharon
16.11.2023 - 17:48DROPS Design respondió:
Dear Mrs Hunt, you won't have to decrease here but to cast off the stitches at the beginning of each row on each side, ie at the beginning of a row from RS and as the beginning of a row from WS. Happy knitting!
17.11.2023 - 08:47
![]() Sharon Hunt- Edwards escribió:
Sharon Hunt- Edwards escribió:
Hi! Started this sweater and decided to make it in the round. When I started M1 over 47 sts I ended with a purl st after the first row. Since am doing this in the round and not back and forth am wondering if I should start from the left instead og the right on the chart. Thanks for your help.
16.11.2023 - 07:34DROPS Design respondió:
Dear Mrs Hunt-Edwards, it looks fine as you say, the diagram worked over 47 sts will start and end with a Purl stitch on 1st row (so that pattern is symmetrical), when working in the round, just work the stitches as they should be seen from RS, ie P1, K1 on first round and K all sts on every other round. Happy knitting!
16.11.2023 - 10:28
|
|||||||
Granite Ridge |
|||||||
|
|
|||||||
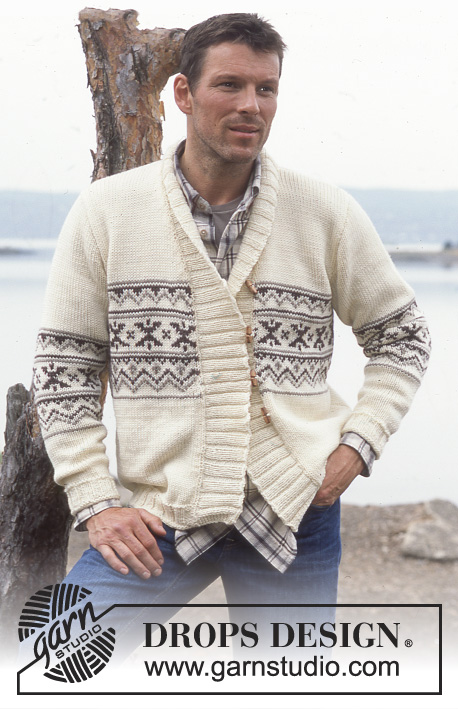
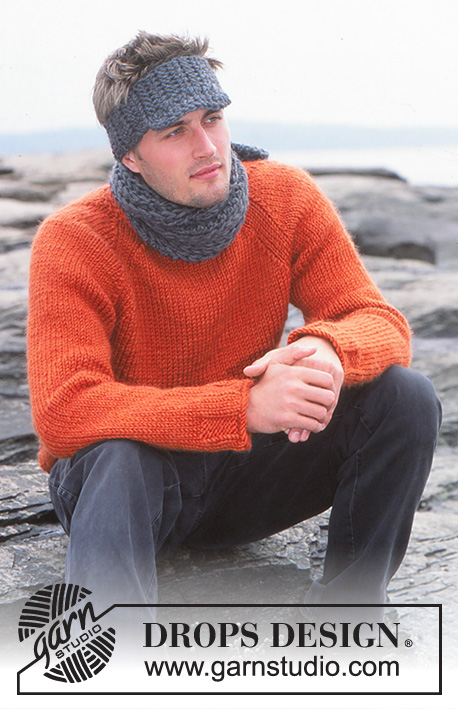
Pulóver o chaleco / chaleco sin mangas de punto para hombre, en DROPS Karisma
DROPS 85-16 |
|||||||
|
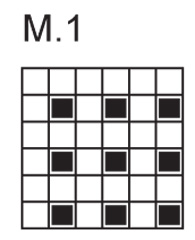
Muestra: 21 pts x 28 vtas en las ag tamaño 4 mm en pt jersey = 10 x 10 cm. Resorte: * 1d, 2r *, repetir de *a*. Patrón: Ver el diagrama abajo. El patrón es visto por el lado derecho. Tips para disminución (para la sisa en el chaleco): Todas las dism se hacen en el lado derecho. Dism junto a 7 pts de la orilla (visto por el lado derecho): 1d (pt de orillo tejido en pt musgo), 1d, 2r, 1d y 2r. Dism 1 pt como sigue: Después de 7 pts de orillo: Desl 1 pt del derecho, 1d, pasar pt desl por encima. Antes de 7 pts de orillo: 2 pjd DELANTERO: Mon 95-104-113-122-131 pts en las ag tamaño 3 mm. Tejer 3 vtas del revés (vuelta 1 = lado revés), luego tejer resorte, dejando 1 pt de orillo de cada lado en pt musgo (ver instrucciones arriba). Cuando la pieza mida 5-6-6-6-6 cm – ajustar para que la vta sig sea por el lado derecho – tejer 2 vtas del derecho, ajustando (aum/dism conforme el caso) a 95-103-113-121-131 pts en la primera vta. Cambiar a las ag tamaño 4 mm y cont como sigue: 1d (pt de orillo tejido en pt musgo), 25-28-32-36-40 pts en pt jersey, M.1 sobre los 43-45-47-47-49 pts sig, 25-28-32-36-40 pts en pt jersey y 1d (pt de orillo tejido en pt musgo). Cuando la pieza mida 10 cm aum 1 pt de cada lado cada 4-5-5-5-5 cm un total de 6 veces = 107-115-125-133-143 pts. Leer la sección completa antes de tejer: Sisa (Chaleco): Cuando la pieza mida 34-42-43-44-45 cm tejer como sigue sobre los 13 pts más externos de cada lado (visto por el lado derecho): 1d (pt de orillo tejido en pt musgo), * 1d, 2r *, repetir de *a* un total de 4 veces (tejer los pts restantes como antes). Cuando la pieza mida 36-44-45-46-47 cm rem los 6 pts más externos de cada lado para la sisa. Cont dism 1 pt en cada sisa en vtas alternas 8-2-6-9-13 veces – ver Tips para disminución arriba. Sisa (Pulóver): Cuando la pieza mida 36-44-45-46-47 cm rem para la sisa en cada lado en vtas alternas: 3 pts 1 vez, 2 pts 3-1-2-4-5 veces y 1 pt 5-3-5-4-6 veces. Abertura del cuello: Al mismo tiempo cuando la pieza mida 36-44-44-46-46 cm rem los 17 pts centrales para la abertura del cuello. Tejer cada lado por separado. 1er lado: = 31-41-42-43-44 pts. Cont con pt jersey y M.1 sobre los 13-14-15-15-16 pts en el delantero central. Cuando la pieza mida 45-53-55-56-57 cm dism 1 pt en la orilla del cuello cada 4 vtas 7-8-9-9-10 veces. Después que se ha terminado de dar forma a la sisa y cuello deberá tener 24-33-33-34-34 pts restantes en el hombro. Cont con pt jersey y el patrón (para el Chaleco: con 7 pts resorte en la sisa). Rem pts cuando la pieza mida 56-66-68-70-72 cm. 2º lado: Tejer igual que el 1er lado, dando la forma a la inversa. ESPALDA: Mon pts y tejer igual que el delantero, más no tejer M.1. Rem pts para la sisa como en el delantero = 79-99-101-103-105 pts. Cuando la pieza mida 54-64-66-68-70 cm rem los 27-29-31-31-33 pts centrales para el cuello. Luego dism 1 pt en cada orilla del cuello en vtas alternas 2 veces = 24-33-33-34-34 pts restantes en cada hombro. Rem pts cuando la pieza mida 56-66-68-70-72 cm. MANGAS (Pulóver): Mon 47-50-50-53-53 pts en las ag tamaño 3 mm. Tejer 3 vtas del revés (vuelta 1 = lado revés), luego tejer resorte, dejando 1 pt de orillo de cada lado – ver instrucciones arriba. Cuando la pieza mida 4-5-5-5-5 cm – ajustar para que la vta sig sea por el lado derecho – tejer 2 vtas del derecho. Cambiar a las ag tamaño 4 mm y pt jersey. Cuando la pieza mida 9-13-9-9-13 cm aum 1 pt de cada lado cada 2.5-2-2-2-1.5 cm un total de 15-17-20-20-23 veces = 77-84-90-93-99 pts. Cuando la manga mida 46-49-49-50-50 cm rem para el copete de manga en cada lado en vtas alternas: 4 pts 1 vez, 3 pts 2-3-3-3-3 veces, 2 pts 1-1-2-2-2 veces y 1 pt 7-2-4-5-8 veces, luego rem 2 pts en cada lado hasta que la pieza mida 55-56-58-60-62 cm, después rem 3 pts en cada lado 1 vez. Rem los pts restantes, la pieza mide aprox 56-57-59-61-63 cm. TERMINACIÓN: Coser los hombros. Cuello: Empezando en el lado izquierdo de los 17 pts rem en el delantero central, levantar aprox 127-163 pts (múltiplo de 3 + 1) en la ag circular tamaño 3 mm alrededor del cuello, terminando en el lado derecho de los 17 pts rem. Tejer de ida y vuelta en las ag como sigue: 1 vta del derecho por el lado revés, montando 1 pt nuevo en cada lado (= pt de orillo) = 129-165 pts. Luego tejer como sigue (visto por el lado derecho): 1d (pt de orillo tejido en pt musgo), 1d, * 2r, 1d *, repetir de *a* y terminar con 1d (pt de orillo tejido en pt musgo). Colocar un marcapuntos (MP) en el 23-23-26-26-29º pt desde cada lado (= 1d visto por el lado derecho). Cuando el borde del cuello mida 3.5 cm aum los 2r de cada lado de los pts con MP a 3r = 133-169 pts. Tejer 2 vtas del derecho sobre todos los pts y rem. Coser el borde del cuello en el delantero central hasta los MP – coser orilla con orilla por el lado derecho con puntadas pequeñas. Coser las orillas del borde del cuello a los 17 pts rematados. Pulóver: Montar las mangas. Coser las mangas y los lados utilizando los pts de orillo como margen de costura. Chaleco: Coser los lados utilizando los pts de orillo como margen de costura. Todas las medidas de los diagramas son en cm. Todas las medidas son de lado a lado. |
|||||||
Explicaciones del diagrama |
|||||||
|
|||||||
 |
|||||||
 |
|||||||
¿Terminaste este patrón?Entonces, etiqueta tus fotos con #dropspattern o envíalas a la galería #dropsfan. ¿Necesitas ayuda con este patrón?Encontrarás 19 videos tutoriales, un espacio para comentarios/preguntas y más visitando la página del patrón en garnstudio.com © 1982-2026 DROPS Design A/S. Todos los derechos reservados. Este documento, incluyendo todas sus sub-secciones, está protegido por los derechos de autor (copyright). Lee más acerca de lo que puedes hacer con nuestros patrones en la parte de abajo de cada patrón de nuestro sitio. |
|||||||


Con más de 40 años en el diseño de modelos de punto y de ganchillo, DROPS Design ofrece una de las más vastas colecciones de patrones gratuitos en el internet - traducidos en 17 idiomas. Al día de hoy, contamos con 324 catálogos y 12290 patrones - de los cuales 11685 están traducidos en español.
Nosotros trabajamos con mucho esmero para brindarte lo mejor que las labores de punto y ganchillo tienen para ofrecer,inspiración y consejos, así como hilos de magnífica calidad a precios increíbles! Te gustaría usar nuestros patrones para otro fin además del uso personal? Puedes leer acerca de lo que estás permitida a hacer en el texto de Copyright en la parte de abajo de todos nuestros patrones. Felices labores!
Escribe un comentario sobre DROPS 85-16
¡Nos encantaría saber qué piensas acerca de este patrón!
Si quieres escribir una pregunta referente al patrón, por favor asegúrate de elegir la categoría correcta en el formulario debajo, para acelerar el proceso de respuesta. Los campos obligatorios están marcados con un *.