
Categorías populares
¿Buscas un hilo?


Comentarios / Preguntas (18)
![]() Ellen escribió:
Ellen escribió:
Jeg er usikker på hva dere mener med størrelsene når det står: STØRRELSE: 2 - 3/5 - 6/9 - 10/12 år Betyr det størrelse 2-3 år, 5-6 år, 9-10 år og 12 år. Eller betyr det 2 år, 3/5 år, 6/9 år og 10/12 år. Jeg oppfattet det første, så jeg tenker å strikke 5-6 år. Blir det riktig?
16.03.2026 - 15:23DROPS Design respondió:
Hei Ellen, Minste størrelse er til 2 år, neste størrelse 3-5 år, så 6-9 år og største størrelse 10-12 år. Vennlig hilsen, Drops Team.
17.03.2026 - 06:40
![]() Birgit escribió:
Birgit escribió:
Udtagning, er det 7 masker på hver side af midten
18.10.2025 - 10:11DROPS Design respondió:
Hei Birgit. Det økes på innsiden av de ytterste 7 maskene mot midt foran. Når arbeidet måler 8-8-9-9 cm fra der merketråden ble satt, økes det 1 maske i hver side mot midt foran – les ØKETIPS (= 2 masker økt). Øk slik på hver 4.pinne (dvs på annenhver pinne fra retten) totalt 8 ganger i hver side = 8 masker i hver side = 16 økte masker. mvh DROPS Design
20.10.2025 - 14:34
![]() Alicia escribió:
Alicia escribió:
Fabulous pattern but I am struggling with the increases. My first yo is between p stitches - p, yo, p On the next knit row how do I manage these? I’ve read the comments and I’m still not getting it. At some point there has to be 3 p and 3 k stitches to maintain the pattern. Is that right? Or is the whole pattern moved over by 1 stitch ? thanks for your help.
01.08.2025 - 01:35DROPS Design respondió:
Dear Alicia, you are working the pattern with 1 edge stitch on each side, so that increasing inside 7 sts will be between the 3rd and 4th stitch in A.1; the new stitches will be worked as en extension of the pattern to the right at the beg of the row and to the left at the end of the row, so that the first 2 sts increased will be worked as 2nd then 1st stitch at the beg of row / 1st and 2nd stitch at the end of the row, and the 6 sts in pattern after/before the edge stitch continue as before. Happy knitting!
01.08.2025 - 08:18
![]() Deni escribió:
Deni escribió:
Hi,In regards to increasing,is it done right after the first(garter)stitch at the beginning of the row and right before the garter stitch at the end of the row? Thank you.
23.05.2025 - 07:45DROPS Design respondió:
Dear Deni, the increases are worked inside the first and last 7 sts - see INCREASE TIP. So work the first 7 sts as before, increase 1 stitch, work remaining sts as before until 7 sts remain, increase 1 stitch, work the last 7 sts as before. Happy knitting!
23.05.2025 - 09:12
![]() K And K escribió:
K And K escribió:
Hi. Thanks for answering. I noticed that I had wrong cast on. I'm trying again. Another question. At INCREASES ON EACH SIDE TOWARDS MID FRONT, should I yarn over at the very first stitch? I'm making size-4 so I have 88 stitches(29 at right side, 30 at mid, 29 at left side) now. Do I have to yarn over at the stitch 1, or stitch 30(first stitch of MID-SECTION)? And, if I yarn over 1st stitch, do I have to yarn over the same stitch? Or at 3rd stitch(knit the 1st and new stitch).
07.02.2025 - 05:33DROPS Design respondió:
Dear K and K, increase as explained under INCREASE TIP (for sides of face-opening): at the beg of the pattern, this means increase from RS after the first 7 sts and before the last 7 sts and incorporate the new stitches in pattern as explained. Happy knitting!
07.02.2025 - 15:48
![]() K And K escribió:
K And K escribió:
Hi again. If the first row(the purl row) is not included in pattern, should I skip the first row when I knit up the stitches? And I knitted over 40 rows, 9cm. But if I have to knit up the stitches only 25, should I skip some rows?
23.01.2025 - 12:21DROPS Design respondió:
Dear K and K, we don't pick up stitches in every row, since the opening will be too tight then. If you have 40 rows in 9 cm you are working very tight (since the gauge is 30 rows = 10cm) so you will need to adjust the number of stitches to knit up accordingly. So pick up in approx. 3 of every 4 rows or something similar, so that the number of stitches is correct for working A.1 later on. You don't need to skip the first row. Happy knitting!
25.01.2025 - 20:20
![]() Peppi escribió:
Peppi escribió:
En ymmärrä, miten lisäykset neulotaan mukaan kuvioon?
22.01.2025 - 20:47DROPS Design respondió:
Hei, lisätyillä silmukoilla neulotaan piirroksen A.1 mallineuletta seuraavasti: Neulo 2 ensimmäisellä lisätyllä silmukalla sileää neuletta, neulo seuraavilla 2 lisätyllä silmukalla ainaoikeaa, neulo seuraavilla 2 lisätyllä silmukalla sileää neuletta jne.
24.01.2025 - 18:33
![]() K And K escribió:
K And K escribió:
Hi. Thanks for the nice pattern. I have a few questions. 1. At the beginning, is the very first row not included in pattern? Should I purl all stitches including the edge? 2. For the 1 edge stitch in GARTER STITCH - do I have to knit all the edge stitches? 3. When I knit the edges, knit rows have holes but purl rows don\'t. Should I knit up stitches only odd rows(except the first purl row)? 4. When should I knit up stitches? At the right side, or the wrong side?
21.01.2025 - 07:48DROPS Design respondió:
Dear K And K, the very first row purled from WS is worked before starting pattern ie not included in diagram and worked extra. When working 1 edge stitch in garter stitch, knit this stitch from both right and wrong side. Pattern A.1 is like broken rib, ie, seen from RS, 2 sts in stocking stitch (first 2 sts A.1), 2 sts in garter stitch (last 2 sts A.1). Happy knitting!
21.01.2025 - 16:21
![]() Ouahida escribió:
Ouahida escribió:
Hi please I don’t understand how to do the increases 😴
28.12.2024 - 10:23DROPS Design respondió:
Dear Ouahida, as you work back and forth, you should see the edges that form the opening of the balaclava. The stitches closest to this face opening (or mid-front) would be the outermost stitches (from the mid back of the piece). So before /after the last and first 7 stitches in the row, you will increase 1 stitch (= 2 in total in the row). This increase is worked 8 times in total on alternate right side rows (you never increase on the wrong side and only increase in one of every two right side rows). The yarn overs are worked twisted and then worked in the pattern: alternating between stocking stitch or garter stitch depending on the stitches before/after them. Happy knitting!
30.12.2024 - 01:29
![]() Argene Revelant escribió:
Argene Revelant escribió:
Bonjour, j'aime beaucoup vos modèles, mais, pour celui-ci, je ne vois pas le diagramme. Merci
28.01.2024 - 15:32DROPS Design respondió:
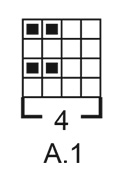
Bonjour Mme Revelant et merci. Le diagramme A.1 se trouve tout à la fin des explications, il se tricote sur 4 mailes et 4 rangs. Bon tricot!
29.01.2024 - 12:14
|
|||||||
Northern Spirit Kids#northernspiritbalaclava |
|||||||
 |
 |
||||||
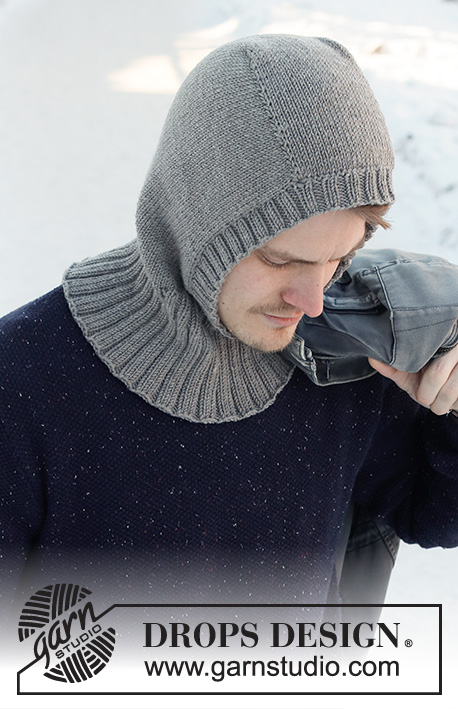
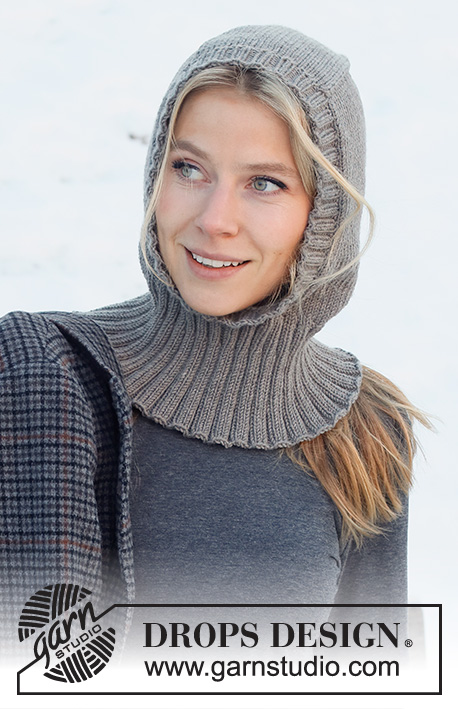
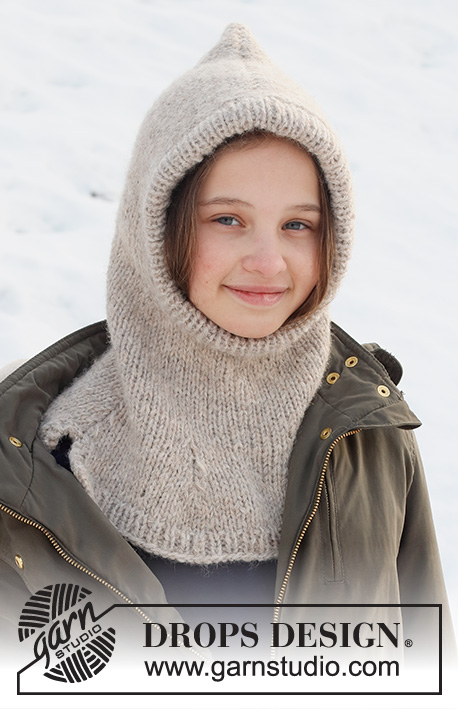
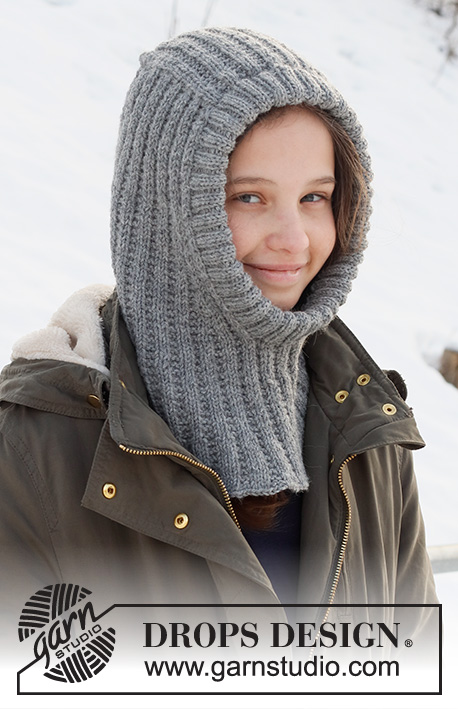
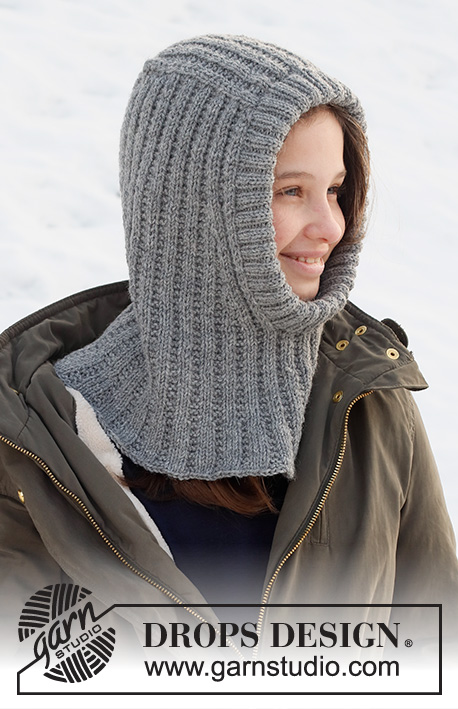
Gorro / balaclava de punto para niños en DROPS Lima. La pieza está tejida con patrón texturado y orilla en resorte. Tallas 2 a 12 años.
DROPS Children 37-28 |
|||||||
|
EXPLICACIONES PARA REALIZAR EL PATRÓN: ------------------------------------------------ SURCO/PUNTO MUSGO (tejido de ida y vuelta): Tejer todas las hileras de derecho. 1 surco en altura = tejer 2 hileras de derecho. PATRÓN: Ver diagrama A.1. El diagrama muestra todas las hileras del patrón vistas por el lado derecho. TIP PARA AUMENTAR (aplicar a los lados de la abertura del rostro): Aumentar en el lado interno de los 7 puntos más exteriores a cada lado. ¡Todos los aumentos son hechos por el lado derecho! Aumentar 1 punto haciendo 1 lazada. En la hilera siguiente (lado revés) tejer las lazadas retorcidas para evitar que se formen agujeros. Los puntos aumentados se tejen dentro de A.1, es decir, los primeros 2 puntos se tejen en punto jersey, los 2 siguientes en punto musgo, los 2 siguientes en punto jersey, etc. TIP PARA DISMINUIR (aplicar al centro de la parte de atrás): ¡Todas las disminuciones son hechas por el lado derecho! Comenzar 4 puntos antes del hilo marcador en el centro de la parte de atrás, tejer 2 puntos juntos de derecho, tejer 4 puntos derechos (el hilo marcador está entre estos 4 puntos), deslizar 1 punto como de derecho, tejer 1 derecho y pasar el punto deslizado por encima del punto tejido (= 2 puntos disminuidos). TIP PARA REMATAR: Para evitar que la orilla de remate quede apretada, se puede rematar con una aguja de tamaño más grande. Si la orilla aun estuviese apretada, hacer 1 lazada después de aprox. cada 8º punto al mismo tiempo que se rematan los puntos; rematar las lazadas como puntos normales. ------------------------------------------------ COMENZAR LA PIEZA AQUÍ: ------------------------------------------------ BALACLAVA – RESUMEN DE LA PIEZA: La sección central se teje de ida y vuelta con aguja circular, a partir del centro del frente y hacia atrás. Se levantan puntos a cada lado de esta sección. La pieza es continuada de ida y vuelta antes de montar puntos para el cuello en el centro del frente. El resto de la balaclava es terminado en redondo con aguja circular. Para terminar, se teje una orilla en resorte alrededor de la abertura del rostro. SECCIÓN CENTRAL: Montar 24-28-32-32 puntos (incluyendo 1 punto de orillo a cada lado) con aguja circular tamaño 3.5 mm y Lima. Tejer 1 hilera de revés por el lado revés. La hilera siguiente se teje de la manera siguiente por el lado derecho: 1 punto de orillo en PUNTO MUSGO – leer descripción arriba, tejer A.1 hasta que resten 3 puntos, tejer los primeros 2 puntos de A.1 (de modo que el patrón comience y termine de la misma manera) y terminar con 1 punto de orillo en punto musgo. Continuar este patrón. ¡RECORDAR MANTENER LA MISMA TENSIÓN DE TEJIDO DE LA MUESTRA! Cuando la pieza mida 9-11-11-13 cm, rematar 1 punto de orillo a cada lado = 22-26-30-30 puntos. Cortar el hilo. Después tejer la capucha como está descrito abajo. CAPUCHA: Ahora levantar puntos a cada lado de la sección central en la hilera siguiente por el lado derecho de la manera siguiente: Levantar 21-25-25-29 puntos a lo largo del lado de la sección central en el interior de 1 punto de orillo, continuar A.1 como antes sobre los 22-26-30-30 puntos en la aguja y levantar 21-25-25-29 puntos a lo largo del otro lado de la sección central en el interior de 1 punto de orillo = 64-76-80-88 puntos. Insertar 1 hilo marcador en el centro de la hilera (= centro de la parte de atrás). Dejar que el hilo siga la labor a medida que se teje; será usado más tarde cuando se disminuya en el centro de la parte de atrás. ¡LA PIEZA ES AHORA MEDIDA A PARTIR DE DONDE EL HILO MARCADOR FUE INSERTADO! Continuar A.1 de ida y vuelta con 1 punto de orillo en punto musgo a cada lado del centro del frente – el patrón debe corresponder con el patrón en la sección central. Después aumentar a cada lado del centro del frente y disminuir en el centro de la parte de atrás como está descrito abajo – ¡leer las secciones de cómo aumentar y disminuir antes de continuar! AUMENTOS A CADA LADO DEL CENTRO DEL FRENTE: Cuando la pieza mida 8-8-9-9 cm a partir de donde el hilo marcador fue insertado, aumentar 1 punto a cada lado del centro del frente – leer TIP PARA AUMENTAR (= 2 puntos aumentados). Aumentar así a cada 4ª hilera (es decir, a cada 2ª hilera por el lado derecho) un total de 8 veces a cada lado. DISMINUCIONES CENTRO DE LA PARTE DE ATRÁS: AL MISMO TIEMPO, cuando se esté a punto de aumentar por 5ª vez, disminuir 2 puntos en el centro de la parte de atrás – leer TIP PARA DISMINUIR. Disminuir así a cada 4ª hilera un total de 4 veces (los aumentos y disminuciones terminan al mismo tiempo). Después de todos los aumentos y disminuciones, hay 72-84-88-96 puntos. Cuando la pieza mida 18-18-19-19 cm a partir de donde el hilo marcador fue insertado, montar puntos en el centro del frente para el cuello; probarse la balaclava y tejer hasta la longitud deseada. Montar 12-12-16-16 puntos al final de la hilera siguiente por el lado derecho = 84-96-104-112 puntos. Retirar el hilo marcador e insertar 1 marcador en la hilera. LA PIEZA ES AHORA MEDIDA A PARTIR DE ESTE MARCADOR. Tejer el cuello como está descrito abajo. CUELLO: Continuar tejiendo en redondo con A.1 sobre todos los puntos – asegurarse que el patrón corresponda en toda la labor en redondo. Cuando la pieza mida 5-6-7-8 cm a partir del marcador en el cuello, aumentar todas las secciones de 2 derechos a 3 derechos haciendo 1 lazada después de todos los 2 derechos (las lazadas se tejen retorcidas de derecho en la vuelta siguiente) = 105-120-130-140 puntos. Continuar tejiendo hasta que la pieza mida 8-9-10-11 cm a partir del marcador. Ahora aumentar todos los 2 puntos musgo a 3 puntos musgo haciendo 1 lazada después de todos los 2 puntos musgo = 126-144-156-168 puntos. Tejer 1 vuelta con 3 derechos, 3 puntos musgo (las lazadas se tejen retorcidas para evitar que se formen agujeros). Tejer 1 vuelta de revés, después rematar flojo de derecho – leer TIP PARA REMATAR. La pieza mide aprox. 32-34-36-38 cm a partir del centro de la sección central para abajo. ORILLA ALREDEDOR DE LA ABERTURA DEL ROSTRO: Comenzar por el lado derecho en la parte de abajo, donde se montaron puntos para el cuello, y levantar 136-140-148-152 puntos alrededor de la abertura, en el interior de 1 punto de orillo usando aguja circular corta tamaño 3 mm y Lima. El número de puntos debe ser múltiplo de 4. Tejer en resorte en redondo (2 derechos, 2 reveses) durante 5-6-6-6 cm – asegurarse que el resorte corresponda con los puntos en la sección central y en los puntos montados en el cuello. Rematar con derecho sobre derecho y revés sobre revés – leer TIP PARA REMATAR. Plegar el resorte en dos para el lado de adentro y coser. Para evitar que la orilla quede apretada y se vire, es importante que la costura sea elástica. |
|||||||
Explicaciones del diagrama |
|||||||
|
|||||||
 |
|||||||
¿Terminaste este patrón?Entonces, etiqueta tus fotos con #dropspattern #northernspiritbalaclava o envíalas a la galería #dropsfan. ¿Necesitas ayuda con este patrón?Encontrarás 25 videos tutoriales, un espacio para comentarios/preguntas y más visitando la página del patrón en garnstudio.com © 1982-2026 DROPS Design A/S. Todos los derechos reservados. Este documento, incluyendo todas sus sub-secciones, está protegido por los derechos de autor (copyright). Lee más acerca de lo que puedes hacer con nuestros patrones en la parte de abajo de cada patrón de nuestro sitio. |
|||||||


Con más de 40 años en el diseño de modelos de punto y de ganchillo, DROPS Design ofrece una de las más vastas colecciones de patrones gratuitos en el internet - traducidos en 17 idiomas. Al día de hoy, contamos con 324 catálogos y 12290 patrones - de los cuales 11673 están traducidos en español.
Nosotros trabajamos con mucho esmero para brindarte lo mejor que las labores de punto y ganchillo tienen para ofrecer,inspiración y consejos, así como hilos de magnífica calidad a precios increíbles! Te gustaría usar nuestros patrones para otro fin además del uso personal? Puedes leer acerca de lo que estás permitida a hacer en el texto de Copyright en la parte de abajo de todos nuestros patrones. Felices labores!
Escribe un comentario sobre DROPS Children 37-28
¡Nos encantaría saber qué piensas acerca de este patrón!
Si quieres escribir una pregunta referente al patrón, por favor asegúrate de elegir la categoría correcta en el formulario debajo, para acelerar el proceso de respuesta. Los campos obligatorios están marcados con un *.