
Popular categories
Looking for a yarn?































Comments / Questions (21)
 Jasmine wrote:
At what point do you join in the round for this pattern?
15.10.2026 - 23:33DROPS Design answered:
Dear Jasmine, you join in the round right after casting on your stitches, as the piece is worked in the round from the very beginning. Happy knitting!
16.10.2026 - 02:10
 Line wrote:
Merci piur votre reponse mais le video pour une torsade ne correspond pas au diagramme. Je vais suivre la video
21.08.2026 - 16:59DROPS Design answered:
Bonjour Line, c'est exact, la vidéo montre comment tricoter ce type de torsades, mais ici on la tricote différemment, il vous suffit juste alors de suivre le diagramme pour obtenir un résultat analogue, mais en suivant la vidéo, vous devriez obtenir un résultat similaire. Bon tricot!
24.08.2026 - 07:33
Line wrote:
Je ne comprends pas quand vous dites faire une jete entre 2 mailles, au tour suivant tricoter le jete a l endroit pour qu il forme un trou pourriez vous mieux expliquer Merci
21.08.2026 - 03:53DROPS Design answered:
Bonjour Line, dans cette vidéo, nous montrons comment tricoter ce type de petites torsades, on la tricote dans la vidéo en allers et retours, le jeté sera donc tricoté à l'envers, comme vous tricotez ici en rond, tricotez simplement le jeté à l'endroit. Bon tricot!
21.08.2026 - 07:10
 Kirsti Eidheim wrote:
Hvis jeg hopper over masken og går videre til neste , så vil masken rakne. Skal det være slik ?
09.07.2026 - 20:21DROPS Design answered:
Hei igjen, Kirsti, Du hopper ikke over en maske. Den masken er strikket vrang (som er neste symbol i diagrammet). Mvh, Drops Team.
10.07.2026 - 06:15
Kirsti Eidheim wrote:
Hvordan skal jeg håndtere «denne ruten er ingen maske, gå videre til neste symbol i diagrammet ? Skjønner ikke hva jeg skal gjøre.
08.07.2026 - 21:51DROPS Design answered:
Hei Kjersti, Da går du rett til neste symbol i diagrammet og strikker videre derfra. Hilsen Drops Team.
09.07.2026 - 05:38
 Sabine wrote:
Is dit telpatroon ook uitgeschreven? Ik snap een telpatroon niet maar zou dit graag maken.
21.04.2026 - 10:31DROPS Design answered:
Dag Sabine,
We hebben helaas alleen een telpatroon en niet een uitgeschreven versie. Waar loop je precies tegenaan bij het breien van het patroon. Heb je de veel gestelde vragen al bekeken?
22.04.2026 - 13:28
 Question wrote:
I have been trying to get a pattern for a Pillow cover without Susccess you help me?
30.04.2025 - 08:04
 Trautwein wrote:
Ich stricke die kissenhülle 207-54 In der Anleitung heisst es ... Es wird in runden gearbeitet. Bei der Erklärung zum Diagramm steht hinreihe und Rückreise. Beim stricken in runden gibt es doch keine hin-und Rückreihen Ich bin irritiert. Ich bitte um Aufklärung. Vielen Dank Karin Trautwein
13.04.2025 - 17:05DROPS Design answered:
Liebe Frau Trautwein, Sie sind ja recht, es gibt hier keine Rückreihe, stricken Sie alle Reihen wie Hin-Reihen da die Arbeit in Runden gestrickt wird. Viel Spaß beim Stricken!
23.04.2025 - 10:18
 Claudette wrote:
How do you ensure cast on edges line up to centre cable pattern when seeming edges together?
13.10.2024 - 01:30DROPS Design answered:
Dear Claudette, insert the cushion and ensure the cable pattern is right in the center of the cushion. Then, before sewing the piece, join the edges together with markers to align the piece correctly and then sew it all together. Happy knitting!
13.10.2024 - 23:51
 Marie-Jeanne Wolter wrote:
Mir gefällt das Kissen Super
11.07.2024 - 17:11
|
||||||||||||||||||||||||||||
Cabled Comfort#cabledcomfortpillow |
||||||||||||||||||||||||||||
 |
 |
|||||||||||||||||||||||||||
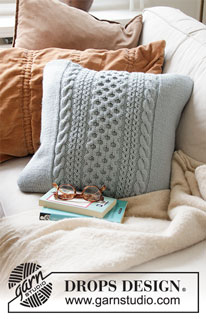
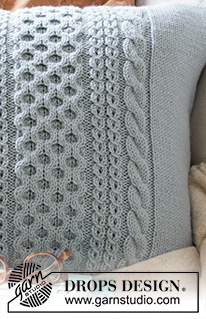
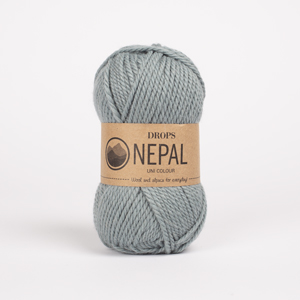
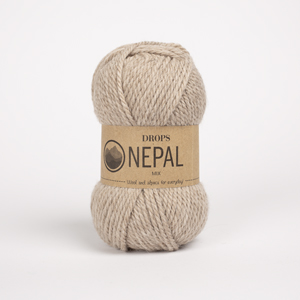
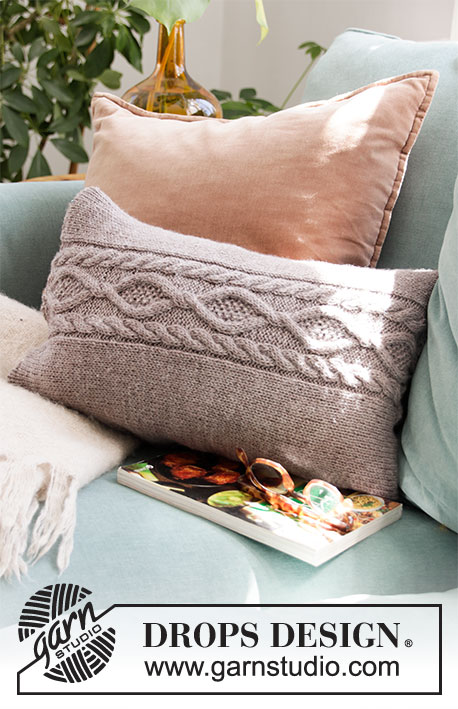
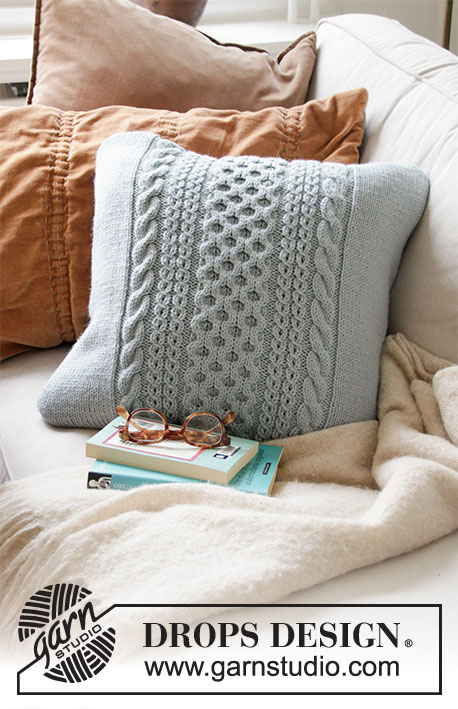
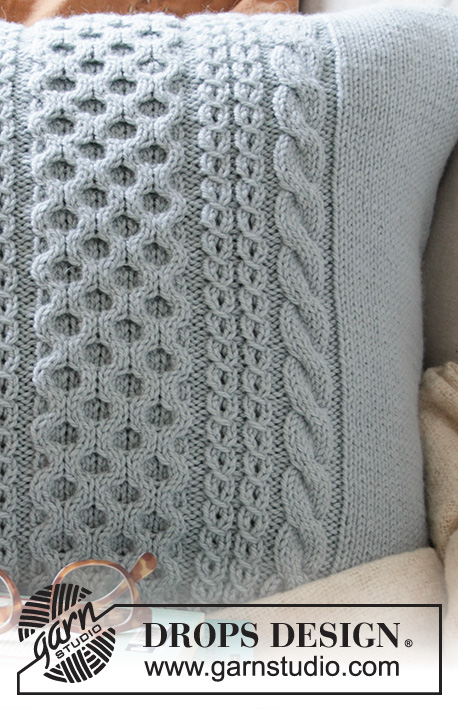
Knitted cushion cover with cables in DROPS Nepal.
DROPS 207-54 |
||||||||||||||||||||||||||||
|
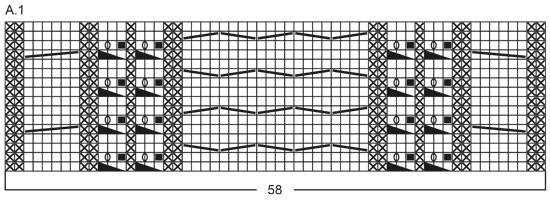
------------------------------------------------------- EXPLANATIONS FOR THE PATTERN: ------------------------------------------------------- RIDGE/GARTER STITCH (worked in the round): 1 ridge = 2 rounds; Knit 1 round and purl 1 round. PATTERN: See diagram A.1 ------------------------------------------------------- START THE PIECE HERE: ------------------------------------------------------- CUSHION COVER – SHORT OVERVIEW OF THE PIECE: The piece is worked in the round with circular needle and sewn together top and bottom to finish. There is a cable-pattern on the front and stocking stitch on the back. COVER: Cast on 164 stitches with circular needle size 4.5 mm and Nepal. Work 1 RIDGE – see description above. The next round is worked as follows: 8 stitches in stocking stitch, A.1 over the next 58 stitches and stocking stitch over the remaining 98 stitches. Continue like this until the piece measures 44 cm. REMEMBER THE KNITTING TENSION! Work 1 ridge over all stitches, then loosely cast off. ASSEMBLY: Sew the cast-on edge together in the outermost loop of the outermost stitch. Insert the cushion (make sure the cable-pattern is mid front) and sew the cast-off edge together. |
||||||||||||||||||||||||||||
Diagram explanations |
||||||||||||||||||||||||||||
|
||||||||||||||||||||||||||||
 |
||||||||||||||||||||||||||||
Have you finished this pattern?Tag your pictures with #dropspattern #cabledcomfortpillow or submit them to the #dropsfan gallery. Do you need help with this pattern?You'll find 10 tutorial videos, a Comments/Questions area and more by visiting the pattern on garnstudio.com. © 1982-2026 DROPS Design A/S. We reserve all rights. This document, including all its sub-sections, has copyrights. Read more about what you can do with our patterns at the bottom of each pattern on our site. |
||||||||||||||||||||||||||||






With over 40 years in knitting and crochet design, DROPS Design offers one of the most extensive collections of free patterns on the internet - translated to 17 languages. As of today we count 333 catalogues and 12525 patterns translated into English (UK/cm).
We work hard to bring you the best knitting and crochet have to offer, inspiration and advice as well as great quality yarns at incredible prices! Would you like to use our patterns for other than personal use? You can read what you are allowed to do in the Copyright text at the bottom of all our patterns. Happy crafting!
Post a comment to pattern DROPS 207-54
We would love to hear what you have to say about this pattern!
If you want to leave a question, please make sure you select the correct category in the form below, to speed up the answering process. Required fields are marked *.