
Popular categories
Looking for a yarn?


Comments / Questions (50)
![]() Anne-Christine wrote:
Anne-Christine wrote:
Je pense que je viens enfin de comprendre!! Merci
16.12.2024 - 15:06
![]() Anne-Christine wrote:
Anne-Christine wrote:
Je pense que le diagramme M7 est erroné. Les "jours" sont supposés se suivre en quinconce, donc il faudrait qu'il y ait toujours 6 mailles entre deux mailles ensemble et le jeté, mais le diagramme passe de six mailles à cinq. Je n'arrête pas de défaire et de recommencer....
14.12.2024 - 23:50DROPS Design answered:
Bonjour Anne-Christine, on va diminuer dans chaque M.7 (cf réponse précédente), ainsi, vous aurez toujours de moins en moins de mailles dans chaque M.7 et entre chacun des jours du motif ajouré. Placer un marqueur entre chaque diagramme à répéter peut vous aider à mieux répéter le diagramme/motif et ainsi vérifier votre nombre de mailles. Bon tricot!
16.12.2024 - 09:42
![]() Anne-Christine wrote:
Anne-Christine wrote:
Excusez-moi, mais je ne comprends pas bien votre réponse. Donc, dans le motif M&, je ne dois diminuer (les diminutions en gras dans le diagramme)qu'en début ou en fin de rang, c'est ça?
13.12.2024 - 20:19DROPS Design answered:
Bonjour Anne-Christine, vous devez répéter M.7 (question précédente) en le répétant tout le rang; placez un marqueur entre chaque motif, le nombre de mailles de chaque M.7 va diminuer progressivement: de 16 m au 1er rang de M.7 il restera 5 m dans chaque M.7 au dernier rang, quand toutes les diminutions sont faites. Bon tricot!
16.12.2024 - 09:41
![]() Anne-Christine wrote:
Anne-Christine wrote:
Quand on tricote M 7, faut il faire les diminutions en gras (2 mailles ensemble) juste en début de rang après la bordure, ou faut-il les répéter tout le long du motif?
12.12.2024 - 19:17DROPS Design answered:
Bonjour Anne-Christine, continuez à diminuer dans M.7 comme dans les autres motifs si vous avez les mailles correspondantes (autrement dit soit au début soit à la fin de M.7 en fonction du rang tricoté), en même temps, pensez à diminuer 1 maille pour l'encolure de chaque côté; si vous n'avez pas suffisamment de mailles dans les motifs M.7 côté encolure pour le point ajouré/la diminution du diagramme, tricotez ces mailles en jersey. Bon tricot!
13.12.2024 - 07:37
![]() Anne-Christine wrote:
Anne-Christine wrote:
Pardon, je voulais parler du motif M3B
04.12.2024 - 20:42DROPS Design answered:
Bonjour Anne-Christine, la réponse précédente reste pertinente: répartissez vos mailles comme cela est plus simple pour vous et/ou placez un marqueur entre chaque diagramme pour mieux vous repérer. Bon tricot!
05.12.2024 - 08:16
![]() Anne-Christine wrote:
Anne-Christine wrote:
Bonjour! Je ne comprends pas comment tricoter le motif M2B sur les manches avec les aiguilles doubles pointes. Faut-il que je décale les aiguilles? Merci!
04.12.2024 - 20:39DROPS Design answered:
Bonjour Anne-Christine, vous pouvez placer vos mailles sur les aiguilles doubles pointes de sorte que les motifs soient entiers, et/ou placer un marqueur entre chaque motif pour bien les repérer et mieux vous y retrouver. Quand on tricote un diagramme en rond, on tricote toujours sur l'endroit, on lit tous les tours de droite à gauche, ainsi, les rangs pairs de M.2 vont se tricoter à l'endroit. Bon tricot!
05.12.2024 - 08:15
![]() Yvonne wrote:
Yvonne wrote:
You end Chart M.2 on a RS row with M.2A=8sts, M.2B=14sts, and M.2C=7sts plus the button bands. You then purl the first WS row. Now the trouble starts with M.3 on the RS row with a stitch count of A=7, not 8 as at the end of M.2, B=14 is the same as at the end of M.2B, then M.3C has 8 sts, not 7 as at the end of M.2C. I think because M.3 starts with a WS row the chart was accidentally “flipped” vertically, accidentally “switching out” M.3A and M3C. Thank you for your help.
13.10.2024 - 22:57DROPS Design answered:
Dear Yvonne, the number of sts should work, you will work now M.3A over 7 sts (even if there were 8 sts in M.2A), M.3B over 14 sts, and finish the lace pattern with M.3C over 8 sts (the last stitch last repeat M.2B + the 7 sts M.2C). Note that the last row in M.2 is worked from RS and the first row in M.3 is worked from WS so that lace pattern is always worked from RS. Happy knitting!
14.10.2024 - 09:35
![]() Ariadna Rodriguez wrote:
Ariadna Rodriguez wrote:
Hola! Empezaré a tejer la prenda pero tengo una duda con la simbología, en el M7 se tejen dos puntos juntos derechos, pero en el resto de los gráficos también se tejen dos puntos juntos derechos pero con una simbolo diferente. Hay alguna diferencia entre esos dos símbolos o se hace exactamente lo mismo?
09.09.2022 - 23:09DROPS Design answered:
Hola Ariadna, se trabajan igual, pero los triángulos negros indican que se están trabajando disminuciones de puntos, mientras que las rayas implican que son para el dibujo de calados.
12.09.2022 - 23:14
![]() Nina wrote:
Nina wrote:
Jag ska börja på diagram M3B på ärmen men förstår inte hur jag ska sticka första varvet på rätsidan. Hur ska jag göra med hoptagningen som hamnar på två stickor?
09.01.2021 - 15:52DROPS Design answered:
Hei Nina. Om det er 2 masker som skal strikkes sammen, kan du fint bare løfte over 1 maske til neste pinne og så strikke de sammen. mvh DROPS design
18.01.2021 - 12:45
![]() Jo Dubbs wrote:
Jo Dubbs wrote:
You gauge this pattern at 23 sts x 36 rows in pattern sts - exactly which pattern sts? There are 7 different patterns in these directions.
15.07.2019 - 07:21DROPS Design answered:
Hi Jo Dubbs, make your gauge in stocking stitch. Happy knitting!
15.07.2019 - 08:25
|
|||||||||||||||||||
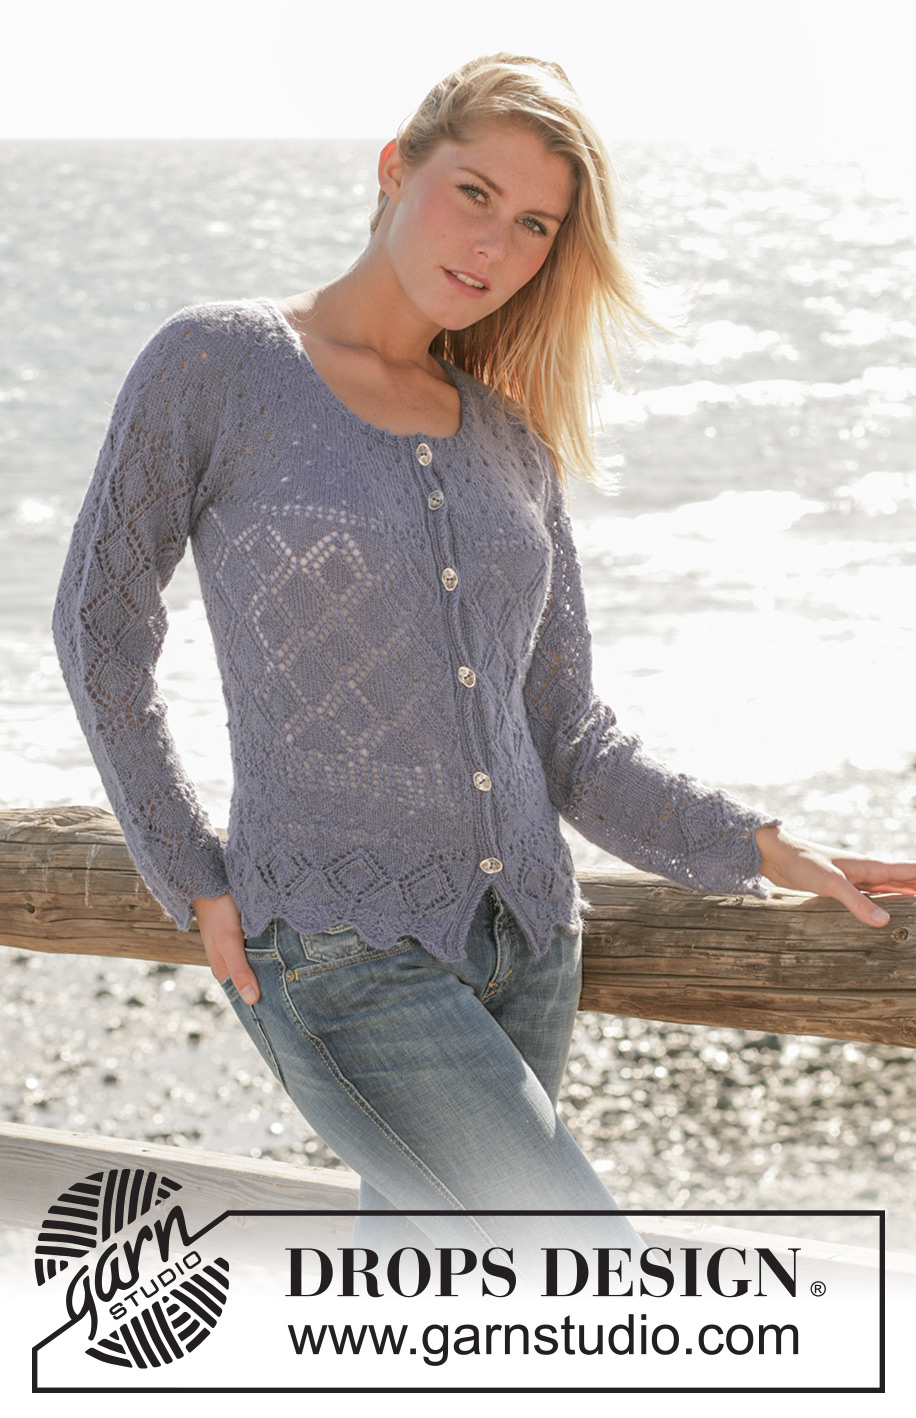
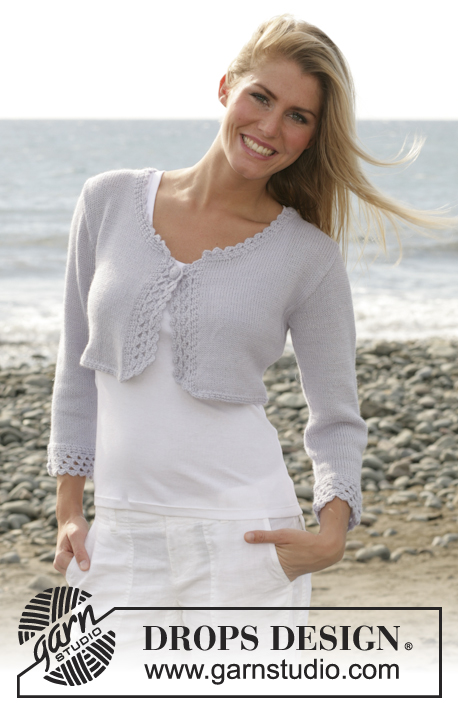
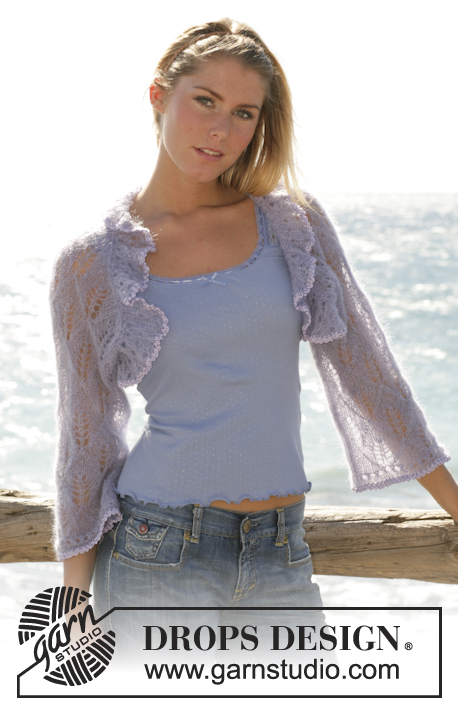
Emma's Diamonds#emmasdiamondscardigan |
|||||||||||||||||||
|
|
|||||||||||||||||||
DROPS cardigan knitted with different lace patterns in “Alpaca”.
DROPS 101-12 |
|||||||||||||||||||
|
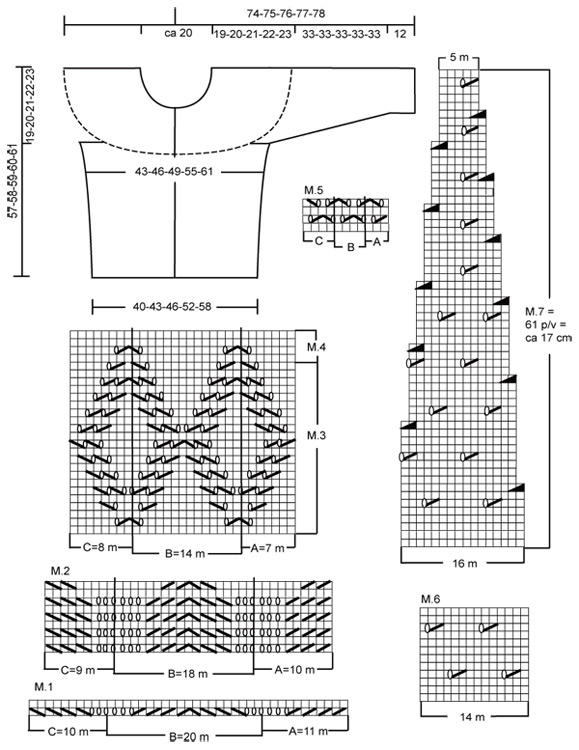
Knitting tension: 23 sts x 36 rows on needles size 3 mm in pattern sts = 10 x 10 cm . Pattern: See diagrams M.1 to M.7. The diagrams are seen from the RS. Garter sts back and forth: Knit on all rows Front band: Knit 7 front band sts each side mid front as follows (seen from the RS): 1 garter st, K1, P2, K1, P2. Continue with K over K and P over P until finished. Note! For best results knit the front band a bit tight. Button holes: Cast off for button holes at the right front band: 1 button hole = P the 3rd and 4 st from edge tog. and make a yo. Cast off for button holes when the piece measures: Size S: 9, 17, 25, 33, 41 and 47 cm Size M: 10, 18, 26, 34, 42 and 48 cm Size L: 11, 19, 27, 35, 43 and 49 cm Size XL: 12, 20, 28, 36, 44 and 50 cm Size XXL: 13, 21, 29, 37, 45 and 51 cm ___________________________________________________________________ Back and front piece: Knit the cardigan back and forth on circular needle from the mid front. Cast on loosely 275-295-315-355-395 sts (incl of 7 front band each side mid front) on circular needles size 3 mm. Purl 1 row from the WS. Continue as follows: 7 front band sts – see explanation above M.1A (= 11 sts), M.1B over the next 240-260-280-320-360 sts, M.1C (=10sts), 7 front band sts – see explanation above. After M.1 is completed there are 249-267-285-321-357 sts left. Continue as follows: 7 front band sts, M.2A (=10 sts), M.2B over the next 216-234-252-288-324 sts, M.2C (=9 sts), 7 front band sts. Remember button holes on the right front band – see explanation above. After M.2 is completed there are 197-211-225-253-281 sts left. Continue with M.3 and M.4 as follows: Purl 1 row from the WS according to diagram and then from the RS as follows: Front band as before A (=7 sts), B over the next 168-182-196-224-252 sts, C (= 8 sts) and front band as before. On the last row of M.4 inc. 2 sts for size M, evenly distributed = 197-213-225-253-281 sts. Continue to knit M.5 as follows: Purl 1 row from the WS according to diagram and then continue from the RS as follows: Front band as before M.5A (=3 sts), M.5B until 11 sts remaining, M.5C (= 4 sts) and front band as before. After M.5 is completed the piece measures approx. 12 cm. Knit M.6 1 vertical repeat – at the same time on the 1st row inc. evenly distributed number of sts to = 203-217-231-259-287 sts. After M.6 is completed knit M.5 for 3 vertical repeats – at the same time on the 1st row adjust the number of sts to 205-217-233-261-289 sts. Continue to knit M.3 again – at the same time on the 1st row inc. evenly distributed number of sts to = 211-225-239-267-295 sts. Knit M.3 for 3 vertical repeats and then finish with M.4 – on the last row of M.4 cast off for armholes as follows: Knit 51-55-58-65-72 sts (=front piece), cast off 10 sts for the arm hole, knit 89-95-103-117-131 sts (=back piece), cast off 10 sts for the armhole, knit 51-55-58-65-72 sts (=front piece). The piece measures approx. 38 cm. Put work aside and knit the sleeves Sleeve: Knit sleeves round on double pointed needles. Cast on loosely 80-80-80-100-100 sts on double pointed needles size 3 mm with Alpaca and purl 1 row. Continue to knit M.1B = 72-72-72-90-90 sts. Continue with M.2B, after M.2B is completed there are 56-56-56-70-70 sts left. Continue with M.3B and M.4B – at the same time on the last row inc. 2 sts for size XL and XXL evenly distributed = 72-72 sts. Continue with M.5B. After M.5 is completed the piece measures approx. 12 cm. Please read all of the following section before knitting it! Knit M.6 for 2 vertical repeats, then M.5 and then M.3 for four vertical repeats, finish with M.4. At the same time when the piece measures 12-12-12-14-14 cm inc. 2 sts mid underneath the sleeve on every 3-2.5-2-3-2.5 cm a total of 11-13-16-10-12 times = 78-82-88-92-96 sts – knit new sts in stocking sts. On the last row of M.4 cast off 10 sts mid underneath the sleeve = 68-72-78-82-86 sts. The sleeve measures approx. 45 cm. Put work aside and knit another sleeve. Yoke: Put the sleeve onto the same circular needle as the back and front piece – where cast off for armholes = 327-349-375-411-447 sts. Cut the thread and begin to knit from the mid right front side. K the 1st row from the RS (front band as before) at the same time adjust the number of sts to 321-337-369-401-445 sts (do not dec. in the front bands). Continue to knit M.5 as follows: Purl 1 row from the WS according to diagram and continue from the RS as follows: Front band as before, M.5A (= 3 sts), M.5B until 11 sts left, M.5C (=4 sts) and front band as before. After M.5 is completed knit and dec. according M.7 (knit front band as before) – at the same time on the 1st row adjust the number of sts to 318-334-366-398-446 sts. Neck shaping: When the back and front piece measures approx. 48-49-50-51-52 cm put 14 sts at the mid front each side on a thread or a stitch holder for shaping of the neck. Continue to cast off 1 st each side towards the neck on every other row until finish – make sure the pattern will not be displaced and knit sts not divisible into M.7 in stocking sts. When M.7 is completed approx. 60 – 90 sts are left. Knit in stocking sts until the piece measure 57-58-59-60-61 cm to the shoulder – at the same time on the last row dec. number of sts evenly distributed to 54-67-60-63-66 sts. Neck edge: Pick up approx. 30-42 sts each side of the neck (incl. the sts from the thread or the stitch holder) = approx. 114 to 150 sts (number should be divisible with 3). Knit 5 rows of Rib = K1, P2 with the front band as before. Cast off loosely with K over K and P over P. Assembly: Sew the opening underneath the sleeves. Sew on the buttons. To make sure the cardigan sits nicely - steam it well. |
|||||||||||||||||||
Diagram explanations |
|||||||||||||||||||
|
|||||||||||||||||||
 |
|||||||||||||||||||
Have you finished this pattern?Tag your pictures with #dropspattern #emmasdiamondscardigan or submit them to the #dropsfan gallery. Do you need help with this pattern?You'll find 24 tutorial videos, a Comments/Questions area and more by visiting the pattern on garnstudio.com. © 1982-2026 DROPS Design A/S. We reserve all rights. This document, including all its sub-sections, has copyrights. Read more about what you can do with our patterns at the bottom of each pattern on our site. |
|||||||||||||||||||


With over 40 years in knitting and crochet design, DROPS Design offers one of the most extensive collections of free patterns on the internet - translated to 17 languages. As of today we count 324 catalogues and 12290 patterns translated into English (UK/cm).
We work hard to bring you the best knitting and crochet have to offer, inspiration and advice as well as great quality yarns at incredible prices! Would you like to use our patterns for other than personal use? You can read what you are allowed to do in the Copyright text at the bottom of all our patterns. Happy crafting!
Post a comment to pattern DROPS 101-12
We would love to hear what you have to say about this pattern!
If you want to leave a question, please make sure you select the correct category in the form below, to speed up the answering process. Required fields are marked *.