
Popular categories
Looking for a yarn?


Comments / Questions (77)
![]() Charlotte wrote:
Charlotte wrote:
Bonjour, sur le côté droit de l'écharpe, je ne parviens pas à garder le même motif jersey en raison des diminutions. Sachant que je tricote une maille double sur l'endroit pour diminuer, j'ignore comment tricoter les mailles à l'envers pour que mon motif jersey ne soit pas décalé ensuite.
10.11.2025 - 23:39DROPS Design answered:
Bonjour Charlotte, vous devez continuer à tricoter les mailles comme avant, autrement dit les 2 mailles endroit se tricotent à l'envers sur l'envers et la maille point mousse à l'endroit, mettez-vous un repère si besoin par ex dans la 1ère/dernière maille point mousse à partir du bord pour mieux savoir comment tricoter ces mailles et ne pas "casser" le motif. Bon tricot!
11.11.2025 - 16:44
![]() Blanca wrote:
Blanca wrote:
Hola. Para la capucha, después de terminar la pieza central, el resto de pieza se teje toda a la vez? Es decir, en las instrucciones se especifica levantar 36 puntos a cada lado y 28 en la parte posterior, pero no tengo claro si debo levantar los 100 puntos y tejerlos al mismo tiempo o hacerlo por partes y unirlos luego. Muchas gracias!
08.11.2025 - 13:02
![]() Nina wrote:
Nina wrote:
Welche Nadelstärke in mm ist eine Nadel nr. 5?
28.10.2025 - 15:17DROPS Design answered:
Liebe Nina, im Deutschen sind die Nadelstärken gleich den mm. Nadel Nr. 5 ist also eine 5mm-Nadel. Viel Spaß beim Stricken!
28.10.2025 - 22:16
![]() Trude wrote:
Trude wrote:
Hei. Forskjellig teknikk på å strikke høyre side skjerf og venstre. Høyre demonstrert i video. Ikke venstre side når man skal strikke skjerf til hette. Problemet er at det blir `hull` når du strikker som beskrevet i oppskriften ordet ser ikke likt ut som på høyre side. Har dere en video jeg kan se av `flytt masker over og strikk tre sammen`. Har strikket mye i mitt liv, men dette får jeg ikke til å bli bra. Frustrert, prøvd 3ganger..
24.10.2025 - 08:40DROPS Design answered:
Hei Trude. Tenker du på 2. pinne (fra retten)/ Skjerf venstre del? Da setter du 2 masker fra hetten (som sitter på 1 tråd) over på venstre pinne, strikk disse 2 maskene sammen med 1 maske fra skjerfet rett sammen, stram tråden så det ikke blir "hull". Har dessverre ingen video på venstre del av denne oppskriften. mvh DROPS Design
03.11.2025 - 08:01
![]() DANIELA wrote:
DANIELA wrote:
Pure questo se uso i ferri normali?
02.10.2025 - 11:01DROPS Design answered:
Hi Daniela, of course you can. Happy knitting!
02.10.2025 - 11:30
![]() Le Levé wrote:
Le Levé wrote:
Bonjour, je n'arrive pas a comprendre la différence entre une maille point mousse et 2 mailles endroit pour réaliser le modèle Winter Hug Hood. Merci pour votre aide
29.09.2025 - 14:20DROPS Design answered:
Bonjour Mme Le Levé, une maille point mousse est une maille qui sera tricotée à l'endroit aussi bien sur l'endroit que sur l'envers. Une maille tricotée à l'endroit peut être tricotée à l'envers (lors des côtes du point fantaisie par ex.) ou bien glissée (lors de la bordure I-cord). Bon tricot!
30.09.2025 - 17:13
![]() Mary wrote:
Mary wrote:
Wie weich ist die angegebene Wolle? Kratzt diese?
23.09.2025 - 12:27DROPS Design answered:
Liebe Mary, die "Kratzigkeit" einer Wolle ist ein sehr individuelles Gefühl. Manch einer verträgt gar keine Wolle. Die beiden Garne sind aber sehr weich und - nach eigener Erfahrung und ich vertrage auch nicht alles - angenehm auf der Haut zu tragen. Viel Spaß beim Stricken!
23.10.2025 - 20:10
![]() Karen wrote:
Karen wrote:
Can you knit this on straight needles please? If you can please give me some instructions. Thank you Karen
20.09.2025 - 14:31
![]() Jacqueline wrote:
Jacqueline wrote:
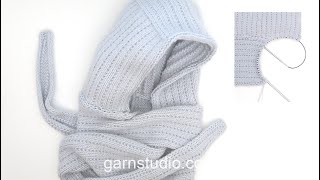
Hello! Is there a video tutorial on the hood like in the beginning of the video? thank you!
17.09.2025 - 17:58DROPS Design answered:
Hi Jacqueline, the video showing how to make this hood is available HERE. Happy knitting!
18.09.2025 - 22:24
![]() Ucume wrote:
Ucume wrote:
Hi! :) am I correct to think that u need another set of needles plus cable to knit the scarf part? In your video the knitter seems to be using two sets on that part (but the pattern doesn’t mention this) Cheers!
15.09.2025 - 11:48DROPS Design answered:
Dear Ucume, the hood stitches are placed onto stitch holders while we work the scarf. We don't need extra circular needles. This is explained in the SHORT OVERVIEW: "When the hood is finished the stitches are placed on a stitch holder." Since the number of stitches is quite high we may need more than one stitch-holder. Happy knitting!
12.10.2025 - 21:02
|
||||||||||
Winter Hug Hood#winterhughood |
||||||||||
 |
 |
|||||||||
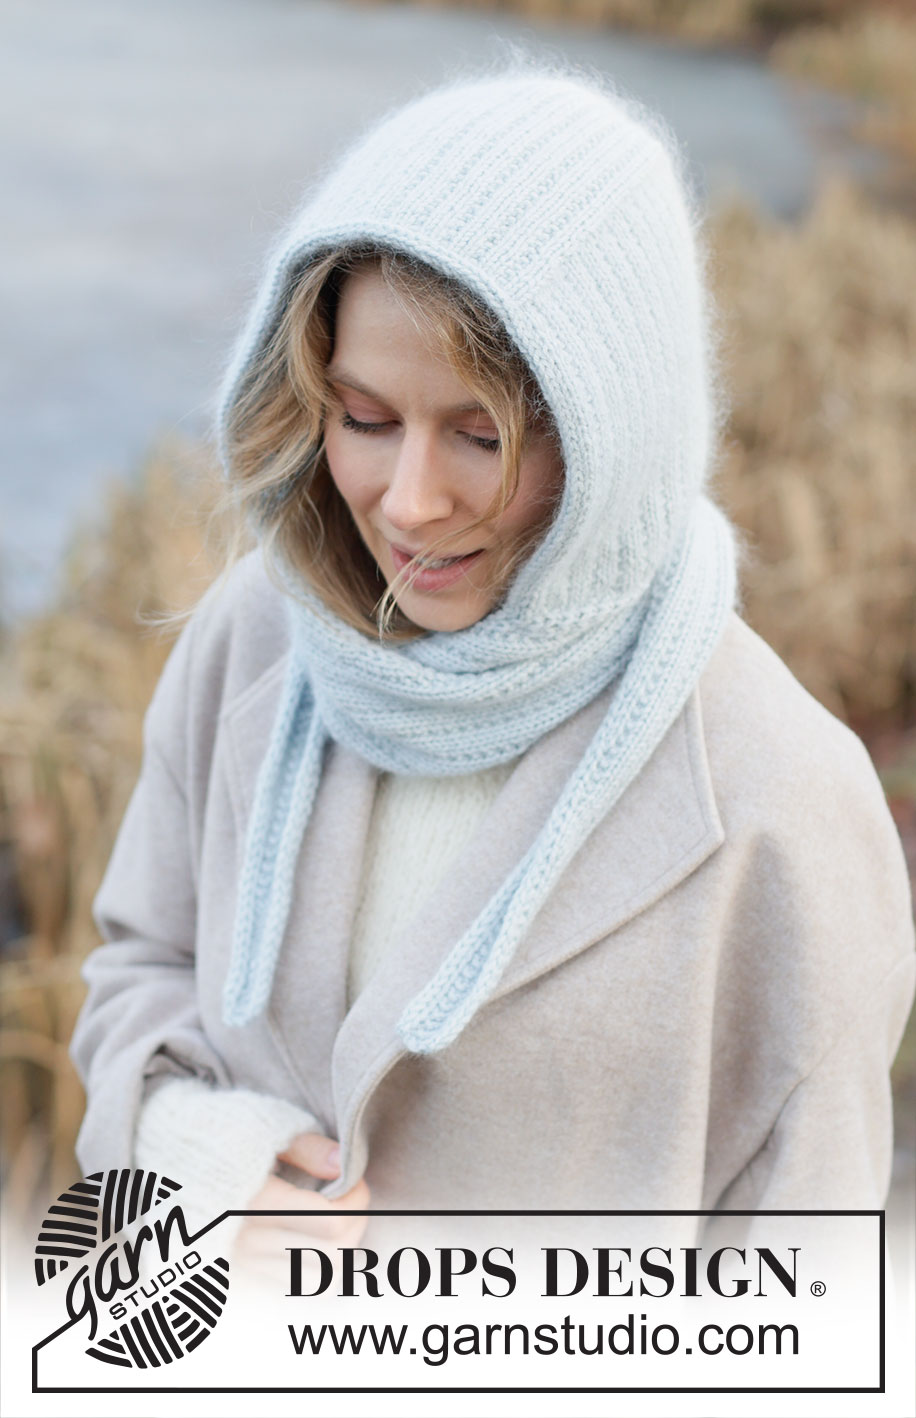
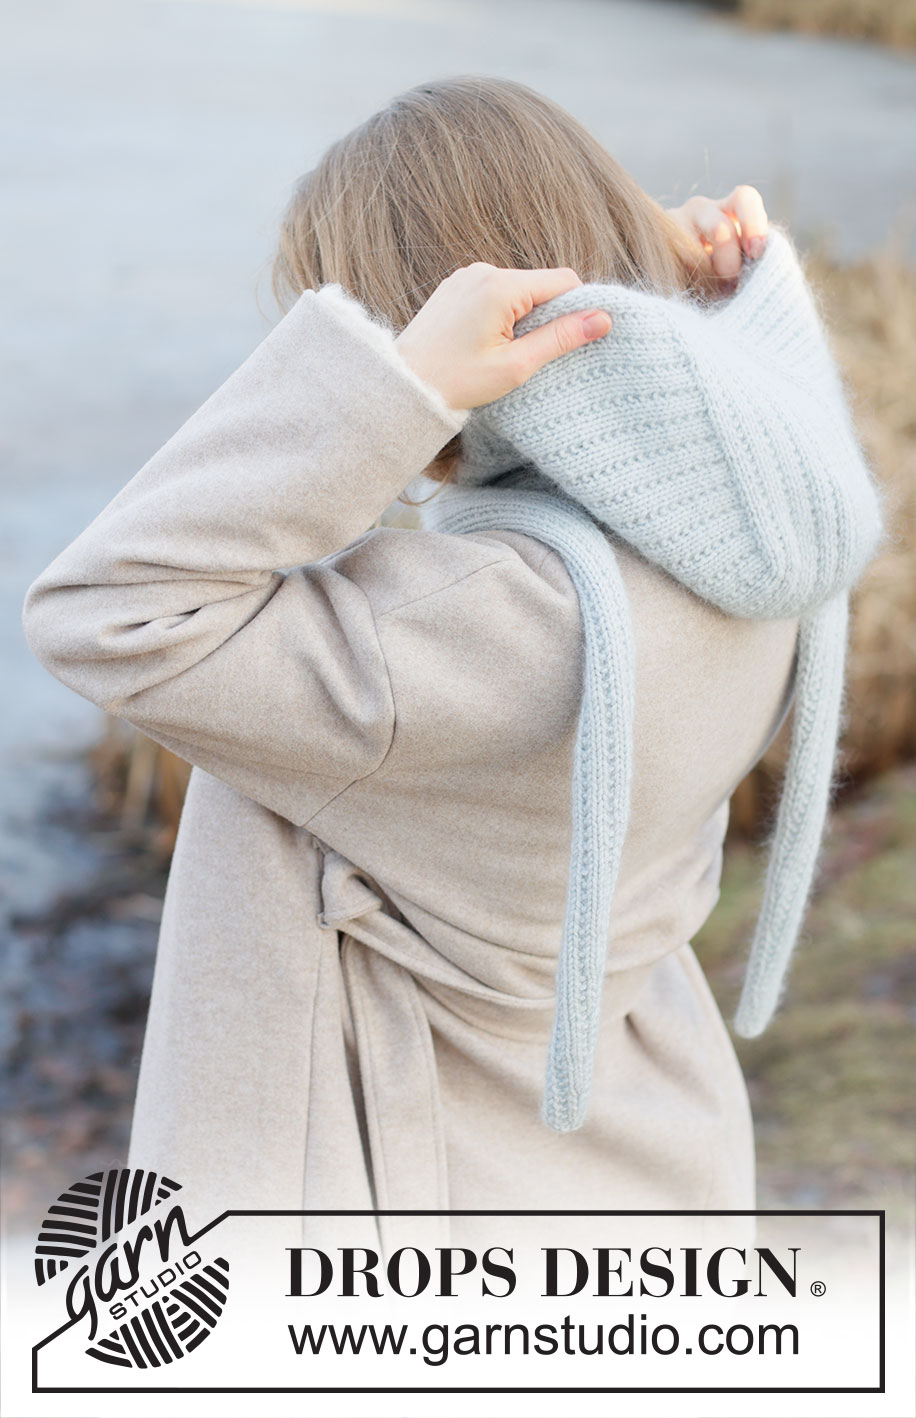
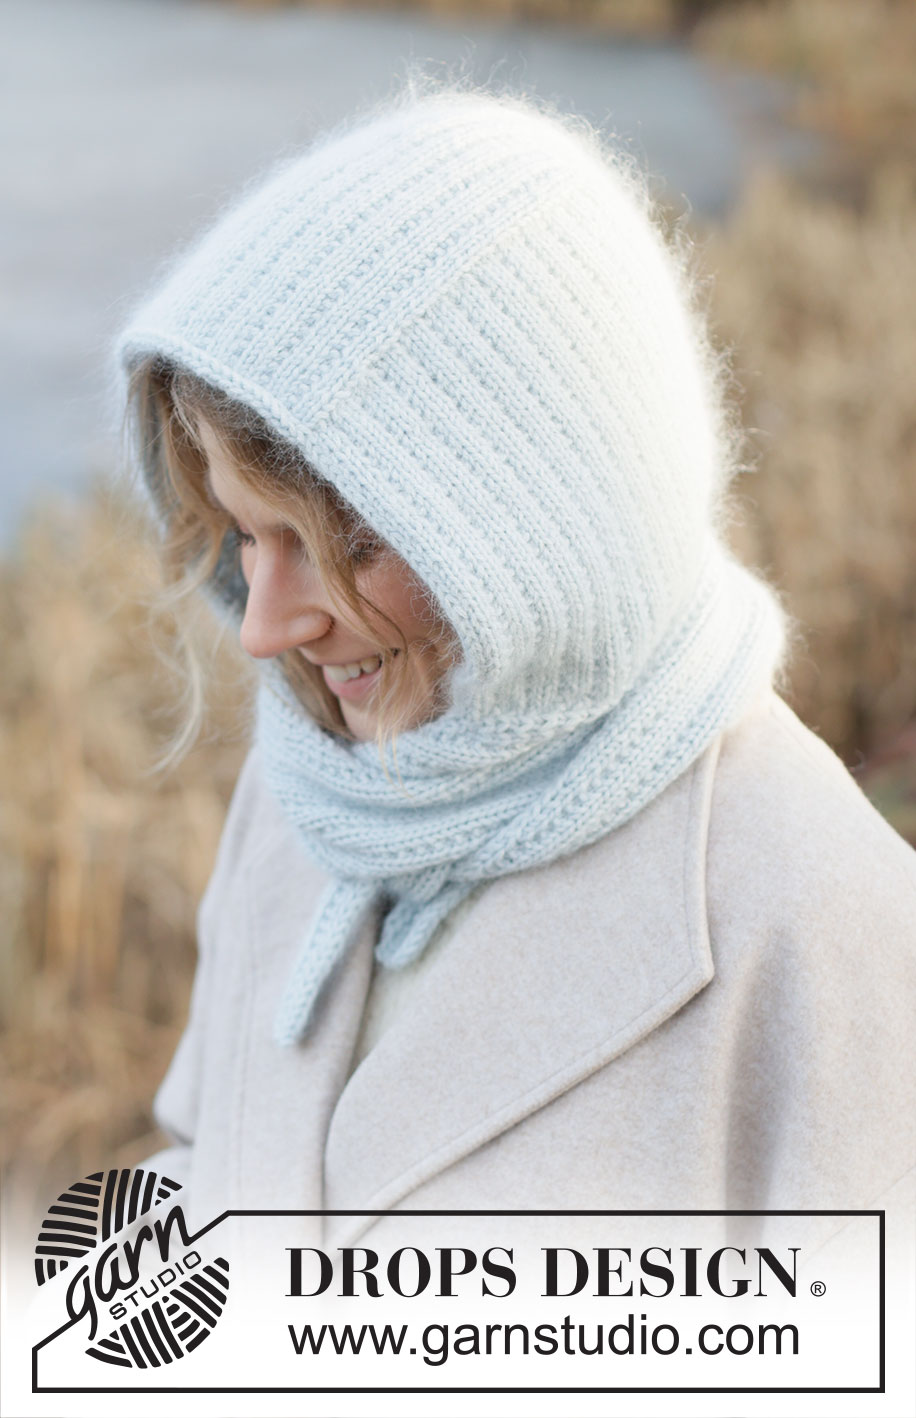
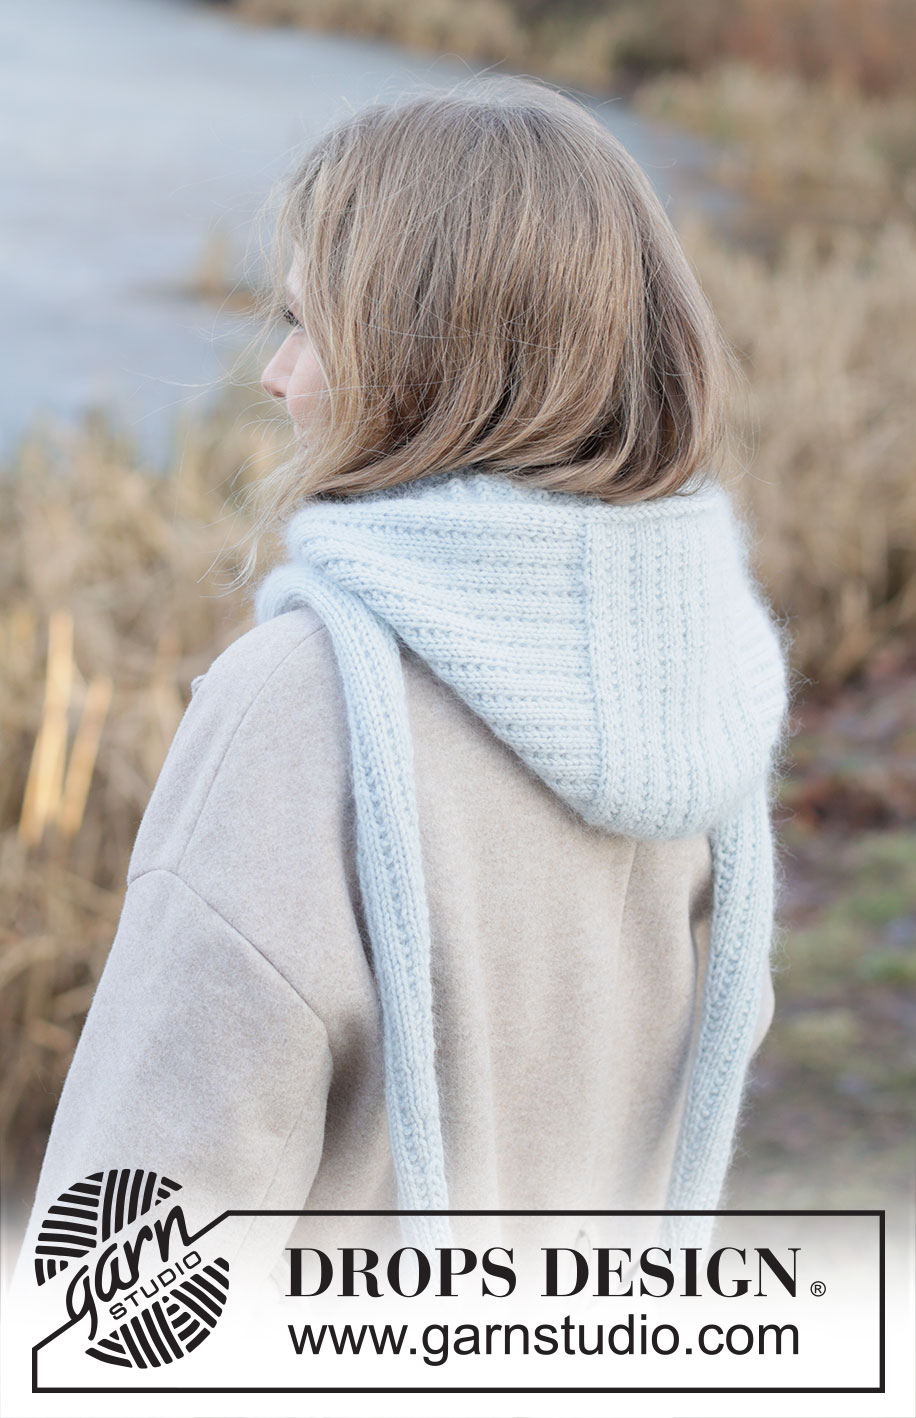
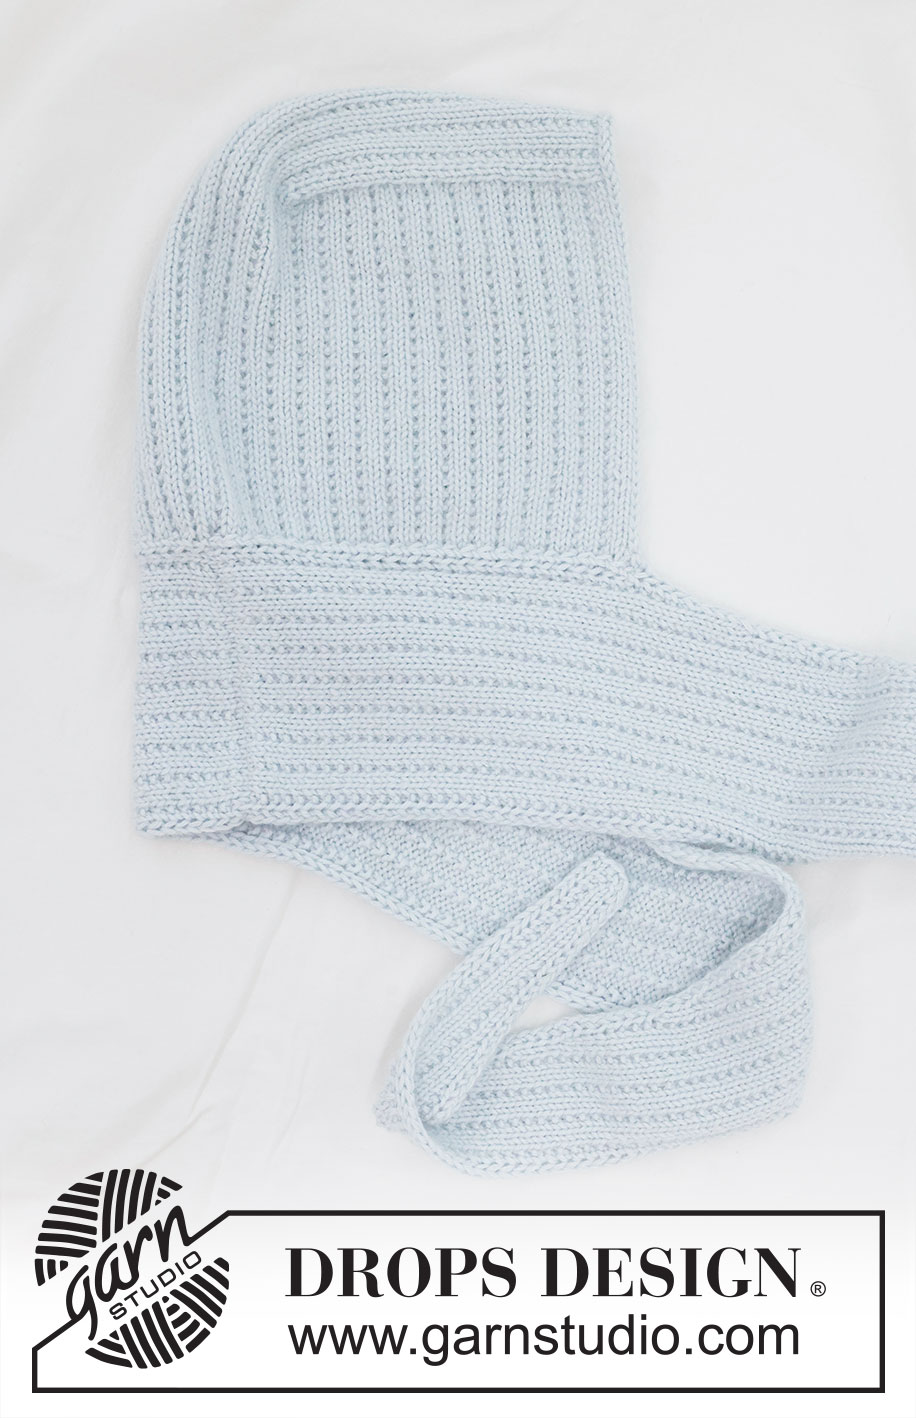
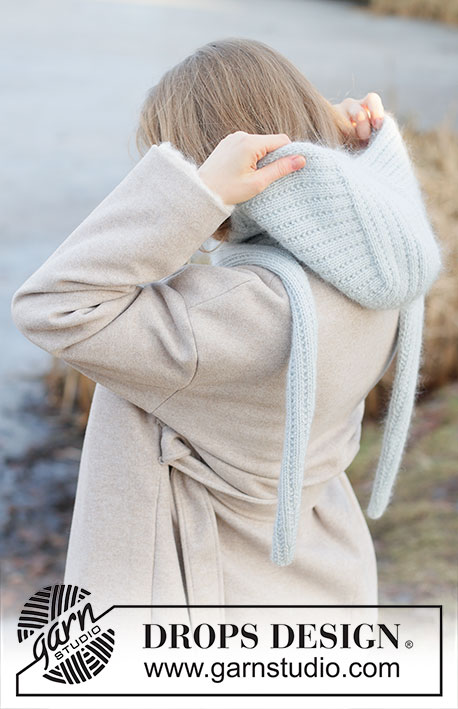
Knitted hooded scarf in DROPS Daisy and DROPS Kid-Silk. The piece is worked with pearl rib and I-cord. Sizes S - XL.
DROPS 253-61 |
||||||||||
|
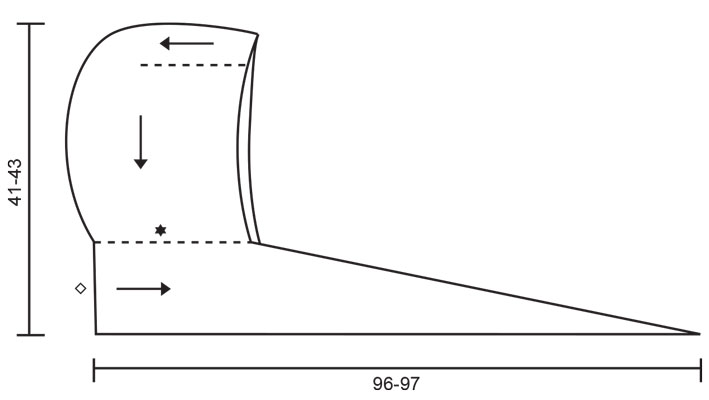
------------------------------------------------------- EXPLANATIONS FOR THE PATTERN: ------------------------------------------------------- GARTER STITCH (worked back and forth): Knit all rows, from both the right and wrong side. 1 ridge in height = knit 2 rows. I-CORD CAST OFF: Cast on 2 stitches on the right needle, slip these 2 stitches onto the left needle with the strand 2 stitches in on the left needle, * knit 1, knit the next 2 stitches twisted together, slip the 2 stitches from the right needle back onto the left needle *, work from *-* until there are 2 stitches left on the row. I-CORD EDGE STITCHES (= 2 stitches): BEGINNING OF ROW: Slip 1 stitch purl-wise with strand in front, knit 1. END OF ROW: Work until there are 2 stitches left on the row, slip 1 stitch purl-wise with strand in front, knit 1. Work like this from both the right and wrong side. ------------------------------------------------------- START THE PIECE HERE: ------------------------------------------------------- HOODED SCARF - SHORT OVERVIEW OF THE PIECE: The hood is worked back and forth with circular needle, from mid-front and backwards. Stitches are picked up on each side and the piece is continued downwards. When the hood is finished the stitches are placed on a stitch holder. An edge is knitted up around the face-opening which is cast off with I-cord. Stitches are cast on for the scarf, starting mid-back. These stitches are worked together with the stitches from the hood. When all stitches are knitted up on one side from mid-back (half the hood), one side of the scarf is finished back and forth. This is then repeated on the other side. The scarf is sewn together mid-back to finish. HOOD: Cast on 22-28 stitches with circular needle size 5 mm, 1 strand DROPS Daisy and 1 strand DROPS Kid-Silk (2 strands). Cast-on edge = mid-front of hood. Work back and forth as follows: ROW 1 (right side): 1 GARTER STITCH – read description above, work pearl rib (knit 2, 1 garter stitch) to end of row. ROW 2 (wrong side): 1 garter stitch, work pearl rib (purl 2, 1 garter stitch) to end of row. Work ROWS 1 and 2 for 19-19 cm, with the last row from the wrong side. Cut the strand and slip stitches on another needle; this piece is top front of hood. You now knit up stitches along both sides, inside the 1 garter stitch: From the right side, start from the corner by the cast-on edge and knit up 36-36 stitches along one side (left side of piece), work across the 22-28 stitches with pearl rib as before (back of hood), knit up 36-36 stitches along the other side (right side of piece) = 94-100 stitches. Further measurements are taken from this knitted-up row. ROW 1 (wrong side): 1 garter stitch, work pearl rib (purl 2, 1 garter stitch) to end of row. ROW 2 (right side): 1 garter stitch, work pearl rib (knit 2, 1 garter stitch) to end of row Work ROWS 1 and 2 until the piece measures 20-21 cm from the knitted-up row. Cut the strand; the hood is finished. Place the first 47-50 stitches on a stitch holder and the last 47-50 stitches on a second stitch holder (divided mid-back). The stitches are for each scarf-length. Now work an I-cord edge around the hood as follows: I-CORD EDGE: Start bottom right of hood (when worn), knit up 34-36 stitches inside the 1 garter stitch as far as the knitted up row, 20-24 stitches along the cast-on edge mid-front and 34-36 stitches down the left side of the hood = 88-96 stitches around the opening. Cut the strand. Start bottom right and work I-CORD CAST OFF – read description above. Cut the strand. Place the remaining 2 stitches on the stitch holder together with the 47-50 stitches on the left side of the hood = 49-52 stitches for left scarf. Pick up 2 stitches where 2 stitches were cast on for the I-cord edge on the opposite side, place these 2 stitches on the stitch holder with the 47-50 stitches on the right side of the hood = 49-52 stitches for right scarf. RIGHT SCARF: Stitches are cast-on for the scarf, AT THE SAME TIME as stitches are knitted together 2 and 2 from the hood. Start with the stitches at the division mid-back and work together with the right side of the hood as follows. Cast on 30-30 stitches with 1 strand of each quality (2 strands) – this is the cast-on edge that will be sewn afterwards to left part of scarf = mid back. ROW 1 (right side): Work 2 I-CORD EDGE STITCHES – read description above, knit 1, work pearl rib (1 garter stitch, knit 2) until there are 3 stitches left, 1 garter stitch, knit 1, slip 1 stitch knit-wise (= last stitch), knit 2 stitches together from the hood, pass the slipped stitch over the knitted together stitches from the hood = 30-30 stitches. ROW 2 (wrong side): Work pearl rib (purl 2, 1 garter stitch) until there are 3 stitches left, purl 1, 2 I-cord edge stitches. Work ROWS 1 and 2 until the first 46-50 stitches from the hood are picked up (= 46-50 rows worked). There are 3-2 stitches left on the stitch holder (including the 2 stitches picked up in I-cord). Work as follows from the right side: 2 I-cord edge stitches, knit 1, 1 garter stitch, work pearl rib (knit 2, 1 garter stitch) to end of row, knit 1-2 stitches from the stitch holder, knit together 2 and 2 the last stitches 1-0 time = 32-32 stitches. Work as follows from the wrong side: 2 I-cord edge stitches, purl 2 together, 1 garter stitch, work pearl rib (purl 2, 1 garter stitch) until there are 3 stitches left, purl 1, 2 I-cord edge stitches = 31-31 stitches. Work 8 rows of pearl rib as before, with 2 I-cord edge stitches + 1 stocking stitch on each side. On the next row (right side) decrease 1 stitch as follows: Work as before until there are 4 stitches left, knit 2 together, 2 I-cord edge stitches. Continue as before back and forth decreasing like this every 8th row (approx. each 3 cm) until there are 7-7 stitches left. Cast off at the same time as the first and last 2 stitches on the row are knitted together. The scarf measures approx. 96-98 cm from the cast-on edge mid-back. LEFT SCARF: Work in the same way as the right scarf, working along the left side of the hood at the same time as 2 and 2 stitches from the hood are worked together with the first stitch on the row as follows: Cast on 30-30 stitches with 1 strand of each quality (2 strands). ROW 1 (wrong side): Work 2 I-cord edge stitches, purl 1, 1 garter stitch, work pearl rib (purl 2, 1 garter stitch) until there are 2 stitches left, purl 2. ROW 2 (right side): Place 2 stitches from the stitch holder on the left needle, knit 3 together (2 stitches from stitch holder + 1 stitch from scarf), knit 1, work pearl rib (1 garter stitch, knit 2) until there are 4 stitches left, 1 garter stitch, knit 1, 2 I-cord edge stitches = 30-30 stitches. Work ROWS 1 and 2 until the first 46-50 stitches from the hood are picked up (= 46-50 rows worked). There are 3-2 stitches left on the stitch holder (including the 2 stitches from the I-cord cast off). Work as follows from the wrong side: 2 I-cord edge stitches, purl 1, 1 garter stitch, work pearl rib (purl 2, 1 garter stitch) to end of row, purl 1-2 stitches from the stitch holder, purl together 2 and 2 the last stitches 1-0 time = 32-32 stitches. Work as follows from the right side: 2 I-cord edge stitches, slip 1 stitch knit-wise, knit 1, pass the slipped stitch over the knitted stitch, 1 garter stitch, work pearl rib (knit 2, 1 garter stitch) until there are 3 stitches left on the row, knit 1, 2 I-cord edge stitches = 31-31 stitches. Work 7 rows of pearl rib as before, with 2 I-cord edge stitches + 1 stocking stitch on each side. On the next row (right side) decrease 1 stitch as follows: 2 I-cord edge stitches, slip 1 stitch knit-wise, knit 1, pass the slipped stitch over the knitted stitch, work to end of row. Continue as before back and forth decreasing like this every 8th row (approx. each 3 cm) until there are 7-7 stitches left. Cast off at the same time as the first and last 2 stitches are knitted together. The scarf measures approx. 96-98 cm from the cast-on edge mid-back. ASSEMBLY: Sew the cast-on edge of right and left sides of the scarf together mid-back with grafting stitches. |
||||||||||
Diagram explanations |
||||||||||
|
||||||||||
 |
||||||||||
Have you finished this pattern?Tag your pictures with #dropspattern #winterhughood or submit them to the #dropsfan gallery. Do you need help with this pattern?You'll find 21 tutorial videos, a Comments/Questions area and more by visiting the pattern on garnstudio.com. © 1982-2026 DROPS Design A/S. We reserve all rights. This document, including all its sub-sections, has copyrights. Read more about what you can do with our patterns at the bottom of each pattern on our site. |
||||||||||


With over 40 years in knitting and crochet design, DROPS Design offers one of the most extensive collections of free patterns on the internet - translated to 17 languages. As of today we count 324 catalogues and 12284 patterns translated into English (UK/cm).
We work hard to bring you the best knitting and crochet have to offer, inspiration and advice as well as great quality yarns at incredible prices! Would you like to use our patterns for other than personal use? You can read what you are allowed to do in the Copyright text at the bottom of all our patterns. Happy crafting!
Post a comment to pattern DROPS 253-61
We would love to hear what you have to say about this pattern!
If you want to leave a question, please make sure you select the correct category in the form below, to speed up the answering process. Required fields are marked *.