
Popular categories
Looking for a yarn?


Comments / Questions (83)
![]() Marimar wrote:
Marimar wrote:
Bonjour, tout d'abord merci pour vos réponses . je fais les manches et vous indiUez de faire une augmentation à 11 cm du début, est ce depuis le début
04.06.2015 - 16:48DROPS Design answered:
Bonjour Mme Marimar, la 1ère augmentation se fait effectivement à 11 cm de hauteur totale, c'est-à-dire depuis la chaînette de base, et on augmente 12-18 fois (cf taille) tous les 2.5/2 cm. Bon crochet!
05.06.2015 - 09:50
![]() Marimar wrote:
Marimar wrote:
Bonjour, je suis prête à débuter les manches. Sur les explications des symboles vous parlez de Brides, or pour l explication des nopes doit on faire 6 demi brides ou 6 brides ? merci
16.05.2015 - 14:15DROPS Design answered:
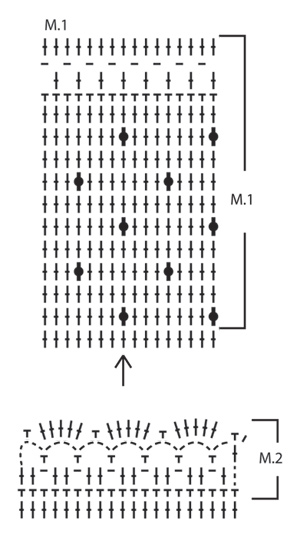
Bonjour Mme Marimar, le 1er rang des manches se réalise en brides, puis on réalise le diagramme M.1 en brides et nopes (= 6 doubles brides écoulées ensemble comme indiqué), et on continue de nouveau en brides ensuite. Bon crochet!
18.05.2015 - 10:36
![]() Marimar wrote:
Marimar wrote:
Bonjour, tout d'abord merci pour votre réponse !.. Pouvez vous une fois de plus m'éclairer sur la partie du dos et devant quand vous écrivez : après les augmentations et avant de diviser l'ouvrage pour les emmachures.. " (de terminer par un rang sur l'envers) " Comment je reconnais que je suis sur l'envers dans un rang de brides en aller retour ? Merci
23.04.2015 - 13:44DROPS Design answered:
Bonjour Mme Marimar, sauf indication contraire, le 1er rang est toujours sur l'endroit (l'extrémité du fil de la chaînette de montage doit être à gauche de l'ouvrage, vu sur l'endroit). Bon crochet!
23.04.2015 - 15:15
![]() Stéphanie wrote:
Stéphanie wrote:
Même avec la laine recommandée, le résultat obtenu est beaucoup trop grand. J'ai pourtant pris un crochet plus petit et décidé de faire la taille S (pour un M), mais j'obtiens les mesures entre la taille L et XL ! Pourtant, je n'en suis pas à mon premier ouvrage au crochet...
08.02.2014 - 10:59DROPS Design answered:
Bonjour Stéphanie, aviez-vous bien l'échantillon de 22 B x 14 rangs = 10 x 10 cm ? Et cette même tension tout du long ? Sur la base de ces indications, les mesures du schémas sont correctes. Bon crochet !
10.02.2014 - 10:18
![]() Christina Andersson wrote:
Christina Andersson wrote:
Ska verkligen förhöjning bak i nacken vara med på detta mönster det verkar ju inte vara med på bilden. Jag får det inte att stämma då halsen kommer upp för högt och blir för liten innan spetskanten. Mvh Christina
16.03.2013 - 18:04DROPS Design answered:
Ja jackan har förhöjning bak i nacken. Men du gör som du vill ;)
03.04.2013 - 11:14Stéphanie wrote:
J'ai fait un échantillon avec un 2.5 c'est encore un peu trop grand. je crois que ma laine est trop "grosse" de la laine plus fine conviendrait ? je crois que c'est ca le problème. merci de me donné un coup de main je débute et j'ai un peu de mal a comprendre. merci
12.03.2013 - 17:48DROPS Design answered:
Bonjour Stéphanie, la réussite serait certainement plus facile avec la laine recommandée : Drops Baby Merino ou Drops Baby Alpaca Silk. N'hésitez pas à demander conseil au magasin où vous avez acheté votre laine. Bon tricot !
13.03.2013 - 08:49Stéphanie wrote:
Bonjour... je ne comprend pas pkoi j'utilise un crochet numéro 3 et mon échantillon est trop grand. est-ce ma laine qui ne convient pas? parce que la veste est trop grande et j'ai crocheté le modèle dans le Small. merci de me donner un coup de main.
11.03.2013 - 18:03DROPS Design answered:
Bonjour Stéphanie, nous ne crochetons pas toutes de la même façon, essayez avec un crochet 2,5. Pour toute aide individuelle, n'hésitez pas à demander au magasin où vous avez acheté votre laine ou sur le forum DROPS. Bon crochet !
12.03.2013 - 09:27Brigitte wrote:
Franchement merci pour vos services .C'est vraiment un chouette modèle que je termine ! merci
11.09.2012 - 14:41NEIRYNCK Brigitte wrote:
Je me demande si il y a une erreur ou je ne comprends pas .Concerne la fin des explications de l'empiècement :diminue d'une bride à chaque rang jusque la fin de l'empiecement.Pouvez vous m 'éclairer .D'avance je vous remercie.
10.09.2012 - 09:09DROPS Design answered:
Bonjour Brigitte. Pour l'encolure devant, vous devez diminuer de chaque côté : 1 fois 7 B, 3 fois 3 B puis 1 B jusqu'à ce que toutes les diminutions de l'empiècement (= celles à faire avant/après chaque marqueur - cf paragraphe précédent) soient finies. Bon crochet !
10.09.2012 - 09:16
![]() Cathy Ellingworth wrote:
Cathy Ellingworth wrote:
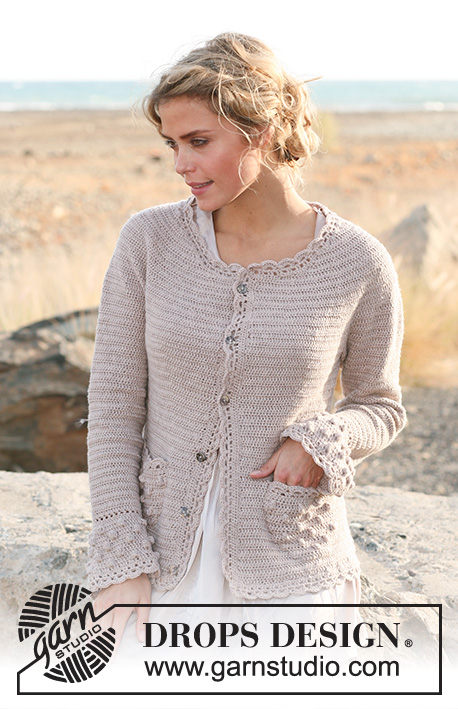
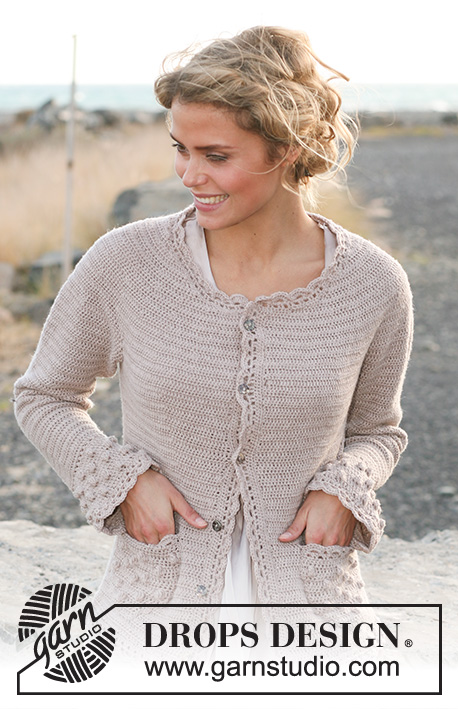
Hello The picture for this pattern shows bobbles and lace edging to the sleeves. I can't find the instructions for this within the pattern. Can you help please? Many thanks Cathy Ellingworth
28.04.2012 - 15:58DROPS Design answered:
Pattern for sleeve is saying "Now work diagram M.1 in the round".... Diagram M.1 gives the bobbles and lace. The diagram is below the pattern text.
30.04.2012 - 23:38
|
|||||||||||||
Hint of Spring#hintofspringcardigan |
|||||||||||||
 |
 |
||||||||||||
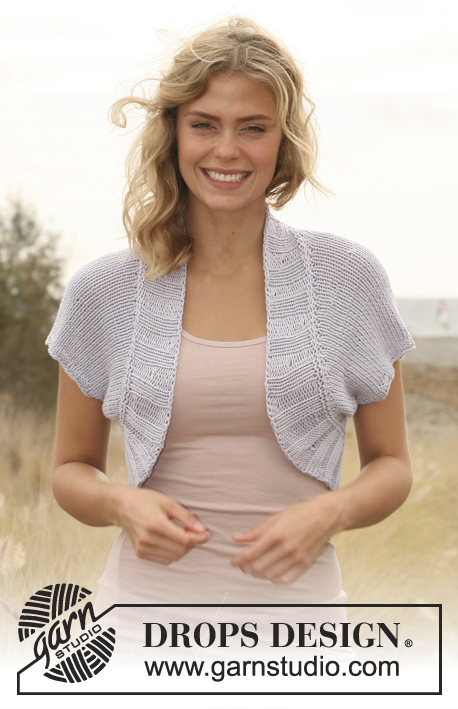
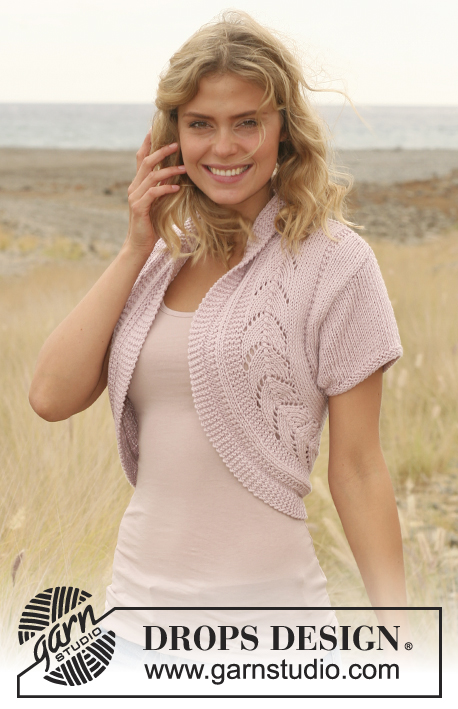
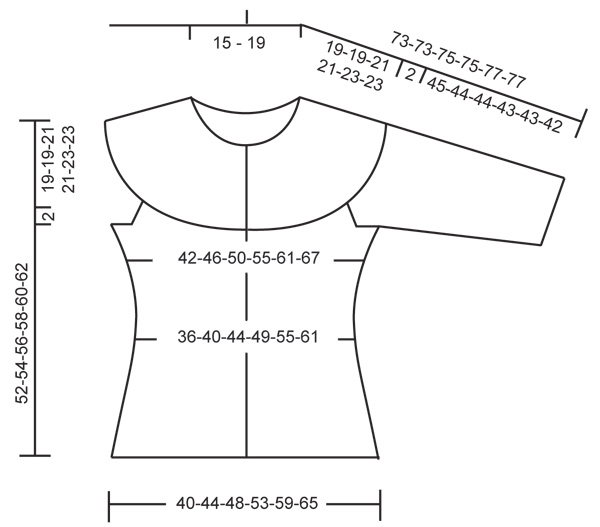
Crochet DROPS jacket with bobbles and lace edges in ”BabyMerino” or ”BabyAlpaca Silk”. Size S - XXXL
DROPS 130-14 |
|||||||||||||
|
PATTERN: See diagram M.1 and M.2. CROCHET INFO: Replace first tr at beg of every tr row with 3 ch, finish the row with 1 tr in 3rd ch from beg of previous row. Replace first tr at beg of every tr round with 3 ch, finish the round with 1 sl st in 3rd ch from beg of round. CROCHET TIP (applies to round yoke): If crochet tension is not correct in height the yoke will be too short or too long. This can be adjusted by working 1 extra row with tr or one row less with tr evenly between dec. DECREASE TIP 1 (applies to waist and yoke): Dec 1 tr by working 2 tr tog, i.e. work 1 tr but wait with last pull through (= 2 sts on hook), work 1 more tr and pull last YO through all 3 sts on hook. DECREASE TIP 2 (applies to armholes and neck): When dec several tr at the same time at the armhole and neck, dec as follows: At beg of row: Replace no of tr to be dec with 1 sl st in every tr. At end of row: Turn piece when no of tr to be dec remains and continue working as before. INCREASE TIP: Inc 1 tr by working 2 tr in same tr. -------------------------------------------------------- BODY: Worked back and forth from mid front. READ CROCHET INFO! Work 243-267-291-320-355-389 ch on hook size 3.5 mm with Baby Merino. WORK 1ST ROW AS FOLLOWS: 1 tr in 4th ch from hook, 1 tr in next ch, skip 1 ch, * 1 tr in each of the next 3 ch, skip 1 ch *, repeat from *-* until 1-1-1-2-1-3 ch remain, finish with 1 tr in each of the last ch = 181-199-217-239-265-291 tr on row, turn piece. 2ND ROW: Work 1 tr in every tr. Insert 4 markers in the piece as follows: 1st marker after 19-21-23-25-28-31 tr from mid front, 2nd marker after another 54-60-64-72-78-86 tr, 3rd marker after another 35-37-43-45-53-57 tr, 4th marker after yet another 54-60-64-72-78-86 tr (19-21-23-25-28-31 tr remain on row after last marker). Work back and forth with 1 tr in every tr and move the markers upwards. REMEMBER THE CROCHET TENSION! AT THE SAME TIME when piece measures 3 cm, dec 1 tr before 1st and 3rd marker and after 2nd and 4th marker (= 4 tr dec on row) - READ DECREASE TIP 1. Repeat dec approx. every 4 cm a total of 5 times = 161-179-197-219-245-271 tr on row. When piece measures 22 cm, inc 1 tr before 1st and 3rd marker and after 2nd and 4th marker (= 4 tr inc) - READ INCREASE TIP. Repeat inc approx. every 1-1-1-1½-1½-1½ cm a total of 7 times = 189-207-225-247-273-299 tr on row. When piece measures 31-33-33-35-35-37 cm (finish with one row from WS), divide for armholes and work each part separately. RIGHT FRONT PIECE: Start from RS and work 43-48-52-58-64-71 tr from mid front, turn piece, work the first 2 tr tog and work the rest of row. Turn piece, work the first 40-45-49-55-61-68 tr and work the next 2 tr tog, turn piece, work the first 2 tr tog and work the rest of row (last row is from WS) = 40-45-49-55-61-68 tr on row, cut the thread. BACK PIECE: Start from RS in 11th tr after right front piece (i.e. there is an opening in the side of 10 tr for armhole), and work 83-91-101-111-125-137 tr, turn piece, work 3 rows with tr over back piece while AT THE SAME TIME working the first 2 and the last 2 tr on every row tog (last row is from WS) = 77-85-95-105-119-131 tr on row, cut the thread. LEFT FRONT PIECE: Start from RS in 11th tr after back piece (there is now an opening of 10 tr for armhole in both left and right side) and work over the remaining 43-48-52-58-64-71 tr as on right front piece but reversed (last row is from WS) = 40-45-49-55-61-68 tr on row, cut the thread. SLEEVE: Crochet 73 ch in all sizes on hook size 3.5 mm with Baby Merino and form a ring with 1 sl st in first ch. READ CROCHET INFO! WORK 1ST ROUND AS FOLLOWS: 3 ch (= 1 tr), 1 tr in each of the next 2 ch, skip 1 ch, * 1 tr in each of the next 3 ch, skip 1 ch *, repeat from *-* until 2 ch remain, 1 tr in each of the last ch and finish with 1 sl st in 3rd ch from beg of round = 56 tr. Now work M.1 in the round - see explanation above! After M.1 continue back and forth (worked back and forth to make the crochet structure the same on body and sleeves). Work 1st row as follows: 1 tr in every tr while AT THE SAME TIME inc 0-0-2-2-6-6 tr evenly = 56-56-58-58-62-62 tr. Continue with 1 tr in every tr. AT THE SAME TIME when piece measures 13-11-11-11-11-11 cm, inc 1 tr in each side - READ INCREASE TIP! Repeat inc approx. every 3-2½-2½-2-2-2 cm a total of 10-12-13-15-15-18 times = 76-80-84-88-92-98 tr. When piece measures 45-44-44-43-43-42 cm (NOTE! Shorter measurements in the larger sizes because of longer sleeve cap and broader shoulder width), work 1 sl st in each of the first 5 tr at beg of row from RS, work 66-70-74-78-82-88 tr and turn piece (there is now an opening of 5 tr in each side (= mid under sleeve). Work 3 rows with tr back and forth over sleeve while AT THE SAME TIME working the first 2 and the last 2 tr on every row tog - READ DECREASE TIP 1 (last row is from WS) = 60-64-68-72-76-82 tr on row. Cut the thread and work another sleeve. YOKE: READ CROCHET TIP! Now work the parts tog as follows - start from RS: Work 1 tr in each of the 40-45-49-55-61-68 tr on right front piece, work 1 tr in each of the 60-64-68-72-76-82 tr from one sleeve, work 1 tr in each of the 77-85-95-105-119-131 tr from back piece, work 1 tr in each of the 60-64-68-72-76-82 tr from the other sleeve and work 1 tr in each of the 40-45-49-55-61-68 tr from left front piece = 277-303-329-359-393-431 tr on row. Insert a marker after 12-14-15-17-21-12 tr, then insert 21-23-23-25-25-29 markers with 12-12-13-13-14-14 tr between each, i.e. 13-13-15-17-22-13 tr remain after last marker. Now work tr back and forth on yoke while AT THE SAME TIME on 1st row dec 1 tr - READ DECREASE TIP 1 - before every marker = 255-279-305-333-367-401 tr. Repeat dec alternately before and after markers (seen from RS) every 3rd row a total of 9-9-10-10-11-11 times. AT THE SAME TIME when piece measures 47-49-51-52-54-56 cm (measured straight down along mid front), dec for neck in each side towards mid front on every row as follows – READ DECREASE TIP 2: 7 tr 1 time, 3 tr 3 times. Continue to dec 1 tr towards mid front on every row until all dec on yoke are done. ELEVATION IN BACK OF NECK: Start mid front, at top of corner on right front piece. Crochet on hook size 3.5 mm around the neck as follows: Start with 1 dc in first tr, * 1 ch, skip 1 tr, 1 dc in next tr *, repeat from *-* around the neck and finish with 1 dc at the front of neck at top of corner on left front piece. Turn piece. Work 1 dc in every ch and 1 ch over every dc around the neck until 8 sts remain (= 4 dc + 4 ch) on right front piece. Turn piece. Work 1 dc in every ch and 1 ch over every dc until 8 sts remain on left front piece. Turn piece. Work 1 dc in every ch and 1 ch in every dc around the neck until 16 sts remain before edge on right front piece (= 8 dc and 8 ch). Turn piece. Work 1 dc in every ch and 1 ch over every dc around the neck until 16 sts remain before edge on left front piece. Turn piece. Work 1 dc in every ch and 1 ch over every dc around the neck until 24 sts remain before edge on right front piece (= 12 dc and 12 ch). Turn piece. Work 1 dc in every ch and 1 ch over every dc until 24 sts remain before edge on left front piece. Cut the thread. LACE EDGES: Work on hook size 3.5 mm with Baby Merino as follows: Along mid front: Start from RS and work 1 row dc up along right front piece - there should be approx. 23 dc on 10 cm up along mid front. Adjust so that no of sts can be divided by 6 + 2 sts. Then work 1 row from WS with 1 tr in every dc. Then work M.2 but skip 1st row in M.2 (= dc row). Repeat along left front piece. Around the neck: Work M.2 along the neckline (start with dc row and adjust no of sts on row so that it can be divided by 6 + 2 sts). Bottom edge: Work M.2 along the bottom edge of jacket (start with dc row and adjust no of sts on row so that it can be divided by 6 + 2 sts). Sleeves: Work M.2 along the bottom edge of each sleeve (start with dc row and adjust no of sts on row so that it can be divided by 6 + 2 sts). POCKETS: Crochet 15 ch on hook size 3.5 mm with Baby Merino. Work 1st row as follows: Work 1 tr in 4th ch from hook, then work 1 tr in each of the remaining ch = 13 tr. Work M.1 back and forth, arrow in diagram marks middle tr on pocket, count outwards from there. AT THE SAME TIME work new tr at end of every row in each side: 3 tr 1 time, 2 tr 1 time and 1 tr 4 times = a total of 31 tr (make new tr by working same no of ch at end of row as no of tr to be inc + 2 ch, turn piece, work 1 tr in 4th ch from hook and 1 tr in the each of the remaining ch (if any) before continuing). Continue with bobbles and tr vertically until pocket measures approx. 11 cm vertically - after last row with bobbles work one row with tr while AT THE SAME TIME inc 1 tr = 32 tr. Then work M.2 at top of pocket (start with dc row), cut and fasten the thread. Crochet another pocket. Sew pockets on to front piece, approx. 5 cm from bottom edge and approx. 8 cm in from mid front on each front piece. Sew 6 buttons on to left front piece, 2 cm below first dec for neck and then evenly spaced with approx. 8 cm between each. Button the jacket in the lace edge. |
|||||||||||||
Diagram explanations |
|||||||||||||
|
|||||||||||||
 |
|||||||||||||
 |
|||||||||||||
Have you finished this pattern?Tag your pictures with #dropspattern #hintofspringcardigan or submit them to the #dropsfan gallery. Do you need help with this pattern?You'll find 11 tutorial videos, a Comments/Questions area and more by visiting the pattern on garnstudio.com. © 1982-2026 DROPS Design A/S. We reserve all rights. This document, including all its sub-sections, has copyrights. Read more about what you can do with our patterns at the bottom of each pattern on our site. |
|||||||||||||


With over 40 years in knitting and crochet design, DROPS Design offers one of the most extensive collections of free patterns on the internet - translated to 17 languages. As of today we count 324 catalogues and 12290 patterns translated into English (UK/cm). 12290
We work hard to bring you the best knitting and crochet have to offer, inspiration and advice as well as great quality yarns at incredible prices! Would you like to use our patterns for other than personal use? You can read what you are allowed to do in the Copyright text at the bottom of all our patterns. Happy crafting!
Post a comment to pattern DROPS 130-14
We would love to hear what you have to say about this pattern!
If you want to leave a question, please make sure you select the correct category in the form below, to speed up the answering process. Required fields are marked *.