
Popular categories
Looking for a yarn?


Comments / Questions (49)
![]() Sylvia wrote:
Sylvia wrote:
Bonjour, une question au sujet de l'échantillon. Il faut commencer avec une chainette de 16 m en l'air, et ensuite sauter une maille et trois brides dans les mailles suivantes une maille en l'air pour avoir 4 groupes de trois brides?
24.08.2023 - 09:22DROPS Design answered:
Bonjour Sylvia, montez un peu plus de mailles en l'air, l'échantillon doit être de 4 motifs de A.2b, n'hésitez pas à en crocheter 6 ou 8 pour pouvoir avoir un meilleur aperçu de la largeur, mais sinon effectivement, vous devez avoir un multiple de 4 + 1 au début + 1 à la fin (pour "encadrer" le motif de chaque côté). Bon crochet!
24.08.2023 - 09:49
![]() Minna Peltonen wrote:
Minna Peltonen wrote:
Moi tulin kysymään tosta puseron A2.a-A2.e kohdasta (en ole vielä siinä kohtaa, koska oon tekemässä vasta ekaa neliötä (ajattelin ensin tehdä molemmat neliöt valmiiksi ennenkun siirryn tohon kohtaan) mutt halusin saada vähän tarkemman kuvauksen siitä ennenkun alan tekemään sen, vaikka teen sen raidotuksen sellain ett käytän jämälankoja), ett en oikeen saa selville siitä ett missä kohdassa tehdään ne olkaimet, ennenkun ommellaan kiinni.
14.07.2023 - 11:42DROPS Design answered:
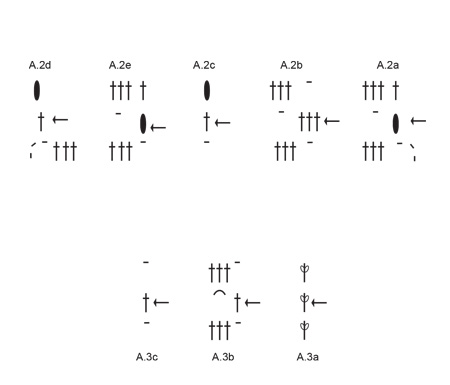
Hei! Aluksi virkataan neliö (neliöt). Tämän jälkeen virkkaat neliön kumpaankin sivuun ja alareunaan ohjeen mukaisesti. Kun neliön alareunassa on 2 kerrosta, katkaise lanka. Tässä kohtaa virkataan nyt olat: Virkkaa oikea olka seuraavasti (1.kerros = nurja puoli): Virkkaa kulmaan mallivirkkausta piirroksen A.2e mukaisesti (HUOM: Virkkaa kulman viimeiseen kerrokseen), virkkaa sivun 2-2-4-6 kerrokseen 1-1-2-3 piirroksen A.2b mallikertaa, jatka piirroksen A.2b mallivirkkausta, kunnes olet ensimmäisen merkityn ketjusilmukan kohdalla, virkkaa merkittyyn ketjusilmukkaan mallivirkkausta piirroksen A.2c mukaisesti.
18.07.2023 - 17:21
![]() Minna Peltonen wrote:
Minna Peltonen wrote:
Moi kysyisin tälläistä liittyen tohon ohjeeseen niin voiko siinäkin ohjeessa käytää jämä lankoja joita on jäänyt edellisistä virkkuu töistä? Meinaan ajattelin jos tekisin ton puseron L-kokoiseksi käyttäen jämä Paris lankaa, jotka oon kerinnyt isoksi keräksi, koska tossa oleva malli kuva näyttää helpolta kuin siinä topissa (en ymmärtänyt sen ohjeen mallikuvaa), joten siksi kyselen tälläistä ett voiko ton puseron käyttäen jämä Paris lankaa.
09.07.2023 - 22:55DROPS Design answered:
Hei! Kyllä, voit käyttää Paris-langan jäännöslankoja myös tähän puseroon. Ota kuitenkin huomioon, että kyseiseen neuleeseen tarvitaan noin 1000 grammaa lankaa.
11.07.2023 - 14:28
![]() Mette wrote:
Mette wrote:
Hei. Har dere testet ut denne oppskriften? For garnmengdene stemmer ikke. Jeg er ferdig med kroppen i xxxl og har 25g f.100 igjen, men ca 140g f.02 igjen og 100g f.11. Jeg har fulgt stripene i oppskriften, skal nå rekke opp alt unntatt hovedrutene på kroppen og bytter om på mange farger så jeg slipper å sitte igjen med 1-2 nøster av noe og må kjøpe inn ekstra av andre. Vanligvis så er jeg veldig fornøyd med garnutregning, men denne stemte ikke i det hele tatt...
27.06.2023 - 13:18
![]() Minna Peltonen wrote:
Minna Peltonen wrote:
Moi kysyisin vielä tälläistä liittyen tohon puseroon ett kuinka monta kierrosta tulee etu ja taka kappalehin + hihoihin jos käyttää 2 väriä L-kokoon? Kun en oikeen tosta saanut selville siitä että kuinka monta kierrosta tulee jos käyttää noita värejä (mikä aika paljon mun makuun) joten siksi vielä kyselen tälläistä ennenkun ostan ne 2 väriä, joita teen sen puseron L-kokoiseksi.
17.06.2023 - 18:08DROPS Design answered:
Hei, neulot aina 1 kerroksen kummallakin värillä tarpeen mukaan (kunnes työ on oikean pituinen).
19.06.2023 - 14:39
![]() Minna Peltonen wrote:
Minna Peltonen wrote:
Moi kysyisin tälläistä liittyen tohon puseroon, ett voiko sen virkata myös kahdella värillä L-kokoiseksi (sellain ett ottaa 500g yhtä väriä ja 500g toista väriä)? Kun tossa ohjeessa kerrotaan noi värit (joita oli aika paljon mun makuun) + se ett jos virkaan yhdellä värillä, niin ajattelin kysellä kans tälläistä ett voiko myös ton puseron tehdä kahdella värillä, ett se raidoitukseen tuli 2 väriä (esim. Liila ja tummansininen).
15.06.2023 - 20:48DROPS Design answered:
Kyllä, voit virkata puseron kahdella värillä. Hanki tällöin molempia värejä 500 grammaa.
16.06.2023 - 17:05
![]() Ingrid wrote:
Ingrid wrote:
Hi, I do not understand how to begin crocheting the bottom. I made 2 rows on the side, which ended with 3 dc around the chains and 1 dc in the beg/end '1dc' ... Where do I need to start the bottom? Sorry, but I just can't understand.
18.05.2023 - 17:51DROPS Design answered:
Dear Ingrid, start the bottom in the first dc worked on the side, then work A.2e (= 3 ch to replace 1st dc, 1 chain and skip the next row on the side), then work A.2b: work 3 dc around first row row, 1 chain, 3 dc around next row, 1 chain (2 repeats); and repeat A.2b as before to the end of the row finishing with 2 repeats of A.2b along the end of the rows on the side and end with A.2c ( 1 dc in the last st on the side). Happy crocheting!
19.05.2023 - 08:17
![]() Friederike wrote:
Friederike wrote:
Ich häkele den Pullover in Gr.M. und bin nun beim Punkt „Fertig stellen“ angekommen. Ich soll eigentlich die Nähte nun schließen. Aber an der Schulternaht sind auf dem Bild zwei weitere Reihen in mandarine und kirschblüte zusehen, bis die Schulternähte geschlossen werden. Diese sind in der Anleitung nicht erwähnt. Kann es sein, dass hier etwas fehlt? Oder habe ich etwas übersehen? LG
24.03.2023 - 12:35DROPS Design answered:
Liebe Friederike, diese Reihe befinden sich in der schriftlichen Anleitung, siehe VORDERTEIL: ;.... Größe S-M: ... Nun die Schultern und den Halsausschnitt an der gegenüberliegenden Seite des Quadrats wie folgt häkeln: ... . Viel Spaß beim häkeln!
24.03.2023 - 13:31
![]() Elena wrote:
Elena wrote:
Buonasera, non riusciamo a capire come dobbiamo lavorare le strisce indicate a pag. 2 dopo tutta la serie di strisce colorate. Significa che dobbiamo fare solo delle strisce sul fondo? Oppure ai lati? Grazie
23.03.2023 - 21:16DROPS Design answered:
Buonasera Elena, a quale punto del lavoro sta facendo riferimento? Buon lavoro!
26.03.2023 - 22:18
![]() Flo wrote:
Flo wrote:
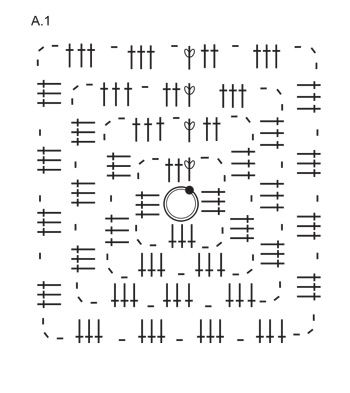
Bonjour je voudrais savoir si le diagramme A1est commun à toutes les tailles ou si on l'adapte: par exemple pour une taille S on ne fait pas toutes les rayures on mesure les 50CM préconisé dans le descriptif merci le modèle est très frais et très seventies pour le printemps qui arrive bientot
15.03.2023 - 13:01DROPS Design answered:
Bonjour Flo, le diagramme A.1 est commun à toutes les tailles, il montre juste le début du carré, on continue ensuite le carré en répétant les derniers rangs du diagramme jusqu'à la hauteur indiquée pour la taille. En même temps, vous suivez les rayures dos & devant, à crocheter en rond, puis en rangs si besoin (pour les extensions). Bon crochet!
15.03.2023 - 13:44
|
||||||||||||||||||||||
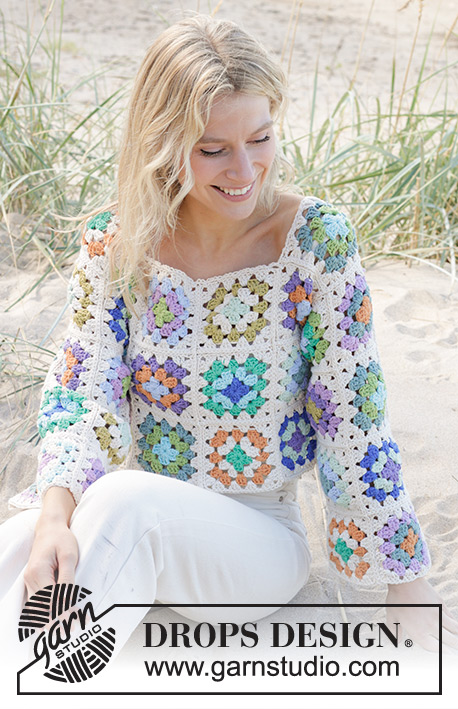
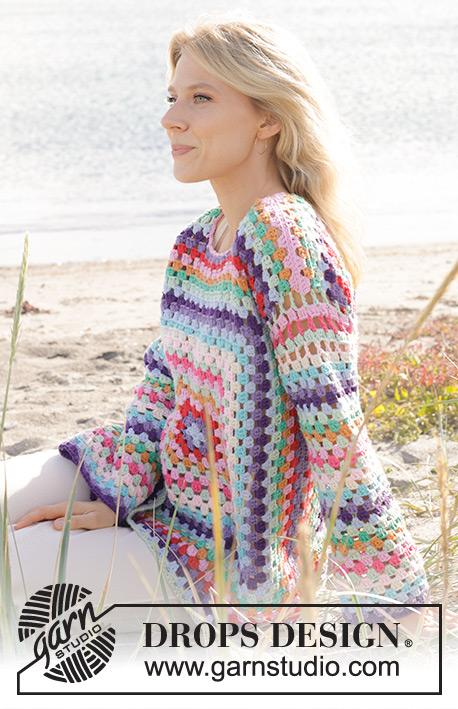
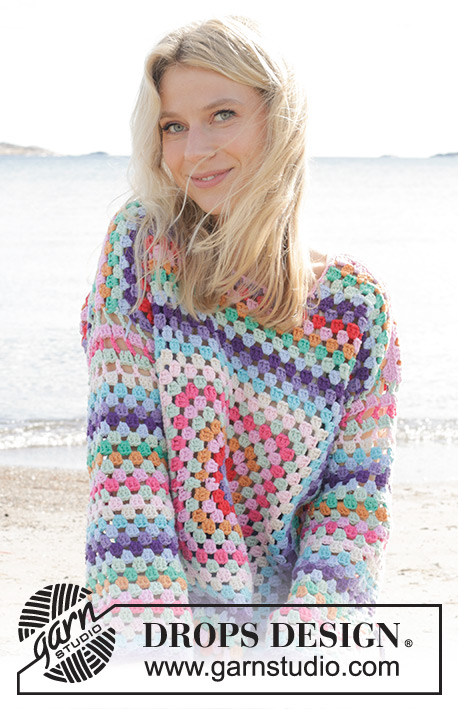
Squared Rainbow#squaredrainbowsweater |
||||||||||||||||||||||
 |
 |
|||||||||||||||||||||
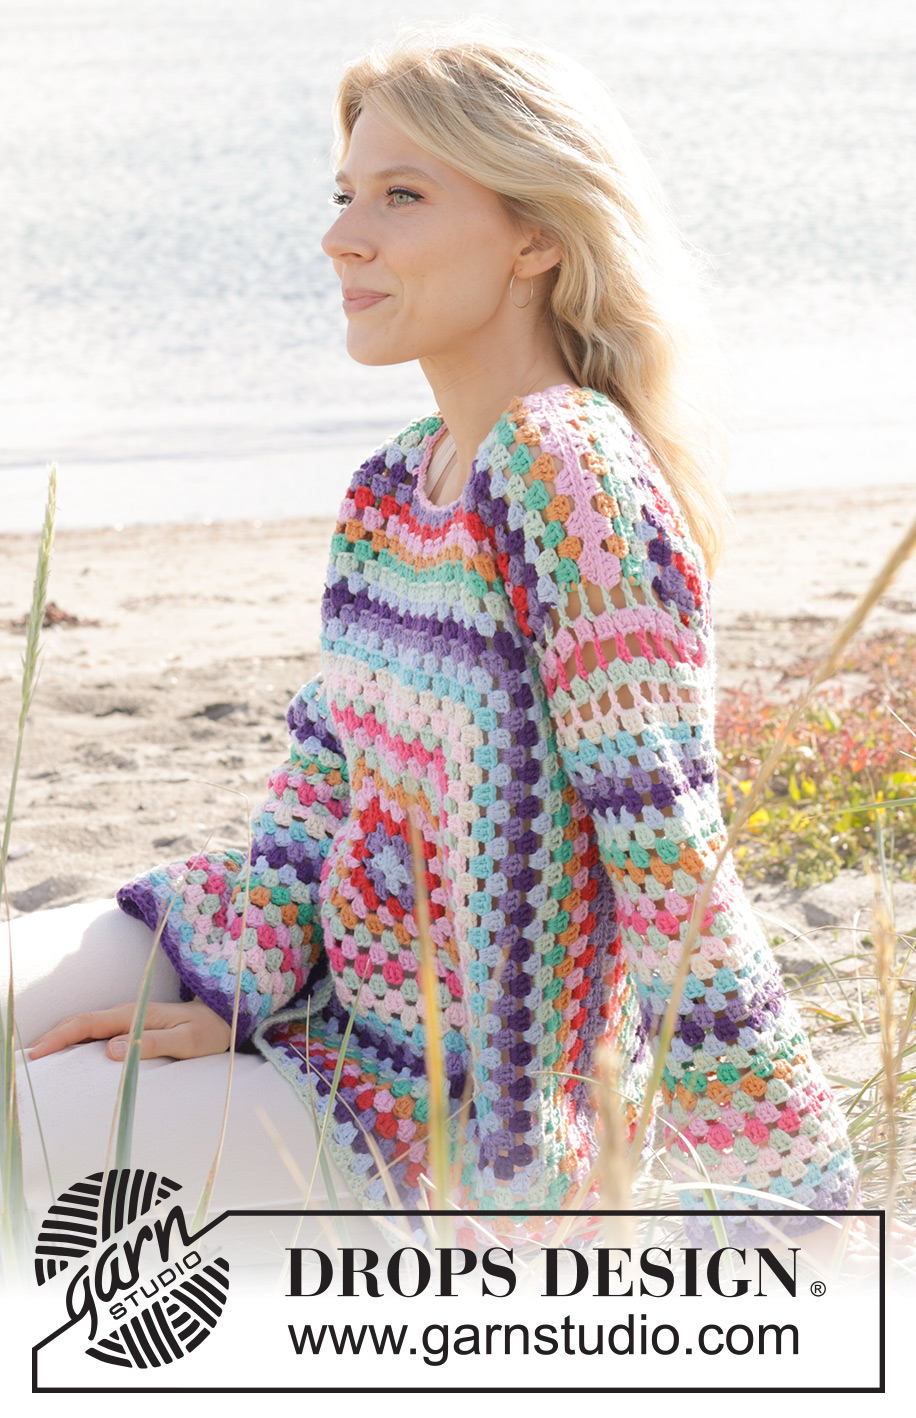
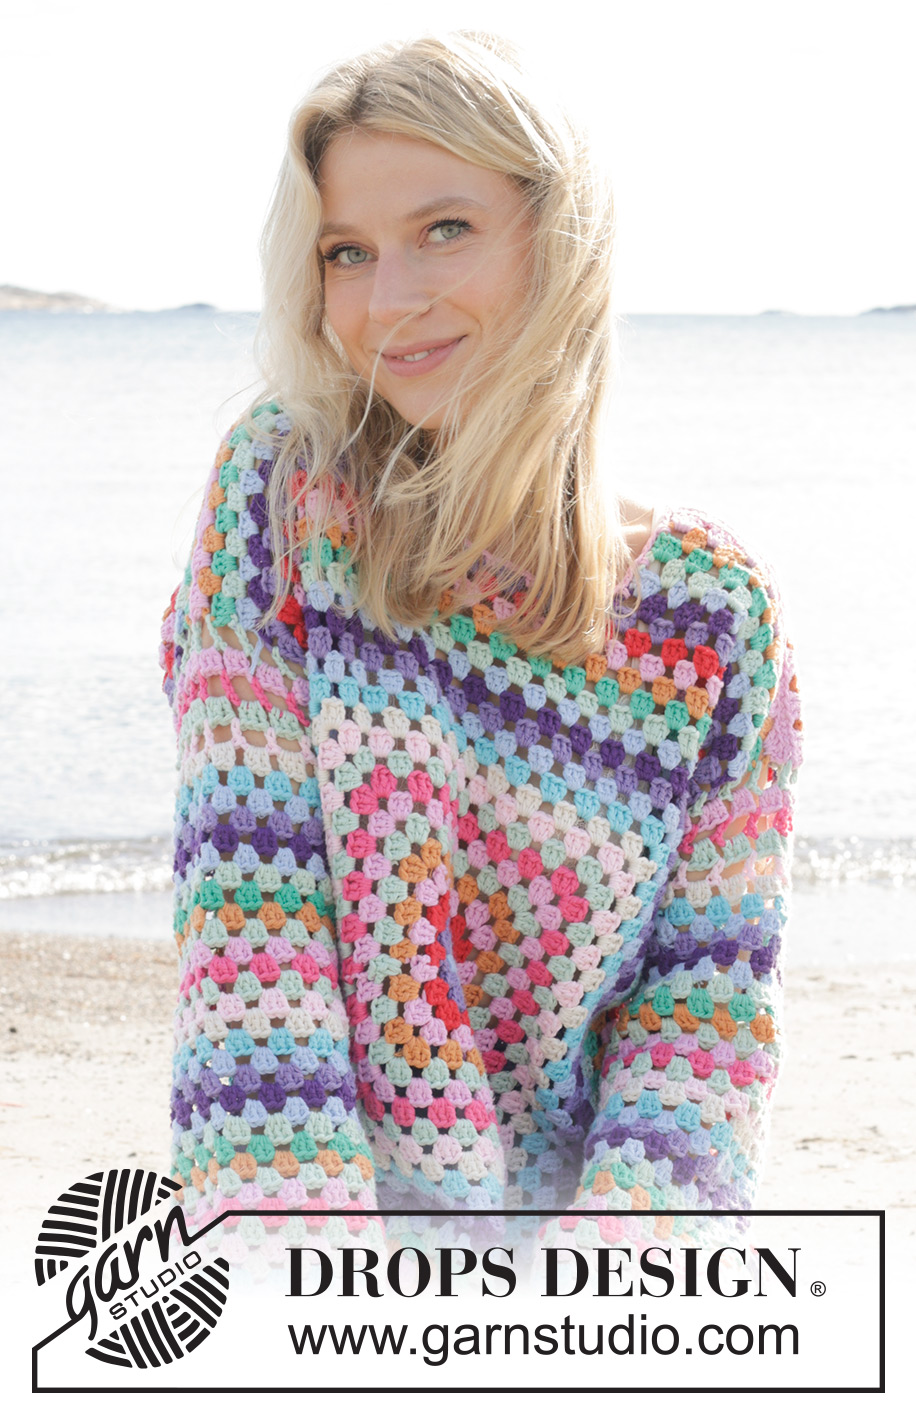
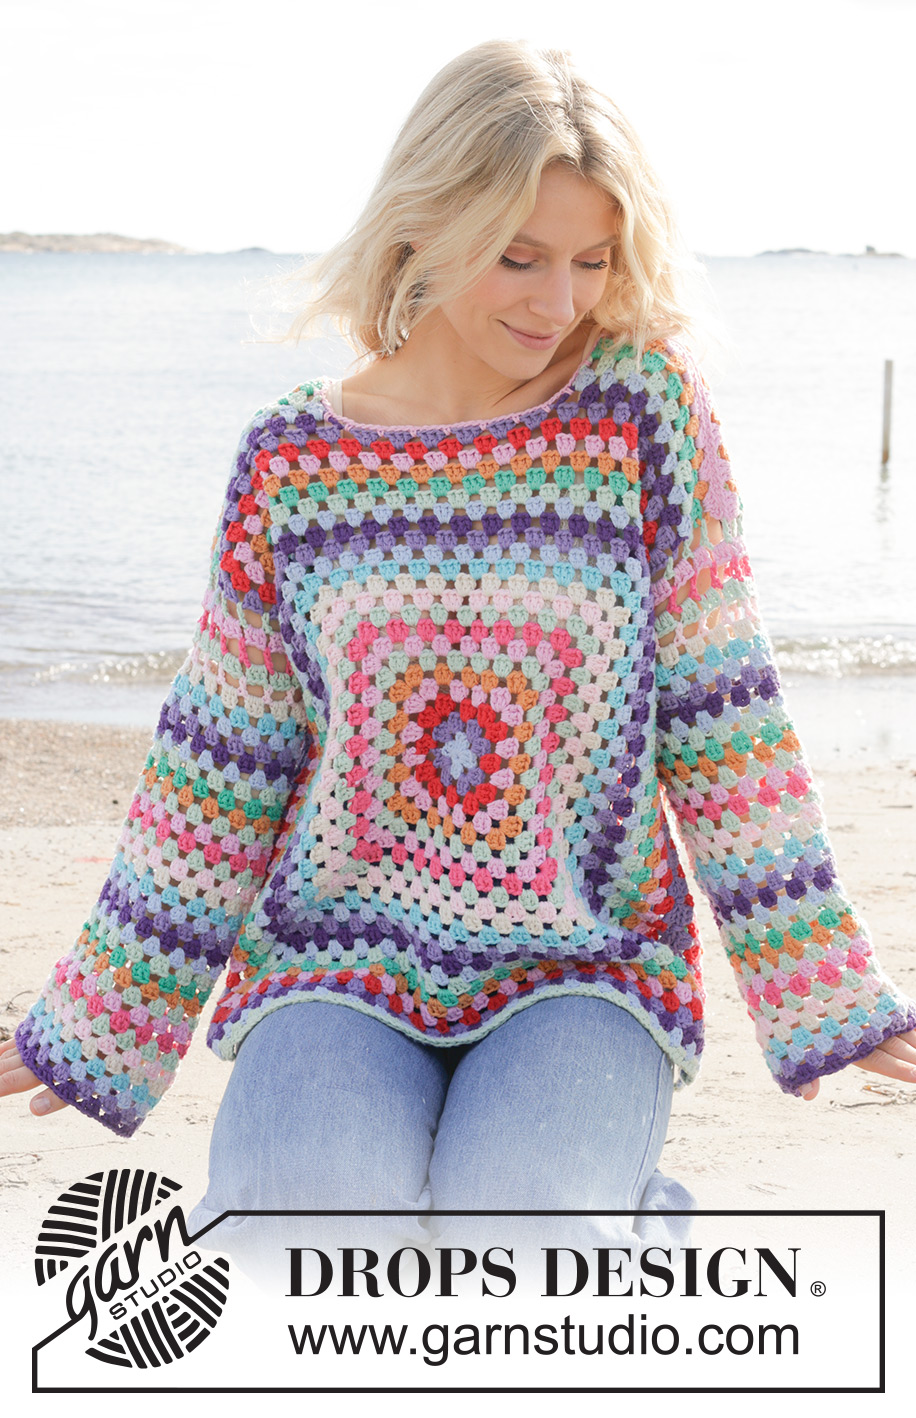
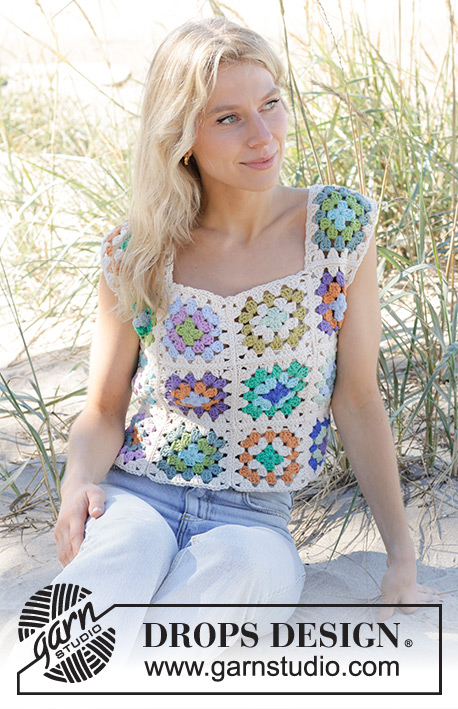
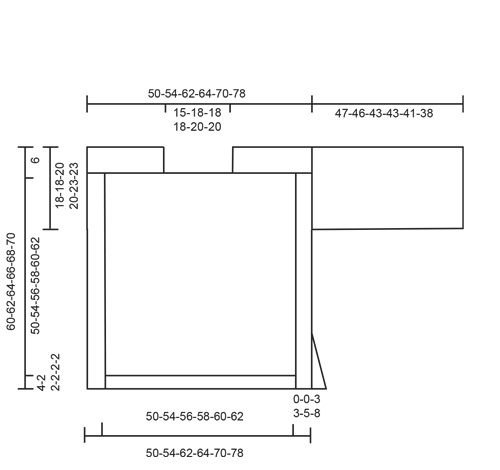
Crocheted sweater in DROPS Paris. The piece is worked from the middle outwards with squares, stripes and split in sides. Sizes S - XXXL.
DROPS 240-18 |
||||||||||||||||||||||
|
------------------------------------------------------- EXPLANATIONS FOR THE PATTERN: ------------------------------------------------------- STRIPES BODY: Work 1 row/round of each color: Color 100, light wash Color 31, purple Color 12, red Color 70, cherry blossom Color 71, tangerine Color 21, mint green Color 70, cherry blossom Color 06, cerise Color 21, mint green Color 57, baby pink Color 17, off white Color 02, light turquoise Color 100, light wash Color 31, purple Color 08, dark purple Color 100, light wash Color 21, mint green Color 11, opal green Color 71, tangerine Color 70, cherry blossom Color 12, red Color 31, purple When these stripes are finished work as follows: Color 08, dark purple Color 100, light wash Color 21, mint green Color 11, opal green Color 71, tangerine Color 70, cherry blossom Color 12, red Color 31, purple Repeat these stripes to finished length. The stripes will end with a different color depending on the size. STRIPES SLEEVES: Work 1 round of each color: Color 21, mint green Color 70, cherry blossom Color 06, cerise Color 21, mint green Color 57, baby pink Color 17, off white Color 02, light turquoise Color 100, light wash Color 31, purple Color 08, dark purple Color 100, light wash Color 21, mint green Color 11, opal green Color 71, tangerine Repeat these stripes. PATTERN: See diagrams A.1 to A.3. ------------------------------------------------------- START PIECE HERE: ------------------------------------------------------- SWEATER - SHORT OVERVIEW OF THE PIECE: The front and back pieces are worked separately, in the round from the middle outwards in a square. The shoulders are worked back and forth. The sleeves are worked in the round, top down. The neck is worked to finish. FRONT PIECE: Square: Start with hook size 5 MM = US H/8 and DROPS Paris in color light wash. Work pattern in the round according to diagram A.1 and STRIPES BODY – read description above. When A.1 is finished, continue working and increasing as shown in A.1 until the square measures 50-54-56-58-60-62 cm x 50-54-56-58-60-62 cm = 19¾"-21¼"-22"-22¾"-23⅝"-24⅜" x 19¾"-21¼"-22"-22¾"-23⅝"-24⅜". REMEMBER THE CROCHET GAUGE! Now continue as described below - remember STRIPES BODY: Sizes S-M: Work back and forth along the bottom edge of the front piece as follows: Fasten the strand with 1 single crochet around the chain-space in the corner and work from the wrong side: A.2a, A.2b as far as the next corner, A.2d around the chain-space in the corner. Turn and work back and forth for 4-2 rows. Cut and fasten the strand. Now work the shoulders and neck on the opposite side of the square: Insert 1 marker-thread on each side of the middle 6 or 7 double-crochet groups (neck). If there are an even number of double-crochet groups on the row, insert the marker-threads around the chain stitch on each side of the middle 6 double-crochet groups, if there are an odd number of double-crochet groups insert the marker-threads around the chain stitch on each side of the middle 7 double-crochet groups. Start from the wrong side and work the right shoulder as follows: A.2a around the chain-space in the corner, A.2b as far as the chain stitch with the first marker-thread, work A.2c around this chain-stitch. Work back and forth like this for 4 rows (the piece measures approx. 5 cm = 2" from the square). Cut and fasten the strand. Skip the 6 or 7 double-crochet groups and work the left shoulder from the wrong side: A.2e around the chain stitch with the marker-thread, work A.2b as far as the corner, A.2d around the chain-space in the corner. Continue like this for 4 rows (the piece measures approx. 5 cm = 2" from the square) – match to the right shoulder. Sizes L, XL, XXL and XXXL. Now work each side as follows: Fasten the strand with 1 single crochet around 1 corner of the square and work from the wrong side: A.2a, A.2b as far as the next corner, A.2d around the chain-space in the corner. Work 2-2-4-6 rows like this. Cut and fasten the strand and work the other side of the square in the same way. Now work along the bottom of the front piece as follows: Fasten the strand with 1 single crochet around the last row at the bottom corner and work from the wrong side: A.2e in the corner (NOTE: work around the last row in the corner), work 1-1-2-3 repeats of A.2b around the 2-2-4-6 rows worked along the side, A.2b as far as the other side, work 1-1-2-3 repeats of A.2b around the 2-2-4-6 rows worked on the other side and A.2c around the corner (NOTE: work around the last row in the corner). Work 2 rows like this. Cut and fasten the strand. Now work the shoulders and neck on the opposite side of the square: Insert 1 marker-thread on each side of the middle 7 or 8 double-crochet groups (neck). If there are an even number of double-crochet groups on the row, insert the marker-threads around the chain stitch on each side of the middle 8 double-crochet groups, if there are an odd number of double-crochet groups insert the marker-threads around the chain stitch on each side of the middle 7 double-crochet groups. Start from the wrong side and work the right shoulder as follows: A.2e in the corner (NOTE: work around the last row in the corner), work 1-2-3 repeats of A.2b around the 2-4-6 rows worked on the side, A.2b as far as the chain stitch with the first marker-thread, work A.2c around this chain stitch. Work 4 rows like this (the piece measures approx. 5 cm = 2" from the square). Cut and fasten the strand. Skip the 7 or 8 double-crochet groups and work the left shoulder from the wrong side: A.2e around the chain stitch with the marker-thread, work A.2b as far as the corner, work 1-2-3 repeats of A.2b around the 2-4-6 rows worked on the side, A.2c in the corner (NOTE: work around the last row). Continue like this for 4 rows (the piece measures approx. 5 cm = 2" from the square) – match to the right shoulder. BACK PIECE: Work in the same way as the front piece, but when working the shoulders and neck work the first 2 rows along the top side of the square + over the rows in each side (applies to sizes L, XL, XXL and XXXL) as follows in the different sizes – remember STRIPES BODY: SIZES S, M: Start in the corner from the wrong side and work A.2a around the chain-space in the corner, A.2b as far as the next corner, work A.2d around the corner. Work 1 row back from the right side (= 2 rows). Insert 1 marker-thread on each side of the middle 6 or 7 double-crochet groups and work the shoulders and neck in the same way as the front piece, but finishing after you have worked 2 rows for the shoulder (a total of 4 rows from the square). Cut and fasten the strand. SIZES L, XL, XXL and XXXL: Start in the corner from the wrong side and work A.2e in the corner, work 1-1-2-3 repeats of A.2b around the 2-2-4-6 rows worked on the side, A.2b as far as the corner of the square, work 1-1-2-3 repeats of A.2b around the 2-2-4-6 rows on the side, A.2c in the corner (NOTE: work around the last row). Work back from the right side (= 2 rows). Insert 1 marker-thread on each side of the middle 7 or 8 double-crochet groups and work the shoulders and neck in the same way as the front piece, but finishing after you have worked 2 rows for the shoulder (a total of 4 rows from the square). Cut and fasten the strand. ASSEMBLY: Sew the shoulder seams – sew in the outermost loop of the outermost stitch from the wrong side. Insert a marker-thread around the chain stitch after 7-7-8-8-9-9 double-crochet groups down from the shoulder seam on each side of both armholes = approx. 18-18-20-20-23-23 cm = 7"-7"-8"-8"-9"-9" from the shoulder seams (armholes). Crochet together the side seams working through both layers from the wrong side as follows: Start at one marker-thread and work 1 single crochet around the chain stitch, * 4 chain stitches, skip 3 double crochets, 1 single crochet around the next chain stitch *, work from *-* until there is 15 cm = 6" left = split. SLEEVES: Read STRIPES SLEEVES. Start mid-under the armhole at the marker-thread and work the round marked with an arrow as follows: A.3a, work 7-7-8-8-9-9 repeats of A.3b as far as the shoulder seam, work the first double crochet in A.3b in the seam, work 7-7-8-8-9-9 repeats of A.3b from the seam and finish with A.3C. Work A.3, three times in height, then continue as follows: A.2a, A.2b until there is 1 stitch left, A.2c. Continue this pattern until the sleeve measures 47-46-43-43-41-38 cm = 18½"-18"-17"-17"-16⅛"-15", Cut and fasten the strand. Work the other sleeve in the same way. NECK: Work with hook size 5 MM = US H/8 and the same color as the last row on the shoulders. Fasten the strand with 1 single crochet in the shoulder seam, working first along the front piece, then the back piece: ROUND 1: Skip the first row, work (3 chain stitches, 1 single crochet around the next row) down to the first corner (= 4 chain-spaces), work (3 chain stitches, 1 single crochet) around each chain stitch along the last round of the square, work (3 chain stitches, 1 single crochet around the next row) as far as the next shoulder seam, skip the first row on the shoulder/neck on the back piece, work (3 chain stitches, 1 single crochet around the next row) down to the first corner, work (3 chain stitches, 1 single crochet) around each chain stitch along the last round on the square, work (3 chain stitches, 1 single crochet around the next row) as far as the shoulder seam (= 3 chain-spaces). |
||||||||||||||||||||||
Diagram explanations |
||||||||||||||||||||||
|
||||||||||||||||||||||
 |
||||||||||||||||||||||
 |
||||||||||||||||||||||
 |
||||||||||||||||||||||
Have you finished this pattern?Tag your pictures with #dropspattern #squaredrainbowsweater or submit them to the #dropsfan gallery. Do you need help with this pattern?You'll find 9 tutorial videos, a Comments/Questions area and more by visiting the pattern on garnstudio.com. © 1982-2026 DROPS Design A/S. We reserve all rights. This document, including all its sub-sections, has copyrights. Read more about what you can do with our patterns at the bottom of each pattern on our site. |
||||||||||||||||||||||


With over 40 years in knitting and crochet design, DROPS Design offers one of the most extensive collections of free patterns on the internet - translated to 17 languages. As of today we count 324 catalogs and 12290 patterns - 12280 of which are translated into English (US/in).
We work hard to bring you the best knitting and crochet have to offer, inspiration and advice as well as great quality yarns at incredible prices! Would you like to use our patterns for other than personal use? You can read what you are allowed to do in the Copyright text at the bottom of all our patterns. Happy crafting!
Post a comment to pattern DROPS 240-18
We would love to hear what you have to say about this pattern!
If you want to leave a question, please make sure you select the correct category in the form below, to speed up the answering process. Required fields are marked *.