
Popular categories
Looking for a yarn?


Comments / Questions (55)
![]() Maïmouna wrote:
Maïmouna wrote:
Vielen Dank für dieses wunderschöne Muster! Ich habe den ersten Raglanteil hinbekommen, sieht auch gut und richtig aus. ABER: Ich habe zu viele Maschen auf der Nadel, auch nachdem ich beide Blenden zusammengestrickt habe. Könnten Sie mir vielleicht sagen, wieviele Maschen ich auf der Nadel haben sollte, BEVOR ich die Blenden zusammenstricke? Dann kann ich noch korrigieren. Beste Grüße
17.09.2020 - 17:16DROPS Design answered:
Liebe Maïmouna, es ist etwas schwierig zu antworten, beachten Sie welche Reihe Sie im A.1 stricken (die mit den Umschlägen, dann haben Sie mehr Maschen auf der Nadel), und prüfen Sie mal die Maschenanzahl von den Raglanzunhammen in den gewünschten Größen. Viel Spaß beim stricken!
18.09.2020 - 08:10
![]() Britt wrote:
Britt wrote:
Der er fejl i opskriften, jeg strikker en str 6/9 mdr der er 102 masker der skal fordeles til raglan og det går ikke op. I skriver i et svar at der i beskrivelsen står en fordeling der siger: 6-14-(4*3=12)- 4-(4*7=28)-4–(4*3=12)-4-12-6 og det giver godt nok 102 men skal mønsteret ikke være ens på begge sider? Altså starte med 6-12-4 som det også slutter?
12.07.2020 - 17:06DROPS Design answered:
Hei Britt. Det er ikke feil i oppskriften. Om du teller maskene fra stolpen til 1.raglanlinjen så er det: 6 stolpemasker – 2 rett - 2 vrang – A.1(2 masker) – 2 vrang – 2 rett – 2 vrang – 2 rett, 1.raglanlinjen settes mellom de to siste rett maskene (= 19 masker med stolpen til 1. raglanslinjen). Om du teller fra den andre stolpen er det: 6 stoplemasker – 2 rett – 2 vrang – A.1(2 masker) – 2 vrang – 2 rett – 2 vrang - 2 rett – 4. raglanlinjen settes mellom de to siste rett maskene (= 19 masker fra 4. raglanslinjen og t.o.m de 6 stolpemaskene). God Fornøyelse!
13.07.2020 - 14:23
![]() Beata wrote:
Beata wrote:
Thank you so much.
20.08.2019 - 05:59
![]() Beata wrote:
Beata wrote:
Witam, Bardzo prosze o pomoc. Zaczelam robic karczku I jedtem w momencie kiedy na drugie mam 134 oczka. / 6o obszycia, 62 o lewe, 60 o dodanych I 6 o obszycia/ Teraz chce robic dalej Jestem na prawej stronie robotki i....zrobilam 6 o obszycia, 2 o prawde, 2 o lewe......I mam teraz robic A1 (=2o) Pytanie.....od ktorego momentu zaczac robic A1. ? Czyli jak przerobic pierwsze A1. Dziekuje bardzo za pomoc Beata
16.08.2019 - 10:38DROPS Design answered:
Witaj Beato, przerabiasz teraz zgodnie z częścią opisu: ROZMIAR (2 lata + 3/4 lata): 6 o. obszycia przodu ściegiem francuskim – patrz powyżej, **2 o.p., 2 o.l., A.1 (= 2 o.)… Czyli po przerobieniu 10 oczek od brzegu (wg opisu) wykonujesz pierwszy rząd schematu A.1 ponad 2 oczkami następująco: 1 oczko prawe, 1 narzut, 1 oczko prawe. Jak wykonywać schemat A.1 znajdziesz TUTAJ. Powodzenia
19.08.2019 - 16:48
![]() Beata wrote:
Beata wrote:
Prosze o pomoc. Zaczynam robotke od karczku. Nabralam 72 oczka I nic dalej nie rozumiem.Nie rozumiem co znaczy przerabiac az zostanie 10 o...przerabiac az zostanie 20 . ...przerabiac az zostanie 30 o. ? Mam gubic te oczka? W ktorym miejscu ?
13.08.2019 - 09:02DROPS Design answered:
Witaj Beato! Tutaj wykonujemy podwyższenie na dekolt tyłu z wykorzystaniem techniki tzw. rzędów skróconych. Ponad tylną częścią bluzeczki będzie wykonanych więcej rzędów, aby tył był lekko wyższy niż przód. Jak wykonać rzędy skrócone obrazuje film TUTAJ. Powodzenia!
13.08.2019 - 20:06
![]() Cynthia wrote:
Cynthia wrote:
Thanks you for the details. I will try this on a test swatch and hopefully will be able to restart and finish. Really appreciate the response.
13.06.2019 - 13:33
![]() Cynthia wrote:
Cynthia wrote:
I'm sorry but this still isn't clear. Reading about the raglan increase does not help. Is there any way you can be more specific about these increase by stepping me through stitch by stitch? Both the increases on the rs and picking them up on the ws? Without clearer instructions I'll be forced to abandon the project.
12.06.2019 - 22:37DROPS Design answered:
Dear Cynthia, the increases for the raglan should be worked in rib as the other sts to keep rib pattern, when you increase before the K2 you have first P2, marker, K2 - you will increase from RS: P2, YO, marker, K2 - this YO will be worked P on next row (WS) so that it becomes from RS: P2, K1, YO, marker, K2 - repeat for next inc so that you have from RS: P2, K2 (= 2 new sts), marker, K2. Work next increase so that it becomes from RS: P2, K2, P1, marker, K2, and on next inc you should have from RS: P2, K2, P2, marker, K2 - repeat the increase like this (before and after the K2 as explained). Happy knitting!
13.06.2019 - 09:06
![]() Cynthia wrote:
Cynthia wrote:
How do you incorporate the yo into the rib pattern? On the wrong side you end up with 2 extra stitches (the yarn overs) one on each side of raglan with 2 k stitches separated by marker. So how do you incorporate these extra stitches into a 2x2 rib? If you k into k and p into p you will end up with a large band of knit in the rib by the raglan. Could you be specific with stitch by stitch explanation how to proceed on wrong side from after the A.1 past first raglan?
12.06.2019 - 14:32DROPS Design answered:
Dear Cynthia, read more about increasing for raglan under RAGLAN. The rib on each front piece, back piece and sleeves should be K2,P2 all the way, so that increasing before/after K2 will let you Purl the first 2 stitches increased, then knit the next 2 stitches increased, then Purl the next 2 and so on, so that on each side of raglan lines the rib will continue. Happy knititng!
12.06.2019 - 15:50
![]() Cynthia wrote:
Cynthia wrote:
When is the vent finished? Is the vent the same as the yoke?
11.06.2019 - 19:35DROPS Design answered:
Dear Cynthia, vent is shorter than yoke, see under ALL SIZES: when piece measures (4) 5-5-6-6 (7-7) cm / (1½”) 2”-2”-2½”-2½” (2¾”-2¾”), band ends and piece is worked in the round. Happy knitting!
12.06.2019 - 07:24
![]() Cynthia wrote:
Cynthia wrote:
Pattern says to work back and forth on circular needle to "after neck vent,' then work piece in the round. It's not clear to me where you join this to knit in the round. Could someone please clarify for me where this gets joined in the round?
11.06.2019 - 16:24DROPS Design answered:
Dear Cynthia, when the vent is finished, you will place the stitches from right front band over the stitches from left front band and work (from the right side of piece) these stitches together two by two then continue to the end of the round, cut the yarn and join then the yarn on mid back, rounds will then start from mid back when working in the round. Happy knitting!
11.06.2019 - 17:04
|
||||||||||
Simply Sweet Singlet#simplysweetsinglet |
||||||||||
 |
 |
|||||||||
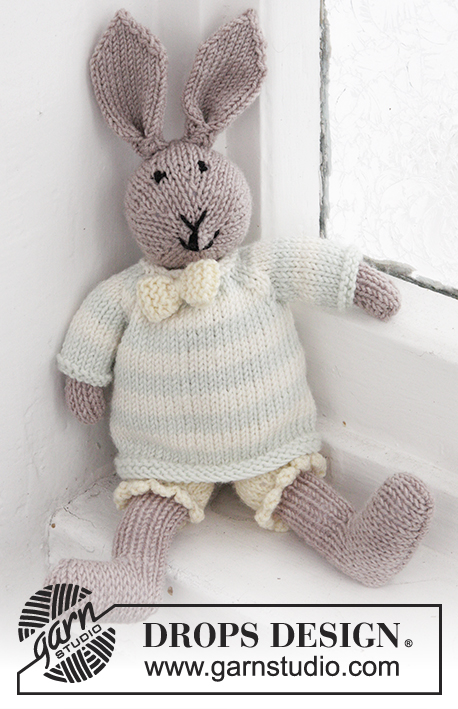
Knitted baby singlet in rib, worked top down in DROPS BabyMerino. Size premature - 4 years.
DROPS Baby 25-31 |
||||||||||
|
GARTER ST (back and forth on needle): K all rows. 1 ridge = 2 rows K. PATTERN: See diagram A.1. The diagram shows all rows in pattern seen from RS. RAGLAN: All inc are done from RS. Inc 1 st on each side of the 4 raglan lines by making 1 YO on each side of the 2 sts K in each raglan line (seen from RS). Work YOs into rib, i.e. P the first 2 sts from WS, K the next 2 sts from WS etc. – NOTE: Do not work YOs twisted (i.e. there should be holes on each side of the 2 K sts in raglan line). BUTTONHOLES: Dec for buttonholes on right band. 1 buttonhole = K tog third and fourth st from edge and make 1 YO (dec for buttonholes from WS). Dec for buttonholes when piece measures: SIZE (premature): 1 and 3 cm. SIZE 0/1 month + 1/3 months: 1 and 4 cm. SIZE 6/9 month + 12/18 months: 1 and 4½ cm. SIZE (2 years + 3/4 years): 1 and 5 cm. ---------------------------------------------------------- SINGLET: The piece is worked top down. Work back and forth on circular needle to after neck vent, then work piece in the round on double pointed needles/circular needle until finished measurements. YOKE: Cast on (54) 60-60-64-74 (74-74) sts (incl 6 band sts in each side towards mid front) on circular needle size 3.5 mm with off white Baby Merino. Work 2 RIDGES in garter st - see explanation above (1st row = RS). Then work an elevation in the back of neck as follows (1st row = RS): K until (6) 8-8-8-10 (10-10) sts remain, turn, tighten yarn and K until (6) 8-8-8-10 (10-10) sts remain in the other side. Turn piece, tighten yarn and K until (12) 16-16-16-20 (20-20) sts remain, turn, tighten yarn and K until (12) 16-16-16-20 (20-20) sts remain in the other side. Turn piece, tighten yarn and K until (18) 24-24-24-30 (30-30) sts remain, turn, tighten yarn and K until (18) 24-24-24-30 (30-30) sts remain in the other side. Turn piece, tighten yarn and K the rest of the row. Work next row as follows from WS: K 6 band sts, P the next (42) 48-48-52-62 (62-62) sts AT THE SAME TIME inc (32) 26-42-38-44 (60-60) sts evenly over these sts and finish with K 6 band sts (remember BUTTONHOLES on band – see explanation above) = (86) 86-102-102-118 (134-134) sts on needle. WORK NEXT ROW AS FOLLOWS FROM RS: SIZE (premature) + 0/1 month: 6 band sts in GARTER ST – see explanation above, K 2, P 2, A.1 (= 2 sts), P 2, K 2 (insert 1 marker in the middle of these 2 sts = raglan line), * P 2, K 2 *, repeat from *-* 3 times in total, P 2, K 2 (insert 1 marker in the middle of these 2 sts = raglan line), * P 2, K 2 *, repeat from *-* 5 times in total, P 2, K 2 (insert 1 marker in the middle of these 2 sts = raglan line), * P 2, K 2 *, repeat from *-* 3 times in total, P 2, K 2 (insert 1 marker in the middle of these 2 sts = raglan line), P 2, A.1 (= 2 sts), P 2, K 2 and 6 band sts in GARTER ST. SIZE 1/3 months + 6/9 months + 12/18 months: 6 band sts in GARTER ST – see explanation above, K 2, P 2, A.1 (= 2 sts), P 2, K 2, P 2, K 2 (insert 1 marker in the middle of these 2 sts = raglan line), * P 2, K 2 *, repeat from *-* 3-3-5 times in total, P 2, K 2 (insert 1 marker in the middle of these 2 sts = raglan line), * P 2, K 2 *, repeat from *-* 7 times in total, P 2, K 2 (insert 1 marker in the middle of these 2 sts = raglan line), * P 2, K 2 *, repeat from *-* 3-3-5 times in total, P 2, K 2 (insert 1 marker in the middle of these 2 sts = raglan line), P 2, K 2, P 2, A.1 (= 2 sts), P 2, K 2 and 6 band sts in GARTER ST. SIZE (2 years + 3/4 years): 6 band sts in GARTER ST – see explanation above, ** K 2, P 2, A.1 (= 2 sts), P 2 **, repeat from **-** 2 times in total, K 2 (insert 1 marker in the middle of these 2 sts = raglan line), * P 2, K 2 *, repeat from *-* 5 times in total, P 2, K 2 (insert 1 marker in the middle of these 2 sts = raglan line), * P 2, K 2 *, repeat from *-* 9 times in total, P 2, K 2 (insert 1 marker in the middle of these 2 sts = raglan line), * P 2, K 2 *, repeat from *-* 5 times in total, P 2, K 2 (insert 1 marker in the middle of these 2 sts = raglan line), ** P 2, A.1 (= 2 sts), P 2, K 2 **, repeat from **-** 2 times in total and finish with 6 band sts in GARTER ST. ALL SIZES: Continue pattern like this back and forth. AT THE SAME TIME on next row from RS inc for RAGLAN – see explanation above (= 8 sts inc). Repeat inc every other row/round (i.e. every row from RS) (7) 7-7-11-11 (11-11) more times (= (8) 8-8-12-12 (12-12) inc in total on each side of every raglan line). AT THE SAME TIME when piece measures (4) 5-5-6-6 (7-7) cm, band ends and piece is worked in the round on needle as follows (adjust so that next row is worked from RS): Place piece tog with sts from right band at the top (so that bands are on top of each other and buttonholes are at the edge). Work 1 round in the round AT THE SAME TIME K tog the 6 sts from right and left band 2 by 2, work the rest of round, cut the yarn and beg next round mid back. Continue rib and pattern in the round AT THE SAME TIME continue inc for raglan as before but work the 6 sts mid front as follows: P 2, A.1 (= 2 sts) and P 2. After last inc for raglan there are (144) 144-160-192-208 (224-224) sts on needle. Work (0) 2-2-2-2 (2-2) more rounds as before, piece measures approx. (7) 8-8-10-11 (11-11) cm from shoulder. On next round LOOSELY cast off the (32) 32-32-40-48 (48-48) sts between each marker over sleeves in rib = (40) 40-48-56-56 (64-64) sts remain on front and back piece. BODY: = (80) 80-96-112-112 (128-128) sts. On next round cast on (8) 16-12-12-16 (16-20) LOOSE sts under each sleeve = (96) 112-120-136-144 (160-168) sts on body – NOW MEASURES PIECE FROM HERE. Continue rib in the round as before (= K 2/P 2) with A.1 at the front as before. When piece measures (10) 13-17-17-18 (21-24) cm from armholes, work rib in the round over all sts (i.e. K 2 instead of A.1 on front piece). When piece measures (13) 16-20-20-21 (24-27) cm from armholes (entire garment measures approx. (20) 24-28-30-32 (35-38) cm from shoulder), LOOSELY cast off with K over K and P over P. ASSEMBLY: Sew the buttons on to the left band. |
||||||||||
Diagram explanations |
||||||||||
|
||||||||||

|
||||||||||
Have you finished this pattern?Tag your pictures with #dropspattern #simplysweetsinglet or submit them to the #dropsfan gallery. Do you need help with this pattern?You'll find 21 tutorial videos, a Comments/Questions area and more by visiting the pattern on garnstudio.com. © 1982-2025 DROPS Design A/S. We reserve all rights. This document, including all its sub-sections, has copyrights. Read more about what you can do with our patterns at the bottom of each pattern on our site. |
||||||||||


With over 40 years in knitting and crochet design, DROPS Design offers one of the most extensive collections of free patterns on the internet - translated to 17 languages. As of today we count 314 catalogues and 11820 patterns translated into English (UK/cm). 11820
We work hard to bring you the best knitting and crochet have to offer, inspiration and advice as well as great quality yarns at incredible prices! Would you like to use our patterns for other than personal use? You can read what you are allowed to do in the Copyright text at the bottom of all our patterns. Happy crafting!
Post a comment to pattern DROPS Baby 25-31
We would love to hear what you have to say about this pattern!
If you want to leave a question, please make sure you select the correct category in the form below, to speed up the answering process. Required fields are marked *.