
Looking for a yarn?


Comments / Questions (147)
![]() Tatiana wrote:
Tatiana wrote:
Buongiorno. Quale filato posso sostituire al Karisma per questo modello? Lo schema resterebbe invariato?
19.09.2021 - 09:08DROPS Design answered:
Buongiorno Tatiana, in sostituzione di Karisma può utilizzare altri filati del gruppo B, ovvero Lima, il nuovo Soft Tweed o Puna controllando sempre che la sua tensione corrisponda a quella indicata nel modello. Buon lavoro!
20.09.2021 - 09:36
![]() Bart wrote:
Bart wrote:
Bonjour J'aimerais faire ce modèle mais où se trouve le diagramme. Pouvez-vous être plus précise ? Cordialement
15.04.2021 - 20:24DROPS Design answered:
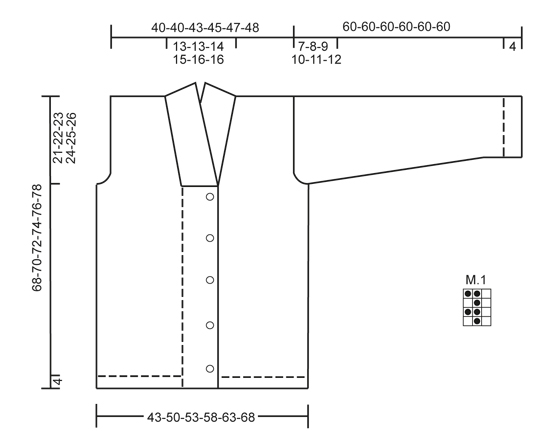
Bonjour Mme Bart, vous trouverez le diagramme au niveau du schéma des mesures, sous la manche. Bon tricot!
16.04.2021 - 14:08
![]() Mary Janet Kirkpatrick wrote:
Mary Janet Kirkpatrick wrote:
On the collar where it says increase in the middle of 12 p sections this is going to disrupt the rib pattern Can you explain what I am to do.
15.04.2021 - 15:43DROPS Design answered:
Dear Mary Janet, in teh collar you start with K1 / P2 ribbing, and at the prescribed row. in the middle on a part of the collar, you will have K/3P ribbing. (inc between the 2 purl stitch). You need this increase so the collar will fold out nicely. Happy Knitting!
15.04.2021 - 17:31
![]() Michele wrote:
Michele wrote:
Hello, I'm making the XL and don't see how many inches between button holes. CAn you please help with that? Thank you
08.03.2021 - 01:18DROPS Design answered:
Dear Michele, you can find the information about the placement of the buttonholes, at the beginning of the pattern. You should make them, when the piece is SIZE XL: 17, 25, 33, 41 and 49 cm long. (which means 8 cm between buttonholes). Happy Knitting!
08.03.2021 - 03:21
![]() Chrystelle wrote:
Chrystelle wrote:
Re Merci de votre réponse Toutefois je ne suis pas sûre d'avoir compris Cela veut il dire que je divise le nombre de mailles total ce qui crée 12 sections où dans chacune d'elles il y aura une fois des côtes différentes ? Désolée, c'est mon premier gros vetement. Déjà que j'ai pas compris le diagramme et que donc j'ai un point totalement différent j'espère pas rater le châle Merci d'avance Chrystelle
01.03.2021 - 15:06DROPS Design answered:
Bonjour Chrystelle, vu sur l'endroit du col, vous tricotez en côtes 1 m end, 2 m env. Vous allez augmenter dans les 12 parties tricotées (2 m env) au milieu du rang (= milieu de l'encolure = encolure dos), vous aurez ainsi, des côtes 1 m end, 2 m env au début du rang, 12 fois ( 1 m end, 3 m env) puis en côtes 1 m end, 2 m env comme avant jusqu'à la fin du rang (vu sur l'endroit). Bon tricot!
02.03.2021 - 08:22
![]() Chrystelle wrote:
Chrystelle wrote:
Bonjour J'ai quasi fini le modèle mais ne comprends pas l'augmentation au niveau du col ni comment une fois les augmentations faites garder les côtes En espérant que vous pourrez m'aider. Merci d'avance Chrystelle
01.03.2021 - 13:57DROPS Design answered:
Bonjour Chrystelle, on va augmenter dans les 12 sections 2 mailles envers des côtes (vues sur l'endroit quand le col est replié), autrement dit, vous tricoterez toujours en côtes 1 m end/2 m envers avant les mailles centrales du col, puis 12 fois en côtes (2 m end/3 m env) et vous terminerez le rang par 2 m end/2 m env. En espérant que ceci puisse vous aider. Bon tricot!
01.03.2021 - 14:42
![]() Anja wrote:
Anja wrote:
Hallo, vielen Dank für das tolle Muster. Ich würde die Jacke gerne noch größer stricken, in 4XL. Ich hätte das aus den übrigen Größenangaben einfach hochgerechnet, aber die Abstände zwischen den Größen, zum Beispiel beim Anschlag, sind nicht gleich. Habt Ihr das Muster in 4XL schon mal ausprobiert und könnt die entsprechenden Angaben zur Verfügung stellen? Danke!
17.12.2020 - 13:32DROPS Design answered:
Liebe Anja, leider können wir jeder Anleitung nach jedem individuellen Frage anpassen und einzelne Modelle auf individuellen Wunsch hin umrechnen. Wenn sie Hilfe damit brauchen, wenden Sie sich bitte an Ihrem DROPS Laden, auch telefonisch oder per E-Mail, dort hilft man Ihnen gerne weiter. Viel Spaß beim stricken!
17.12.2020 - 17:00
![]() Sylvie wrote:
Sylvie wrote:
Bonsoir Je vais commencer ce modèle par le dos mais vous dîtes de faire en même temps les diminutions pour les emmanchures ???? Je comprends pas à partir de quelle hauteur commence t’on les diminutions pas à partir du 1er rang !!!!! Merci de bien vouloir m’aider cordialement Sylvie
15.11.2020 - 18:29DROPS Design answered:
Bonjour Sylvie, la réponse ci-dessous a-t'elle pu vous aider? Si ce n'est pas le cas, n'hésitez pas à nous le faire savoir. Bon tricot!
16.11.2020 - 09:11
![]() Sylvie wrote:
Sylvie wrote:
Bonsoir Je vais commencer ce modèle par le dos mais vous dîtes de faire en même temps les diminutions pour les emmanchures ???? Je comprends pas à partir de quelle hauteur commence t’on les diminutions pas à partir du 1er rang !!!!! Merci de bien vouloir m’aider cordialement Sylvie
14.11.2020 - 23:30DROPS Design answered:
Bonjour Sylvie, cette veste se tricote de bas en haut en commençant par le dos et les 2 devants jusqu'aux emmanchures, puis on divise chaque partie pour terminer chaque devant et le dos séparément. Vous devez d'abord commencer par la partie DOS & DEVANTS dans la taille concernée et tricoter comme indiqué jusqu'à la hauteur des emmanchures (= 47 à 52 cm). Bon tricot!
16.11.2020 - 08:48
![]() Surekha wrote:
Surekha wrote:
Hello, I can’t find the diagram for this pattern , where is it? Thanks.
14.11.2020 - 22:57DROPS Design answered:
Hi Surekha, The diagram is at the bottom of the page, to the right of the sketch with the size measurements. Happy knitting!
15.11.2020 - 11:26
|
|||||||
Lewis#lewisjacket |
|||||||
|
|
|||||||
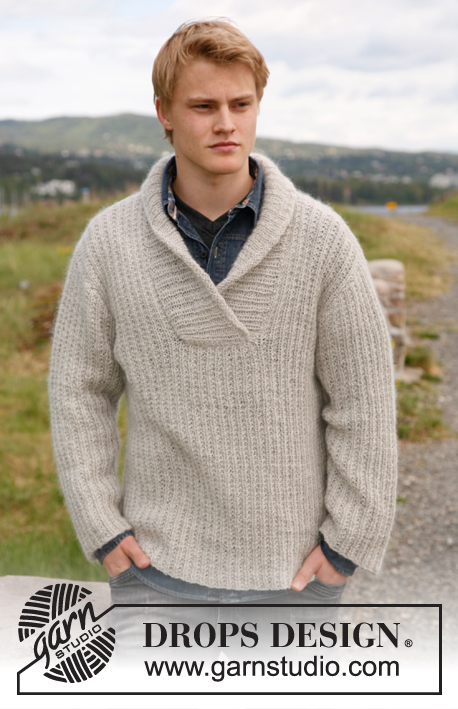
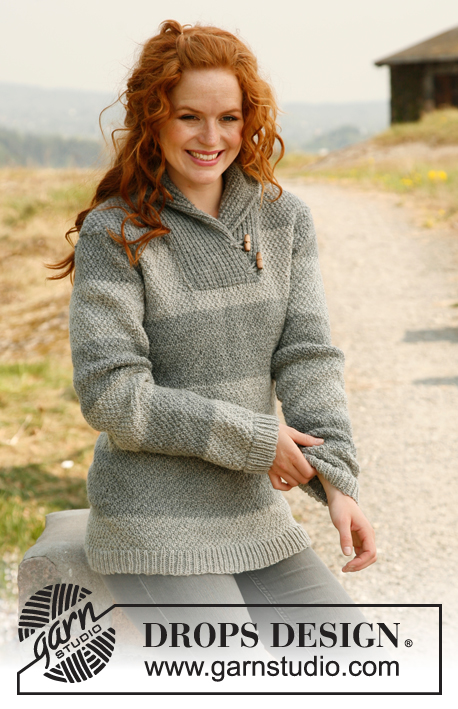
Knitted jacket for men with broad bands and shawl collar in DROPS Karisma and DROPS Kid-Silk. Size: S to XXXL.
DROPS 135-20 |
|||||||
|
GARTER ST (back and forth on needle): K all rows. PATTERN: See diagram M.1 – diagram shows pattern from RS. BUTTON HOLES: Cast off for 5 button holes from RS on left front band. 1 button hole = cast off 5th st from mid front and cast on 1 new st on next row over this st. Cast off for button holes when piece measures: SIZE S: 14, 22, 30, 38 and 46 cm SIZE M: 15, 23, 31, 39 and 47 cm SIZE L: 16, 24, 32, 40 and 48 cm SIZE XL: 17, 25, 33, 41 and 49 cm SIZE XXL: 18, 26, 34, 42 and 50 cm SIZE XXXL: 19, 27, 35, 43 and 51 cm DECREASE TIP (applies to neck): Dec from RS inside 1 edge st in garter st. Dec AFTER 1 st as follows: Slip 1 st as if to K, K 1, psso. Dec BEFORE 1 st as follows: K 2 tog. ---------------------------------------------------------- BODY: Worked back and forth on circular needle from mid front. Cast on 176-200-212-227-248-263 sts (incl 20 band sts in each side towards mid front) on needle size 4.5 mm with 1 thread Karisma and 1 thread Kid-Silk. Work rib as follows (seen from from RS): 20 band sts in GARTER ST - see explanation above - * K 1, P 2 *, repeat from *-* until 21 sts remain, K 1 and 20 band sts in garter st. Then work K over K and P over P and band sts in garter st. When piece measures 4 cm, switch to needle size 5.5 mm. Continue with diagram M.1 and band sts in garter st – diagram M.1 starts and ends with 1 K st (seen from RS). When piece measures 14-15-16-17-18-19 cm, cast off for BUTTON HOLES on left front band - see explanation above! When piece measures 47-48-49-50-51-52 cm, work next row as follows: Cast off the first 19 sts, insert a marker (this marks where to start the knit up for collar), work 27-33-36-39-45-48 sts (= right front piece), cast off 6 sts for armhole, work 72-84-90-99-108-117 sts (= back piece), cast off 6 sts for armhole and work the rest of row (= 46-52-55-58-64-67 sts on left front piece). Turn and cast off the first 19 sts, insert a marker (this marks where to end the knit up for collar), work the rest of row = 27-33-36-39-45-48 sts. Finish each part separately. LEFT FRONT PIECE: = 27-33-36-39-45-48 sts. Continue with diagram M.1 as before and outermost st towards mid front in garter st. AT THE SAME TIME cast off for armhole at beg of every row from the side: 2 sts 0-2-2-3-4-5 times and 1 st 0-2-2-3-4-5 times. AT THE SAME TIME when piece measures 49-50-51-52-53-54 cm, dec 1 st towards the neck - SEE DECREASE TIP! Repeat dec every 5-5-5-5-3-4 cm a total of 3-3-4-3-5-4 times. After all cast offs and dec are done, 24-24-26-27-28-29 sts remain on needle. Cast off when piece measures 68-70-72-74-76-78 cm. RIGHT FRONT PIECE: Work as left front piece but reversed. BACK PIECE: = 72-84-90-99-108-117 sts. Continue with diagram M.1 while at the same time casting off for armholes at the beg of every row in each side as on front piece = 72-72-78-81-84-87 sts. When piece measures 66-68-70-72-74-76 cm, cast off the middle 22-22-24-25-26-27 sts for neck and finish each shoulder separately. At beg of next row from neck, dec 1 st = 24-24-26-27-28-29 sts remain on shoulder. Cast off when piece measures 68-70-72-74-76-78 cm. SLEEVE: Worked back and forth on needle. Cast on 50-53-53-56-56-59 sts (incl 1 edge st in each side) on needle size 4.5 mm with 1 thread Karisma and 1 thread Kid-Silk. Work as follows (seen from from RS): 1 edge st in garter st, * K 1, P 2 *, repeat from *-* and finish with 1 edge st in garter st. When piece measures 4 cm, switch to needle size 5.5 mm. Continue with diagram M.1 with 1 edge st in each side in garter st. AT THE SAME TIME when piece measures 10 cm, inc 1 st in each side. Repeat inc every 5-5-3½-3-2½-2½ cm a total of 9-9-12-12-15-15 times = 68-71-77-80-86-89 sts – work the inc sts gradually in diagram M.1. When piece measures 53-52-51-50-49-48 cm (shorter measurements in the larger sizes because of longer sleeve cap and broader shoulder width) cast off at beg of every row in each side: 4 sts 1 time, 2 sts 3 times and 1 st 1-2-4-5-7-8 times. Then cast off 2 sts in each side until piece measures 59 cm, then cast off 3 sts 1 time in each side. Cast off, the piece measures approx. 60 cm in all sizes. ASSEMBLY: Sew the shoulder seams. SHAWL COLLAR: Knit up sts (inside 1 edge st) on circular needle size 4.5 mm with 1 thread Karisma and 1 thread Kid-Silk - start mid front at marker on right front piece: Knit up approx. 40 to 50 sts up to shoulder, then 26 to 32 sts along the neck, and 40 to 50 sts down along left front piece until marker = 106 to 132 sts. K 1 row from WS while AT THE SAME TIME inc no of sts to 132-138-144-150-156-162. Then work rib as follows (seen from RS): 1 st in garter st, * K 1, P 2 *, repeat from *-* and finish with K 1 and 1 st in garter st. Continue like this until collar measures approx. 5 cm. Now inc 1 st in each of the middle 12 P-sections, seen from RS (= back of neck) = 144-150-156-162-168-174 sts. Continue with K over K and P over P until collar measures approx. 10 cm - adjust so that next row is from WS. K 3 rows over all sts, then cast off all sts with K from RS. Fasten collar with stitches in each side towards band – sew edge to edge to avoid a chunky seam. MORE ASSEMBLY: Sew in sleeves and sew on buttons. |
|||||||
Diagram explanations |
|||||||
|
|||||||
 |
|||||||
Have you finished this pattern?Tag your pictures with #dropspattern #lewisjacket or submit them to the #dropsfan gallery. Do you need help with this pattern?You'll find 14 tutorial videos, a Comments/Questions area and more by visiting the pattern on garnstudio.com. © 1982-2025 DROPS Design A/S. We reserve all rights. This document, including all its sub-sections, has copyrights. Read more about what you can do with our patterns at the bottom of each pattern on our site. |
|||||||


With over 40 years in knitting and crochet design, DROPS Design offers one of the most extensive collections of free patterns on the internet - translated to 17 languages. As of today we count 320 catalogues and 12093 patterns translated into English (UK/cm). 12093
We work hard to bring you the best knitting and crochet have to offer, inspiration and advice as well as great quality yarns at incredible prices! Would you like to use our patterns for other than personal use? You can read what you are allowed to do in the Copyright text at the bottom of all our patterns. Happy crafting!
Post a comment to pattern DROPS 135-20
We would love to hear what you have to say about this pattern!
If you want to leave a question, please make sure you select the correct category in the form below, to speed up the answering process. Required fields are marked *.