
Looking for a yarn?


Comments / Questions (147)
![]() Tina wrote:
Tina wrote:
Det står att man ska lägga upp 212 maskor och sen inkl 20 maskor på var sida. Ska man endast lägga upp 212 eller är de totalt 252 maskor?
27.08.2013 - 17:45DROPS Design answered:
Om du stickar strl. L ska du lägga upp totalt 212 m (det inkluderar framkantsmaskorna). Lycka till!
29.08.2013 - 11:21
![]() Tina wrote:
Tina wrote:
Om det står inkl, ska dessa räknas på de 212 maskorna så att de totalt blir 252 maskor?
27.08.2013 - 17:40DROPS Design answered:
Det är totalt 212 m som ska läggas upp.
29.08.2013 - 11:23
![]() Sarah wrote:
Sarah wrote:
After you switch needle size, the pattern says to follow the diagram M.1, but say that it starts and ends with 1K stitch. As I read the diagram, it would be as follows: Row 1 -PPK repeated, Row 2: KPK repeated and this two-row sequence just repeats. Are the K1s supposed to be added to each of these series, or to the beginning and end of each row? Thanks!!
27.06.2013 - 03:52DROPS Design answered:
Dear Sarah, diagram is read from the bottom corner at the right side towards the right (from RS) and from left to right (from WS), so that you start M.1 with K1 (1st row in M.1 is K1,P1,K1) and end with K1 so that pattern fits on both front piece. Happy knitting!
27.06.2013 - 09:32
![]() Sarah wrote:
Sarah wrote:
For the beginning, the pattern refers to a ribbing, but says to K over K and P over P. This does not seem to make a rib, but looks almost like garter stitch. Is that correct? Do you have a picture of what this should look like? Thanks!!
27.06.2013 - 03:51DROPS Design answered:
Dear Sarah, body starts with 4 cm ribbing with 20 garter sts each side, so that you will work for 4 cm : from RS:K 20,*K1,P2*, repeat from *-* and finish with K1, K20 - and from WS: K20, *P1,K2*, repeat from *-* and finish with P1, K20. Happy knitting!
27.06.2013 - 09:13
![]() BOZZONE wrote:
BOZZONE wrote:
Bonjour, Pouvez-vous me donner une correspondance des tailles en cm (tour de poitrine notamment). J'hésite entre L et XL. Bien cordialement Simon Bozzone.
14.06.2013 - 11:57DROPS Design answered:
Bonjour Mr Bozzone, vous trouverez les mesures correspondantes sur le schéma à la fin des explications, elles devraient vous permettre de "trancher" pour la bonne taille en comparant avec une veste analogue que vous avez. Bon tricot!
14.06.2013 - 13:25
![]() Victoria Raaschou wrote:
Victoria Raaschou wrote:
After the button hole area, which area are we measuring from, the body with the M1 pattern or the garter knit edge where the button holes start out and is nearly 6.5cm shorter than the body?
02.05.2013 - 22:28DROPS Design answered:
Dear Mrs Raaschou, could you please give us more informations about your question, we are very sorry but cannot see which point does worry you. Thank you.
04.05.2013 - 08:18
![]() Victoria Raaschou wrote:
Victoria Raaschou wrote:
When Finished with buttonholes and you measure next section, do you measure the body or the ribbed edge? I ask because there's a difference in the body of the cardi and the ribbed edge of nearly 6.5 cm. pls advise. Thx
02.05.2013 - 17:04Sylvie Prévost wrote:
Merci!
09.04.2013 - 01:32
![]() Isabel wrote:
Isabel wrote:
No entiendo para que sirven las agujas rectas? me lo pueden explicar?
06.04.2013 - 15:17DROPS Design answered:
Hola Isabel, este modelo se puede realizar sólo con ag circulares.
26.05.2013 - 00:37Sylvie Prévost wrote:
Je reprends ma question, mais en français (ce sera plus facile): Je ne comprends pas comment faire les augmentations du col châle. S'agit-il d'ajouter sur 1 rang 1 maille par répétition du motif sur la section du col qui sera vis-à-vis la nuque ?
01.04.2013 - 02:26DROPS Design answered:
Bonjour Madame Prévost, on augmente 1 m env dans les 12 sections envers des côtes au milieu du col (= partie dos du col), et on tricote ensuite en côtes (vu sur l'endroit) 1 m end, 2 m env comme avant sur les mailles du col + 1 m end, 3 m env sur les mailles du milieu du col. Bon tricot !
02.04.2013 - 09:40
|
|||||||
Lewis#lewisjacket |
|||||||
|
|
|||||||
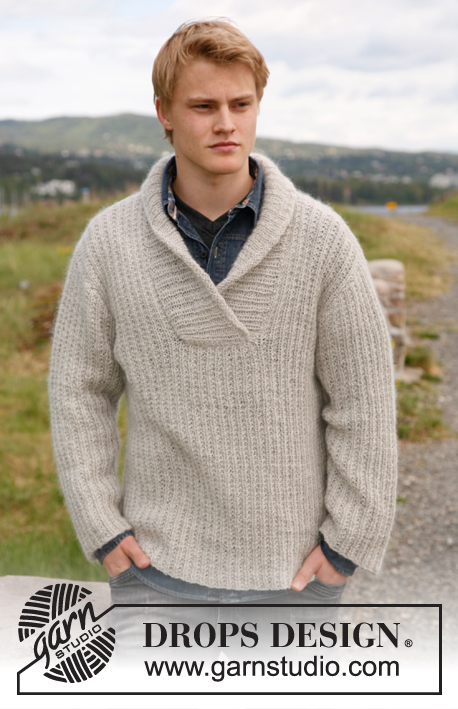
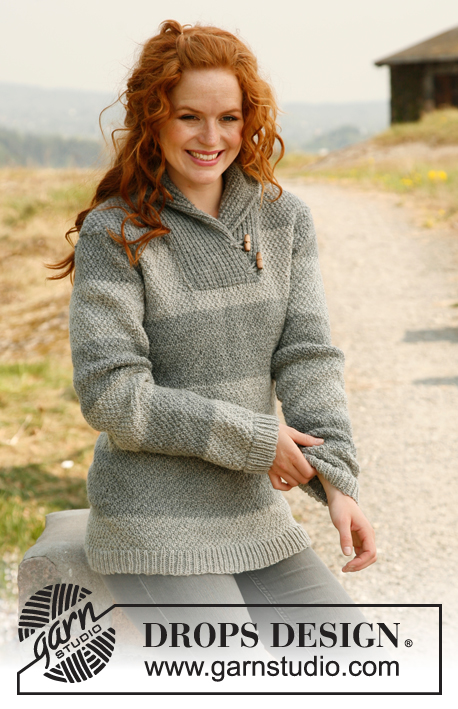
Knitted jacket for men with broad bands and shawl collar in DROPS Karisma and DROPS Kid-Silk. Size: S to XXXL.
DROPS 135-20 |
|||||||
|
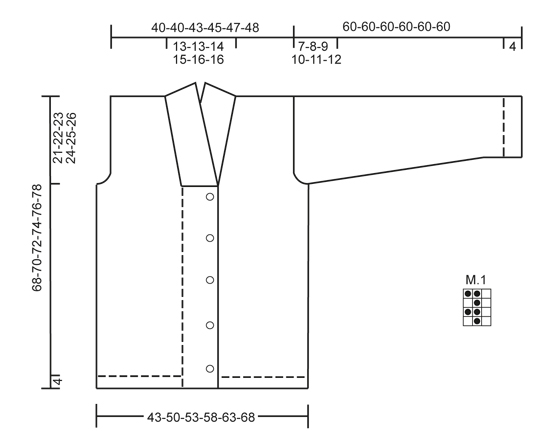
GARTER ST (back and forth on needle): K all rows. PATTERN: See diagram M.1 – diagram shows pattern from RS. BUTTON HOLES: Cast off for 5 button holes from RS on left front band. 1 button hole = cast off 5th st from mid front and cast on 1 new st on next row over this st. Cast off for button holes when piece measures: SIZE S: 14, 22, 30, 38 and 46 cm SIZE M: 15, 23, 31, 39 and 47 cm SIZE L: 16, 24, 32, 40 and 48 cm SIZE XL: 17, 25, 33, 41 and 49 cm SIZE XXL: 18, 26, 34, 42 and 50 cm SIZE XXXL: 19, 27, 35, 43 and 51 cm DECREASE TIP (applies to neck): Dec from RS inside 1 edge st in garter st. Dec AFTER 1 st as follows: Slip 1 st as if to K, K 1, psso. Dec BEFORE 1 st as follows: K 2 tog. ---------------------------------------------------------- BODY: Worked back and forth on circular needle from mid front. Cast on 176-200-212-227-248-263 sts (incl 20 band sts in each side towards mid front) on needle size 4.5 mm with 1 thread Karisma and 1 thread Kid-Silk. Work rib as follows (seen from from RS): 20 band sts in GARTER ST - see explanation above - * K 1, P 2 *, repeat from *-* until 21 sts remain, K 1 and 20 band sts in garter st. Then work K over K and P over P and band sts in garter st. When piece measures 4 cm, switch to needle size 5.5 mm. Continue with diagram M.1 and band sts in garter st – diagram M.1 starts and ends with 1 K st (seen from RS). When piece measures 14-15-16-17-18-19 cm, cast off for BUTTON HOLES on left front band - see explanation above! When piece measures 47-48-49-50-51-52 cm, work next row as follows: Cast off the first 19 sts, insert a marker (this marks where to start the knit up for collar), work 27-33-36-39-45-48 sts (= right front piece), cast off 6 sts for armhole, work 72-84-90-99-108-117 sts (= back piece), cast off 6 sts for armhole and work the rest of row (= 46-52-55-58-64-67 sts on left front piece). Turn and cast off the first 19 sts, insert a marker (this marks where to end the knit up for collar), work the rest of row = 27-33-36-39-45-48 sts. Finish each part separately. LEFT FRONT PIECE: = 27-33-36-39-45-48 sts. Continue with diagram M.1 as before and outermost st towards mid front in garter st. AT THE SAME TIME cast off for armhole at beg of every row from the side: 2 sts 0-2-2-3-4-5 times and 1 st 0-2-2-3-4-5 times. AT THE SAME TIME when piece measures 49-50-51-52-53-54 cm, dec 1 st towards the neck - SEE DECREASE TIP! Repeat dec every 5-5-5-5-3-4 cm a total of 3-3-4-3-5-4 times. After all cast offs and dec are done, 24-24-26-27-28-29 sts remain on needle. Cast off when piece measures 68-70-72-74-76-78 cm. RIGHT FRONT PIECE: Work as left front piece but reversed. BACK PIECE: = 72-84-90-99-108-117 sts. Continue with diagram M.1 while at the same time casting off for armholes at the beg of every row in each side as on front piece = 72-72-78-81-84-87 sts. When piece measures 66-68-70-72-74-76 cm, cast off the middle 22-22-24-25-26-27 sts for neck and finish each shoulder separately. At beg of next row from neck, dec 1 st = 24-24-26-27-28-29 sts remain on shoulder. Cast off when piece measures 68-70-72-74-76-78 cm. SLEEVE: Worked back and forth on needle. Cast on 50-53-53-56-56-59 sts (incl 1 edge st in each side) on needle size 4.5 mm with 1 thread Karisma and 1 thread Kid-Silk. Work as follows (seen from from RS): 1 edge st in garter st, * K 1, P 2 *, repeat from *-* and finish with 1 edge st in garter st. When piece measures 4 cm, switch to needle size 5.5 mm. Continue with diagram M.1 with 1 edge st in each side in garter st. AT THE SAME TIME when piece measures 10 cm, inc 1 st in each side. Repeat inc every 5-5-3½-3-2½-2½ cm a total of 9-9-12-12-15-15 times = 68-71-77-80-86-89 sts – work the inc sts gradually in diagram M.1. When piece measures 53-52-51-50-49-48 cm (shorter measurements in the larger sizes because of longer sleeve cap and broader shoulder width) cast off at beg of every row in each side: 4 sts 1 time, 2 sts 3 times and 1 st 1-2-4-5-7-8 times. Then cast off 2 sts in each side until piece measures 59 cm, then cast off 3 sts 1 time in each side. Cast off, the piece measures approx. 60 cm in all sizes. ASSEMBLY: Sew the shoulder seams. SHAWL COLLAR: Knit up sts (inside 1 edge st) on circular needle size 4.5 mm with 1 thread Karisma and 1 thread Kid-Silk - start mid front at marker on right front piece: Knit up approx. 40 to 50 sts up to shoulder, then 26 to 32 sts along the neck, and 40 to 50 sts down along left front piece until marker = 106 to 132 sts. K 1 row from WS while AT THE SAME TIME inc no of sts to 132-138-144-150-156-162. Then work rib as follows (seen from RS): 1 st in garter st, * K 1, P 2 *, repeat from *-* and finish with K 1 and 1 st in garter st. Continue like this until collar measures approx. 5 cm. Now inc 1 st in each of the middle 12 P-sections, seen from RS (= back of neck) = 144-150-156-162-168-174 sts. Continue with K over K and P over P until collar measures approx. 10 cm - adjust so that next row is from WS. K 3 rows over all sts, then cast off all sts with K from RS. Fasten collar with stitches in each side towards band – sew edge to edge to avoid a chunky seam. MORE ASSEMBLY: Sew in sleeves and sew on buttons. |
|||||||
Diagram explanations |
|||||||
|
|||||||
 |
|||||||
Have you finished this pattern?Tag your pictures with #dropspattern #lewisjacket or submit them to the #dropsfan gallery. Do you need help with this pattern?You'll find 14 tutorial videos, a Comments/Questions area and more by visiting the pattern on garnstudio.com. © 1982-2025 DROPS Design A/S. We reserve all rights. This document, including all its sub-sections, has copyrights. Read more about what you can do with our patterns at the bottom of each pattern on our site. |
|||||||


With over 40 years in knitting and crochet design, DROPS Design offers one of the most extensive collections of free patterns on the internet - translated to 17 languages. As of today we count 320 catalogues and 12092 patterns translated into English (UK/cm). 12092
We work hard to bring you the best knitting and crochet have to offer, inspiration and advice as well as great quality yarns at incredible prices! Would you like to use our patterns for other than personal use? You can read what you are allowed to do in the Copyright text at the bottom of all our patterns. Happy crafting!
Post a comment to pattern DROPS 135-20
We would love to hear what you have to say about this pattern!
If you want to leave a question, please make sure you select the correct category in the form below, to speed up the answering process. Required fields are marked *.