
Popular categories
Looking for a yarn?


Comments / Questions (85)
![]() Gisèle DAVID wrote:
Gisèle DAVID wrote:
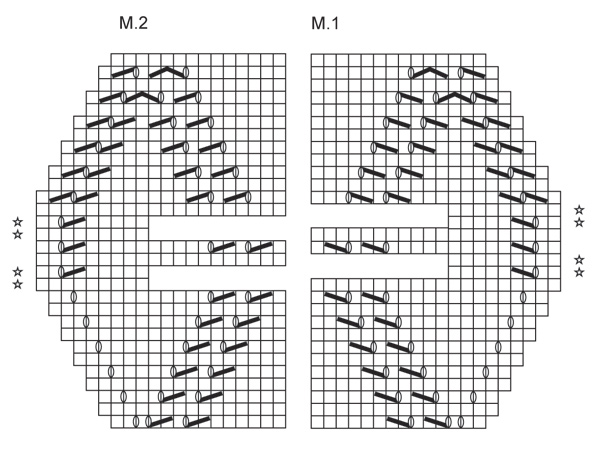
Bonjour, Concernant les explications du diagramme M2 et M1, l'étoile "*" vous indiquez "sur ce rang, tricoter seulement les 9 m du bord extérieur" : cela signifie t- il que les 11 mailles restantes du point ajouré sont passées sur l'autre aiguille sans les tricoter et qu'on tricote ensuite les m suivantes au point mousse ? Le fil est donc juste passé derrière ces 11 mailles? Ce n'est pas très beau car compte tenu du nombre de mailles à ne pas tricoter il pend un peu.
12.11.2022 - 21:09DROPS Design answered:
Bonjour Mme David, les rangs indiqués par une étoile sont des rangs raccourcis, autrement dit, vous ne tricotez que les mailles dessinées dans le diagramme, ex M.1, en commençant sur l'endroit, tricotez 9 mailles, tournez et tricotez ces 9 m; tricotez toutes les mailes, tournez et tricotez le rang retour, tricotez 9 m, tournez et tricotez ces 9 mailles etc. Bon tricot!
14.11.2022 - 09:38
![]() Christiane Puttemans wrote:
Christiane Puttemans wrote:
In het telpatroon staat; brein deze naald alleen over de buitenste 9 st. Moet men dan de volgende10st gewoon overstekenen en dan verder breien.
02.10.2022 - 11:48DROPS Design answered:
Dag Christiane,
Aan het eind van de naald (M.2) brei je deze 9 steken als volgt: je breit 9 steken terug, dan keer je het werk en brei je de naald weer uit (9 steken). Aan het begin va de naald (M.1) brei je 9 steken, dan keer je het werk en brei je weer 9 steken terug.
04.10.2022 - 19:26
![]() Jac Carey wrote:
Jac Carey wrote:
Please confirm how many balls of yarn I would need for this pattern. For example pattern says 350gm = 14 balls of Alpaca and 125gm for Kid silk = 5 balls. Thanks Jac
26.02.2022 - 02:52DROPS Design answered:
Hi, Alpaca 350g = 7 balls (1 ball is 50 g), Kid-Silk 125g = 5 balls (1 ball= 25g). Happy knitting!
27.02.2022 - 09:15
![]() Blanc Oriette wrote:
Blanc Oriette wrote:
J ai fait une bande du point ajoure sur 14 mailles que j ai cousu au bas du gilet finition tres jolie sur ce modele
16.01.2020 - 12:20
![]() Mapau wrote:
Mapau wrote:
Ce modèle est magnifique, grâce à vos explications j'ai pu le réaliser sans difficultés et le résultat est superbe, à tel point que j'en fait un 2ème.
05.08.2019 - 22:38
![]() Geke Reitsema wrote:
Geke Reitsema wrote:
Hallo. mijn vraag is: heb 8 cm gebreid daarna markeerders geplaatst en moet nu 1 steek aan iedere kant van de mark. minderen. is dat dan totaal 4 steken in deze nld of 2 st, en als het 2 st zijn doe ik die dan op het rugpand of het voorpand. mvg Geke
02.03.2015 - 16:24DROPS Design answered:
Hoi Geke. Je hebt 2 markeerders in het werk. Je mindert aan iedere kant van beide markeerders = 4 st minder in de nld.
03.03.2015 - 13:34
![]() Marion wrote:
Marion wrote:
Ich verstehe nicht, wie die weiteren Zunahmen für den Kragen nach dem Lochmuster zu machen sind. Das Lochmuster ist doch fortlaufend. Bis zu den 31 cm und 20 Maschen pro Seite ist alles klar. Aber wann muss ich dann wieder aufnehmen (10 mal 1M in jeder 4. Reihe)
05.07.2014 - 11:18DROPS Design answered:
Liebe Marion, die Anleitung wurde an dieser Stelle gerade etwas umformuliert, da sie nicht ganz korrekt war, das dürfte Ihr Problem beheben. Sie nehmen nicht NACH dem Lochmuster zu, sondern gleichzeitig, während Sie das Lochmuster stricken. Wenn es weiterhin Verständnisprobleme gibt, fragen Sie einfach noch einmal. Weiterhin gutes Gelingen!
06.07.2014 - 14:16
![]() Hennie wrote:
Hennie wrote:
Ik begrijp het begin van de kanttekening niet. Is de 1e naald onderaan? Ik moet recht breien tot er 14 steken over zijn en dan? M2 onderaan starten of boevenaan? Begin ik dan de volgende naald met M1? Graag uw hulp!
10.05.2012 - 12:50DROPS Design answered:
U breit M.1 aan de ene kant van het werk (beg nld aan goede kant) en M.2 aan het einde van de nld. Alle telpatronen leest u van rechtsonder naar linksonder en de volgende nld (teruggaand) van rechts naar links.
11.05.2012 - 12:26
![]() Jutta wrote:
Jutta wrote:
HAllo,ich verstehe das mit den Zunahmen beim Kragen nicht.Dort steht :am Anfang und am Ende R.für Kragen aufnehmen: 2re, 1Umschl.,1re, 1 Umschl. dann die Blende und ie Krusrippe wie gehabt.Muss die Blende nicht immer am Anfang und Ende der Reihe bleiben? Wenn ich davor aufnehme, verrutscht sie ja nach innen.
29.03.2012 - 17:07DROPS Design answered:
Due Zunahmen werden am Anfang und am Schluss ganz aussen an der Arbeit gemacht.
30.03.2012 - 21:41
![]() Barbara wrote:
Barbara wrote:
Kann ich diese Jacke auch in Karisma stricken ?
18.03.2012 - 08:46DROPS Design answered:
Nei, Karisma ist zu dünn (garngruppe b). 2 Fäden in Garngruppe A ergeben Garngruppe C (Alaska, Nepa....).
19.03.2012 - 09:25
|
|||||||||||||||||||
Beautiful You!#beautifulyoucardigan |
|||||||||||||||||||
 |
 |
||||||||||||||||||
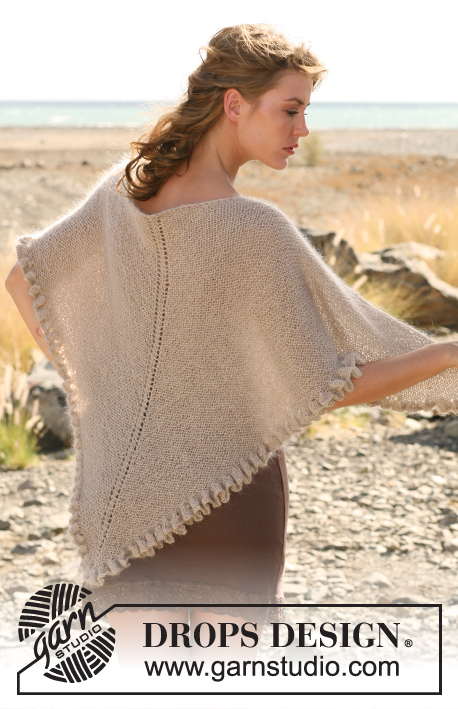
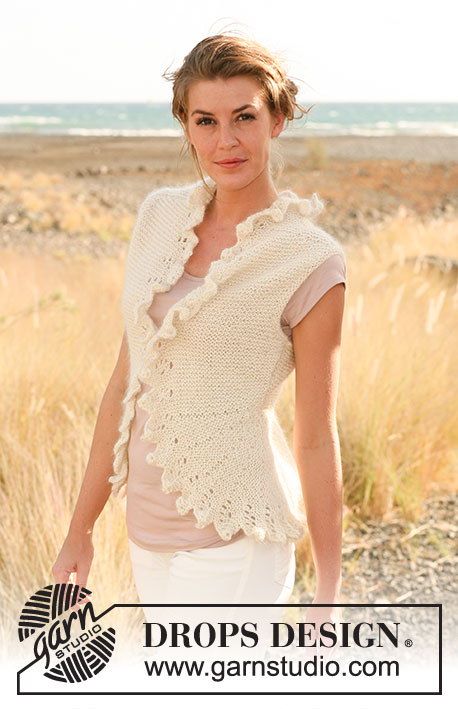
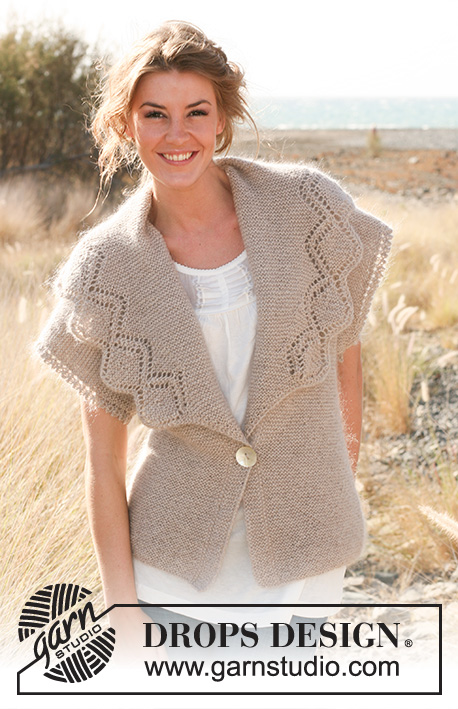
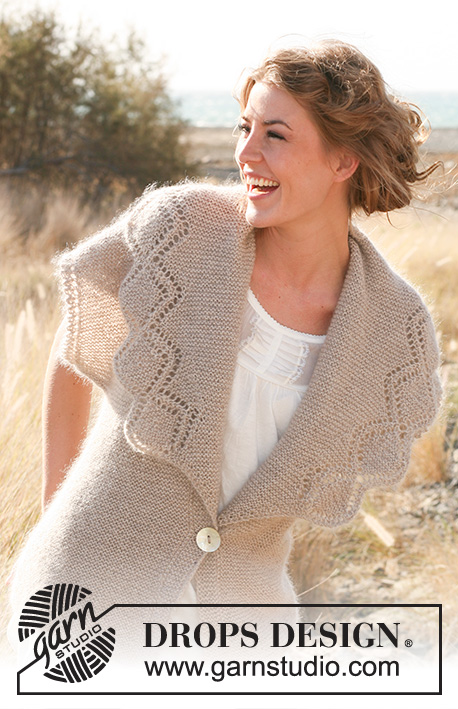
Knitted DROPS jacket in garter st with broad collar and lace pattern in "Alpaca" and "Kid-Silk". Size: S - XXXL.
DROPS 130-2 |
|||||||||||||||||||
|
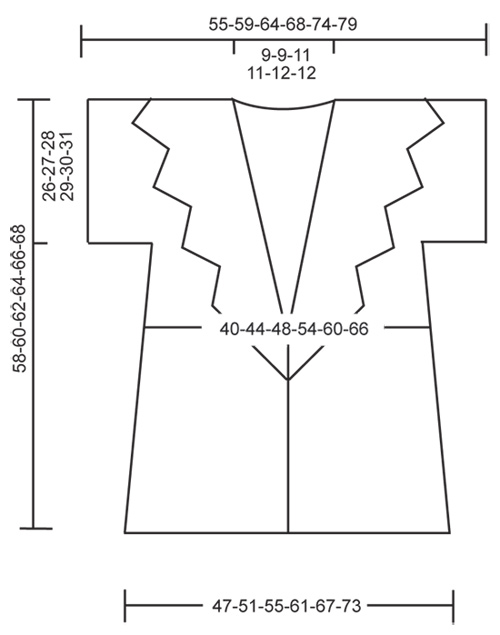
GARTER ST (back and forth on needle): K all rows. BUTTON HOLE: Cast off for 1 button hole on right front band. 1 button hole = cast off 4th and 5th st from mid front. On next row cast on 2 new sts over the cast off sts. Cast off for button hole when piece measures 20 cm in all sizes. LACE PATTERN: See diagram M.1 and M.2 (= 14 sts). Diagram shows pattern seen from WS, i.e. 1st row = from WS. PICOT EDGE (back and forth on needle): Row 1 (= the last 4 sts on needle): K all sts. Row 2 (= the first 4 sts on needle): K all sts. Row 3 (= the last 4 sts on needle inc to 6 sts): K until 4 sts remain, work these sts as follows: K 2 tog, 1 YO, work 2 sts in each of the last 2 sts. Row 4 (= the first 6 sts on needle dec to 4 sts): Slip 1st st as if to K, K 1, psso, K 1 and slip the last st on right needle over the foremost st - then K the remaining sts. Repeat row 1-4 in each side. INCREASE TIP (applies to collar): Inc for collar from WS. Inc by making 1 YO after M.1 and 1 YO before M.2. On next row K YOs twisted (i.e. work in the back loop of st instead of front to avoid holes). Then work the inc sts in garter st. -------------------------------------------------------- JACKET: Worked back and forth on circular needle from mid front. Cast on 174-188-200-222-242-262 sts (incl 7 band sts in each side) on circular needle size 4.5 mm with 1 thread Alpaca and 1 thread Kid-Silk. Then work as follows, beg from RS: 6 sts in GARTER ST - see explanation above, P 1 (P on every row), work in garter st until 7 sts remain, finish with P 1 (P on every row) and 6 sts in garter st (the 6 sts in garter st + P 1 = front bands. Work these sts K over K and P over P until finished measurements). REMEMBER THE KNITTING TENSION! When piece measures 8 cm, insert 2 markers in the piece; after 47-51-53-59-64-69 sts in from each side (back piece = 80-86-94-104-114-124 sts). READ ALL OF THE FOLLOWING SECTION BEFORE CONTINUING! On next row from RS, dec 1 st on each side of marker in each side. Repeat dec every 4 cm a total of 6 times. AT THE SAME TIME when piece measures 20 cm, cast off for 1 BUTTON HOLE - see explanation above - on right front band. AT THE SAME TIME when piece measures 21 cm, inc for collar from WS in each side at the beg and end of row as follows: K 2, 1 YO, K 1, 1 YO, work front band and in garter st as before until 3 sts remain, finish with 1 YO, K 1, 1 YO, K 2 (= 2 sts inc towards mid front in each side). Repeat inc of 2 sts at beg and end of every 4th row (i.e. work 3 rows without inc, inc again on next row from WS) a total of 10 times - work the inc sts in garter st (collar has now inc to a total of 20 sts in each side and piece measures approx. 31 cm). On next row from WS work LACE PATTERN - see explanation above - as follows: M.1, work in garter st until 14 sts remain (P sts on front bands are worked P as before), finish with M.2. AT THE SAME TIME inc again for collar from WS inside lace pattern in each side towards mid front - READ INCREASE TIP! Repeat inc every 4th row a total of 8-8-10-10-12-12 times. AT THE SAME TIME when piece measures 32-33-34-35-36-37 cm, divide the piece at the markers and finish each part separately. BACK PIECE: = 68-74-82-92-102-112 sts. Then cast on 13-13-13-12-12-11 new sts for sleeves at the end of the next 2 rows = 94-100-108-116-126-134 sts. Now work in garter st with PICOT EDGE - see explanation above - over the outermost 4 sts on row in each side until finished measurements (1st row of picot edge beg from RS in left side of piece and on next row from WS in right side of piece). When piece measures 56-58-60-62-64-66 cm, cast off the middle 14-14-16-16-18-18 sts for neck and finish each part separately. Then dec 1 st on next row from neck = 39-42-45-49-53-57 sts remain on needle (after one whole repetition of the picot edge in each side). Cast off when piece measures 58-60-62-64-66-68 cm (finish after one whole repetition of the picot edge). LEFT FRONT PIECE: Cast on sts in the side as on back piece and continue M.1 and inc towards the side for collar while AT THE SAME TIME working picot edge over the last 4 sts on row towards the side as on back piece. When all inc are done, there are 68-72-76-81-88-92 sts + M.1 on needle (after one whole repetition of the picot edge in the side). Continue to work like this until piece measures 58-60-62-64-66-68 cm. Now cast off the first 39-42-45-49-53-57 sts for shoulder with start from RS = 29-30-31-32-35-35 sts + M.1 remain for collar. Work rest of row. Then work short rows with start from WS: Work 2 rows back and forth over M.1 + the next 8-8-9-9-10-10 sts, work 2 rows back and forth over all sts. Continue with lace pattern and collar sts in garter st until piece measures 7-7-8-8-8-8 cm, measured at the shortest and down to shoulder. Cast off. RIGHT FRONT PIECE: Work as left front piece but reversed (continue M.2 as before). ASSEMBLY: Sew shoulder seams and underarm seams. Sew collar tog mid back and sew on to back of neck. Sew the button on to left front piece. |
|||||||||||||||||||
Diagram explanations |
|||||||||||||||||||
|
|||||||||||||||||||
 |
|||||||||||||||||||
 |
|||||||||||||||||||
Have you finished this pattern?Tag your pictures with #dropspattern #beautifulyoucardigan or submit them to the #dropsfan gallery. Do you need help with this pattern?You'll find 19 tutorial videos, a Comments/Questions area and more by visiting the pattern on garnstudio.com. © 1982-2026 DROPS Design A/S. We reserve all rights. This document, including all its sub-sections, has copyrights. Read more about what you can do with our patterns at the bottom of each pattern on our site. |
|||||||||||||||||||


With over 40 years in knitting and crochet design, DROPS Design offers one of the most extensive collections of free patterns on the internet - translated to 17 languages. As of today we count 324 catalogues and 12290 patterns translated into English (UK/cm). 12290
We work hard to bring you the best knitting and crochet have to offer, inspiration and advice as well as great quality yarns at incredible prices! Would you like to use our patterns for other than personal use? You can read what you are allowed to do in the Copyright text at the bottom of all our patterns. Happy crafting!
Post a comment to pattern DROPS 130-2
We would love to hear what you have to say about this pattern!
If you want to leave a question, please make sure you select the correct category in the form below, to speed up the answering process. Required fields are marked *.