
Popular categories
Looking for a yarn?


Comments / Questions (121)
![]() Lisette wrote:
Lisette wrote:
Ben beginner. Hoe komt het dat ik alles goed brei en toch geen "ribbels" heb. Mijn breiwerk ziet er plat uit. Ligt dat aan de wol.
10.10.2012 - 10:23DROPS Design answered:
Nee, dan brei je toch iets verkeerd denk ik. Je moet breit op de goede kant 2 r, 1 av, maar op de verkeerde kant moet je dan de 2 r av breien en de 1 av r, dan krijg je de ribbel zoals te zien is op de foto.
11.10.2012 - 10:58Francine Labrie wrote:
J,aimerais beaucoup avoir le patron de ce bandeau 86-10 merci Francine du QUÉBEC
04.10.2012 - 19:04DROPS Design answered:
Bonjour Francine, les explications du bandeau se trouvent un peu plus bas sur la page. Bon tricot !
05.10.2012 - 09:09
![]() Minnie wrote:
Minnie wrote:
Could you please clarify how the pattern continues after the increases? For example, after the increase to 24 stitches, on the next row, do you then do K2, P2?
27.09.2012 - 03:21DROPS Design answered:
Dear Minnie, you increase each time a st in P section, so that you inc each time the number of sts in each P section until you get rib K2, P5. Happy knitting!
13.11.2012 - 11:10
![]() Lindsey Loxley wrote:
Lindsey Loxley wrote:
How do you do the inc and get the pattern to still follow? please could i have a step by step guide?
10.07.2012 - 00:25
![]() Susana wrote:
Susana wrote:
Gostaria de saber como fazer o avesso das carreiras depois de comecar os aumentos. Obrigada.
16.02.2012 - 00:28DROPS Design answered:
Uma vez que se fazem aumentos, pelo direito da peça, nas partes tricotadas em liga, tricotam-se os aumentos, pelo avesso, em meia. É importante não esquecer que os aumentos são sempre feitos pelo direito da peça. Esperamos tê-la ajudado na sua dúvida. Obrigado por nos contactar.
21.02.2012 - 18:58
![]() Drops Design France wrote:
Drops Design France wrote:
Tout à fait Sarah, merci. Bon tricot.
14.11.2011 - 13:36Sarah wrote:
"A 48 cm du marqueur, joindre au rang de montage" Ne serait-ce pas à 48cm de hauteur totale?
14.11.2011 - 11:13Marilena Coppola wrote:
Sono italiana, potreste tradurre questo modello in italiano? grazie marilena
09.06.2011 - 12:33
![]() Rebecca wrote:
Rebecca wrote:
Loved it!
03.04.2011 - 21:10Carole Boisclair wrote:
Ce bandeau est tellement bien, il s'ajuste à toutes les têtes.Merci de nous partager vos modèles, ils sont géniaux.
31.03.2011 - 19:22
|
|
Saturn Rings |
|
|
|
|
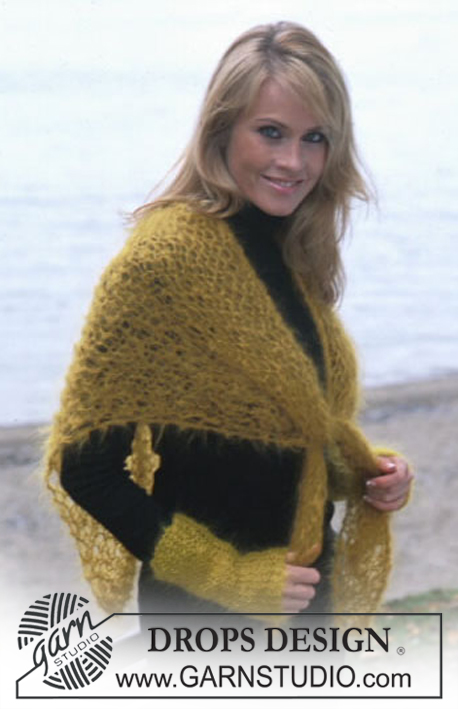
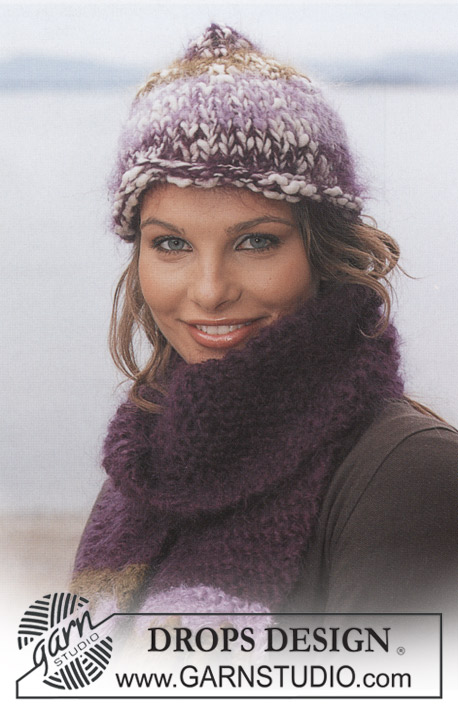
DROPS Headband in Alaska and Shawl in Vienna
DROPS 86-10 |
|
|
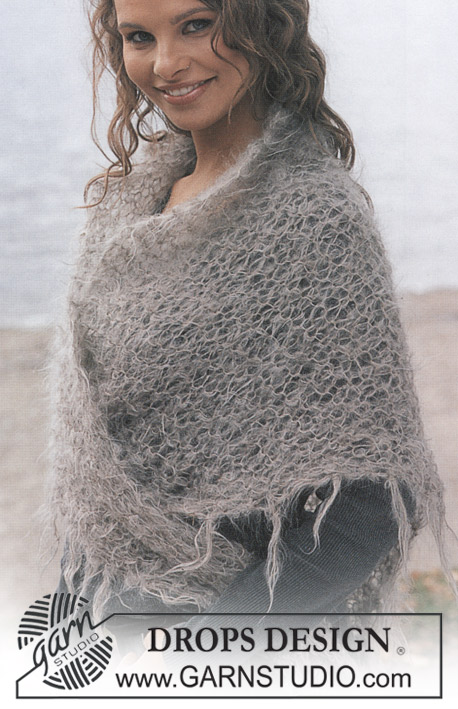
Gauge: 18 sts x 23 rows in stockinette st = 10 x 10 cm Headband: Start at center back. Cast on 19 sts. Work in rib as follows: Row 1 (right side): K 1 (edge st knit in garter st), * K 2, P 1 * repeat a total of 5 times – finish row with K 2 and K 1 (edge st knit in garter st). Row 2 (wrong side): K 1 (edge st knit in garter st), * P 2, K 1 * repeat a total of 5 times – finish row with P 2 and K 1 (edge st knit in garter st). Make all incs on right side rows, inc by P 2 sts into 1 P stitch. When the piece measures 8 cm all P 1 to P 2 = 24 sts. When the piece measures 14 cm all P 2 to P 3 = 29 sts. When the piece measures 18 cm all P 3 to P 4 = 34 sts. When the piece measures 21 cm inc all P 4 to P 5 = 39 sts. When the piece measures 24 cm place a marker = this is the center of headband. Now reverse shaping – measure from marker. Make all decs on right side rows, dec by P2 tog. When the piece measures 3 cm dec all P 5 to P 4 = 34 sts. When the piece measures 6 cm dec all P 4 to P 3 = 29 sts. When the piece measures 10 cm dec all P 3 to P 2 = 24 sts. When the piece measures 16 cm dec all P 2 to P 1 = 19 sts. When the piece measures a total of 48 cm bind off and sew to cast on edge. ----------------------------------------------------- SHAWL : Measurements: Length: 100 cm Width: 205 cm Materials: VIENNA from Garnstudio 200 gr nr 43, light brown DROPS 15 mm needles, or size needed to obtain correct gauge. Gauge: 5 sts x 9 rows in garter st = 10 x 10 cm (this is loosely knit) Shawl: Cast on 4 sts and knit garter st, increasing 1 st at one side every other row. Inc by knitting 2 sts in 1 st. Continue incs until there are 50 sts, the piece measures approx. 102 cm. Now dec on the same side as incs – dec every other row by K 2 tog the 2 outermost sts. Continue dec until 4 sts remain, the piece measures approx. 205 cm, bind off. Fringe: Fasten fringe tufts along both sides approx. 4-5 cm apart – start at point at lower edge. Cut 6 strands 35 cm long, fold in half, pull folded end through outermost st and pull ends through loop. |
|
Have you finished this pattern?Tag your pictures with #dropspattern or submit them to the #dropsfan gallery. Do you need help with this pattern?You'll find 16 tutorial videos, a Comments/Questions area and more by visiting the pattern on garnstudio.com. © 1982-2025 DROPS Design A/S. We reserve all rights. This document, including all its sub-sections, has copyrights. Read more about what you can do with our patterns at the bottom of each pattern on our site. |


With over 40 years in knitting and crochet design, DROPS Design offers one of the most extensive collections of free patterns on the internet - translated to 17 languages. As of today we count 314 catalogues and 11820 patterns translated into English (UK/cm). 11820
We work hard to bring you the best knitting and crochet have to offer, inspiration and advice as well as great quality yarns at incredible prices! Would you like to use our patterns for other than personal use? You can read what you are allowed to do in the Copyright text at the bottom of all our patterns. Happy crafting!
Post a comment to pattern DROPS 86-10
We would love to hear what you have to say about this pattern!
If you want to leave a question, please make sure you select the correct category in the form below, to speed up the answering process. Required fields are marked *.