
Looking for a yarn?


Comments / Questions (77)
![]() Malin wrote:
Malin wrote:
Jag undrar, när man gjort omslag +Rät maska +markör +rät maska osv hur ska man göra vriden maska på det aviga varvet på omskagsmaskan? Ev vriden rät eller vriden avig? Eller gör man en vriden avig på avigan och en vriden rät på rätan på maskan före maskan innan markören bak på alla varv? Fattar inte. Det blir hål för mig
04.10.2025 - 20:16DROPS Design answered:
Hej Malin. Alla ökningar görs från rätsidan och det ökas 1 maska genom att göra ett omslag om stickan. På nästa varv stickas omslaget vridet avigt, så att det inte blir hål. Du kan se en video på hur man stickar vridet avigt här. Mvh DROPS Design
07.10.2025 - 14:21
![]() My wrote:
My wrote:
Det står såhär i sista momentet av kanten runt ansiktet;Sticka upp ca 52 till 68 maskor (inklusive maskorna från rundstickan) innanför 1 kantmaska på strumpstickor. Förstår inte riktigt, ska maskorna på strumpstickan vara kvar när man stickar runt? Eller ska maskorna fördelas på 4 strumpstickor som när man stickar sockar? Förklara gärna
28.09.2025 - 14:11DROPS Design answered:
Hi My, the double edge is made on double pointed needles size 4 mm, you cast on stitches on 4 needles and you work with the 5th needle. You can also use circular needles and work with magic loop technique. At the end, you cast off with circular needle size 5 mm. Happy knitting!
29.09.2025 - 08:39
![]() MaLinn wrote:
MaLinn wrote:
Skickade en fråga tidigare som löste sig. Men nu undrar jag en annan sak. Stickar balaklava i syl 6-9 mån. När arbetet mäter 11 cm ska det flyttas över 21 m på var sida till strupstickor. Det blir 42 m sen återstår 16 m på rundstickan. Det blir totalt 58m Tidigare stod det att det skulle var 56 m som man skull sticka på rundstickan i 11cm. Vart kommer +2 maskor in? Står inget om utökning
12.09.2025 - 14:01DROPS Design answered:
Hej MaLinn. Tror kanske du såg på fel storlek, såhär blir det i storlek 6/9 månader: När arbetet mäter 11 cm från där det maskades av maskor mitt fram, sätts de yttersta 21 maskorna i varje sida på var sin strumpsticka 5, dvs det återstår 14 maskor på rundstickan. 21+21+14= 56 m. Mvh DROPS Design
15.09.2025 - 14:50
![]() Beata wrote:
Beata wrote:
KOMINIARKA – SKRÓCONY OPIS ROBÓTKI: Przerabiana na okrągło, na drutach z żyłką, od góry do dołu....... ? napewno od góry do dołu ,a nie odwrotnie ?
12.09.2025 - 05:35DROPS Design answered:
Witaj ponownie Beato, oczywiście, że jest odwrotnie, kominiarka jest przerabiana od dołu do góry. Zaraz spojrzę na ten wzór w całości, bo coś tam się jakiś chochlik chyba wkradł :) Pozdrawiamy!
12.09.2025 - 07:44
![]() Beata wrote:
Beata wrote:
W następnym okrążeniu zamknąć 1 oczko w każdej grupie 2 oczek lewych przerabiając 2 oczka razem na lewo = 66-72-78-81 (93-96) oczek. Dalej przerabiać ściągaczem, 1 oczko lewe/1 oczko prawe....Jak mam przecież 2L - 2P to jest wtedy po zamknięciu 1L i 2 P . Czy ja czegoś nie rozumiem?!
12.09.2025 - 05:31DROPS Design answered:
Witaj Beato, już poprawione. Oczywiście powinno być ...Dalej przerabiać ściągaczem, 1 oczko lewe/2 oczka prawe. Dziękujemy za Twoją wiadomość i pozdrawiamy!
12.09.2025 - 07:42
![]() Malin wrote:
Malin wrote:
Hej igen, tack för svar, jag vet hur man praktiskt går till väga för att sticka med magic loop men undrar mer hur man ska läsa mönstret om man inte använder strumpstickor. Vad gör man när det står byt till strumpstickor, går det bara att göra som det står i mönstret men med samma rundstickor? Och hur gör man när man ska sticka maskorna i sidan som annars stickats med strumpstickorna?😊
03.09.2025 - 07:25DROPS Design answered:
Hej igen, När du ska byta till strumpstickor och stickar runt så kan du bara fortsätta med rundstickan. Men när maskor ska sättas av på strumpsticka så måste du sätta de på en annan sticka ("När arbetet mäter 10-10-11-11 (11-12) cm från där det maskades av maskor mitt fram, sätts de yttersta 18-19-21-20 (22-24) maskorna i varje sida på var sin strumpsticka 5, dvs det återstår 12-14-14-16 (18-18) maskor på rundstickan."). Mvh DROPS Design
03.09.2025 - 09:37
![]() Malin wrote:
Malin wrote:
Hej, Hur ska man göra om man vill sticka med endast rundsticka? Börjar man med magic loop? Hur gör man när mönstret går över till strumpstickor?
01.09.2025 - 10:03DROPS Design answered:
Hej Malin. Om du vill sticka med magic loop så behöver du bara en lång rundsticka, se gärna denna video. Mvh DROPS Design
03.09.2025 - 07:06
![]() Birgitte wrote:
Birgitte wrote:
Der er IKKE et print-symbol, når jeg åbner opskriften på computeren. Men på telefonen er der. På computeren kan man trykke "ctrl p" - så kan man udskrive opskriften :-)
27.08.2025 - 09:01
![]() Birgitte wrote:
Birgitte wrote:
Print - der er altså ikke noget billede af en printer ved denne opskrift
26.08.2025 - 15:56DROPS Design answered:
Hej. Jo rett vid sidan av där det står "Chilly Day Balaclava". Mvh DROPS Design
27.08.2025 - 08:44
![]() Birgitte wrote:
Birgitte wrote:
Er der ingen knap til "udskriv opskrift"??
24.08.2025 - 09:16DROPS Design answered:
Hej Birgitte. Øverst til højre på opskriften er der et billede af en lille printer, tryk på den for at udskriv opskrift. Mvh DROPS Design
26.08.2025 - 12:07
|
|
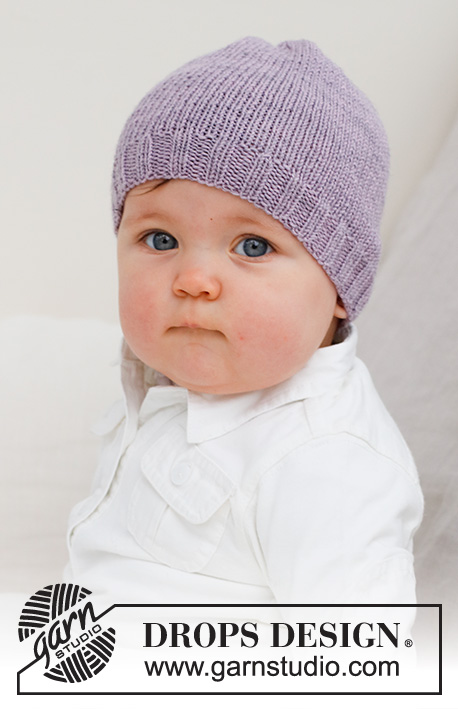
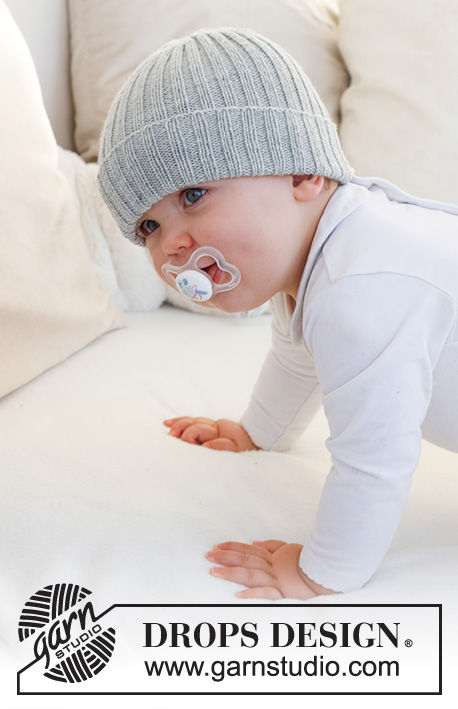
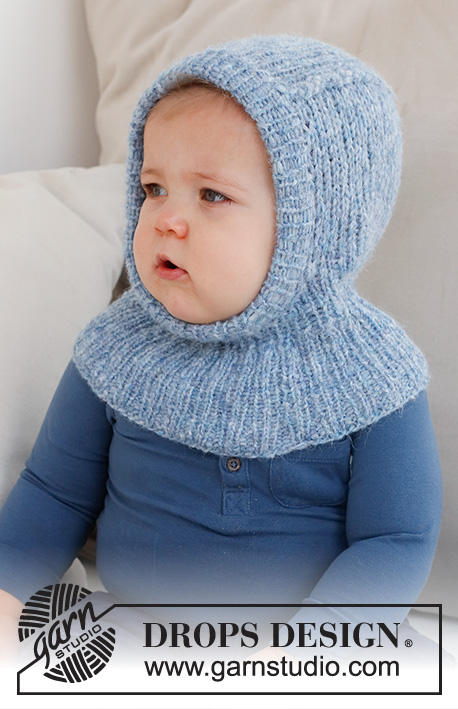
Chilly Day Balaclava#chillydaybalaclava |
|
 |
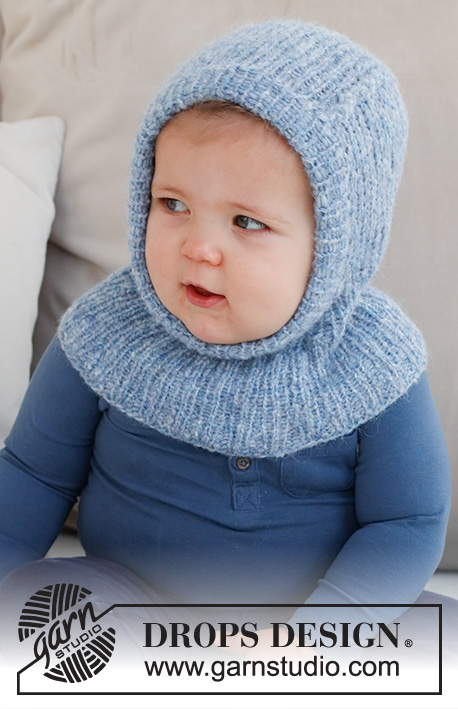 |
Knitted hat / balaclava for baby and children in DROPS Air. Piece is knitted in rib. Size 0 - 4 years
DROPS Baby 42-20 |
|
|
---------------------------------------------------------- EXPLANATION FOR THE PATTERN: ---------------------------------------------------------- GARTER STITCH (back and forth): Knit all rows. 1 ridge vertically = knit 2 rows. INCREASE TIP: All increases are done from the right side. Increase 1 stitch by making a yarn over. On next row purl yarn over twisted to avoid hole. DECREASE TIP: All decreases are done from the right side! WORK 2 STITCHES TOGETHER AT THE BEGINNING OF ROW AS FOLLOWS: Slip 1 stitch knitwise, knit 1, pass slipped stitch over stitch worked (= 1 stitch decreased). WORK 2 STITCHES TOGETHER AT THE END OF ROW AS FOLLOWS: Knit 2 together. ---------------------------------------------------------- START THE PIECE HERE: ---------------------------------------------------------- HAT - SHORT SUMMARY OF GARMENT: Worked in the round on circular needle, bottom up. Decrease stitches mid front and continue piece back and forth. Finish with a double edge around the opening for face. HAT: Cast on 88-96-104-108 (124-128) stitches on circular needle size 4 mm with DROPS Air. Knit 1 round. Then work rib (purl 2/knit 2) for 2-2-3-3 (4-4) cm. On next round work all 2 purl together into 1 purl stitch = 66-72-78-81 (93-96) stitches. Continue rib with purl 1/knit 2. When piece measures 6-6-7-8 (10-12) cm from cast-on edge, work all 2 knit together into 1 knit stitch = 44-48-52-54 (62-64) stitches. Switch to double pointed needles size 4 mm. Continue rib with purl 1/knit 1. When piece measures 8-8-9-10 (12-14) cm from cast-on edge, switch to circular needle size 5 mm and work back and forth as follows: Cast off the first 6-6-6-8 (10-10) stitches, work 1 edge stitch in GARTER STITCH – read explanation above, knit 17-19-21-21 (24-25), make 1 yarn over, knit 1, insert 1 marker around needle (mid back), knit 1, make a yarn over, knit 17-19-21-21 (24-25) and 1 edge stitch in garter stitch = 40-44-48-48 (54-56) stitches. Continue piece in stocking stitch back and forth with 1 edge stitch in garter stitch in each side (on next row work yarn overs twisted). AT THE SAME TIME on next row from right side decrease stitches on each side of opening mid front and increase stitches mid back as follows: Work 1 edge stitch in garter stitch, work 2 stitches together (= 1 stitch decreased) - read DECREASE TIP, work until 1 stitch remains before marker mid back, increase 1 stitch - read INCREASE TIP, knit 2, increase 1 stitch, work until 3 stitches remain on needle, work 2 stitches together (= 1 stitch decreased) and finish with 1 edge stitch in garter stitch. Decrease like this in each side mid front on every row from right side 3 times in total. Increase like this on each side of marker on every row from right side 7-7-7-7 (7-8) times in total (in addition to the increase done when casting off stitches mid front). REMEMBER THE KNITTING TENSION! When all increases and decreases are done, there are 48-52-56-56 (62-66) stitches on row. Continue in stocking stitch with 1 edge stitch in garter stitch in each side. When piece measures 10-10-11-11 (11-12) cm from where stitches were cast off mid front, slip the outermost 18-19-21-20 (22-24) stitches in each side on separate double pointed needle size 5 mm, i.e. 12-14-14-16 (18-18) stitches on circular needle. Cut the yarn. Stitches from double pointed needle in each side should be worked together with the outermost stitch in each side on circular needle at the end of every row as follows: FROM RIGHT SIDE: Knit until 1 stitch remains on needle, slip last stitch knitwise, knit 1 from pointed needle and pass slipped stitch from circular needle on to stitch worked (= 1 stitch decreased double pointed needle). Turn piece. FROM WRONG SIDE: Purl 1 twisted (i.e. work in back loop of stitch), purl until 1 stitch remain on circular needle, slip 1 stitch purlwise, purl 1 from double pointed needle and pass the slipped stitch over stitch worked. Turn piece. Work and decrease like this until all stitches from double pointed needles in each side have been decreased. There are 12-14-14-16 (18-18) stitches on circular piece and no stitches on double pointed needles in the side. Now work an edge around the opening as follows: DOUBLE EDGE: Pick up approx. 52 to 68 stitches (including stitches from circular needle) inside 1 edge stitch on double pointed needles size 4 mm. Adjust so that number of stitches is divisible by 2 and to avoid a tight/loose edge. Work rib (knit 1/purl 1) for 5 cm. Cast off with circular needle size 5 mm. Fold the edge double towards inside of hat and fasten cast-off edge to where stitches were picked up around the opening for face. To avoid a tight edge that sticks out it is important to keep the seam elastic. |
|
Have you finished this pattern?Tag your pictures with #dropspattern #chillydaybalaclava or submit them to the #dropsfan gallery. Do you need help with this pattern?You'll find 22 tutorial videos, a Comments/Questions area and more by visiting the pattern on garnstudio.com. © 1982-2025 DROPS Design A/S. We reserve all rights. This document, including all its sub-sections, has copyrights. Read more about what you can do with our patterns at the bottom of each pattern on our site. |
|


With over 40 years in knitting and crochet design, DROPS Design offers one of the most extensive collections of free patterns on the internet - translated to 17 languages. As of today we count 320 catalogues and 12095 patterns translated into English (UK/cm). 12095
We work hard to bring you the best knitting and crochet have to offer, inspiration and advice as well as great quality yarns at incredible prices! Would you like to use our patterns for other than personal use? You can read what you are allowed to do in the Copyright text at the bottom of all our patterns. Happy crafting!
Post a comment to pattern DROPS Baby 42-20
We would love to hear what you have to say about this pattern!
If you want to leave a question, please make sure you select the correct category in the form below, to speed up the answering process. Required fields are marked *.