
Beliebte Kategorien
Suchen Sie nach einem Garn?


Kommentare / Fragen (113)
![]() Nicole hat geschrieben:
Nicole hat geschrieben:
Very pretty headband!
06.01.2014 - 02:18
![]() Patricia Hill hat geschrieben:
Patricia Hill hat geschrieben:
DROPS 86-10 headband - pattern for flower with button center (Toumaya). Where can I get pattern?
04.01.2014 - 21:23DROPS Design hat geantwortet:
Dear Mrs Hill, The flower you are talking about is an extra added by a customer, please contact her directly on Ravelry to get more informations. Happy knitting!
06.01.2014 - 09:25
![]() Heidi hat geschrieben:
Heidi hat geschrieben:
I fi ished this headband recently and LOVE it. I am a very new knitter and found the directions easy to follow. I experimented with making this slightly longer and added buttons and buttonholes (a first for me). I can't wait to make more.
13.12.2013 - 17:13
![]() Tara Buffington hat geschrieben:
Tara Buffington hat geschrieben:
I got the increases/decreases, but am confused about how many rows of garter/stockinette stitch are between the increases, there's no information on that...does anyone know the answer?!!!
25.10.2013 - 14:51DROPS Design hat geantwortet:
Dear Mrs Buffington, inc are done when piece measures 3", 51/2", 7" and 8 1/4". When work measures 9 1/2", place a marker and measure then from this marker for the dec. Happy knitting!
29.10.2013 - 10:14
![]() Malin hat geschrieben:
Malin hat geschrieben:
Hej! I mönstret på svenska, står inget om hur fjärde varvet ska stickas. Fortsatte som i beskrivningen men det ger ju inga ränder. Men jag antar att man ska sticka "bakvänt", dvs det som var avig maska på förra varvet, blir nu rät maska, osv, för att bilda ränder. Det vore hjälpsamt om detta skrevs tydligt. För den som är hyfsat nybörjare är det inte så lätt att räkna ut. :)
25.04.2013 - 22:18DROPS Design hat geantwortet:
Om du stickar enligt beskrivningen så här: "1 rätst m, * 2 rm, 1 am * upprepa totalt 5 ggr – avsluta v med 2 rm och 1 rätst m" och fortsätter enligt beskrivningen får du ränderna som på bilden.
03.05.2013 - 10:16
![]() Veniesta hat geschrieben:
Veniesta hat geschrieben:
I Crochet but know how to knit and purl , so I am going to take a shot at this head band and let you know how I did.
22.04.2013 - 18:21
![]() Ann hat geschrieben:
Ann hat geschrieben:
Once I start the increase purl stitches... do I continue to follow the knit/purl sequence based on the stitches that I see. ie. after the purl increase row, turn and working back do I then do a "knit 1,purl 2,knit 1, purl 3 - or follow the pattern and do the purl 2, knit 1 repeat, as indicated for the WS. Hope this makes sense.
23.03.2013 - 17:43DROPS Design hat geantwortet:
Dear Ann, you will inc P1 in all P sections seen from RS, so that after 1st inc sequence, youll have K2, P2 with 1 edge st in garter st each side. Happy knitting!
25.03.2013 - 11:30
![]() Paola Rigon hat geschrieben:
Paola Rigon hat geschrieben:
Cara Marica, riesci sempre a stupirmi! Questo modello lo farò per mia figlia super critica,ma stavolta sarà contentissima! Grazie
13.02.2013 - 14:03
![]() Kordula hat geschrieben:
Kordula hat geschrieben:
Habe das Stirnband gestrickt mit Alaska Wolle und Nadelstärke 4. Laut Anleitung hat alles prima geklappt und passt sehr gut. Werde noch ein Weiteres stricken und verschenken!
12.12.2012 - 19:32
![]() Elizabeth hat geschrieben:
Elizabeth hat geschrieben:
So, I did the beginning 5 stitches, okay. Now I'm tripped up by "Make all incs on right side rows, inc by P 2 sts into 1 P stitch." Let the record show I have been knitting for 6 months, so maybe I'm just dumb, but how do I do that? Does increase mean GO UP? How... just... How? Help me. Please?
12.12.2012 - 16:24DROPS Design hat geantwortet:
Dear Elizabeth, there are different ways to increase, click on the link to our videos to check and see how to do. Your RS rows are odd numbered rows : 1,3,5 ... and you will have (with K1 each side for edges): *K2, P1*, repeat from *-*. After the first inc, you will have first *K2, P2, K2, P1*, after the 2nd inc, you will have *K2,P2*. etc.. Happy knitting !
13.12.2012 - 18:10
|
|
Saturn Rings |
|
|
|
|
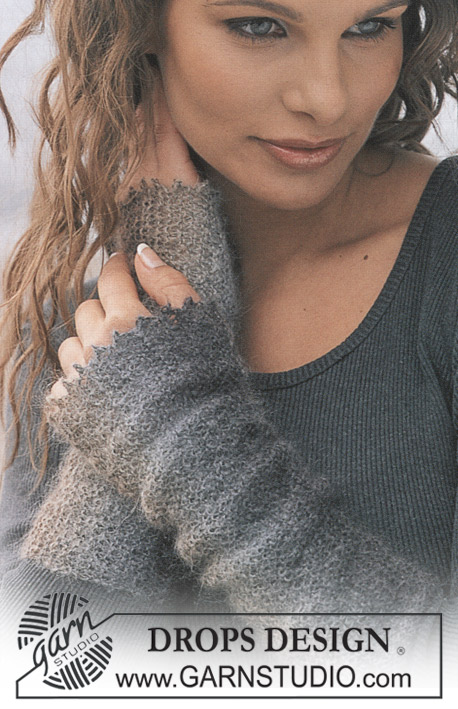
Gestricktes Stirnband in DROPS Alaska
DROPS 86-10 |
|
|
KRAUS RECHTS (in Hin- und Rück-R): Jede R re str. -------------------------------------------------------- STIRNBAND: In der Mitte hinten anfangen und mit Alaska auf Ndl. Nr. 4,5 19 M anschlagen. Die nächste R. in dieser Weise stricken: 1 M KRAUS RECHTS (siehe oben), * 2 M re, 1 M li *, von *-* insgesamt 5 Mal arbeiten und mit 2 M re und 1 M kraus rechts enden. Wenn die Arb. 8 cm misst, bei jeder Linksrippe 1 M zunehmen, sodass aus 1 M li 2 M li werden = 24 M auf der Ndl. Wenn die Arb. 14 cm misst, wieder in jeder Linksrippe 1 M zunehmen, sodass aus 2 M li 3 M li werden = 29 M auf der Ndl. Wenn die Arb.18 cm misst, wieder in jeder Linksrippe 1 M zunehmen, sodass aus 3 M li 4 M li werden = 34 M auf der Ndl. Wenn die Arb. 21 cm misst, wieder in jeder Linksrippe 1 M zunehmen, sodass aus 4 M li 5 M li werden = 39 M auf der Ndl. Wenn die Arb. 24 cm misst, einen Markierungsfaden anbringen = die Mitte oben. Von hier wird die Arb. gegengleich gestrickt - d.h. es werden die M abgenommen, die vorher zugenommen wurden. Dies wird gemacht, bis 19 M auf der Ndl. übrig sind. Wenn die Arb. 48 cm misst, die M auf einen Hilfsfaden legen. Die M vom Hilfsfaden mit dem Anschlagrand zusammennähen, dabei die Naht Masche an Masche arb, damit die Naht elastisch wird. |
|
Haben Sie diese Anleitung nachgearbeitet?Dann taggen Sie Ihre Fotos mit #dropspattern oder schicken Sie sie an die #dropsfan Galerie Brauchen Sie Hilfe bei dieser Anleitung?Sie finden 16 Videotutorials, einen Kommentar/Fragen-Bereich und vieles mehr, wenn sie die Anleitung bei garnstudio.com aufrufen. © 1982-2026 DROPS Design A/S. Wir besitzen alle Rechte. Dieses Dokument, einschließlich aller Untersektionen, hat Urheberrechte. Mehr dazu, was Sie mit unseren Anleitungen machen können, finden Sie ganz unten auf der Seite zu jeder Anleitung. |


Mit über 40 Jahren Tätigkeit im Entwerfen von Strick- und Häkelmustern bietet Ihnen DROPS Design eine der umfangreichsten Sammlungen von kostenlosen Anleitungen im Internet - in 17 Sprachen übersetzt. Zum jetzigen Zeitpunkt haben wir insgesamt 324 Handarbeitshefte und 12290 Anleitungen auf Deutsch. 12202
Unser Ziel ist es, Ihnen die besten Angebote zum Stricken und Häkeln, Inspirationen und Ratschläge sowie qualitativ hochstehende Garne zu unglaublichen Preisen zu bieten! Möchten Sie unsere Anleitungen nicht nur für den persönlichen Gebrauch nutzen? Unsere Copyright Bedingungen finden Sie bei allen unseren Anleitungen ganz unten auf der jeweiligen Seite. Viel Spaß beim Handarbeiten!
Kommentieren Sie die Anleitung DROPS 86-10
Wir würden gerne Ihre Meinung zu diesem Modell erfahren!
Wenn Sie eine Frage stellen möchten, prüfen Sie bitte, dass Sie die richtige Kategorie im unten stehenden Formular gewählt haben - so bekommen Sie schneller eine Antwort. Die obligatorischen Felder sind mit einem * gekennzeichnet.