
Popular categories
Looking for a yarn?


Comments / Questions (5)
![]() Marit wrote:
Marit wrote:
Har dere noen video av hvordan man syr sammen hullet i toppen av lua til slutt sånn at det blir pent?
13.03.2024 - 21:58DROPS Design answered:
Hej Marit, ja, se sidst i denne video, du kan spole til sidste minut :) Lue 150-40
15.03.2024 - 09:42
![]() Sigrid Westly wrote:
Sigrid Westly wrote:
Hei, Halskantens første omgang: strikk 2 r sammen, lag kast og ta maske løst av. Dette medfører vel ingen reduksjon i maskeantall, hvordan går det da fra 78 til 52 masker? Begynnelsen på A1 gir heller ingen mening når man har kast i første omgang, skal første omgang strikkes uten kast? Hilsen Sigrid
08.01.2021 - 22:43DROPS Design answered:
Hei Sigrid. 1) Jo, du reduserer når du strikker 2 masker sammen. Kastet du gjør tilhører masken du løfter løst over på høyre pinne (= patentmaske). Så når du er ferdig med 1 omgang teller du ikke med kastene, da stemmer maskeantallet som står i oppskriften. 2) Her kunne det ha vært bedre formulert. Oppskriften er oversendt til design avd for en dobbeltsjekk. (ser ut som 1.omgang i diagrammet er både forklart og vist i diagrammet). mvh DROPS design
15.01.2021 - 10:50
![]() Angelika Baumann wrote:
Angelika Baumann wrote:
Sehr gut beschrieben, gut zum Nachmachen.
07.11.2020 - 14:32
![]() Marit wrote:
Marit wrote:
Hei, det henvises til diagram i beskrivelsen, men jeg ser ikke atdiise er oppgitt i oppskriften?
01.11.2020 - 08:03DROPS Design answered:
Hei Marit. Ja, her var diagrammene glemt å publiseres. De er lagt til nå, takk for at du gjorde oss oppmerksom på dette. mvh DROPS design
02.11.2020 - 14:47
![]() Evelyn Waddell wrote:
Evelyn Waddell wrote:
Wondering when this will be issued. I've been checking for a week or so. It looks practical.
20.10.2020 - 23:14
|
||||||||||||||||||||||||||||
Frozen Falls Set#frozenfallsset |
||||||||||||||||||||||||||||
 |
 |
|||||||||||||||||||||||||||
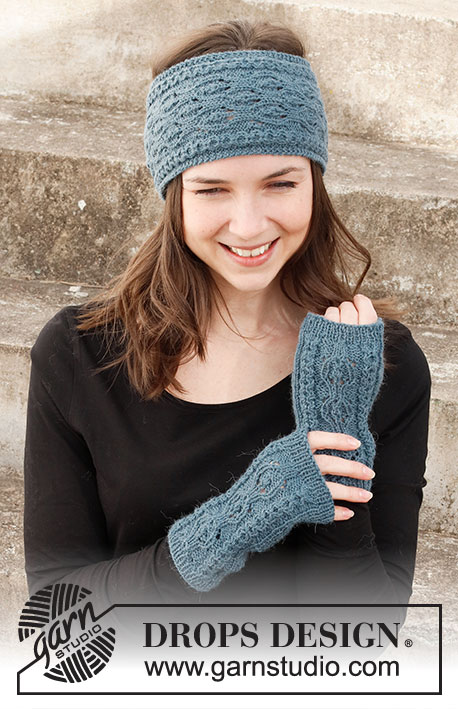
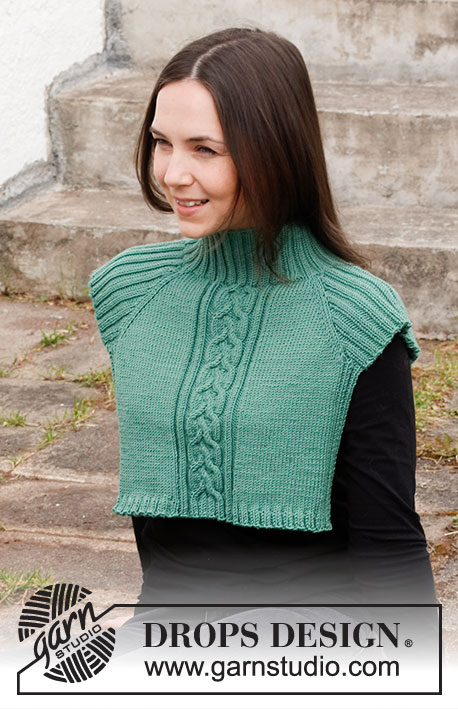
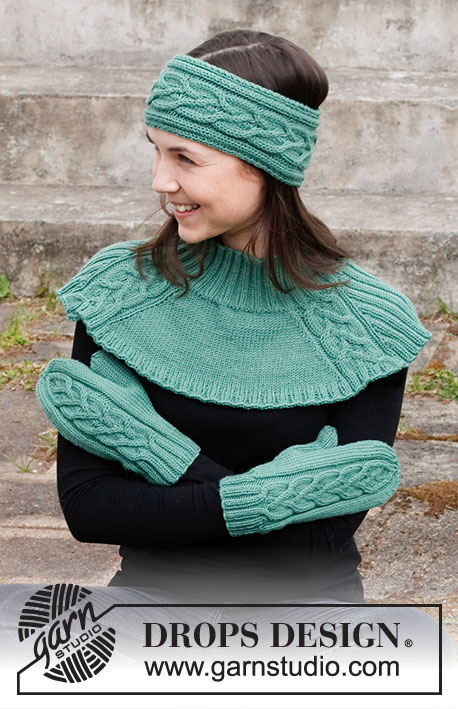
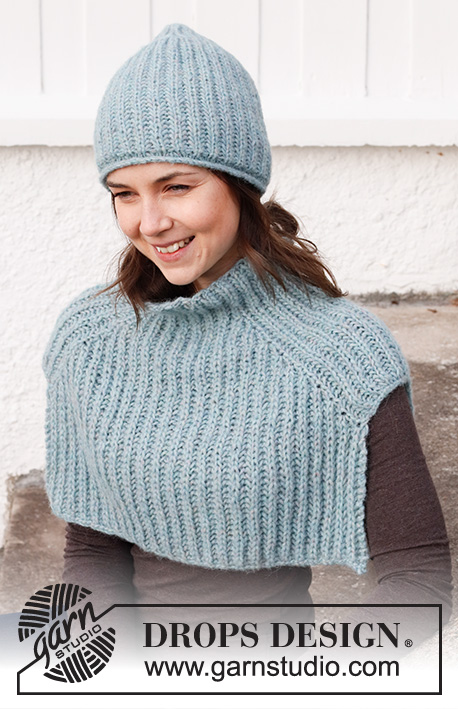
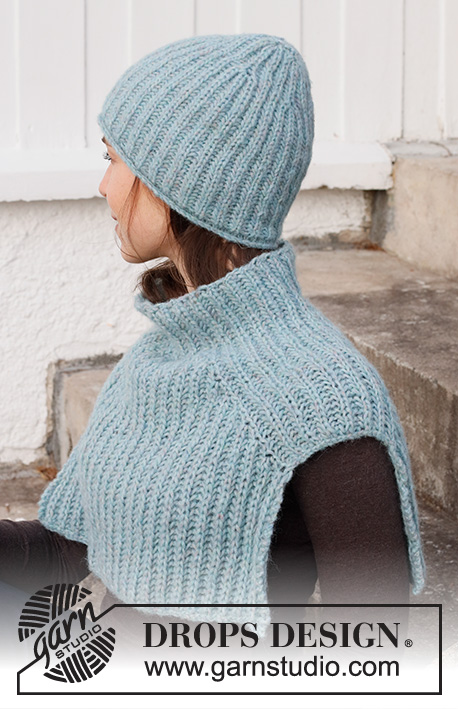
Knitted hat and neck warmer in DROPS Air. The piece is worked in English rib. Sizes S - XXXL.
DROPS 214-34 |
||||||||||||||||||||||||||||
|
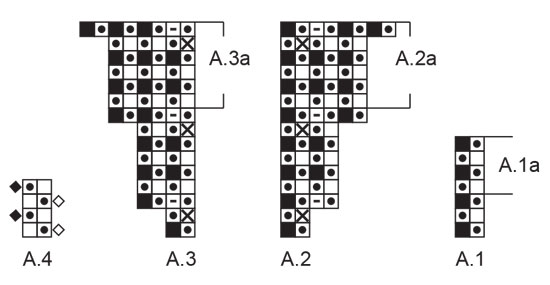
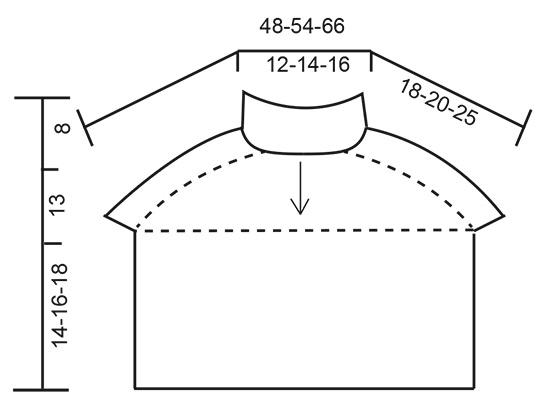
------------------------------------------------------- EXPLANATIONS FOR THE PATTERN: ------------------------------------------------------- RIDGE/GARTER STITCH (worked back and forth): Knit all rows. 1 ridge in height = Knit 2 rows. PATTERN: Neck warmer: See diagrams A.1 to A.4. ENGLISH RIB (for hat): ROUND 1: * make 1 yarn over, slip 1 stitch as if to purl, knit 1 *, repeat from *-* to end of round. ROUND 2: * Purl together the yarn over and slipped stitch, make 1 yarn over, slip 1 stitch as if to purl *, repeat from *-* to end of round. ROUND 3: * make 1 yarn over, slip 1 stitch as if to purl, knit together the yarn over and slipped stitch *, repeat from *-* to end of round. Repeat rounds 2 and 3 onwards. INCREASE TIP-1 (for hat): Work 5 stitches in the knitted stitch and yarn over as follows: * Knit together the stitch and yarn over but do not slip them from the left needle, make 1 yarn over the right needle *, work from *-* a total of 2 times, knit together the stitch and yarn over 1 more time = 5 stitches (= 4 stitches increased). On the next round work the increased stitches into the pattern but without their respective yarn overs (as they have not yet been made). INCREASE TIP-2 (evenly spaced for hat): To work out how to increase evenly, count the total number of stitches on the needle (e.g. 60 stitches) and divide by the number of increases to be made (e.g. 18) = 3.3. In this example, increase by making 1 yarn over after alternately each 3rd and 4th stitch. ------------------------------------------------------- START THE PIECE HERE: ------------------------------------------------------- HAT - SHORT OVERVIEW OF THE PIECE: The piece is worked in the round with double pointed needles/short circular needle, top down. HAT: Cast on 12-14 stitches with double pointed needles size 5.5 mm and Air (leave a strand-length of approx. 30 cm to sew the hole at the top of the hat together). Knit 1 round and purl 1 round. Work ENGLISH RIB – read description above. When round 1 in the pattern has been worked there are 6-7 knitted stitches on the needles. Insert 1 marker in each of these stitches; to be used when increasing. On round 3 in the pattern increase 4 stitches in each of the 6-7 knitted stitches – read INCREASE TIP-1 (= 24-28 increased stitches). Repeat the increase when the piece measures 7 cm (= 24-28 stitches increased) = 60-70 stitches. REMEMBER THE KNITTING TENSION! Continue working until the hat measures 25-27 cm – adjust to finish after round 3 in the pattern. Change to circular needle size 4 mm and work the rolled-edge as follows: * Purl together the yarn over and slipped stitch, knit 1 *, work from *-*. Now knit 1 round where you increase 18 stitches evenly spaced - read INCREASE TIP-2 = 78-88 stitches. Knit 2 rounds then cast off with knit; it is important the cast-off edge is not tight as the edge will then not roll as it should – you can cast off with a larger size needle if necessary. ------------------------------------------------------- NECK WARMER – SHORT OVERVIEW OF THE PIECE: The neck and yoke are worked in the round with circular needle, from mid-back and top down. Stitches are increased for the shoulders and the yoke is divided. The front and back pieces are then finished separately, back and forth. NECK: Cast on 78-84-96 stitches with circular needle size 6 mm and Air. Work the first round as follows: * Knit 2 together, make 1 yarn over, slip 1 stitch as if to purl *, work from *-* to end of round = 52-56-64 stitches. Now continue in the round according to diagram A.1 (= 2 stitches). When A.1 has been worked 1 time in height, repeat A.1a onwards. Continue until the piece measures 8 cm. Change to circular needle size 7 mm. YOKE: Work pattern as follows: A.1 (= 2 stitches) over the first 6-6-8 stitches (= half back piece), A.2 (= 2 stitches), A.1 over 12 stitches, A.3 (= 2 stitches) (= shoulder), A.1 over 10-12-16 stitches (= front piece), A.2 over 2 stitches, A.1 over 12 stitches, A.3 over 2 stitches (= shoulder) and A.1 over the last 4-6-8 stitches (= half back piece). REMEMBER THE KNITTING TENSION! Insert a marker in the middle of A.1 on one of the shoulders; the piece is now measured from here. When A.2 and A.3 have been worked 1 time in height, continue with A.2a and A.3a (i.e. increase every 6th round and work the increased stitches into the English rib). When A.2a and A.3a have been worked a total of 8-9-12 times in height there are 132-144-176 stitches on the needle. Work A.1a over all stitches until the piece measures 18-20-25 cm, along the shoulder from the marker. If the piece is shorter than this continue with English rib but without further increases to the correct length – adjust so the next round is purled. Now divide the yoke for the front and back pieces, casting off at the shoulder as follows: Work 26-28-36 stitches in English rib, 1 stitch in GARTER STITCH – read description above (= half back piece), cast off the next 13 stitches (yarn overs cast off as normal stitches), 1 stitch in garter stitch, work 51-57-73 stitches in English rib, 1 stitch in garter stitch (= front piece), cast off the next 13 stitches (yarn overs cast off as normal stitches), 1 stitch in garter stitch and English rib over the last 25-29-37 stitches (= half back piece). Cut the strand. Keep all the stitches on the needle. BACK PIECE: = 53-59-75 stitches. Work as follows from the right side: 1 stitch in garter stitch, A.4 (= 2 stitches) until there is 1 stitch left (the English rib starts and ends with purl 1) and finish with 1 stitch in garter stitch. Continue this pattern back and forth until the piece measures 14-16-18 cm from the division, then cast off with knit from the right side (yarn overs cast off as normal stitches; to keep the cast-off edge loose). FRONT PIECE: Work the 53-59-75 stitches in the same way as the back piece. |
||||||||||||||||||||||||||||
Diagram explanations |
||||||||||||||||||||||||||||
|
||||||||||||||||||||||||||||
|
||||||||||||||||||||||||||||
|
||||||||||||||||||||||||||||
Have you finished this pattern?Tag your pictures with #dropspattern #frozenfallsset or submit them to the #dropsfan gallery. Do you need help with this pattern?You'll find 19 tutorial videos, a Comments/Questions area and more by visiting the pattern on garnstudio.com. © 1982-2025 DROPS Design A/S. We reserve all rights. This document, including all its sub-sections, has copyrights. Read more about what you can do with our patterns at the bottom of each pattern on our site. |
||||||||||||||||||||||||||||


With over 40 years in knitting and crochet design, DROPS Design offers one of the most extensive collections of free patterns on the internet - translated to 17 languages. As of today we count 314 catalogues and 11822 patterns translated into English (UK/cm).
We work hard to bring you the best knitting and crochet have to offer, inspiration and advice as well as great quality yarns at incredible prices! Would you like to use our patterns for other than personal use? You can read what you are allowed to do in the Copyright text at the bottom of all our patterns. Happy crafting!
Post a comment to pattern DROPS 214-34
We would love to hear what you have to say about this pattern!
If you want to leave a question, please make sure you select the correct category in the form below, to speed up the answering process. Required fields are marked *.