DROPS Snow
DROPS Snow
100% Wool
from 2.00 £ /50g
Get the yarn to make this pattern from 26.00£.

The yarn cost is calculated from the pattern’s smallest size and the yarn’s cheapest product type. Looking for an even better price? You might find it on the DROPS Deals!

DROPS SS24

Trails Head

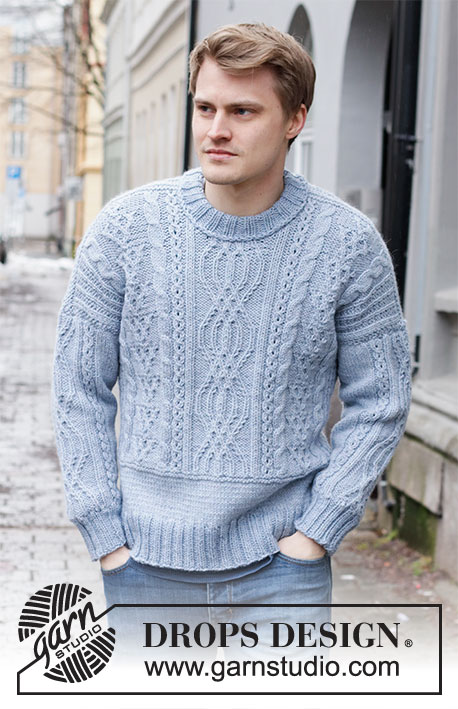
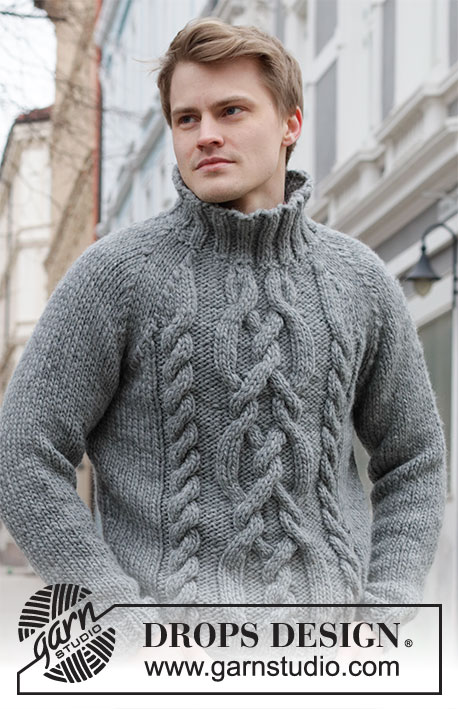
Knitted jumper with raglan, cables and high neck for men in DROPS Snow. Sizes S - XXXL.

DROPS 219-4
DROPS Design: Pattern no ee-697
Yarn group E or C + C
-------------------------------------------------------

SIZES:
S – M – L – XL – XXL – XXXL

MATERIALS:
DROPS SNOW from Garnstudio (belongs to yarn group E)
650-700-750-850-950-1000 g colour 46, medium grey

KNITTING TENSION:
11 stitches in width and 15 rows in height with stocking stitch = 10 x 10 cm.

NEEDLES:
DROPS DOUBLE POINTED NEEDLES SIZE 8 MM for stocking stitch.
DROPS CIRCULAR NEEDLE SIZE 8 MM: Length 40 cm and 60 cm or 80 cm for stocking stitch.
DROPS DOUBLE POINTED NEEDLES SIZE 7 MM for rib.
DROPS CIRCULAR NEEDLE SIZE 7 MM: Length 40 cm and 60 cm or 80 cm for rib.
DROPS CABLE NEEDLE – for cables.
Needle size is only a guide. If you get too many stitches on 10 cm, change to a larger needle size. If you get too few stitches on 10 cm, change to a smaller needle size.

-------------------------------------------------------

Alternative Yarn – See how to change yarns here
Yarn Groups A to F – Use the same pattern and change the yarn here
Yarn usage using an alternative yarn – Use our yarn converter here

-------------------------------------------------------

DROPS Snow
DROPS Snow
100% Wool
from 2.00 £ /50g
Get the yarn to make this pattern from 26.00£.

The yarn cost is calculated from the pattern’s smallest size and the yarn’s cheapest product type. Looking for an even better price? You might find it on the DROPS Deals!

Pattern instructions

NOTE: This pattern is written in British English. All measurements in charts are in cm. For conversion from cm to inches - click here. There are different terms for crocheting in British and American English. If this pattern includes crochet, click for "crochet terms" here. For this pattern in American English, please click here.
-------------------------------------------------------

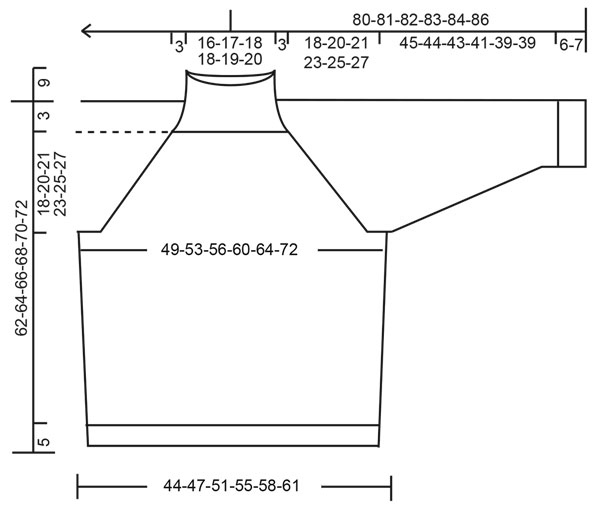
EXPLANATIONS FOR THE PATTERN:

-------------------------------------------------------

PATTERN: 
See diagrams A.1 to A.3. The diagrams show all rows in the pattern from the right side.

DECREASE TIP (for raglan):
Decrease in each transition between body and sleeves every 2nd round – start 4 stitches before the marker thread and work as follows: Slip 1 stitch as if to knit, knit 1 and pass the slipped stitch over the knitted stitch, knit 4 (the marker sits in the middle of these 4 stitches) and knit 2 together.
When the stitches for the neck have been placed on a thread, continue working back and forth – now decrease to raglan on each row from the right side.

INCREASE TIP (for sides of body and mid under sleeves):
Work as far as 1 stitch before the marker, make 1 yarn over, knit 2 (the marker sits between these 2 stitches), 1 yarn over = 2 stitches increased. On the next round knit the yarn overs twisted to avoid holes.

-------------------------------------------------------

JUMPER – SHORT OVERVIEW OF THE PIECE:
The body is worked in the round with circular needle as far as the armholes. The sleeves are worked in the round with double pointed needles (change to short circular needle when necessary). Then place the sleeves on the same circular needle as the body and continue the yoke in the round. The neck is worked in the round with double pointed needles or short circular needle.

BODY:
Cast on 96-104-112-120-128-148 stitches with circular needle size 7 mm and Snow. Insert 1 marker at the beginning of the round and a new marker after 48-52-56-60-64-74 stitches. Work 1 round of stocking stitch.

Now work 5 cm of rib in the round, starting in the different sizes as follows:
SIZES S, L and XXL: Start with purl 1, then work rib (knit 2, purl 2) over the next 6-10-14 stitches, continue as explained under all sizes below.
SIZES M, XL: Start with knit 1, then work rib (purl 2, knit 2) over the next 8-12 stitches, continue as explained under all sizes below.
SIZES XXXL: Start with purl 2, then work rib (knit 2, purl 2) over the next 18 stitches, continue as explained under all sizes below.

ALL SIZES:
Work diagram A.1a over 8 stitches, A.2a over 18 stitches, A.3a over 8 stitches, then rib (knit 2, purl 2) to end of round. On the last row in the diagrams increase stitches so there are 58-62-66-70-74-84 stitches on the front piece and you still have 48-52-56-60-64-74 stitches on the back piece.
Change to circular needle size 8mm and work stocking stitch over the first 7-9-11-13-15-20 stitches, A.1b over A.1a, A.2b over A.2a, A.3b over A.3a and stocking stitch to the end of the round. Continue this pattern.
REMEMBER THE KNITTING TENSION!
When the piece measures 12-12-12-12-12-12 cm, increase 1 stitch on each side of each marker – read INCREASE TIP in the explanations above. Repeat the increase every 6-10-10-10-10-10 cm a total of 3 times = 118-126-134-142-150-170 stitches.
Work until the piece measures 41-41-42-42-42-42 cm. On the next round cast off 6 stitches each side for the armholes (= 3 stitches on each side of each marker) = 58-62-66-70-74-84 stitches on the front piece and 48-52-56-60-64-74 stitches on the back piece. Lay the piece to one side and work the sleeves.

SLEEVE:
Cast on 24-24-24-32-32-36 stitches with double pointed needles size 7 mm and Snow. Work 2 rounds of stocking stitch, then work rib (knit 2, purl 2) until the piece measures 6-6-6-7-7-7 cm.
Change to double pointed needles size 8 mm and insert a marker at the beginning of the round, then continue with stocking stitch. When the piece measures 8-10-10-9-9-9 cm, increase 1 stitch on each side of the marker – read INCREASE TIP in the explanations above.
Repeat the increase every 5½-4-3½-5-4½-4 cm a total of 8-10-11-8-9-9 times = 40-44-46-48-50-54 stitches.
Work until the piece measures 51-50-49-48-46-46 cm. On the next round cast off 6 stitches mid under the sleeve (3 stitches on each side of the marker) = 34-38-40-42-44-48 stitches. Lay the piece to one side and work 1 more sleeve in the same way.

YOKE:
Place the sleeves on the same circular needle as the body – where stitches were cast off for the armholes = 174-190-202-214-226-254 stitches. Insert marker threads in each transition between the sleeves and the body = 4 marker threads. Work 2-1-1-0-0-0 rounds before beginning to decrease to raglan.
READ THE WHOLE OF THE NEXT SECTION BEFORE CONTINUING!
Decrease to raglan on each side of the 4 stitches at each marker thread - read DECREASE TIP in explanations above – every 2nd round, 13-15-16-17-18-21 times. AT THE SAME TIME when the piece measures 56-58-60-62-64-66 cm decrease 4-4-4-4-4-4 stitches over the cables in A.2b.Then place the middle 8-8-10-12-14-16 stitches on 1 thread for the neck. The piece is continued back and forth, continuing to decrease to raglan as before on each row from the right side. In addition, decrease for the neck at the beginning of each row as follows: Cast off 2 stitches 1 time and 1 stitch 1 time.
After all the decreases to raglan and to the neck there are 52-52-54-56-58-60 stitches on the needle.

NECK:
Using double pointed needles size 7 mm knit up stitches for the neck and place the stitches from the thread onto the needles, so you have approx. 14 to 22 stitches on the front neck. There should be a total of 60 to 76 stitches on the needle (stitch-number needs to be divisible by 4). Purl 1 round, then work rib (knit 2, purl 2) for 9 cm. Loosely cast off with knit over knit and purl over purl.

ASSEMBLY:
Sew the openings under the sleeves.

This pattern has been corrected.

Updated online: 02.02.2022
BODY:... SIZES M, XL: Start with knit 1, then work rib (purl 2, knit 2) over the next 8-12 stitches, continue as explained under all sizes below...
Updated online: 07.03.2022
New diagram A.3a.

Diagram

symbols = knit
symbols = purl
symbols = place 3 stitches on cable needle in front of piece, knit 3, knit 3 from the cable needle
symbols = place 3 stitches on cable needle in front of piece, purl 1, knit 3 from the cable needle
symbols = place 1 stitch on cable needle behind the piece, knit 3, purl 1 from the cable needle
symbols = place 3 stitches on cable needle behind the piece, knit 3, knit 3 from the cable needle
symbols = knit 2 in the same stitch (i.e. knit 1 in the back loop and then knit 1 in the front loop)
symbols = purl 2 in the same stitch (i.e. purl 1 in the back loop and then purl 1 in the front loop)
diagram
diagram
diagram

Each of our patterns has specific tutorial videos to help you.

Do you have a question? See a list of frequently asked questions (FAQ)

Knitting tension is what determines the final measurements of your work, and is usually measured per 10 x 10 cm. It is provided like so: number of stitches in width x number of rows in height - eg: 19 stitches x 26 rows = 10 x 10 cm.

The knitting tension is very individual; some people knit/crochet loosely while others work tightly. You adjust the knitting tension with the needle size, which is why the suggested needle size is only meant as a guide! You need to adjust this (up or down) to ensure that YOUR knitting tension matches the knitting tension provided in the pattern. If you work with a different knitting tension than provided you will have a different yarn consumption, and your work will have different measurements than what the pattern suggests.

The knitting tension also determines which yarns can replace each other. As long as you achieve the same knitting tension you can replace one yarn with another.

See DROPS lesson: How to measure your tension/gauge

See DROPS video: How to make a gauge tension swatch

The required amount of yarn is provided in grams, eg: 450 g. To calculate how many balls you’ll need you first need to know how many grams are in 1 ball (25g, 50g or 100g). This information is available if you click on the individual yarn quality on our pages. Divide the amount required with the amount of each ball. For example, if each ball is 50g (the most common amount), the calculation will be as follows: 450 / 50 = 9 balls.

The important thing when changing from one yarn to another is that the knitting/crochet tension remains the same. This is so that the measurements of the finished piece will be the same as on the sketch provided. It is easier to achieve the same knitting tension using yarns from the same yarn group. It is also possible to work with multiple strands of a thinner yarn to achieve the knitting tension of a thicker one. Please try our yarn converter. We recommend you to always work a test swatch.

Please NOTE: when changing yarn the garment might have a different look and feel to the garment in the photo, due to individual properties and qualities of each yarn.

See DROPS lesson: Can I use a different yarn than the one mentioned in the pattern?

All our yarns are categorised into yarn groups (from A to F) according to thickness and knitting tension – group A contains the thinnest yarns and group F the thickest. This makes it easier for you to find alternative yarns to our patterns, should you wish to switch yarn. All yarns within the same group have a similar knitting tension and can easily replace each other. However, different yarn qualities have different structures and properties which will give the finished work a unique look and feel.

Click here for an overview of the yarns in each yarn group

At the top of all our patterns you’ll find a link to our yarn calculator, which is a helpful tool should you wish to use a different yarn than suggested. By filling in the yarn quality you wish to replace, the amount (in your size) and number of strands, the calculator will present good alternative yarns with the same knitting tension. Additionally it will tell you how much you’ll require in the new qualities and whether you’ll need to work with multiple strands. Most skeins are 50g (some are 25g or 100g).

If the pattern is worked with multiple colours, every colour will have to be calculated separately. Similarly, if the pattern is worked with several strands of different yarns (for example 1 strand Alpaca and 1 strand Kid-Silk) you will have to find alternatives for each, individually.

Click here to see our yarn calculator

Since different yarns have different qualities and textures we have chosen to keep the original yarn in our patterns. However, you can easily find options among our available qualities by using our yarn calculator, or simply pick a yarn from the same yarn group.

It is possible that some retailers still have discontinued yarns in stock, or that someone has a few skeins at home that they would like to find patterns for.

The yarn calculator will provide both alternative yarn as well as required amount in the new quality.

If you think it's hard to decide what size to make, it can be a good idea to measure a garment you own already and like the size of. Then you can pick the size by comparing those measures with the ones available in the pattern's size chart.

You'll find the size chart at the bottom of the pattern.

See DROPS lesson: How to read size chart

The needle size provided in the pattern serves only as a guide, the important thing is to follow the knitting tension. And since knitting tension is very individual, you will have to adjust the needle size to ensure that YOUR tension is the same as in the pattern – maybe you’ll have to adjust 1, or even 2 needle sizes, up or down to achieve the correct tension. For this, we recommend that you work test swatches.

Should you work with a different knitting tension than the one provided, the measurements of the finished garment might deviate from the measurement sketch.

See DROPS lesson: How to measure your tension/gauge

See DROPS video: How to make a tension/gauge swatch

Working a garment top-down provides more flexibility and room for personal adjustment. For example it is easier to try the garment on while working, as well as making adjustments to length of yoke and shoulder caps.

The instructions are carefully explaining every step, in the correct order. Diagrams are adjusted to the knitting direction and are worked as usual.

The diagram depicts all rows/rounds, and every stitch seen from the right side. It is read from bottom to top, from right to left. 1 square = 1 stitch.

When working back and forth, every other row is worked from the right side and every other row is worked from the wrong side. When working from the wrong side, the diagram will have to be worked reversed: from left to right, knit stitches are purled, purl stitches are knit etc.

When working in the round every round is worked from the right side and the diagram are worked from right to left on all rounds.

See DROPS lesson: How to read knitting diagrams

The diagram depicts all rows/rounds, and every stitch seen from the right side. It is worked from bottom to top, from right to left.

When working back and forth every other row is worked from the right side: from right to left and every other row is worked from the wrong side: from left to right.

When working in the round, every row in the diagram are worked from the right side, from right to left.

When working a circular diagram you start in the middle and work your way outwards, counter clockwise, row by row.

The rows usually start with a given number of chain stitches (equivalent to the height of the following stitch), this will either be depicted in the diagram or explained in the pattern.

See DROPS lesson: How to read crochet diagrams

Instructions for working several diagrams after each other on the same row/round, will often be written like so: “work A.1, A.2, A.3 a total of 0-0-2-3-4 times". This means you work A.1 once, then A.2 is worked once, and A.3 is repeated (in width) the number of times provided for your size – in this case like so: S = 0 times, M = 0 times, L=2 times, XL= 3 times and XXL = 4 times.

The diagrams are worked as usual: begin with the first row in A.1, then work the first row in A.2 etc.

See DROPS lesson: How to read knitting diagrams

See DROPS lesson: How to read crochet diagrams

The total width of the garment (from wrist-to-wrist) will be larger in the larger sizes, despite the actual sleeves being shorter. The larger sizes have longer sleeve caps and wider shoulders, so there will be a good fit in all sizes.

The measurement sketch/schematic drawing provides information regarding the full length of the garment. If it’s a jumper or a jacket the length is measured from the highest point on the shoulder closest to the neckline, and straight down to the bottom of the garment. It is NOT measured from the tip of shoulder. Similarly, the length of yoke is measured from the highest point on the shoulder and down to where yoke is split into body and sleeves.

On a jacket measures are never taken along bands, unless specifically stated. Always measure inside band stitches when measuring the length.

See DROPS lesson: How to read a schematic drawing

Diagrams are often repeated on the round or in height. 1 repeat is the diagram the way it appears in the pattern. If it says to work 5 repeats of A.1 in the round, then you work A.1 a total of 5 times after/next to each other in the round. If it says to work 2 repeats of A.1 vertically/in height you work the entire diagram once, then begin again at the start and work the entire diagram one more time.

Chain stitches are slightly narrower than other stitches and to avoid working the cast-on edge too tight, we simply chain more stitches to begin with. The stitch count will be adjusted on the following row to fit the pattern and measurement sketch.

The rib edge is more elastic and will contract slightly compared to, for example, stocking stitch. By increasing before the rib edge, you avoid a visible difference in width between the rib edge and the rest of the body.

It’s very easy to cast off too tightly, and by making yarn overs while casting off (and simultaneously casting these off) you avoid a too tight cast off edge.

See DROPS video: How to bind off with yarn overs (yo)

To achieve an even increase (or decrease) you can increase on, for example: every 3rd and 4th row alternately, like so: work 2 rows and increase on the 3rd row, work 3 rows and increase on the 4th. Repeat this until the increase is complete.

See DROPS lesson: Increase or decrease 1 st on every 3rd and 4th row alternately

Should you prefer to work in the round instead of back and forth, you may of course adjust the pattern. You’ll need to add steeks mid-front (usually 5 stitches), and follow the instructions. When you would normally turn and work from the wrong side, simply work across the steek and continue in the round. At the end you’ll cut the piece open, pick up stitches to work bands, and cover the cut edges.

See DROPS video: How to knit steeks and cut open

Should you prefer to work back and forth instead of in the round, you may of course adjust the pattern so you work the pieces separately and then assemble them at the end. Divide the stitches for the body in 2, add 1 edge stitch in each side (for sewing) and work the front and back pieces separately.

See DROPS lesson: Can I adapt a pattern for circular needles into straight needles?

Pattern repeats can vary slightly in the different sizes, in order to get the correct proportions. If you’re not working the exact same size as the garment in the photo, yours might deviate slightly. This has been carefully developed and adjusted so that the complete impression of the garment is the same in all sizes.

Make sure to follow instructions and diagrams for your size!

If you have found a pattern you like which is available in women’s size it’s not very difficult to convert it to men’s size. The biggest difference will be the length of sleeves and body. Start working on the women size that you think would fit across the chest. The additional length will be worked right before you cast off for the armhole/sleeve cap. If the pattern is worked top-down you can add the length right after the armhole or before the first decrease on sleeve.

Regarding additional yarn amount, this will depend on how much length you add, but it is better with a skein too many than too few.

All yarns will have excess fibres (from production) that might come off as lint or shedding. Brushed yarns (ie hairier yarns) have more of these loose, excess fibres, causing more shedding.

Shedding also depends on what is worn under or over the garment, and whether this pulls at the yarn fibres. It’s therefore not possible to guarantee that there will be no shedding

Below are some tips on how to get the best result when working with hairier yarns:

1. When the garment is finished (before you wash it) shake it vigorously so the looser hairs come off. NOTE: do NOT use a lint roller, brush or any method that pulls at the yarn.

2. Place the garment in a plastic bag and put it in your freezer - the temperature will cause the fibres to become less attached to each other, and excess fibres will come off easier.

3. Leave in the freezer for a few hours before taking it out and shaking it again.

4. Wash the garment according to the instructions on the yarn label.

Pilling is a natural process that happens to even the most exclusive of fibers. It's a natural sign of wear and tear that is hard to avoid, and that is most visible in high friction areas of your garment like a sweater's arms and cuffs.

You can make your garment look as new by removing the pilling, using a fabric comb or a pill/lint remover.

Still can't find the answer you need? Then scroll down and leave your question so one of our experts can try to help you. This will be done normally within 5 to 10 working days.
In the meantime, you can read the questions and answers that others have left to this pattern or join the DROPS Workshop on Facebook to get help from fellow knitters/crocheters!

You might also like...

Trails Head

Linda Christensen, Denmark

Trails Head

Kristýna, Czech Republic

Trails Head

@bezige.brei, Belgium

Trails Head

Sylwia, Poland

Post a comment to pattern DROPS 219-4

We would love to hear what you have to say about this pattern!

If you want to leave a question, please make sure you select the correct category in the form below, to speed up the answering process. Required fields are marked *.

Comments / Questions (45)

country flag Orietta wrote:

Come si riprendono le maglie intorno allo scollo? Devo poi lavorare con i ferri a doppia punta n.7 per terminare il collo ?

15.11.2021 - 14:56

DROPS Design answered:

Buonasera Orietta, provi a vedere questo video che le mostra come riprendere le maglie: . Deve riprendere le maglie con i ferri n° 7 mm. Buon lavoro!

16.11.2021 - 22:14

country flag Liz wrote:

Hi, I’m finding the Yoke section of this pattern very confusing. When decreasing 4 stitches on A2b, which 4 stitches should be decreased? And what does “bind off 2 stitches one time and 1 stitch one time” mean? Do you alternate on different rows, so bind off 2 stitches on one row and 1 stitch the next? Or what does it mean? Thank you Liz

11.10.2021 - 11:20

DROPS Design answered:

Dear Liz, what is important is that you decrease 4 sts over the stitches worked in A.2b to keep the correct width, but the stitches that have to be decreased are not that important, you can knit togheter the knit sts 2 and 2 or the purl/knit sts togeter, just remember the width is the important thing here, these stitches will be worked in rib for neck edge afterwards. Happy knitting!

11.10.2021 - 11:30

country flag Marika Van Ruth wrote:

Brei ik de voor- EN achterkant met kabel-telpatronen? ik zie alleen foto's vd voorzijde vd trui? op zich Niet verkeerd, ..

01.10.2021 - 20:30

DROPS Design answered:

Dag Mariska,

Nee de kabels worden alleen over het voorpand gebreid, op het achterpand brei je tricotsteek.

02.10.2021 - 10:19

country flag Maria Jonsson wrote:

Hej! Stickat diagram A1a-A2a-A3a. Bytte till sticka 8. I instruktionen står det att jag ska sticka 7 rm och därefter sticka A1b över A1a - A2b över A2a och A3b över A3a. Om jag stickar 7 rm så kommer mönstret inte stämma. Har jag missat sticka 7 rm före det att börjat med första diagrammet, hittar inget i isnturiktionen. Vad missar jag?

16.05.2021 - 14:17

DROPS Design answered:

Hei Maria. Tar utgangspunkt i at du strikker den minste str. Fra starten av har du 7 masker (du starter med en vrangmaske, deretter vrangbord over 6 masker) før du strikker diagrammene A.1a, A2.a og A.3a. På siste omgang av diagrammene skal du øke 10 masker på forstykket. Se siste rad i diagrammene A.1a, A2.a og A.3a hvor det skal økes (2 steder i A.1a + A.3a og 4 steder i A.2a). Da skal mønstret stemme, lykke til. mvh DROPS design

19.05.2021 - 09:03

country flag Gulden Kiyici wrote:

Hallo, ich möchte das mittlere Muster (A2b) nicht stricken. Würde sich die Maschen Anzahl des Rumpfteils aendern? Danke für die Antwort..

15.02.2021 - 18:46

DROPS Design answered:

Liebe Frau Kiyici, leider können wir nicht jede Anleitung nach jeder individuelln Anfrage umrechnen - vielleicht können Sie hier die Zunahmen von A.2a nicht stricken (so wird die Maschenanzahl unterschiedlich als in die Anleitung sein), dh diejenigen, die vor A.2b gestrickt sind. Am besten wenden Sie sich an Ihrem DROPS Laden, dort bekommen Sie Hilfen, auch telefonisch oder per E-Mail. Viel Spaß beim stricken!

16.02.2021 - 09:15

country flag Hetty wrote:

Ik begrijp de volgende zin niet denk ik: "minder voor de raglan aan elke kant van de 4 steken op elke markeerdraad." Want als ik de tip voor het minderen (voor de raglan) volg, zit de markeerdraad in de mindering in het midden. Daardoor krijg ik aan de ene kant de overgehaalde steek op het voorpand en aan de andere kant op de mouw? Wat doe ik niet goed?

03.02.2021 - 22:37

DROPS Design answered:

Dag Hetty,

De markeerdraden zitten in het midden van de raglanlijn en je mindert aan beide zijden van deze markeerdraden. Bij 'tip voor het minderen (voor de raglan)' staat aangegeven hoe je dit precies doet (verschillend voor en na de markeerdraad, zodat de steek de goede kant op leunt).

06.02.2021 - 11:58

country flag Annette Franzen wrote:

Beim Stricken in Gr. M. kann etwas beim Bündchen nicht stimmen. Stricke ich wie angegeben am Ende der Runde 2M. rechts bleibt 1 M. übrig. Stricke ich diese links, habe ich an der Stelle nur 1M.links bevor die neue Runde wieder mit nur 1M.rechts beginnt.Oder ich stricke diese M. rechts und habe dann 4M.rechts in Folge und nicht 2M.rechts und dann 2 M. links. Was mache ich verkehrt? Danke für eure Hilfe. Liebe Grüße,Annette

02.02.2021 - 19:48

DROPS Design answered:

Liebe Annette, so stricken Sie in M; 1 M re, 2 M li, 2 M re, 2 M li, 2 M re, A.1a (= 8 M), A.2a (= 18 M), A.3a (= 8 M), 2 M re, 2 M li, 2 M re, 2 M li, 1 M re = 52 Maschen. Viel Spaß beim stricken!

03.02.2021 - 08:42

country flag Carla Sforza​​ wrote:

Buongiorno, dopo aver diminuito a destra le 4 maglie nelle trecce ho messo in attesa su un fermamaglie le 10 centrali dello scollo ma come faccio a diminuire quelle a sinistra? Come devo proseguire? Grazie mille

21.01.2021 - 17:13

DROPS Design answered:

Buongiorno Carla, da questo punto in poi deve proseguire la lavorazione in piano, per cui il lavoro inizierà a un lato del collo. Buon lavoro!

21.01.2021 - 20:21

country flag Hilde wrote:

Ik begrijp de instructie niet voor de pas. Er staat ‘ ...minder tegelijkertijd als het werk 56-66 cm meet 4 steken over de kabels in A.2BE.’ Worden de kabels zelf smaller of moet je aan de zijkant minderen in de averecht steken?

27.12.2020 - 20:51

DROPS Design answered:

Dag Hilde,

Nee, je mindert over de kabels, dus de 8 steken van de kabels minder je door deze steken 2 aan 2 samen te breien. Alleen over de kabels dus.

17.01.2021 - 14:50

country flag Alessia wrote:

Buongiorno, non capisco come diminuire 4 maglie nelle trecce di A2b. In che punto dello schema? Grazie

21.12.2020 - 00:48

DROPS Design answered:

Buongiorno Alessia, da questo punto in poi le trecce non saranno più lavorate, può diminuire dove preferisce. Buon lavoro!

21.12.2020 - 08:57