
Popular categories
Looking for a yarn?


Comments / Questions (37)
![]() Kadri wrote:
Kadri wrote:
Koko XL, joustimen jälkeen lisäsin 15 silmukka nyt on yhteensä 81 silmukka. Pitää laittaa silmukkamerkit raglaania varten 18(etukappale)-8(hiha)-29(selkä)-8(hiha)-18(etukappale) se on yhteensä 92 silmukka. Missä on vika?
05.05.2025 - 21:34DROPS Design answered:
Hei, joustimen jälkeen työhön lisätään koossa XL 11 silmukkaa, tämän jälkeen työssä on 73 silmukkaa. Koossa XXL lisätään 15 silmukkaa ja tämän jälkeen työssä on 81 silmukkaa. 18 + 8 + 29 + 8 + 18 = 81 silmukkaa.
06.05.2025 - 16:27
![]() Anna wrote:
Anna wrote:
Det är ju bra om ni skriver rätt maskantal, så man slipper repa och börja om. Det fattas 8 maskor, när man stickar efter största stl. 8 maskor, det är rätt stor skillnad. Så det ska var 93 maskor istället för 85 maskor efter övningarna på 19 maskor. Gör och gör det rätt
28.02.2023 - 12:14
![]() Loretta wrote:
Loretta wrote:
Corpo del cardigan nella d escursione vi e' un errore mancano le indicazione su come procedere dopo gli aumenti perché dopo i 31centimetri e poi le ciste di 4centimetei non si raggiunge la fine del maglione buona sera e grazie
11.02.2023 - 00:02DROPS Design answered:
Buonasera Loretta, guardando lo schema delle misure i 31 cm dovrebbero essere dalla divisione delle maniche. Abbiamo inoltrato la sua segnalazione al settore design: se ci dovessero essere delle correzioni, il modello verrà aggiornato direttamente online. Buon lavoro!
15.03.2023 - 17:12
![]() Loretta wrote:
Loretta wrote:
Corpo del cardigan dopo aver aumentato le maglie previste il maglione e finito? O bisogna lavorare a maglia rasata fino ad arrivare al bordo a punto ciste ? E per quanti centimetri non e chiaro buongiorno e grazie
10.02.2023 - 11:56DROPS Design answered:
Buonasera Loretta, è indicato come procedere: dopo gli aumenti si cambiano i ferri e si lavora a coste come indicato. Buon lavoro!
10.02.2023 - 16:22
![]() Loretta Fantini wrote:
Loretta Fantini wrote:
Corpo del cardigan i 31 centimetri prima di cominciare a aumentare si contano dal segnapunti o da dove? Buongiorno e grazie.
09.02.2023 - 16:24DROPS Design answered:
Buonasera Loretta, nel paragrafo del collo viene indicato il punto da cui iniziare a misurare. Buon lavoro!
10.02.2023 - 16:19
![]() Ursula Becker wrote:
Ursula Becker wrote:
Guten Tag, ich habe Schwierigkeiten beim Verstehen des 6. und 7. Streifens bei Streifen-1. Dort ist angegeben, dass diese Streifen im Rippenmuster gestrickt werden, also 4cm Bündchen. Bedeutet dass, das diese beiden Streifen in dieser kurzen Strecke verarbeitet werden, je 2cm, oder wie ist das gemeint? Vielen Dank für die Antwort. Mit freundlichen Grüßen Ursula Becker
20.06.2022 - 08:54DROPS Design answered:
Liebe Frau Becker, die 6. Streifen stricken Sie nach der 5. bis Anfang von Bündchen = bis der Rumpfteil ca 31 cm misst und nach der Zunahmenreihe. Dann stricken Sie die 7. Streife für das Rippenmuster. Viel Spaß beim stricken!
20.06.2022 - 10:08
![]() Marie-Françoise LEMINEUR wrote:
Marie-Françoise LEMINEUR wrote:
Bonjour, Je suis "coincée" au niveau des manches : j'ai bien compris qu'elles se tricotaient avec les rayures 2. Mais, il est indiqué de tricoter les rayures -1 : faut-il donc commencer par la rayure 1 (2 fils vert forêt + 1 fil gris) des rayures 1 et ce, jusqu'à la rayure 3 (1 fil vert forêt + 1 gris+ 1 gris clair) ? mais, alors, pourquoi la manche ne mesure-t-elle que 6 cm en fil de rayure 3 ?? Je vous remercie pour votre aide.
26.12.2021 - 22:23DROPS Design answered:
Bonjour Marie-Françoise, sur la manche vous ne faites que la partie du rayure 3 de la partie RAYURES-1 (pour qu’il ait la meme longueur que celui sur le dos et les devants). Ensuite vous realisez des rayures 4, 5 et 6 des RAYURES-2 (manches). Bon tricot!
28.12.2021 - 10:34
![]() Gabriella wrote:
Gabriella wrote:
Buongiorno Vorrei le istruzione per confezionare questo modello con i ferri dritti e cominciando dal basso verso l'alto Geazie Gabriella
06.11.2021 - 12:36DROPS Design answered:
Buonasera, il modello è stato progettato con la costruzione top down e in questa sede non ci è possibile riprogettarlo diversamente. Può lavorarlo con i i ferri dritti. Buon lavoro!
06.11.2021 - 17:24
![]() Marion wrote:
Marion wrote:
Bonsoir, j'aimerais tricoter ce gilet en uni noir. Quel poids de laine dois-je commander ? Si je prends 375g (qui correspond au poids des 4 couleurs pour une taille S) je pense que j'en aurai trop. Pourriez-vous m'aider s'il vous plait? Merci beaucoup! Marion
27.09.2021 - 20:44DROPS Design answered:
Bonjour Marion, comme ce modèle a été tricoté avec des rayures nous ne pouvons pas vous donner la quantité exacte nécessaire avec une seule couleur, effectivement additionner les couleurs est une bonne idée, mais vous en aurez probablement un peu trop, votre magasin saura vous aider et vous conseiller, même par mail ou téléphone. Bon tricot!
28.09.2021 - 07:59
![]() Marie wrote:
Marie wrote:
Hallo liebes Drops-Team, kann ich statt der drei Fäden Brushed Silk auch die Drops Wish mit einem Faden verwenden? Die Maschenprobe ist laut der Beschreibung dieselbe. Wenn ja, wie viel Gramm brauche ich für Größe "L"? Da sie "Wish" noch so neu ist, gibt es kaum Anleitungen für einen Cardigan... Herzlichen Dank, Ihr helft mir sehr weiter!! Marie
28.06.2021 - 15:07DROPS Design answered:
Liebe Marie, es könnte vielleicht auch mal with nur Wish passen (siehe alle unseren Anleitung von der Garngruppe E mit 10 M = 10 cm hier) - am besten immer eine Maschenprobe stricken. Hier lesen Sie mehr - Ihr Laden wird Ihnen noch damit weiterhelfen - auch telefonisch oder per E-Mail. Viel Spaß beim stricken!
28.06.2021 - 16:06
|
|
Forest Shadows#forestshadowsjacket |
|
 |
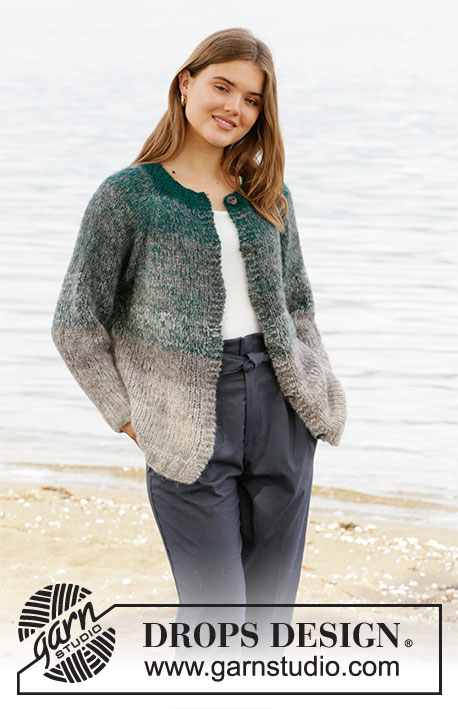 |
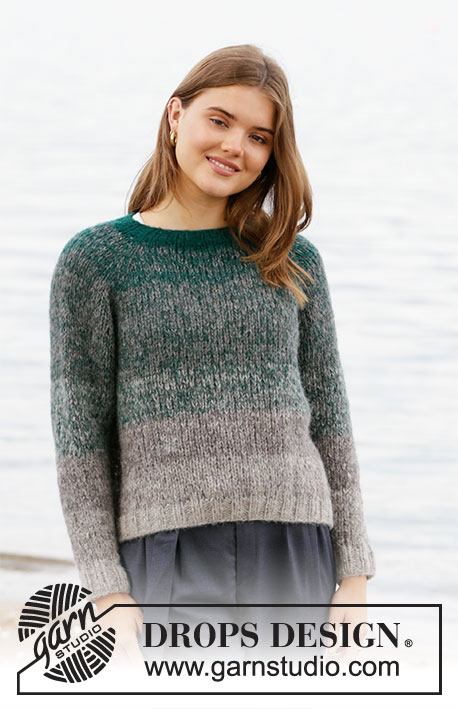
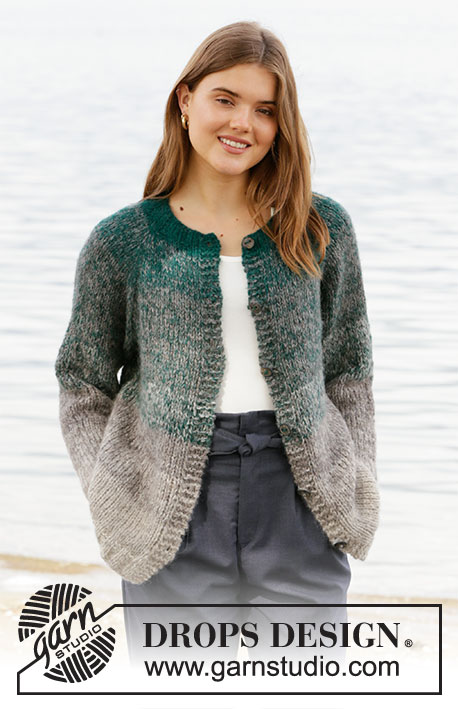
Knitted jacket with raglan in 3 strands DROPS Brushed Alpaca Silk. The piece is worked top down with stripes. Sizes S - XXXL.
DROPS 207-16 |
|
|
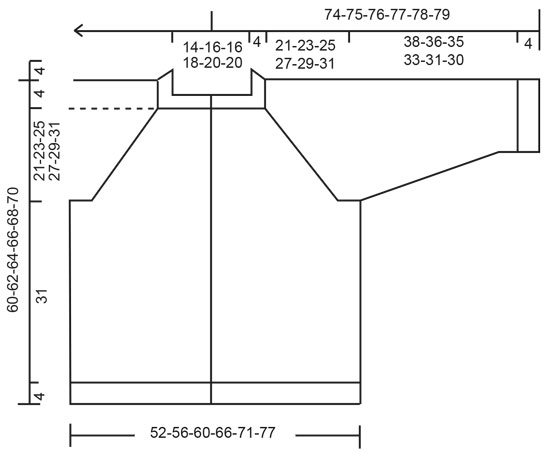
------------------------------------------------------- EXPLANATIONS FOR THE PATTERN: ------------------------------------------------------- RIDGE/GARTER STITCH (worked back and forth): Knit all rows. 1 ridge in height = Knit 2 rows. INCREASE TIP (evenly spaced): To work out how to increase evenly, count the total number of stitches on the needle (e.g. 54 stitches) minus the band stitches (= 8 stitches) and divide the remaining stitches by the number of increases to be made (e.g. 11) = 4.1. In this example, increase by making 1 yarn over after approx. each 4th stitch. On the next row work the yarn overs twisted to avoid holes. STRIPES-1: All stripes are worked with 3 strands. STRIPE 1: 7-7-8-8-8-9 cm with 2 strands forest green + 1 strand grey. STRIPE 2: 14-14-16-16-16-18 cm with 2 strands grey + 1 strand forest green. STRIPE 3: 7-7-8-8-8-9 cm with 1 strand forest green + 1 strand grey + 1 strand light grey. STRIPE 4: 7-7-8-8-8-9 cm with 2 strands grey + 1 strand light grey. STRIPE 5: 7-7-8-8-8-9 cm with 1 strand grey + 2 strands light grey. STRIPE 6: Work with 3 strands light grey as far as the rib. STRIPE 7: Work rib with 2 strands light grey + 1 strand off-white STRIPES-2 (for sleeves): All stripes are worked with 3 strands. Continue with STRIPES-1 – read description above, until stripe 3 is finished. The sleeve measures approx. 8-6-8-6-4-6 cm from the division. Continue the stripes as follows: STRIPE 4: 13-13-12-12-12-11 cm with 2 strands grey + 1 strand light grey. STRIPE 5: 13-13-12-12-12-11 cm with 1 strand grey + 2 strands light grey. STRIPE 6: Work with 3 strands light grey to finished length. RAGLAN: All increases are worked from the right side! Increase 1 stitch on each side of the marker thread in each transition between body and sleeves (= 8 stitches increased on the round) as follows: Work until there is 1 stitch left before marker thread, 1 yarn over, knit 2 (marker thread sits between these 2 stitches), 1 yarn over (= 2 stitches increased). Repeat at all marker threads. On the next row purl the yarn overs twisted to avoid holes. Then work the new stitches in stocking stitch. DECREASE TIP (for sleeves): Decrease 1 stitch on each side of the marker thread as follows: Work until there are 3 stitches left before the marker thread, knit 2 together, knit 2 (marker thread sits between these 2 stitches), slip 1 stitch as if to knit, knit 1 and pass the slipped stitch over the knitted stitch. BUTTONHOLES: Work buttonholes on the right band (when the garment is worn). Work from the right side when there are 3 stitches left on the row as follows: Make 1 yarn over, knit 2 together and knit 1. On the next row (wrong side), knit the yarn over to leave a hole. The first buttonhole is worked when the rib on the neck measures 2 cm. Then work the other 5-5-5-5-5-6 buttonholes with approx. 9½-9½-10-10-10-10 cm between each one. ------------------------------------------------------- START THE PIECE HERE: ------------------------------------------------------- JACKET – SHORT OVERVIEW OF THE PIECE: The piece is worked back and forth with circular needle, top down. The sleeves are worked in the round with short circular needle/double pointed needles. NECK: Cast on 54-58-58-62-66-66 stitches with circular needle size 6 mm and 3 strands forest green. Purl 1 row from the wrong side. Then work as follows: 4 band stitches in GARTER STITCH – read description above, rib (= knit 2 / purl 2) until there are 6 stitches left on the row, knit 2 and 4 band stitches in garter stitch. REMEMBER THE BUTTONHOLE on the right band – read description above. When the rib measures 4 cm, insert 1 marker in the piece. THE PIECE IS NOW MEASURED FROM HERE! YOKE: Knit 1 row from the right side where you increase 11-11-11-11-15-19 stitches evenly spaced – read INCREASE TIP = 65-69-69-73-81-85 stitches. Knit 1 row back from the wrong side (band stitches are knitted). Change to circular needle size 8 mm. Now insert 4 marker threads in the piece as follows: Insert the first marker thread after the first 14-15-15-16-18-19 stitches, skip the next 8 stitches (= sleeve), insert the next thread here, skip the next 21-23-23-25-29-31 stitches (= back piece), insert the next thread here, skip the next 8 stitches (= sleeve), insert the last thread here; there are 14-15-15-16-18-19 stitches between the last marker thread and end of row. Continue with stocking stitch and 4 band stitches in garter stitch on each side and work STRIPES-1 – read description above. AT THE SAME TIME on the first row from the right side begin to increase to RAGLAN – read description above. Increase like this every 2nd row a total of 12-13-15-16-16-17 times = 161-173-189-201-209-221 stitches. Then continue to increase every 2nd row on the front and back pieces (do not increase further on the sleeves = 4 stitches increased on round) 2-2-2-2-3-4 more times = 169-181-197-209-221-237 stitches. Continue working without increasing until the piece measures 21-23-25-27-29-31 cm. The next row from the wrong side is worked as follows: Work the first 28-30-32-34-37-40 stitches (= right front piece), place the next 32-34-38-40-40-42 stitches on 1 thread for sleeve, cast on 6-6-6-8-8-8 new stitches on the needle (= in side under sleeve), work the next 49-53-57-61-67-73 stitches (= back piece), place the next 32-34-38-40-40-42 stitches on 1 thread for sleeve, cast on 6-6-6-8-8-8 new stitches on the needle (= in side under sleeve), work the remaining 28-30-32-34-37-40 stitches (= left front piece). Measure now from here! BODY: = 117-125-133-145-157-169 stitches. Continue back and forth with STRIPES-1, stocking stitch and 4 band stitches in garter stitch on each side. When the piece measures 31 cm from the division, increase 17-21-21-21-25-25 stitches evenly spaced – remember INCREASE TIP = 134-146-154-166-182-194 stitches. Change to circular needle size 6 mm and work rib as follows: 4 band stitches in garter stitch, rib (= knit 2 / purl 2) until there are 6 stitches left on the row, knit 2 and finish with 4 band stitches in garter stitch. When the rib measures 4 cm, cast off with knit over knit and purl over purl. The jacket measures approx. 60-62-64-66-68-70 cm from the shoulder down. SLEEVE: Place the 32-34-38-40-40-42 stitches from the thread on the one side of the piece on short circular needle/double pointed needles size 8 mm and knit up 1 stitch in each of the 6-6-6-8-8-8 stitches cast on under the sleeve = 38-40-44-48-48-50 stitches. Insert a marker thread in the middle of the new stitches (= 3-3-3-4-4-4 new stitches on each side of the thread). Work stocking stitch and STRIPES-2; at the same time when the sleeve measures 4 cm decrease 2 stitches under the sleeve - read DECREASE TIP. Decrease like this every 4½-3½-3-2-2-2 cm a total of 7-8-9-11-10-11 times = 24-24-26-26-28-28 stitches. When the piece measures 38-36-35-33-31-30 cm (shorter measurements in larger sizes due to longer yoke) increase 4-4-6-6-8-8 stitches evenly spaced = 28-28-32-32-36-36 stitches. Change to double pointed needles size 6 mm and work rib (= knit 2 / purl 2) for 4 cm. Cast off with knit over knit and purl over purl. Cut and fasten the strands. The sleeve measures approx. 42-40-39-37-35-34 cm from the division. Work the other sleeve in the same way. ASSEMBLY: Sew buttons onto left band. |
|
|
|
Have you finished this pattern?Tag your pictures with #dropspattern #forestshadowsjacket or submit them to the #dropsfan gallery. Do you need help with this pattern?You'll find 26 tutorial videos, a Comments/Questions area and more by visiting the pattern on garnstudio.com. © 1982-2025 DROPS Design A/S. We reserve all rights. This document, including all its sub-sections, has copyrights. Read more about what you can do with our patterns at the bottom of each pattern on our site. |
|


With over 40 years in knitting and crochet design, DROPS Design offers one of the most extensive collections of free patterns on the internet - translated to 17 languages. As of today we count 314 catalogues and 11821 patterns translated into English (UK/cm).
We work hard to bring you the best knitting and crochet have to offer, inspiration and advice as well as great quality yarns at incredible prices! Would you like to use our patterns for other than personal use? You can read what you are allowed to do in the Copyright text at the bottom of all our patterns. Happy crafting!
Post a comment to pattern DROPS 207-16
We would love to hear what you have to say about this pattern!
If you want to leave a question, please make sure you select the correct category in the form below, to speed up the answering process. Required fields are marked *.