
Popular categories
Looking for a yarn?


|
||||||||||||||||||||||||||||
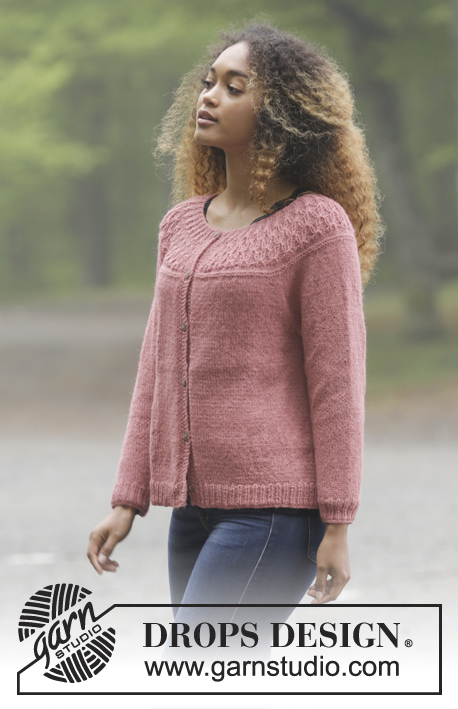
Namdalen Jacket |
||||||||||||||||||||||||||||
 |
 |
|||||||||||||||||||||||||||
Knitted jacket with round yoke, raglan and texture, worked top down. Size: S - XXXL Piece is knitted in DROPS Puna or Sky.
DROPS 179-2 |
||||||||||||||||||||||||||||
|
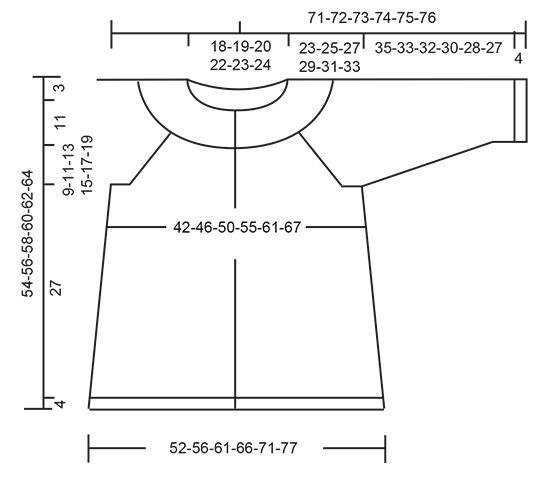
INFORMATION FOR PATTERN: GARTER STITCH (back and forth): 1 ridge = knit 2 rows. PATTERN: See diagrams A.1 to A.3. Diagrams show all rows in pattern seen from the right side. INCREASE TIP (evenly): To calculate how to increase evenly, use the total number of stitches on row (e.g. 254 stitches), minus stitch in band (= 14 stitches) and divide the remaining stitches by number of increases to be done (e.g. 8) = 30. I.e. in this example increase after approx. every 30th stitch and do not increase over bands. Increase 1 stitch by making a yarn over. On next row knit yarn overs twisted to avoid holes. RAGLAN: All increases are done from right side. Increase 1 stitch on each side of marker thread as follows: Work until 2 stitches remain before marker thread, 1 yarn over, knit 4 (marker thread is in the middle of these 4 stitches), 1 yarn over. Repeat at the remaining marker threads on row (= 8 stitches increased on needle). On next row purl yarn overs twisted to avoid holes. DECREASE TIP (applies to mid under sleeve): Begin 3 stitches before marker and knit 2 together, knit 2 (marker is between these 2 stitches), slip 1 stitch knitwise, knit 1, pass slipped stitch over stitch worked (= 2 stitches decreased). BUTTONHOLES: Decrease for buttonholes on right band. I.e. decrease for buttonhole at the end of row from right side. 1 BUTTONHOLE = knit third and fourth band stitch from edge together and make 1 yarn over. On next row knit yarn over = hole. Decrease for buttonholes when piece measures: S: 2, 11, 20, 29, 38 and 47 cm. M: 2, 11, 20, 29, 39 and 49 cm. L: 2, 11, 21, 31, 41 and 51 cm. XL: 2, 11, 21, 31, 41 and 51 cm. XXL: 2, 11, 20, 29, 38, 47 and 56 cm XXXL: 2, 11, 20, 29, 38, 47 and 56 cm ---------------------------------------------------------- JACKET: Worked back and forth on circular needle, top down. Work sleeves in the round on double pointed needles. YOKE: Cast on 128-134-140-146-152-158 stitches on circular needle size 3.5 mm with Puna or Sky. Purl 1 row from wrong side. Then work PATTERN – see explanation above, as follows: Work A.1a (= 7 band stiches), work A.2a (= 2 stitches on first row), work A.2b (= 36-38-40-42-44-46 repetitions of 3 stitches on first row), work A.2c (= 4 stitches on first row), work A.1b (= 7 band stiches). When 6 rows have been worked of diagrams (to and with row marked with arrow in diagrams) switch to circular needle size 4 mm. Remember BUTTONHOLES - see explanation above. Work band stitches as shown in diagrams A.1a and A.1b until finished measurements. REMEMBER THE KNITTING TENSION! When entire A.2a, A.2b and A.2c have been worked vertically, there are 242-254-266-278-290-302 stitches on needle and piece measures 10 cm from cast-on edge. Work 2 rows in stocking stitch while increasing 2-8-16-24-20-34 stitches evenly on first row – read INCREASE TIP = 244-262-282-302-310-336 stitches, Work 2 ridges in GARTER STITCH - see explanation above. Insert 4 marker threads in piece without working as follows: Insert 1st marker thread after 41-43-46-50-53-58 stitches, 2nd marker thread after another 47-52-56-58-56-59 stitches, 3rd marker thread after another 68-72-78-86-92-102 stitches, and 4th marker thread after another 47-52-56-58-56-59 stitches. There are now 41-43-46-50-53-58 stitches left on needle. Continue in stocking stitch and band stitches in each side as before and on next row from right side begin increase for RAGLAN – see explanation above. Increase like this on every 4th row (= every other row from right side) 6-8-9-10-12-13 times in total = 292-326-354-382-406-440 stitches. Continue with stocking stitch without increasing stitches until piece measures 23-25-27-29-31-33 cm from cast-on edge. Work next row from wrong side as follows: Work first 47-51-55-60-65-71 stitches (= half right front piece), slip the next 59-68-74-78-80-85 stitches on a stitch holder (= sleeve), cast on 8-8-10-10-12-12 new stitches under sleeve, work the next 80-88-96-106-116-128 stitches (= back piece), slip the next 59-68-74-78-80-85 stitches on a stitch holder (= sleeve), cast on 8-8-10-10-12-12 new stitches under sleeve, work the remaining 47-51-55-60-65-71 stitches on round (= half left front piece). BODY: = 190-206-226-246-270-294 stitches. Insert a marker thread in the middle of the new stitches cast-on under sleeves in each side (= 4-4-5-5-6-6 stitches on each side of marker thread). NOW MEASURE THE PIECE FROM HERE! Work in stocking stitch with 7 edge stitches in garter stitch in each side of piece. When piece measures 3 cm, work A.3 (= 6 stitches) mid under each sleeve so that there are 3 stitches of diagram on each side of marker thread. For every time A.3 has been worked vertically, 4 stitches have been increased on needle. Work the new stiches in stocking stitch. Continue like this until A.3 have been worked 11 times vertically = 234-250-270-290-314-338 stitches. Piece measures approx. 27 cm. Knit 1 row from right side while increasing 20-22-23-24-27-30 stitches evenly = 254-272-293-314-341-368 stitches. Purl 1 row from wrong side. Switch to circular needle size 3.5 mm. Now work rib as follows: Work 7 band stitches as before, purl 1, * knit 1, purl 2 *, work from *-* until 9 stitches remain on needle, knit 1, purl 1 and 7 band stitches as before. When rib measures 4 cm - adjust so that last row worked is from right side, switch to circular needle size 4 mm. Purl 1 row from wrong side and cast off by knitting from right side. To avoid a tight cast-off edge use a larger needle or make a yarn over that is casted off after approx. every 4th stitch. Jumper measures approx. 54-56-58-60-62-64 cm from shoulder and down. SLEEVES: Work sleeves in the round on double pointed needles. Slip the 59-68-74-78-80-85 stitches from stitch holder on double pointed needles size 4 mm. Pick in addition up 1 stitch in each of the 8-8-10-10-12-12 stitches cast on under sleeve = 67-76-84-88-92-97 stitches. Insert 1 marker thread in the middle of the new stitches (= mid under sleeve). NOW MEASURE THE PIECE FROM HERE! Work in stocking stitch in the round. When piece measures 3 cm, decrease 2 stitches mid under sleeve - read DECREASE TIP. Decrease like this every 8th-6th-5th-4th-4th-3rd round 11-14-16-18-19-20 times in total = 45-48-52-52-54-57 stitches. Work 1 round while decreasing 0-0-1-1-0-0 stitches = 45-48-51-51-54-57 stitches. Continue in stocking stitch until piece measures 35-33-32-30-28-27 cm (NOTE: shorter measurements in the larger sizes because of longer yoke). Switch to double pointed needles size 3.5 mm. Now work rib = knit 1/purl 2 until rib measures 4 cm. Switch back to circular needle size 4 mm. Knit 1 round. Then cast off by knitting. To avoid a tight cast-off edge use a larger needle or make a yarn over that is casted off after approx. every 4th stitch. Sleeve measures approx. 39-37-36-34-32-31 cm. Work the other sleeve the same way. |
||||||||||||||||||||||||||||
Diagram explanations |
||||||||||||||||||||||||||||
|
||||||||||||||||||||||||||||

|
||||||||||||||||||||||||||||

|
||||||||||||||||||||||||||||
|
||||||||||||||||||||||||||||
|
Have you made this or any other of our designs? Tag your pictures in social media with #dropsdesign so we can see them! Do you need help with this pattern?You'll find tutorial videos, a Comments/Questions area and more by visiting the pattern on garnstudio.com. © 1982-2024 DROPS Design A/S. We reserve all rights. This document, including all its sub-sections, has copyrights. Read more about what you can do with our patterns at the bottom of each pattern on our site. |
||||||||||||||||||||||||||||


With over 40 years in knitting and crochet design, DROPS Design offers one of the most extensive collections of free patterns on the internet - translated to 17 languages. As of today we count 304 catalogues and 11422 patterns - 11422 of which are translated into English (UK/cm).
We work hard to bring you the best knitting and crochet have to offer, inspiration and advice as well as great quality yarns at incredible prices! Would you like to use our patterns for other than personal use? You can read what you are allowed to do in the Copyright text at the bottom of all our patterns. Happy crafting!
Comments / Questions (47)
Ich brauche Hilfe. Mir ist nicht klar wo ich einstechen soll, wenn es im Diagramm zwischen der 4 & 5 Masche heißt. Das Zeichen umfasst doch nur 4 Kästchen. Ich bitte um Antwort.
09.04.2018 - 22:29DROPS Design answered:
Liebe Jenny, genau, die Nadel stechen Sie nach den 4. Maschen ein und Faden durchholen , dann stricken Sie die 4 Maschen: 1 re, 2 li, 1 re. Dieses Video zeigt wie man dieses Muster (in der Runde) strickt. Viel Spaß beim stricken!
10.04.2018 - 08:29Bonjour, dans les explications de ce modèle en français, je ne trouve pas le diagramme. Puis-je me servir du diagramme du N° 179/2? Merci
16.02.2018 - 09:35DROPS Design answered:
Bonjour Sylvie, les diagrammes et leur légende sont désormais de nouveau visible, merci. Bon tricot!
16.02.2018 - 09:58Ich habe genau die gleichen 2 Fragen wie Frau Wagner (s.u.). Gibt es dazu schon eine Antwort irgendwo oder habe ich sie überlesen? Danke!
04.12.2017 - 22:23Ich habe 2 Fragen zu einer Stelle kurz vor dem Rumpfteil: 1. Ich habe XL gewählt und habe damit 382M auf der Nadel. Wenn ich aber die M, die ich stricken bzw. stilllegen soll zusammenzähle, komme ich nur auf 372. Ebenso am Anfang des Rumpfteils, in meiner Rechnung komm ich nur auf 236. 2. Ich weiß nicht ganz, wie ich das mit dem Anschlagen und Stilllegen machen soll: die stillgelegten M kommen auf einen Hilfsfaden und die 10M werden direkt dahinter neu angeschlagen? Vielen Dank!
18.11.2017 - 11:41DROPS Design answered:
Liebe Frau Wagner, Danke für den Hinweis, unser Desigh team wird die Anleitung noch mal prüfen. Danke im voraus für Ihren Geduld.
20.11.2017 - 08:55Suite : et bien entendu pareil aux rangs 20,26,32...Merci.
12.11.2017 - 07:40Bonjour, pour moi il y a une erreur sur le diagramme : au rang 14 la diminution se fait 2 mailles ensemble à l'envers en prenant la maille précédente+la maille ajouté au rang précédent,nous sommes en aller/retour et pas en circulaire( modèle cardigan/modèle pull)Merci de me dire si c'est correct ?!
12.11.2017 - 07:34Liebes Drops-Design-Team, irgendwie verstehe ich den Anfang der Anleitung nicht: Sie beginnt mit einer Rückreihe links? Wie beginnt man denn mit einer Rückreihe? Vielen Dank und beste Grüße!
15.10.2017 - 16:31DROPS Design answered:
Liebe Frau Wagner, die erste Reihe wird hier links gestrickt und dieser 1. Reihe wird Rückseite sein so daß nächste Reihe eine Hinreihe wird (= Vorderseite). Viel Spaß beim stricken!
16.10.2017 - 09:56Die Jacke ist wunderschön! Ich habe gesehen, dass es eine Größentabelle gibt und versuche mich auch an dieser zu orientieren. Da ich dies bei Gestricktem aber manchmal nicht ganz leicht finde, dürfte ich trotzdem fragen, wie groß die Dame ist, die die Jacke auf dem Bild trägt und welche Größe sie anhat? (Das würde mir als zusätzliche Orientierung helfen.) Vielen Dank!
10.10.2017 - 09:43DROPS Design answered:
Liebe Frau Wagner, die Jacke im Foto ist eine Größe M, aber um die richtige GrÖße zu finden, vergleichen Sie einfach die Ma╩en einer ähnlichen Jacke, die Sie haben und gerne haben mit dem Maßen in der Skizze. Viel Spaß beim stricken!
10.10.2017 - 09:50Can you clarify the raglan decrease on every 4th row (= every other row on right side). Is it every 4th row or every other row? A bit confusing as every other row would be the second row. Thank you.
10.10.2017 - 00:20DROPS Design answered:
Dear Nancy, when increasing every 4th row, you will increase every other RS row = every other row worked from right side of piece, ie inc on next row from RS, work 3 rows and repeat these 4 rows. Happy knitting!
10.10.2017 - 09:41I have a general question, not just about this pattern but Drop patterns in total. I am looking for a woman's sweater or cardigan that has a bit of detail but no cable and no circular needle. All the ones I have seen so far, that I like, use circular needle and I do not have one nor do I know how to use one. Can I use ordinary knitting needle instead of a circular? thanks
09.10.2017 - 13:34DROPS Design answered:
Dear Mrs Crighton, you will find here relevant informations about adjusting patterns onto straight needles. Remember your DROPS store will be also able to help you if required. Happy knitting!
09.10.2017 - 15:19