


Komentáře / Otázky (44)
![]() Lena Brønsholt napsala:
Lena Brønsholt napsala:
Hej Findes der evt. en video, hvor man kan se, hvordan man laver forhøjning bagpå? Jeg kan kun finde i strik?!! Og jeg forstår det ikke?!! Hvad menes der med: “hvert hjørne i halsen/starten af hver raglanlinie”?? Mvh. Lena Brønsholt
19.06.2025 - 12:36Odpověď DROPS Design :
Hei Lena. Har dessverre ikke video på denne forhøjningen. Men når du har heklet "hele" plagget og det måler 35-39-43-48-52 cm, så klipp og fest trådene. Nå skal du starte ved halskanten og hekle "motsatt" vei. Halskanten har en typ firkantet form og det skal settes 4 merker i hvert hjørne i halsen + 1 merke midt foran. Disse "hjørnene" ble skapt da man økte til raglan, altså 4 steder = 4 hjørner. mvh DROPS Design
23.06.2025 - 11:17
![]() Renate B napsala:
Renate B napsala:
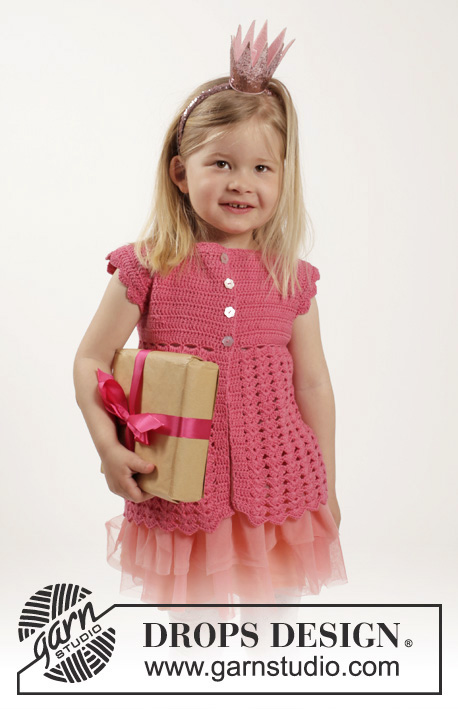
Auf dem Foto sieht es aus, als wäre unter dem Kleid ein Unterrock. Gibt es dazu auch eine Anleitung?
06.05.2025 - 10:08Odpověď DROPS Design :
Liebe Renate B, auf dem 1. Foto trägt sie einen Stoffunterrock - dafür haben wir keine Anleitung. Viel Spaß beim Häkeln!
06.05.2025 - 13:32
![]() Giusy napsala:
Giusy napsala:
Buongiorno c'e il modello del sotto abito?
09.12.2024 - 11:10Odpověď DROPS Design :
Buonasera Giusy, no, non abbiamo il modello del sotto abito. Buon lavoro!
13.12.2024 - 22:44
![]() Marianne Børgesen napsala:
Marianne Børgesen napsala:
I opskriften står der: fra retsiden således: Hvad hækler man så på bagsiden? Stangmasker eller fastmasker? Eller skal man ikke tage ud ved mærketrådene? Hvad starter man så med på omg. efter man har sat mærketrådene? Hilsen Marianne
06.07.2024 - 11:58Odpověď DROPS Design :
Hei Marianne. Jo, etter at du har satt 4 merketråder i arbeidet (uten å hekle) fortsetter du slik fra retten: Hækl 1 stangmaske i hver fm, men i hver fm med mærketråd i hækles der 2 st + 2 lm + 2 st = 88-92-96-96-100 st på rækken (= 12 st taget ud). Fra vrangen: Nu tages der ud til raglan: Fortsæt med STANGMASKER, og hækl 2 st + 2 lm + 2 st om hver lm-bue i hver raglan linje (= 16 st tages ud på rækken) Gentag udtagningen på hver række, 6-6-7-8-9 gange til (= totalt 7-7-8-9-10 gange) = 200-204-224-240-260 st på rækken. mvh DROPS Design
09.07.2024 - 07:24
![]() Gudrun-Louise Larsen napsala:
Gudrun-Louise Larsen napsala:
Overgangen bak på viftemønsteret. Når man er ferdig med en omg skal man da avslutte med kjede maske også kjede maske til man er ved første lm bue? Hvor skal i så fall den avsluttende kjede masken?
11.05.2024 - 17:47Odpověď DROPS Design :
Hej Gudrun-Louise, HEKLEINFO: På beg av hver omg/rad med st erstattes 1.st med 3 lm. Omg avsluttes med 1 kjm i 3.lm fra beg av omg. Raden avsluttes med 1 st i 3.lm fra beg av forrige rad.
14.05.2024 - 11:44
![]() Julie napsala:
Julie napsala:
In the "Body" section, it says to repeat Round 3 until the dress measures "X." For me, that's 6&3/4. From where to where is that measurement taken?
01.04.2023 - 16:16Odpověď DROPS Design :
Dear Julie, the measurement is taken from where it indicated: NOW MEASURE PIECE FROM HERE! at the beginning of the Body, up until the round you are currently working. Happy crochetting!
02.04.2023 - 20:25
![]() Rie napsala:
Rie napsala:
Jeg vil gerne hækle med flere farver garn til 5/6 år. Hvor mange garn-ruller (af 50 gram) skal man bruge til øverste del af kjolen og hvor mange til den nedre del af kjolen (den del med hæklede luft huller)? Jeg har 4 forskellige farver. Er den hvide underdel med i opskriften?
15.11.2022 - 21:00Odpověď DROPS Design :
Hej Rie, du skal bruge ialt 5 nøgler DROPS Baby Merino. Nej den hvide underkjole er ikke med :)
16.11.2022 - 13:12
![]() Gillian Sansum napsala:
Gillian Sansum napsala:
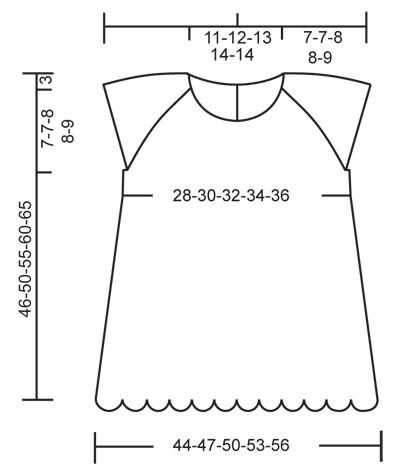
Hi I have looked at the diagram provided and it looks like it is a round neck....I seem to have ended up with a square neck...your help please thanks Gillian
02.08.2022 - 13:11Odpověď DROPS Design :
Dear Mrs Sansum, at the very end, you will crochet an elevation to make the neck higher on the back so that the neckline will look round - see ADJUSTING NECKLINE. Happy crocheting!
02.08.2022 - 17:15
![]() Jette Brøns napsala:
Jette Brøns napsala:
Hej. Jeg har et spørgsmål angående kjolen. Den hvide underdel er den også hæklet? Venlig hilsen Jette Brøns
12.01.2022 - 08:23Odpověď DROPS Design :
Hej Jette, nej det er kun det røde i kjolen som er hæklet. God fornøjelse!
13.01.2022 - 11:32
![]() Marianne napsala:
Marianne napsala:
Vedr. vifteærme Det passer bedre med at springe over 2masker pr. gang og ikke 2cm.
25.11.2021 - 16:31
|
|
Princess Matilde#princessmatildedress |
|
 |
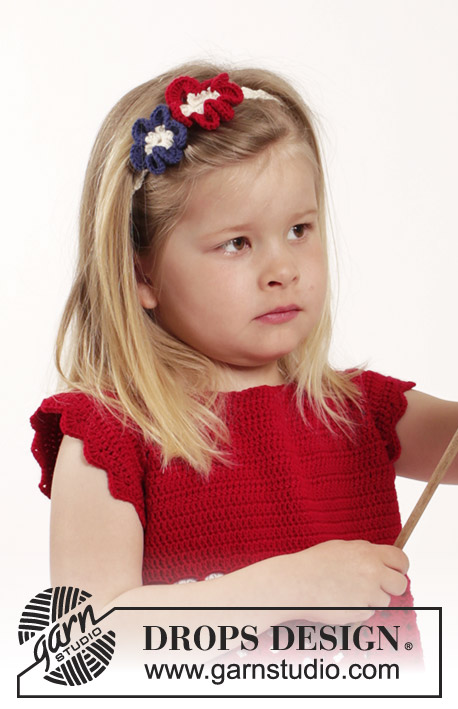 |
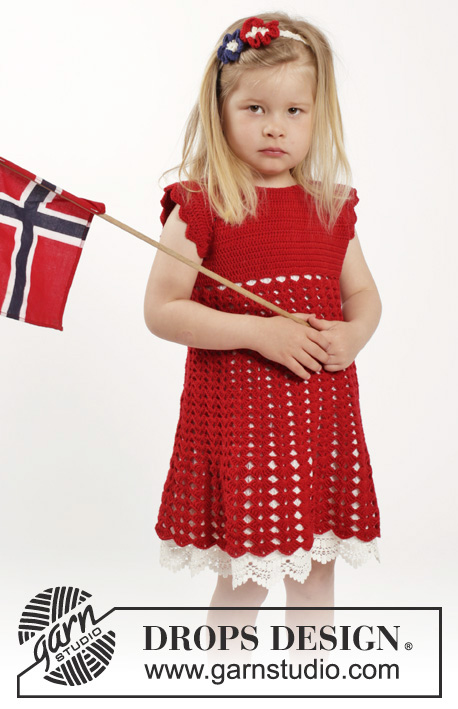
Souprava: dětské šaty s krátkými raglánovými rukávy a vějířkovým vzorem háčkované shora dolů a čelenka s kytičkami háčkovaná z příze DROPS BabyMerino nebo DROPS ♥ You #7. Velikost: 2 - 10 let
DROPS Children 26-5 |
|
|
INFO: První DS na začátku každé kruhové řady/řady DS nahrazujeme 3 řo. Každou kruhovou řadu končíme 1 pevným okem do 3. řo ze začátku kruhové řady. Každou řadu končíme 1 DS do 3. řo ze začátku předchozí řady. TIP - PŘIDÁVÁNÍ: 1 DS přidáme uháčkováním 2 DS do jednoho a téhož oka. ---------------------------------------------------------- ŠATY: Háčkujeme shora dolů, od průkrčníku k dolnímu okraji. Nejprve háčkujeme v řadách až k dolnímu okraji rozparku pro zapínání uprostřed zad, pak pokračujeme v kruhových řadách. SEDLO: Háčkem č. 3,5 uháčkujeme přízí Baby Merino 77-81-85-85-89 volných řo (včetně 1 řo na otočení). Do 2. řo od háčku pak uháčkujeme 1 KS a dále po 1 KS do každého řo až do konce řady = v řadě máme 76-80-84-84-88 KS. Nyní si označíme raglánové “švy” – vložíme 4 značky, takto (začínáme uprostřed zad – POZN.: teď pouze rozmístíme značky, NEháčkujeme): vynecháme 12-13-14-14-15 KS (= pravý zadní díl), následující KS označíme 1. značkou, vynecháme 12 KS (= rukáv), další KS označíme 2. značkou, vynecháme 24-26-28-28-30 KS (= přední díl), následující KS označíme 3. značkou, vynecháme 12 KS (= rukáv) a další KS označíme 4. značkou (za touto poslední značkou leží 12-13-14-14-15 KS levého zadního dílu). NEŽ BUDETE POKRAČOVAT, PŘEČTĚTE SI CELÝ NÁSLEDUJÍCÍ POPIS: Viz INFO a následující – lícovou – řadu háčkujeme takto: po 1 DS do každého KS, jen do každého označeného KS háčkujeme 2 DS + 2 řo + 2 DS = v řadě máme 88-92-96-96-100 DS (= 12 DS jsme přidali). Pak přidáváme pro raglánové zkosení: Pokračujeme DS a do každého obloučku z řo v každém raglánovém “švu” háčkujeme 2 DS + 2 řo + 2 DS (= v jedné řadě přidáme 16 DS). Toto přidávání opakujeme v každé řadě ještě 6-6-7-8-9x (= celkem 7-7-8-9-10x) = v řadě máme 200-204-224-240-260 DS. Následující řadu (lícovou) háčkujeme takto: Po 1 DS do každého z prvních 28-29-32-34-37 DS (= pravý zadní díl), následujících 44-44-48-52-56 DS vynecháme (= rukáv), uháčkujeme 8 řo, pak po 1 DS do každého z dalších 56-58-64-68-74 DS (= přední díl), následujících 44-44-48-52-56 DS vynecháme (= rukáv), uháčkujeme 8 řo a pak po 1 DS do každého z posledních 28-29-32-34-37 DS (= levý zadní díl). Rukávové hlavice máme nyní hotové a pokračovat budeme v kruhových řadách. TRUP: Díl uprostřed zad spojíme (lícová strana leží nahoře) a uháčkujeme 1 kruhovou řadu DS (po 1 DS do každého DS z předchozí kruhové řady a po 1 DS do každého řo v podpaží – viz INFO) = v kruhové řadě máme 128-132-144-152-164 ok. NYNÍ MĚŘÍME DÍL OD TOHOTO MÍSTA! Dál háčkujeme 1 DS do každého DS, a to až do výše 4-4-4-5-5 cm; v poslední kruhové řadě přidáme rovnoměrně 2-3-1-3-1 DS - viz TIP - PŘIDÁVÁNÍ = 130-135-145-155-165 DS. Nyní háčkujeme vějířkový vzor, takto: 1. KRUHOVÁ ŘADA: 1 KS do 1. DS, *4 řo, 4 DS vynecháme, 1 KS do následujícího DS*, *-* opakujeme v průběhu celé kruhové řady a končíme 4 řo, 4 DS vynecháme a 1 pevným okem do prvního KS = 26-27-29-31-33 obloučků z řo. 2. KRUHOVÁ ŘADA: 3 DS + 2 řo + 3 DS do každého obloučku z řo. 3. KRUHOVÁ ŘADA: pevná oka až k 1. obloučku z řo, pak háčkujeme do každého obloučku z řo 3 DS + 2 řo + 3 DS. 3. kruhovou řadu stále opakujeme, až do výše 15-17-18-20-21 cm NÁSLEDUJÍCÍ KRUHOVOU ŘADU HÁČKUJEME TAKTO: pevná oka až k 1. obloučku z řo, pak do každého obloučku z řo háčkujeme 4 DS + 2 řo + 4 DS. Tuto kruhovou řadu stále opakujeme, až do výše 25-28-31-34-36 cm. DALŠÍ KRUHOVOU ŘADU HÁČKUJEME TAKTO: pevná oka až k 1. obloučku z řo, pak do každého obloučku z řo háčkujeme 4 2x nahozené DS + 2 řo + 4 2x nahozené DS. Tuto kruhovou řadu stále opakujeme, až do výše 35-39-43-48-52 cm. Práci ukončíme. TVAROVÁNÍ PRŮKRČNÍKU: Aby šaty hezky seděly, vytvarujeme průkrčník pomocí mírného zvýšení jeho zadní strany. Označíme si konce zadního průkrčníku – vložíme značku na začátek raglánového “švu” na každé straně a 1 značku vložíme doprostřed předního dílu. Háčkem č.3,5 háčkujeme – začínáme uprostřed zad: po 1 KS do každého oka až po 1 poslední oko před značkou, 1 PDS do následujícího oka, 1 DS do označeného oka a PDs do dalšího oka, pak po 1 KS do každého oka až po poslední 1 oko před další značkou, 1 PDS do následujícího oka, 1 DS do označeného oka a 1 PDS do dalšího oka, pak po 1 KS do každého oka až po posledních 4-4-5-5 (5-6) ok před značkou uprostřed předního dílu. Práci otočíme a háčkujeme 1 KS do každého KS zpět ke středu zad, jen u každé značky sháčkujeme 3 KS dohromady, tj. uháčkujeme 1 KS do PDS, ale nekončíme jej – před posledním protažením příze uháčkujeme 1 KS do označeného oka, ale opět jej nedokončíme a uháčkujeme 1 KS do následujícího PDS, při jeho dokončování pak protáhneme přízi všemi 4 smyčkami na háčku (= ujmuli jsme 2 KS). Přízi odstřihneme a postup zopakujeme na protější straně průkrčníku. KNOFLÍKOVÁ LÉGA NA ZÁDECH: Podél levého okraje rozparku na zádech háčkujeme: po 2 KS do každé řady DS a po 1 KS do každé řady KS. Uháčkujeme celkem 4 řady KS, pak práci ukončíme. Podél pravého okraje rozparku háčkujeme knoflíkové dírky, takto (začínáme u průkrčníku z lícové strany): 4 KS (= po 2 KS do každé z prvních 2 řad DS), 4 řo (= 1 knoflíková dírka), asi 1 cm vynecháme, pak háčkujeme KS až do cca středu légy, 4 řo, vynecháme asi 1 cm, háčkujeme KS až po 1 cm od konce légy, pak uháčkujeme 4 řo a přichytíme je 1 KS do posledního oka. Práci ukončíme. Na levou légu přišijeme knoflíky. LEM PRŮKRČNÍKU: Okraj průkrčníku obháčkujeme takto: 1 KS do prvního oka, *2 řo, 2 oka vynecháme, 1 KS do následujícího oka*, *-* opakujeme v průběhu celé řady, pak práci ukončíme. VĚJÍŘKOVÝ RUKÁVEK: Okraj průramku - rukávové hlavice obháčkujeme vějířkovým vzorem, takto: po 1 KS do každého z 8 ok v podpaží, pak *vynecháme asi 2 cm, do následujícího oka háčkujeme 3 DS + 2 řo + 3 DS, vynecháme asi 2 cm, do dalšího oka uháčkujeme 1 KS*, *-* opakujeme a končíme 1 pevným okem do 1. KS ze začátku kruhové řady (= po obvodu rukávové hlavice máme asi 9-9-10-10-11 vějířků). Práci ukončíme. Stejný postup zopakujeme i u druhého průramku. ---------------------------------------------------------- ČELENKA : Háčkem č. 3,5 uháčkujeme smetanovou přízí 6 řo. 1. ŘADA: 1 KS do 4. řo od háčku, po 1 KS do každého z následujících 2 řo, práci otočíme = 3 KS + 3 řo. 2. ŘADA: 3 řo, po 1 KS do každého ze 3 KS z předchozí řady, práci otočíme. 2. řadu opakujeme, až je čelenka dlouhá asi 42-44-46-48 cm (ppř. do libovolné délku, asi o 6-8 cm kratší, než obvod hlavy). Přízi odstřihneme a konce čelenky sešijeme. KYTIČKA VELKÁ: Háčkem č. 3,5 uháčkujeme smetanovou přízí 7 řo a spojíme je pevným okem do kroužku. 1. KRUHOVÁ ŘADA: 3 řo (= 1 DS), 2 DS do kroužku z řo, *6 řo, 1 KS do posledního z uháčkovaných DS, 3 DS do kroužku z řo*, *-* opakujeme celkem 6x a končíme 6 řo a 1 pevným okem do 3. řo ze začátku kruhové řady = 7 obloučků z řo, mezi nimi vždy 3 DS. Práci ukončíme. 2. KRUHOVÁ ŘADA – přízi změníme na červenou: 1 KS do prostředního z prvních 3 DS v kruhové řadě, *12 DS do obloučku z řo, 1 DS vynecháme, 1 KS do následujícího DS, 1 DS vynecháme*, *-* opakujeme v průběhu celé kruhové řady a končíme 1 pevným okem do prvního KS ze začátku kruhové řady. Práci ukončíme. KYTIČKA MALÁ: Háčkem č. 3,5 uháčkujeme smetanovou přízí 6 řo a spojíme je pevným okem do kroužku. 1. KRUHOVÁ ŘADA: 2 řo (= 1 PDS), 2 PDS do kroužku z řo, *5 řo, 1 KS do posledního z uháčkovaných PDS, 3 PDS do kroužku z řo*, *-* opakujeme celkem 5x a končíme 5 řo a 1 pevným okem do 2. řo ze začátku kruhové řady = 6 obloučků z řo, mezi nimi vždy 3 PDS. Práci ukončíme. 2. KRUHOVÁ ŘADA - přízi změníme na modrou: 1 KS do prostředního z prvních 3 PDS v kruhové řadě, *10 DS do obloučku z řo, 1 PDS vynecháme, 1 KS do následujícího PDS, 1 PDS vynecháme*, *-* opakujeme v průběhu celé kruhové řady a končíme 1 pevným okem do prvního KS ze začátku kruhové řady. Práci ukončíme. DOKONČENÍ: Na čelenku přišijeme kytičky. |
|
|
|
Dokončili jste tento model?Pak označte své fotky tagem #dropspattern #princessmatildedress nebo je pošlete do galerie #dropsfan. Potřebujete s tímto návodem poradit?Otevřete-li si návod na stránce garnstudio.com, najdete tam 13 výukových video-ukázek, Komentáře/Dotazy a další užitečné informace. © 1982-2025 DROPS Design A/S. Vyhrazujeme si veškerá práva. Tento dokument, včetně všech jeho dílčích částí, podléhá autorským právům. Podrobnější komentář k možnostem užití našich návodů najdete dole pod každým návodem na našich stránkách. |
|


V oblasti pletené a háčkované módy působí DROPS Design více než 40 let. Díky tomu vám můžeme nabídnout jednu z nejrozsáhlejších kolekcí modelů s bezplatnými návody dostupnými na internetu - navíc v 17 jazycích. K dnešnímu dni máme na 314 katalogů a 11821 návodů celkem - z nich je už 7047 dostupných v [češtině].
Přidejte komentář k návodu DROPS Children 26-5
Rádi bychom věděli, co si o tomto modelu myslíte!
Pokud se chcete na něco zeptat, dbejte prosím na to, abyste ve formuláři níže vybrali správnou kategorii - díky tomu se dříve dozvíte, co potřebujete vědět. Povinná pole jsou označena *.