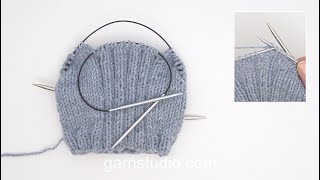
Výukové video-ukázky

Prohlédnout všechna videa podle kategorie
7:03
How to work 2-coloured English rib with second colour in the edge and colour change

In this DROPS video we show how to work 2-colour English rib in stripes where it works with the second colour on the edge stitches/band stitches and how to twist the strands together when changing colours. The edge stitches/band stitches works in garter stitches. ROW 1 (from RS): Work 5 edge stitches in garter stitch with the second colour, switch to the main colour, but twist the strands together to avoid holes and work English rib to the edge stitches on the other side. Lift the edge stitches over to the right needle, push the stitches back on the circular needle so the next row is also worked from the right side. ROW 2 (from RS): Lift the edge stitches over to the right needle, work English rib with the second colour and work 5 edge stitches in garter stitch, turn. ROW 3 (from WS): Work 5 edge stitches in garter stitch with the second colour, change to the main color, remember to twist the strands to avoid holes and work English rib to the edge stitches on the other side, lift the edge stitches over to the right needle. Push the stitches back on the circular needle so the next row is also worked from the wrong side. ROW 4 (from WS): Lift the edge stitches over to the right needle, work English rib with the second colour and work 5 edge stitches in garter stitch, turn. Repeat row 1- 4. We use the yarn DROPS Air in the video. You must also read a pattern using this technique as well as watch the video. You can find a pattern using this technique by clicking one the picture below.

10:39
European yoke with raglan-increases, sleeves, front & back and cast on new stiches - Part 4

In this DROPS video, we show you how to knit an European yoke with raglan-increases, both sleeves, front and back piece increases and cast on new stitches. We increase on both sides of all the markers = 8 increases on the round, read INCREASE TIP-1 below, and how to cast on new stitches under each sleeve. We have already worked the back piece, shoulders/front pieces and knitted together the back and front pieces (see videos below). Work as follows: ROUND 1: Knit all stitches (we only show the beginning and end of this round). ROUND 2: Knit until there are 2 stitches left before the first marker, increase towards the right, knit 2, move the marker onto the right needle, increase towards the left, knit across the sleeve-stitches, increase towards the right, move the marker onto the right needle, knit 2, increase towards the left, knit until there are 2 stitches left before the next marker, increase towards the right, knit 2, move the marker onto the right needle, increase towards the left, knit across the sleeve-stitches, increase towards the right, move the marker onto the right needle, knit 2, increase towards the left, knit to end of round (= 1 stitch increased on each side of 2 stitches in each transition between body and sleeves = a total of 8 increased stitches). Repeat these 2 rounds the stated number of times in your pattern. The piece now measures X cm measured down the middle of the sleeve, from where stitches were knitted up, when the jumper is folded double at the shoulder. The piece measures X cm outermost along the armhole. Work to the first marker (= transition between front piece and left shoulder). Now divide the yoke for the body and sleeves, casting on stitches under both sleeves. Follow your pattern for how many stitches are placed on a thread, how many stitches are cast on and how you continue the body. INCREASE TIP-1: INCREASE 1 STITCH TOWARDS THE LEFT – from right side: Use the left needle to pick up the front strand between 2 stitches from the previous row, knit through the back loop. INCREASE 1 STITCH TOWARDS THE RIGHT – from right side: Use the left needle to pick up the back strand between 2 stitches from the previous row, knit through the front loop. Yarn used: DROPS Andes. You need to read your chosen pattern and work the correct number of stitches. You can find pattern using this technique and more related videos below.

15:23
European yoke with raglan-increase, joining front & back pieces together, knitting up stitches-Part3

In this DROPS video we show you how the front and back pieces are knitted together, how to knit up stitches for the sleeves and how to increase for the neckline and raglan on a garment with European yoke. We have already worked the back piece and the shoulders (see videos below). Work like this: ROW 1 (right side): From the right side work as follows, starting with the left front piece: Knit 3, increase 1 stitch towards the left (read INCREASE TIP-1 below), knit the remaining stitches on the left front piece, insert 1 marker, knit up 11 stitches along the side of the left front piece, insert 1 marker, knit across the back piece, insert 1 marker, knit up 11 stitches along the side of the right front piece, insert 1 marker, knit across the right front piece until there are 3 stitches left, increase 1 stitch towards the right (read INCREASE TIP-1 below), knit 3. ROW 2 (wrong side): Purl all stitches (we only show the beginning and end of this row). ROW 3 (right side): Knit to the first marker (= left front piece), move the marker onto the right needle, increase 1 stitch towards the left, knit 11, increase 1 stitch towards the right, move the marker onto the right needle, knit to the next marker (= back piece), move the marker onto the right needle, increase 1 stitch towards the left, knit 11, increase 1 stitch towards the right, move the marker onto the right needle, knit to end of row (= right front piece), finish the row by casting on 13 stitches for the neckline. Now continue in the round. ROUND 1: Knit all stitches (we do not show this round). ROUND 2: Knit all stitches and increase 2 stitches for each sleeve as before. The number of stitches on each sleeve increases but the number of stitches on the front and back pieces stays the same. Work these 2 rounds 8 times. INCREASE TIP-1: INCREASE 1 STITCH TOWARDS THE LEFT – from right side: Use the left needle to pick up the front strand between 2 stitches from the previous row, knit through the back loop. INCREASE 1 STITCH TOWARDS THE RIGHT – from right side: Use the left needle to pick up the back strand between 2 stitches from the previous row, knit through the front loop. Yarn used: DROPS Andes. You need to read your chosen pattern and work the correct number of stitches. You can find pattern using this technique and more related videos below.

6:56
European yoke with raglan-increases. Part 1 – Back piece

In this DROPS video, we show you how to work a back piece with European yoke and how to increase stitches for the shoulders. We have already cast on 19 stitches (using 2 needles to start with rather than a circular needle). Read below to find out how to work the increases (INCREASE TIP-1 & INCREASE TIP-2). We show 4 rows. ROW 1 (wrong side): Purl. ROW 2 (right side): Read INCREASE TIP-1. Knit 3, increase 1 stitch towards the left, knit until there are 3 stitches left on the row, increase 1 stitch towards the right, knit. 3.ROW 3 (wrong side): Read INCREASE TIP-2. Purl 3, increase 1 stitch towards the left, purl until there are 3 stitches left on the row, increase 1 stitch towards the right, purl 3. AFTER ROW 3: Work ROWS 2 and 3 a total of 7 times. Cut the strand. Place the stitches on a stitch holder. INCREASE TIP-1: INCREASE 1 STITCH TOWARDS THE LEFT – from right side: Use the left needle to pick up the front strand between 2 stitches from the previous row, knit through from the back. INCREASE 1 STITCH TOWARDS THE RIGHT – from right side: Use the left needle to pick up the back strand between 2 stitches from the previous row, knit through from the front. INCREASE TIP-2: INCREASE 1 STITCH TOWARDS THE LEFT – from wrong side: Use the left needle to pick up the back strand between 2 stitches from the previous row, purl through from the front. INCREASE 1 STITCH TOWARDS THE RIGHT – from wrong side: Use the left needle to pick up the front strand between 2 stitches from the previous row, purl through from the back. Yarn used: DROPS Andes. You can find pattern using this technique and more related videos below.

20:09
How to knit a hooded scarf, following DROPS pattern 253-61

In this DROPS video, we have already worked the hood (size L/XL) and placed the stitches on 2 stitch holders. We now show how to knit up stitches around the hood and work an I-cord cast-off until there are 2 stitches left on the row. These 2 stitches are placed on one of the stitch holders, while 2 stitches are picked up on the other side and placed on the second stitch holder. Read I-CORD CAST-OFF in the pattern text. Cut the strand. Place the stitches from one stitch holder back on the needles. Now we show you how to cast on stitches for the right-hand side of the scarf, work 1 row before knitting together the hood and scarf, starting mid-back. At the same time, you work I-cord edge stitches and moss stitch rib. Read the explanations in the pattern text, for I-CORD CAST-OFF, 2 I-CORD EDGE STITCHES, moss stitch rib and how the hood and scarf are joined. When all stitches are picked up from the hood (50 rows worked), the 2 stitches from the stitch holder are still separate and on the stitch holder (in the video they are placed on the needle). Knit these 2 stitches (in size S/M there are 3 stitches on the stitch holder, you then knit 1 and knit the other 2 stitches together). Then work back from the wrong side with 2 I-cord edge stitches, purl 2 together, work moss stitch rib until there are 3 stitches left, purl 1 and work 2 I-cord edge stitches. Read the explanation in the pattern text on how and where to cast off the scarf’s right-hand side. We show row 1 (from the right side) of the 8 first rows, then how to cast off on row 1 (from the right side). Now work the left-hand side of the scarf, then sew the cast-on edges on the right and left-hand sides of the scarf together mid-back, using grafting stitch. We use the yarns DROPS Daisy and DROPS Kid-Silk in the video, with the same colours and needle size as in the pattern.