
Popular categories
Looking for a yarn?


|
|
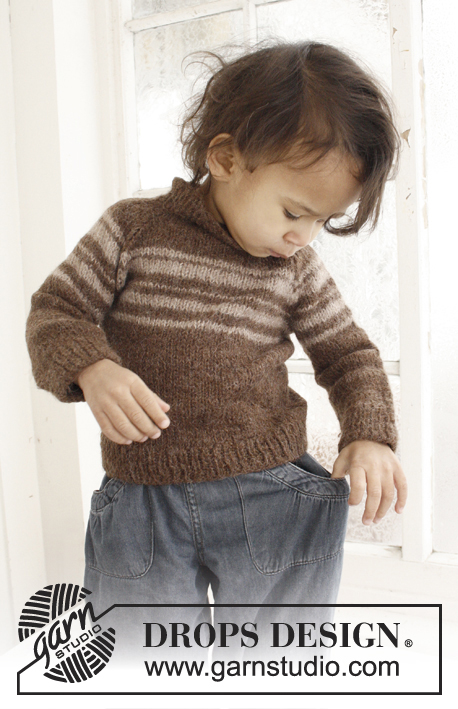
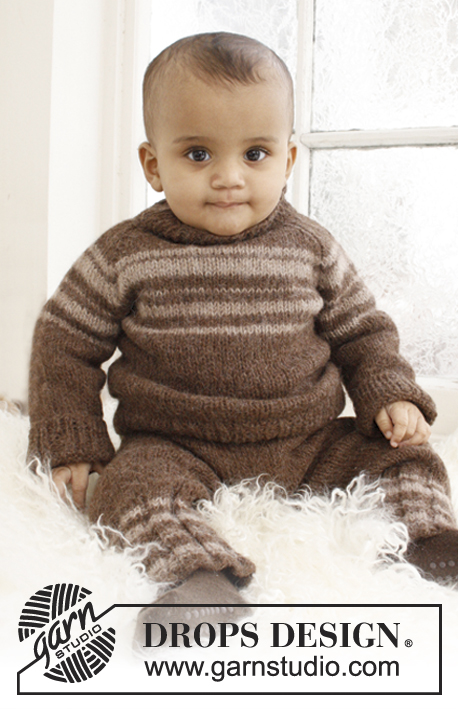
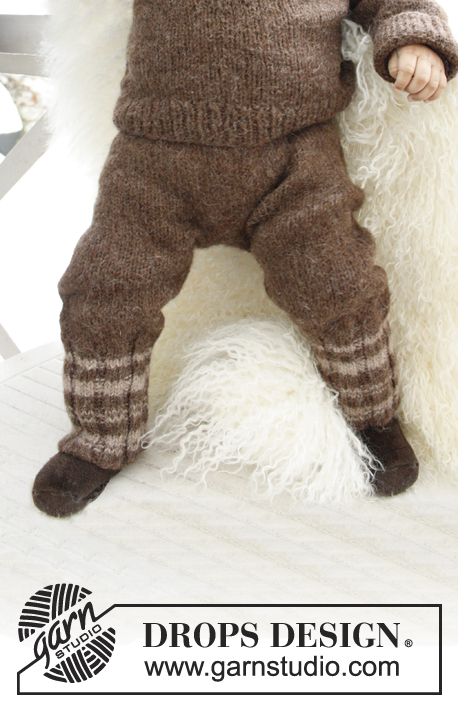
Happy Days |
|
 |
 |
Knitted overall with raglan for baby and children in DROPS Merino Extra Fine
DROPS Baby 21-23 |
|
|
GARTER ST (back and forth on needle): K all rows. DECREASE TIP: All dec are done from RS. Dec as follows before marker: K 2 tog. Dec as follows after marker: Slip 1 st as if to K, K 1, psso. ------------------------------------------------------- LEG: Worked in the round on double pointed needles. Cast on 48-54-60 (66-72) sts on double pointed needles size 3.5 mm with Merino Extra Fine. Insert a marker at beg of round = inside of leg. K 1 round, then work rib K 3/P 3. Work rib for 4-4-4 (5-5) cm. K 1 round while dec 6 sts evenly = 42-48-54 (60-66) sts. Switch to double pointed needles size 4.5 mm. P 1 round, then work in stocking st. When piece measures 6-6-6 (7-7) cm, inc 1 st on each side of marker, repeat inc every 3-4-5 (5-7) cm a total of 4 times = 50-56-62 (68-74) sts. When piece measures 16-20-23 (25-32) cm, divide at inside of leg and finish the piece back and forth on needle (to make it easier to slip the legs on the same circular needle). Cast on 1 edge st in each side = 52-58-64 (70-76) sts. When piece measures 18-22-25 (29-34) cm, dec 1 edge st in each side. Put piece aside and knit another leg the same way. SUIT: Slip both legs on the same circular needle size 4.5 mm = 100-112-124 (136-148) sts. Continue to work back and forth from mid front as follows (1st row = RS): Cast off 4 sts, K the rest of row. Turn piece, cast off 4 sts and P the rest of row = 92-104-116 (128-140) sts. Continue in stocking st back and forth over all sts. When piece measures 27-35-43 (43-50) cm, work in garter st until finished measurements - see explanation above. When piece measures 37-45-53 (58-65) cm, work next row (from RS) as follows: Work 17-20-23 (26-29) sts in stocking st (= right front piece), cast off 8 sts for armhole, work 42-48-54 (60-66) sts in stocking st (= back piece), cast off 8 sts for armhole, work 17-20-23 (26-29) sts in stocking st (= left front piece). Put piece aside and knit the sleeves. SLEEVE: Worked in the round on double pointed needles. Cast on 36-42-42 (48-48) sts on double pointed needles size 3.5 mm with Merino Extra Fine. K 1 round, continue in rib = K 3/P 3. When piece measures 3 cm, K 1 round while AT THE SAME TIME dec 6-10-8 (12-10) sts evenly = 30-32-34 (36-38) sts. Switch to double pointed needles size 4.5 mm and P 1 round. Insert a marker at beg of round = mid under sleeve. Then work in stocking st. AT THE SAME TIME when piece measures 5 cm, inc 1 st on each side of marker mid under sleeve, repeat inc on every 5th-5th-6th (6th-6th) round a total of 6-6-7 (8-9) times = 42-44-48 (52-56) sts. When piece measures 17-18-21 (24-28) cm, cast off 8 sts mid under sleeve (i.e. cast off 4 sts on each side of marker) = 34-36-40 (44-48) sts. Put piece aside and knit another sleeve. YOKE: Slip sleeves on to same circular needle as body where armholes were cast off = 144-160-180 (200-220) sts. Insert a marker in all transitions between sleeves and body = 4 markers. Work in garter st back and forth over all sts. AT THE SAME TIME on 3rd row, dec 1 st on each side of all markers for raglan - Read DECREASE TIP! Repeat dec every other row (every row from RS) a total of 10-11-12 (13-15) times. AT THE SAME TIME when dec for raglan has been done 7-6-6 (6-7) times, cast off for neck at beg of every row in each side: 2 sts 3-3-4 (5-5) times and then 1 st 0-2-2 (2-3) times. After all dec for raglan and cast offs for neck, 52-56-64 (72-74) sts remain on the needle and piece measures approx. 45-53-62 (68-77) cm up to shoulder. Cast off all sts. BAND: Knit up 63-75-91 (95-103) sts along right front piece from bottom up to neck on circular needle size 3.5 mm with Merino Extra Fine. K 1 row from WS and K 1 row from RS. Then work rib as follows (from WS): 1 st in garter st, * P 2, K 2 *, repeat from *-* and finish with P 2. When rib measures 2 cm, cast off for button holes on next row from RS as follows: Rib over the first 10-10-2 (6-2) sts, * P 2 tog, 1 YO, 10 sts in rib * repeat from *-* a total of 4-5-7 (7-8) times, finish with P 2 tog, 1 YO, K 2, 1 st in garter st. Continue with rib until band measures 4 cm, cast off with K over K and P over P. Repeat on the left side but without button holes. NECK EDGE: Knit up approx. 80 to 120 sts (divisible by 4 sts) around the neck on double pointed needles size 3.5 mm. Work as follows: 1 st in garter st, then rib K 2/P 2 until 1 st remains on needle – work 1 st in garter st. Repeat for 3 cm. Cast off. ASSEMBLY: Sew opening under the sleeves and sew seam on inside of legs inside 1 edge st. Sew left band to where 8 sts were cast off mid front. Sew the buttons on to the left front band. |
|

|
|
|
Have you made this or any other of our designs? Tag your pictures in social media with #dropsdesign so we can see them! Do you need help with this pattern?You'll find tutorial videos, a Comments/Questions area and more by visiting the pattern on garnstudio.com. © 1982-2024 DROPS Design A/S. We reserve all rights. This document, including all its sub-sections, has copyrights. Read more about what you can do with our patterns at the bottom of each pattern on our site. |
|


With over 40 years in knitting and crochet design, DROPS Design offers one of the most extensive collections of free patterns on the internet - translated to 17 languages. As of today we count 304 catalogues and 11422 patterns - 11422 of which are translated into English (UK/cm).
We work hard to bring you the best knitting and crochet have to offer, inspiration and advice as well as great quality yarns at incredible prices! Would you like to use our patterns for other than personal use? You can read what you are allowed to do in the Copyright text at the bottom of all our patterns. Happy crafting!
Comments / Questions (30)
Hallo, ich habe eine Frage zum Bein, denn ich verstehe den Satz bei der ersten Größe nicht: "Nach 6cm auf beiden Seiten der Markierung je 1 M. aufnehmen. Total 4 Mal alle 3cm = 50M. Nach 16cm die Arbeit bei der Markierung teilen". Ist damit 6cm bzw. 16 cm ab Anschlag gemeint oder 6cm nach der 1R. links und dann 16cm nach der letzten Aufnahme, also dann insgesamt 38cm ab Anschlag bis zur Teilung? Vielen Dank für die Antwort im Voraus!
11.12.2017 - 20:34DROPS Design answered:
Liebe Anna, die 6 bzw 16 cm sind ab Anschlag gemessen. Viel Spaß beim stricken!
12.12.2017 - 08:04Jeg har et problem med at se, hvor jeg skal starte forkanten... i bunden , det ser lidt besynderligt ud... jeg har spurgt, der hvor jeg købte garnet, men de kunne heller ikke se det, så nu spørger jeg jer... vh Annette Rasmussen
09.10.2017 - 18:04DROPS Design answered:
Hej Annette, forkanten starter der hvor du har lukket 4 masker af i hver side mod midt foran. God fornøjelse!
12.10.2017 - 12:24Finito, è proprio carino..non ho capito le indicazioni x la confezione dove dite "Cucire i primi 4 cm dal cappuccio al bordo superiore del bordo da ogni lato..." si parla di cappuccio.... Non ho trovato a cosa riferirlo Grazie e buona domenica
23.09.2017 - 20:16DROPS Design answered:
Buonasera Paola, abbiamo corretto il testo ed eliminato la parte relativa al cappuccio. Grazie per la segnalazione!
23.09.2017 - 20:26Basia wrote:
Dzień dobry. Prosze o przetlumaczenie tego wzoru na język polski. Pozdrawiam
08.09.2017 - 09:46DROPS Design answered:
Witaj Basiu, wzór zostanie przetłumaczony do końca tygodnia. Pozdrawiam
18.10.2017 - 18:03Hallo, muss ich die Maschen am Ende der Rundpasse zwangsläufig abketten oder kann die auch stilllegen und nach Fertigstellung der Blende einfach noch auf beiden Seiten ein paar mit dazu aufnehmen?
16.01.2017 - 14:33DROPS Design answered:
Liebe Frau Saatjohann, es wird hier abgekettet und dann bei der Halskante Maschen auffassen. Viel Spaß beim stricken!
05.04.2017 - 10:54Hallo, ich komme an der Stelle nicht weiter, an der man alle Teile auf eine Rundnadel legen soll... um dann den Rundpasse zu stricken ("Alle M. auf eine Rundnadel legen = 144-160-180 (200-220) M") Also den Strampler und die Arme. Sollen die Armmaschen in das vorgesehene Armloch gelegt werden oder erst alle Stramlermaschen und daneben die Armmaschen? mfG
24.08.2016 - 11:28DROPS Design answered:
Liebe Theresa, die Ärmel kommen an die Stelle, an der für das Armloch abgekettet wurde.
25.08.2016 - 17:39Derek Robertson wrote:
Thank you, I now understand! It was the x 2 front pieces that made it clear!
26.02.2016 - 22:15Derek Robertson wrote:
I am enjoying the challenge of the design and am now at the yoke (4th size - 200 stitches). I am making a chart and cannot seem to end up with 72 stitches remaining. The best I can get is 74 and this includes a total of 14 decreases each side of the markers and 6 (not 5) x 2 stitch bind-offs (for balance) and the 2 x 1 stitch bind-off at the neck edge. Hence 14 x 8 = 112 + 14 for the neck edge giving a total of 126. This leaves 74 stitches. Am I missing something or just dim - help?!
26.02.2016 - 12:39DROPS Design answered:
Dear Mrs Robertson, in 4th size you will dec as follows: for yoke: 8 sts a total of 13 times (= 104 sts dec) + for neckline: (2 sts a total of 5 times + 1 st a total of 2 times) x 2 front pieces (= (2x5 + 1x2)x2= 24 sts dec), so that you have 200-104-24=72 sts. Happy knitting!
26.02.2016 - 15:56Niet goed gelezen sorry Het is niet 12×4=48st minderen voor de raglan, maar 12×8=96st minderen. Ik schaam mij diep.
20.11.2015 - 13:18DROPS Design answered:
Hoi Tamara. Dat is oké, kan gebeuren. veel breiplezier
20.11.2015 - 14:13Ik heb een vraag over het minderen & afkanten bij de pas. In het patroon staat dat als het pakje voor 12/18 maanden breit je 64 st moet overhouden aan het eind.Ik kom echter op 112 st over, namelijk: - na het plaatsen van de mouwen zijn er 180 st, - minderen voor de raglan geeft 180 - (12 x 4 = 48 st) = 132st - afkanten voor de hals geeft 132 - ((4 × 2)×2) - ((2 × 2) × 2)) = 112st Wie kan mij helpen? Waar mis ik de 48st die ik ook nog moet minderen dan wel afkanten? Bij voorbaat dank!
20.11.2015 - 11:22DROPS Design answered:
Hoi Tamara. Je mindert als volgt: 180 st op de nld en 4 markeerders. Je mindert aan beide zijkanten van elke markeerder = 8 st minder per keer. 12 keer minderen = 96 st minder en voor de hals 2 x 4 steken en 2 keer 1 st aan ieder halszijde: 16 en 4 st: 180-96-16-4 = 64 st over
20.11.2015 - 12:31