
Popular categories
Looking for a yarn?


Comments / Questions (31)
![]() Anne wrote:
Anne wrote:
Felle på hver andre og hver fjerde pinne? Det får jeg ikke til å henge på greip. Bedre forklaring ønskes.
14.07.2025 - 23:55
![]() Cent wrote:
Cent wrote:
Kan er bij de patronen ook een tekening worden geplaatst met de maten en afmetingen, zoals dat voorheen ook werd gedaan?
01.03.2025 - 12:49DROPS Design answered:
Dag Cent,
Helaas is dit wat een ouder patroon, waar geen maattekening voor is. Bij de nieuwere patronen staat wel een maattekening.
01.03.2025 - 14:45
![]() Ele wrote:
Ele wrote:
......
14.11.2024 - 16:28
![]() Valana wrote:
Valana wrote:
Is the bikini top suppose to have some type of clasp to hold the back together?
02.08.2024 - 03:48DROPS Design answered:
Dear Valant, no claps but you will work a tie picking up 8 sts in the garter stitch edge at the bottom and work (4 rows garter stitch, 4 rows stocking stitch) until tie measures 40 cm and repeat on the other side. Happy knitting!
02.08.2024 - 08:59
![]() Rose Mason wrote:
Rose Mason wrote:
How do i know what size S, M, L equals?
22.10.2023 - 21:30DROPS Design answered:
Hi Rose, You have the hip measurements for the shorts. As regards the bikini top, the cup sizes are very individual and you might like to check your cup-size against the knitting tension: 21 stitches and 28 rows =10 cm x 10 cm, adjusting with more or fewer stitches and rows if necessary. Hope this helps and happy knitting!
23.10.2023 - 07:27
![]() Sara wrote:
Sara wrote:
Finishing up the shorts, for the rib on the legs, do you advise using a smaller needle as in the waist? The pattern doesn't specify.
11.08.2023 - 13:17DROPS Design answered:
Dear Sarah, use any technique that will allow the edge to stay elastic, see for example this video where we show 3 different techniques to cast off loosely - and in this video we show how to cast off such a rib with an italian cast off. Happy finishing!
11.08.2023 - 15:30
![]() Sara wrote:
Sara wrote:
Working the rib waist on the shorts and 6" seems like too much. Is it meant to fold over? The picture looks like about 2.5"-3" at most. The top fits well!
12.07.2023 - 02:12DROPS Design answered:
Hi Sara, The pattern is for 6" rib waistband but you can of course work the waistband to the height you wish or fold it double. Happy knitting!
12.07.2023 - 07:12
![]() Sara wrote:
Sara wrote:
I had asked a question about the decreases on the top and just found the answer in the instructions! I had missed those previously - now it makes sense!
24.04.2023 - 04:52
![]() Sara wrote:
Sara wrote:
For the bikini top, where are the decreases done? From the picture, it looks like there are decreases on either side of the marker (size large, marker at 25 sts). Or are the 2 sts decreased always after the marker? Is it a k1psso decrease or k2tog decrease?
24.04.2023 - 04:31DROPS Design answered:
Hi Sara, The decreases are 1 stitch on each side of the marker - knit 2 together before the marker and slip 1, knit 1, pass the slipped stitch over after the marker. Happy knitting!
24.04.2023 - 06:43
![]() Elisa Nunne wrote:
Elisa Nunne wrote:
Bonjour, je souhaiterais tricoter ce modèle mais en uni (sans rayures). Pouvez-vous m'aider en me disant combien de pelotes me faudrait il pour une taille S (Top et short) ? Merci !
13.06.2022 - 10:17DROPS Design answered:
Bonjour Mme Nunne, nous ne sommes malheureusement pas en mesure de pouvoir adapter chacun de nos modèles à chaque demande, et comme nous n'avons plus de modèle, nous ne pouvons plus vérifier. Contactez votre magasin, il saura vous aider, même par mail ou téléphone. Merci pour votre compréhension, bon tricot!
13.06.2022 - 11:46
|
|
Mermaid Stripes |
|
|
|
|
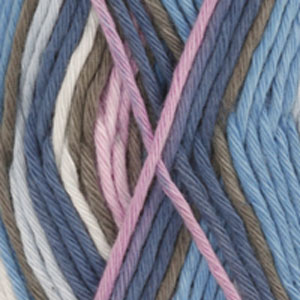
DROPS stripy bikini top and shorts in “Muskat” and” Muskat Soft”.
DROPS Extra 0-443 |
|
|
Garter sts, back and forth on needle: knit all rows. Stripes: Work stripes as follows: *4 rows Muskat Soft, 2 rows Muskat*, repeat from *-*. Decreasing tip: Make all dec from RS. Beg 2 sts before Marking Thread (MT). K2 tog, MT, slip 1 st as if to knit, K1, psso. Bikini top: Worked back and forth on needle. Cast on 76-84-92 sts on needle size 4 mm with Muskat. Work 12 rows garter st – see above. Now work only the first 38-42-46 sts on row and slip remaining sts on a st holder (piece divided mid front). Continue in stocking st and stripes – see above – with 3 garter sts each side. Remember the knitting tension! Work 2 rows, at the same time inc to 42-46-50 sts evenly on 2nd row. Insert a Marking Thread (MT) after 21-23-25 sts and now dec 2 sts on every other and 4th row alternately – see Decreasing tip. Continue dec until 6 sts remain on row, piece measures approx 20-22-24 cm. Continue on the remaining 6 sts in Muskat (do not work stripes) for strap as follows: *4 rows garter st, 4 rows stocking st*, repeat from *-* and cast off when strap measures approx 45 cm, or required length. Slip sts from st holder back on needle and work the other side as described above. Pick up 8 sts with Muskat in the garter sts at the side at bottom of top and work back strap as follows: *4 rows garter st, 4 rows stocking*, repeat from *-* and cast off when strap measures 40 cm. Repeat the other side. SHORTS Size: XS – S – M – L – XL –XXL To fit hip: 82/86 – 88/92 – 96/100 – 104/108 – 112/116 – 120-124 cm Materials: DROPS Muskat 100 g for all sizes, colour no 18, white and use: DROPS Muskat Soft 150-150-150-200-200-200 g, colour no 03, blue Drops circular needle size 4 mm (40 and 80 cm) or size needed to obtain 21 sts x 28 rows = 10 x 10 cm. Drops circular needle size 3.5 mm (80 cm) for Rib. Rib: *K2, P2*, repeat from *-*. Stripes: Work stripes as follows: *2 rounds Muskat, 4 rounds Muskat Soft*, repeat from *-*. NB! Round beg mid back, change colour here (do not cut thread for each colour change). Shorts: Worked in the round from waist down. Cast on 140-156-168-184-196-212 sts on circular needle size 3.5 mm with Muskat. Insert 1 Marking Thread (MT) at beg of round and 1 MT after 70-78-84-92-98-106 sts and now work 15 cm Rib – see above. Change to circular needle size 4 mm and continue in stocking st and stripes – see above- at the same time dec 0-1-0-1-0-1 st on both sides of MT mid back (= beg of round) on first row = 140-154-168-182-196-210 sts. Remember the knitting tension! Now inc 1 st on each side of both MT on every 2.5-2.5-2.5-2.5-3-3 cm a total of 8 times = 172-186-200-214-228-242 sts. When piece measures 33-34-35-36-37-38 cm cast off the first 6-6-7-7-8-8 sts on round, slip the next 75-81-87-93-99-105 sts on a st holder (= leg), leave the next 11-12-13-14-15-16 sts on needle (= gusset), slip the next 75-81-87-93-99-105 sts on a st holder (= leg) and cast off the last 5-6-6-7-7-8 sts. Now work 9-10-11-12-13-14 cm stocking st on sts for gusset, cast off and sew gusset to the 11-12-13-14-15-16 sts cast off mid back. Leg: Slip the 75-81-87-93-99-105 sts from 1 st holder back on needle on small circular needle size 4 mm and pick up 17-19-21-23-25-27 sts along the side of gusset = 92-100-108-116-124-132 sts. Work stocking st and stripes on all sts. When leg measures 4-4-5-5-6-6 cm work 2 cm Rib – see above. Cast off in Rib and repeat on the other leg. |
|
Have you finished this pattern?Tag your pictures with #dropspattern or submit them to the #dropsfan gallery. Do you need help with this pattern?You'll find 21 tutorial videos, a Comments/Questions area and more by visiting the pattern on garnstudio.com. © 1982-2025 DROPS Design A/S. We reserve all rights. This document, including all its sub-sections, has copyrights. Read more about what you can do with our patterns at the bottom of each pattern on our site. |


With over 40 years in knitting and crochet design, DROPS Design offers one of the most extensive collections of free patterns on the internet - translated to 17 languages. As of today we count 314 catalogues and 11821 patterns translated into English (UK/cm).
We work hard to bring you the best knitting and crochet have to offer, inspiration and advice as well as great quality yarns at incredible prices! Would you like to use our patterns for other than personal use? You can read what you are allowed to do in the Copyright text at the bottom of all our patterns. Happy crafting!
Post a comment to pattern DROPS Extra 0-443
We would love to hear what you have to say about this pattern!
If you want to leave a question, please make sure you select the correct category in the form below, to speed up the answering process. Required fields are marked *.