
Popular categories
Looking for a yarn?


Comments / Questions (19)
![]() Sofie wrote:
Sofie wrote:
Hei, må man bruke symaskin for å sy sammen ermene?
05.06.2025 - 18:54DROPS Design answered:
Hei Sofie, Nei, vi anbefaler at du syr inn ermene for hånd. Hilsen Drops team.
09.06.2025 - 06:27
![]() Cristina wrote:
Cristina wrote:
Buongiorno, vorrei sapere gentilmente cose si cambia il colore del filo durante la lavorazione per seguire lo schema A1 e A2 Grazie
08.03.2025 - 16:02DROPS Design answered:
Buonasera Cristina, deve portarsi dietro i fili sul rovescio del lavoro. Buon lavoro!
18.03.2025 - 21:17
![]() Hanna wrote:
Hanna wrote:
Tein paidan suuremmilla puikoilla kuin mitä ohjeessa on, mutta silti paidasta tuli paljon pienempi kuin mitä kuvan mitat ovat. L-koon paidan leveydeksi tuli 48 cm. Lankaakin kului vähemmän. Yleensä olen Dropsin ohjeilla saanut sopivan paidan. Mikähän oli vikana?
10.02.2025 - 16:25DROPS Design answered:
Hei, oletko tarkistanut, että neuletiheytesi on sama kuin ohjeessa annettu tiheys? Kun neulotaan kirjoneuletta, neuleesta voi joskus tulla liian pieni. Voit tällöin vaihtaa vieläkin paksumpiin puikkoihin.
12.02.2025 - 18:45
![]() Ella wrote:
Ella wrote:
När jag gör armarna och ska göra mönstret har jag räknat ut vart i mönstret jag ska börja vid markören mitt under ärmen. Dock blir det 7 st i följd (3 innan markör mitt under armen och 4 st i början av nästa varv, efter markör mitt under armen). Ska det vara så?
17.11.2024 - 00:59DROPS Design answered:
Hej Ella, mønsteret vil ikke gå op under ærmet, så du følger mønsteret så langt du kan til de 2 midterste masker under ærmet :)
22.11.2024 - 14:27
![]() Corrie Kroeze wrote:
Corrie Kroeze wrote:
Ik minder voor de hals voorpand en heb nog niets eens de eerste insteuctie van het minderen a(1-0-1-1-1-2 keer 2 steken) en het is al even lang als het achterpand. Dus ik doe vast iets niet goed want er staat dat ik ook nog 2-4-2-2-4-4 keer 1 steek moet minderen???
11.11.2024 - 21:17DROPS Design answered:
Dag Corrie,
Bij het achterpand begin je met het afkanten voor de hals op een hoogte van 54-56-58-60-62-64 cm en op het voorpand begin je al eerder met afkanten, namelijk op een hoogte van 50-50-52-53-55-56 cm. Hierdoor heb je meer naalden op het voorpand over om de ronding voor de hals te maken.
12.12.2024 - 17:21
![]() Marilyn wrote:
Marilyn wrote:
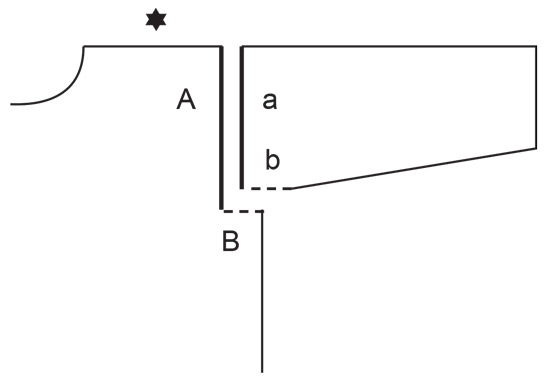
I have made many sweaters, but don't understand the following instruction: "When the sleeve measures ..., work the sleeve cap back and forth (from the marker-thread under the sleeve). Work until the sleeve measures ..., a split of ... at the top." I guess I'm supposed to stop knitting in the round, but what does the "split" mean?
15.05.2024 - 16:32DROPS Design answered:
Dear Marilyn, yes, you are supposed to work back and forth from that point (flat and not in the round), and there will be a small opening under the arms (the split), that you should sew in as the diagram shows. Happy Knitting!
16.05.2024 - 01:18
![]() Dargent Liliane wrote:
Dargent Liliane wrote:
Je n'arrive pas à caler correctement le diagramme avec les augmentations sous la manche
07.05.2024 - 11:44DROPS Design answered:
Bonjour Mme Dargent, vous devez augmenter avant la première maille du tour (à la fin du tour) et après la 1ère maille du tour, à la fin du tour, tricotez la maille comme la maille suivante du motif, en lisant le diagramme de droite à gauche, au début du tour, tricotez la nouvelle maille comme la maille précédente du diagramme, en le lisant donc de gauche à droite, pour que le motif continue en s'élargissant vers le milieu du dessous de la manche. Bon tricot!
07.05.2024 - 13:29
![]() Jantine wrote:
Jantine wrote:
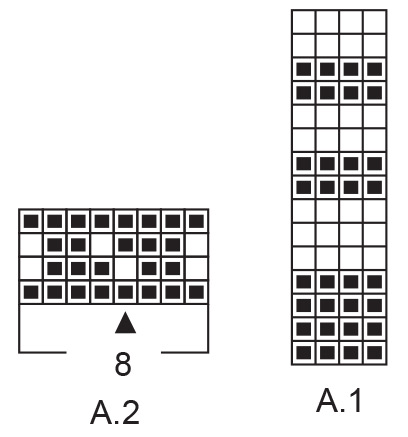
Wat betekent het cijfer 8 bij telpatroon 2 voor de tricotsteek ?
13.11.2023 - 15:18DROPS Design answered:
Dag Jantine,
Dit cijfer geeft het aantal steken van het telpatroon in de breedte aan.
15.11.2023 - 13:49
![]() Katja wrote:
Katja wrote:
Very classic pattern!
10.10.2023 - 20:37
![]() Inge wrote:
Inge wrote:
Wunderschöner Klassiker! Ich freue mich diese Pulli stricken zu dürfen.
01.09.2023 - 16:01
|
|||||||||||||
Winter Twilight#wintertwilightsweater |
|||||||||||||
 |
 |
||||||||||||
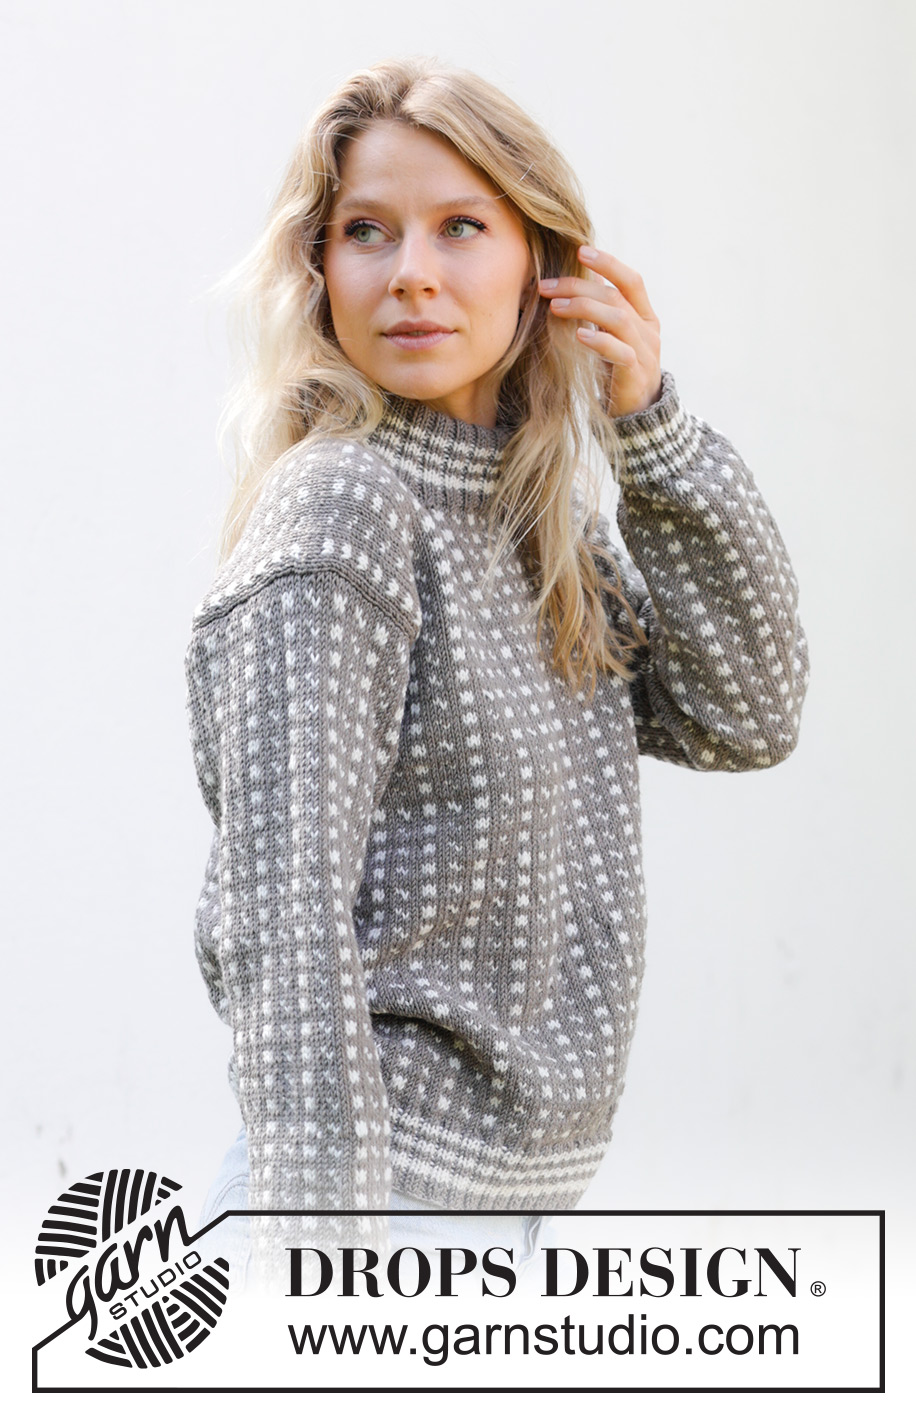
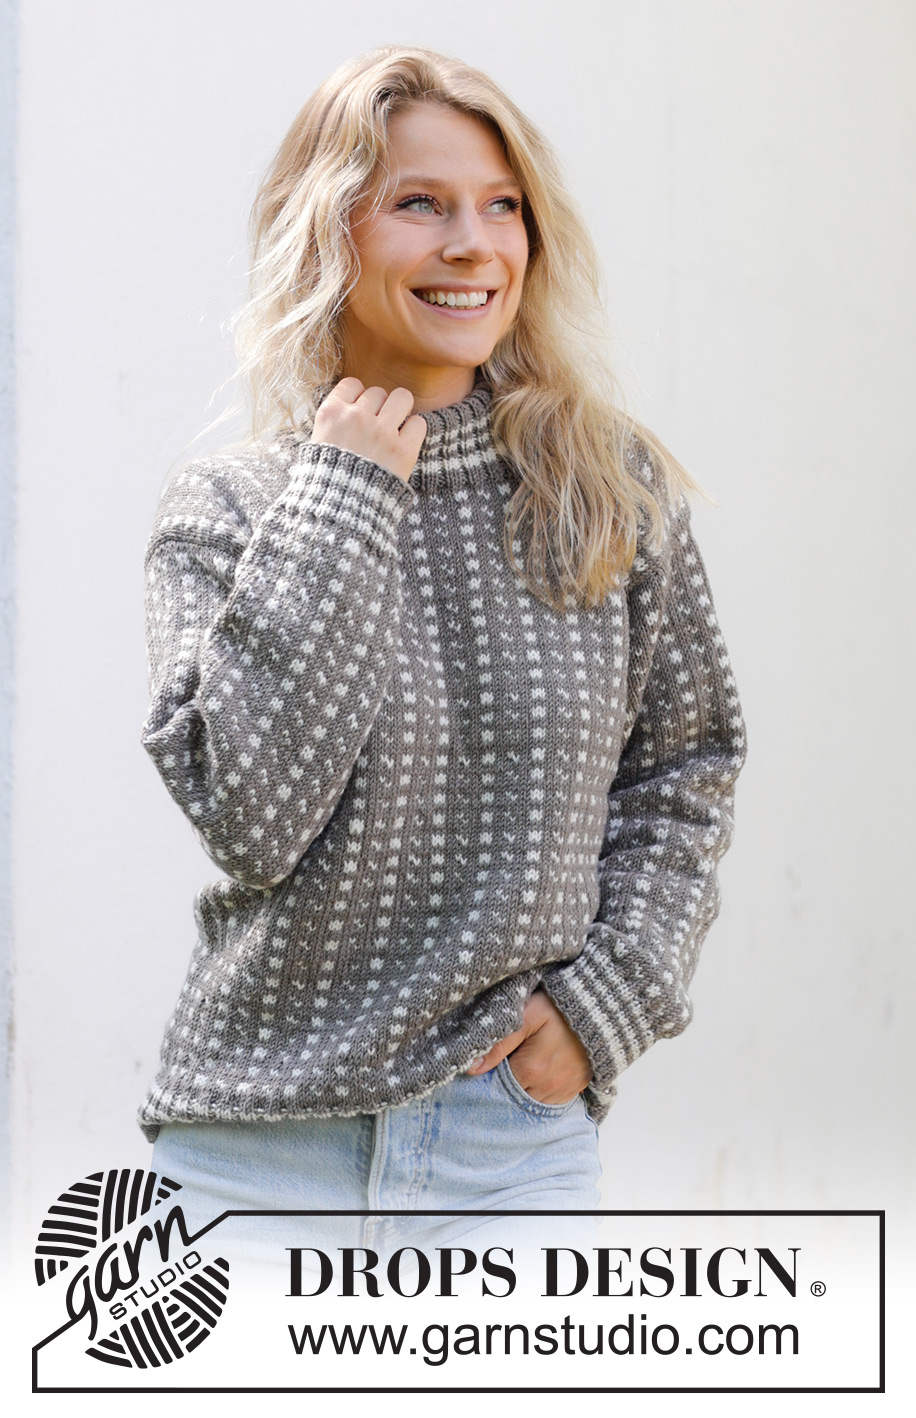
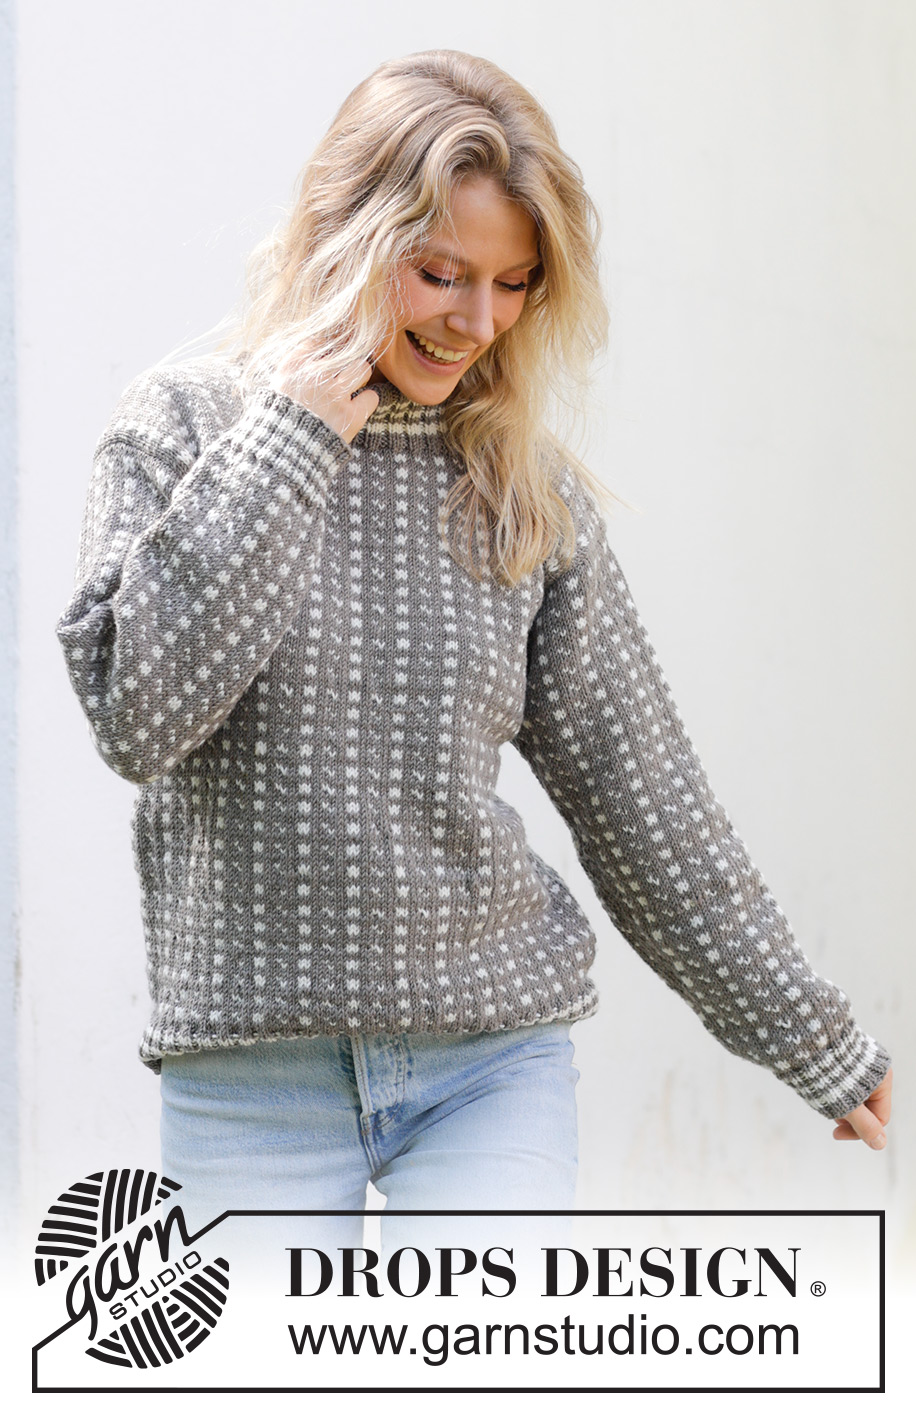
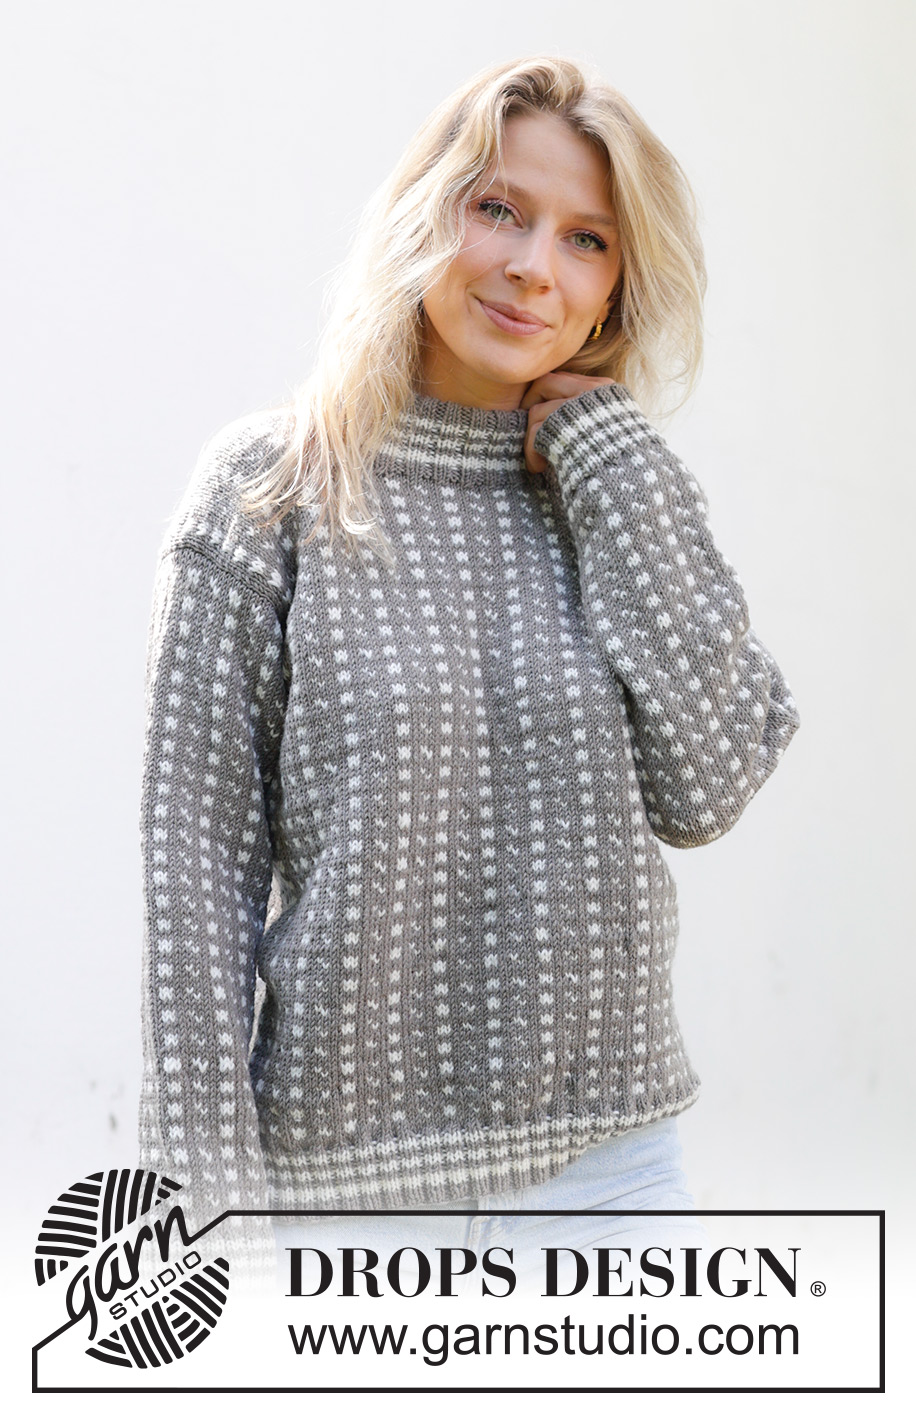
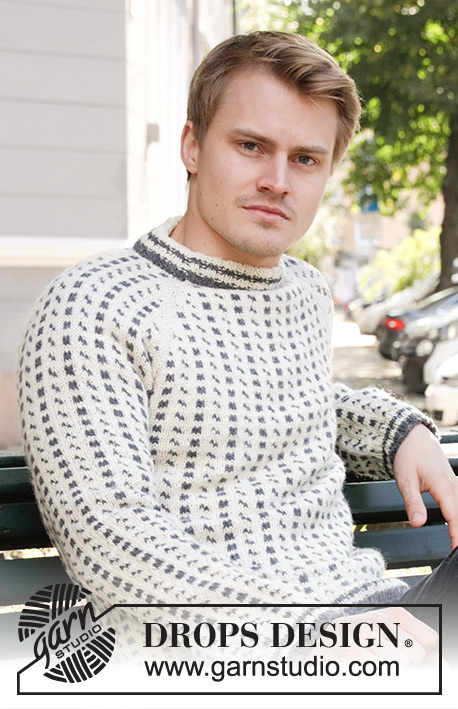
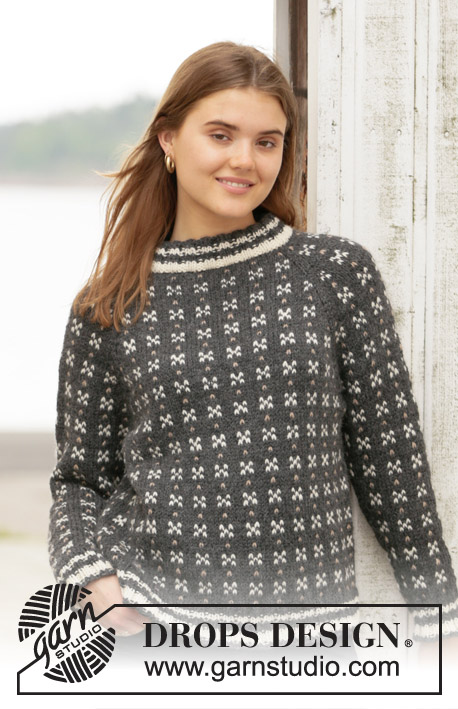
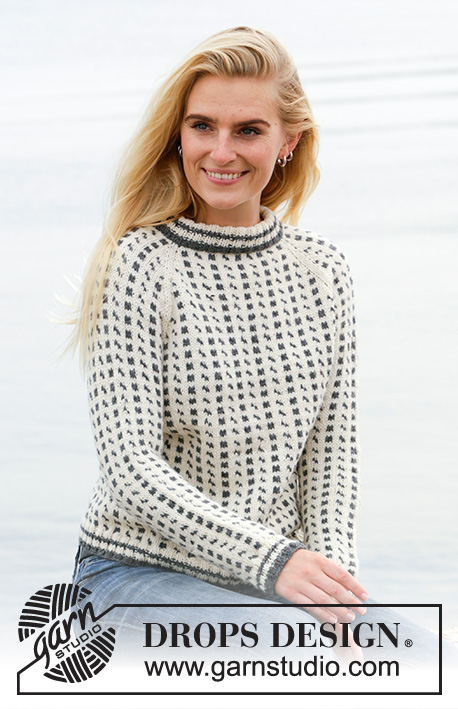
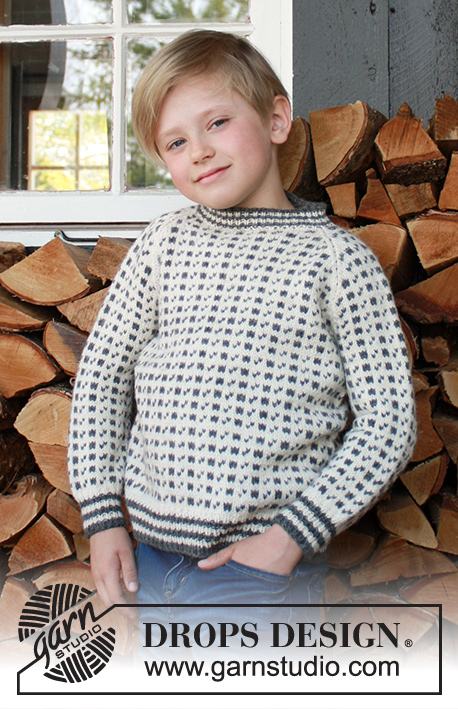
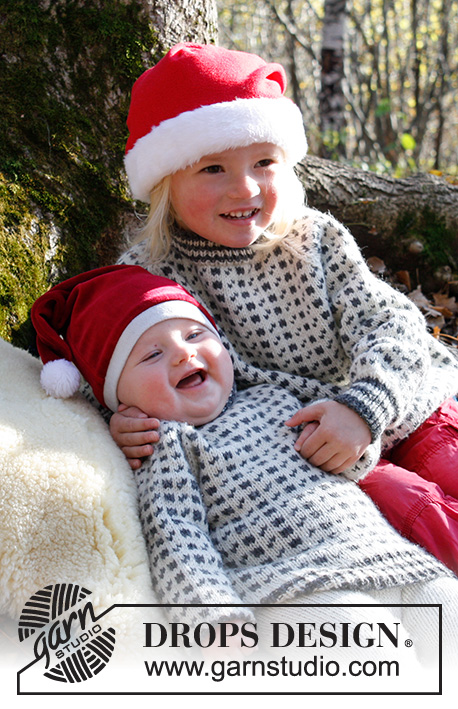
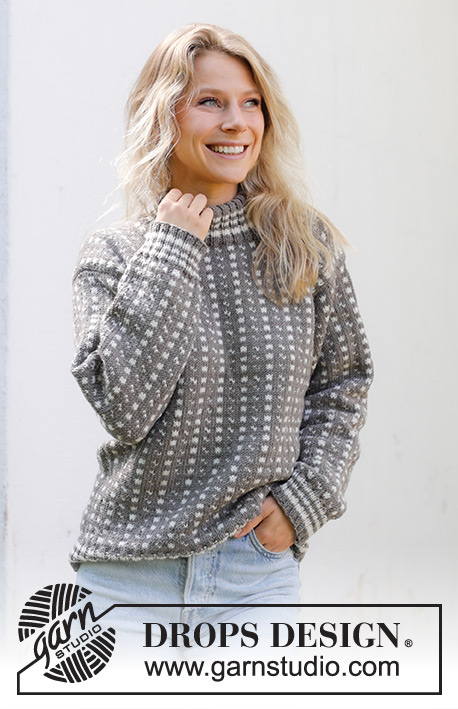
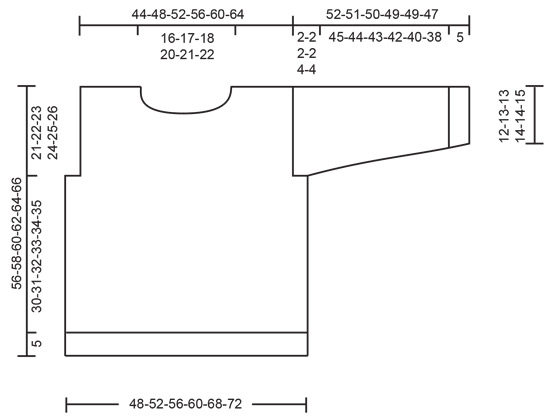
Knitted jumper in DROPS Merino Extra Fine. The piece is worked bottom up with Nordic/Icelandic pattern, double neck and sewn-in sleeves. Sizes S - XXXL.
DROPS 243-27 |
|||||||||||||
|
------------------------------------------------------- EXPLANATIONS FOR THE PATTERN: ------------------------------------------------------- PATTERN: See diagrams A.1 and A.2. A.1 is worked in rib, A.2 in stocking stitch. INCREASE TIP (sleeves): Start 1 stitch before the marker-thread, make 1 yarn over, knit 2 (marker-thread sits between these 2 stitches), 1 yarn over. On the next round knit the yarn overs twisted to avoid holes (= 2 increased stitches). The new stitches are worked into the pattern. ------------------------------------------------------- START THE PIECE HERE: ------------------------------------------------------- JUMPER – SHORT OVERVIEW OF THE PIECE: The body is worked in the round with circular needle, bottom up, as far as the armholes. The front and back pieces are finished separately, back and forth with circular needle. The sleeves are worked in the round with double pointed needles / short circular needle, bottom up as far as the armhole, then the sleeve cap is finished back and forth with short circular needle. The neck is worked to finish. BODY: Cast on 212-228-248-264-300-316 stitches with circular needle size 3.5 mm and colour light taupe DROPS Merino Extra Fine. Work rib in the round (knit 2, purl 2) and A.1. When A.1 is finished, the rib measures approx. 5 cm. Change to circular needle size 4.5 mm. Knit 3 rounds with colour light taupe at the same time as you decrease 20-20-24-24-28-28 stitches evenly on the first round = 192-208-224-240-272-288 stitches. REMEMBER THE KNITTING TENSION! Insert 1 marker-thread at the beginning of the round and 1 marker-thread after 96-104-112-120-136-144 stitches (= sides). Allow the threads to follow your work onwards. Work A.2 over all stitches. When the piece measures 35-36-37-38-39-40 cm, cast off for the armholes as follows: Start 4-4-4-4-8-8 stitches before the first marker-thread, cast off 8-8-8-8-16-16 stitches, work until there are 4-4-4-4-8-8 stitches left before the next marker-thread, cast off 8-8-8-8-16-16 stitches, work to end of round. The back and front pieces are finished separately. BACK PIECE: = 88-96-104-112-120-128 stitches. Start from the wrong side and continue the pattern, with the 3 outermost stitches on each side worked in light taupe. When the piece measures approx. 54-56-58-60-62-64 cm, cast off the middle 30-32-34-38-40-42 stitches for the neckline (cast off on a row without pattern) and finish each shoulder separately. Cast off 1 stitch on the next row from the neck = 28-31-34-36-39-42 shoulder stitches. Work until the piece measures approx. 56-58-60-62-64-66 cm (last row is without pattern). Cast off. Work the other shoulder in the same way. FRONT PIECE: = 88-96-104-112-120-128 stitches. Start from the wrong side and continue working in the same way as the back piece, until the front measures 50-50-52-53-55-56 cm. Place the middle 24-26-28-32-30-28 stitches on a thread for the neck (on a row without pattern) and finish each shoulder separately. Cast off at the beginning of each row from the neck as follows: 2 stitches 1-0-1-1-1-2 times and 1 stitch 2-4-2-2-4-4 times = 28-31-34-36-39-42 shoulder stitches. Work until the piece measures 56-58-60-62-64-66 cm (match the back piece). Cast off. Work the other shoulder in the same way. SLEEVE: Cast on 56-56-60-60-64-64 stitches with double pointed needles size 3.5 mm and colour light taupe. Work rib in the round (knit 2, purl 2) and A.1. When A.1 is finished, the rib measures approx. 5 cm. Knit 2 rounds with colour light taupe at the same time as you decrease 7-5-7-5-7-5 stitches evenly on the first round = 49-51-53-55-57-59 stitches. Insert 1 marker-thread at the beginning of the round (mid-under sleeve). Allow the thread to follow your work onwards; it is used when increasing. In addition, insert 1 marker in the middle stitch on the round. This stitch should match the stitch marked in the diagram – count outwards from this stitch to find where you start the pattern under the sleeve. Change to short circular needle size 4.5 mm. Work A.2 (first and last stitch on the round always worked with colour light taupe to allow neat increases under the sleeve). When the sleeve measures 8-12-10-7-12-9 cm from the cast-on edge, increase 2 stitches mid-under the sleeve - read INCREASE TIP. Increase like this every 2½-2-2-2-1½-1½ cm a total of 17-18-19-20-21-22 times = 83-87-91-95-99-103 stitches. When the sleeve measures 50-49-48-47-45-43 cm, work the sleeve cap back and forth (from the marker-thread under the sleeve). Work until the sleeve measures 52-51-50-49-49-47 cm, a split of 2-2-2-2-4-4 cm at the top – adjust so the last 2 rows are without pattern. Cast off. Work the other sleeve in the same way. ASSEMBLY: Sew the shoulder seams, inside the cast-off edge. Sew the sleeve cap to the armhole, then the bottom of the armhole - see sketch. DOUBLE NECK: Use short circular needle size 3.5 mm and colour light taupe. Start from the right side on one shoulder seam and knit up 96 to 132 stitches around the neck (including the stitches from the thread). The stitch count should be divisible by 4. Work rib in the round (knit 2, purl 2) and pattern A.1. When A.1 is finished, continue the rib with colour light taupe for 7 cm. The neck measures approx. 12 cm. Cast off with knit over knit and purl over purl. Fold the neck double to the inside and sew down. To avoid the neck being tight and rolling outwards, it is important that the seam is elastic. |
|||||||||||||
Diagram explanations |
|||||||||||||
|
|||||||||||||
|
|||||||||||||
|
|||||||||||||
|
|||||||||||||
Have you finished this pattern?Tag your pictures with #dropspattern #wintertwilightsweater or submit them to the #dropsfan gallery. Do you need help with this pattern?You'll find 30 tutorial videos, a Comments/Questions area and more by visiting the pattern on garnstudio.com. © 1982-2025 DROPS Design A/S. We reserve all rights. This document, including all its sub-sections, has copyrights. Read more about what you can do with our patterns at the bottom of each pattern on our site. |
|||||||||||||


With over 40 years in knitting and crochet design, DROPS Design offers one of the most extensive collections of free patterns on the internet - translated to 17 languages. As of today we count 314 catalogues and 11822 patterns translated into English (UK/cm).
We work hard to bring you the best knitting and crochet have to offer, inspiration and advice as well as great quality yarns at incredible prices! Would you like to use our patterns for other than personal use? You can read what you are allowed to do in the Copyright text at the bottom of all our patterns. Happy crafting!
Post a comment to pattern DROPS 243-27
We would love to hear what you have to say about this pattern!
If you want to leave a question, please make sure you select the correct category in the form below, to speed up the answering process. Required fields are marked *.