Comments / Questions (6)
![]() Patricia Scott wrote:
Patricia Scott wrote:
Je n'arrive pas à vos calculs, on monte 64 mailles pour le col taille M et lorsqu'on arrive pour la séparation des manches, devant et dos on arrive à 60 mailles au lieu de 64 mailles
21.05.2025 - 17:52DROPS Design answered:
Bonjour Mme Scott, notez que chacun des 4 marqueurs est placé dans une maille (pas entre les mailles), d'où probablement les 4 mailles qui vous manquent. Bon tricot!
22.05.2025 - 08:46
![]() Tori Milling wrote:
Tori Milling wrote:
Mener der er en fejl i opskrift på ærmerne. Mindste størrelse har de længste ærmer: Strik til ærmet måler 41-39-38-38-37-35 cm fra delingen..
30.11.2023 - 20:07DROPS Design answered:
Hei Tori. Jo, målene stemmer. Det er kortere mål i de større størrelsene pga bredere skuldervidde og lengre ermetopp. mvh DROPS Design
04.12.2023 - 10:53
![]() Aggi wrote:
Aggi wrote:
Hallo, ich bin nun bei der Passe angekommen. Meine Maschenzahlen und Aufteilung ist richtig. Je 16 Maschen für die Ärmel, je 20 Maschen für den Rumpf und je 4 markierte Maschen für die Raglanlinie. Wenn ich nun mit Muster A.1 beginne, habe ich an der 3. markierten Masche eine LINKE Masche; das ist natürlich falsch. Wie soll ich das Muster stricken, damit die markierten Maschen immer RECHTS sind. Liebe Grüße
03.12.2022 - 11:58DROPS Design answered:
Liebe Aggi, A.1 wird nicht symmetrisch sein, da es über 2 M gestrickt wird und es sind eine gerade Mascheanzahl, aber die Raglanmaschen stricken Sie glatt rechts, und A.1 stricken Sie zwischen diese rechte Maschen. Viel Spaß beim stricken!
06.12.2022 - 08:48
![]() Martina wrote:
Martina wrote:
Grazie per la sollecita ed esauriente risposta.
11.11.2022 - 17:58DROPS Design answered:
Buonasera Martina, i ferri accorciati vengono lavorati a partire dal segnapunti-3 andando verso il segnapunti 2, quindi coprono il dietro e le maniche. Buon lavoro!
13.11.2022 - 00:10
![]() Martina wrote:
Martina wrote:
Buonasera, dalla spiegazione della scollatura con i ferri accorciati, io capisco che la cosiddetta "alzatina" venga sul davanti. Ho capito male io? Non dovrebbe essere sul dietro? Grazie per l'attenzione.
17.10.2022 - 18:02DROPS Design answered:
Buonasera Martina, i ferri accorciati vengono lavorati a partire dal segnapunti-3 andando verso il segnapunti 2, quindi coprono il dietro e le maniche. Buon lavoro!
13.11.2022 - 00:10
![]() Beatrice Mikha wrote:
Beatrice Mikha wrote:
What process is used for. Superwashwool and is it toxic after?
23.08.2022 - 10:06DROPS Design answered:
Dear Mrs Mikha, our DROPS Karisma is oeko tex certified (certificate number 25.3.0110), Standard 100, Class I from the INNOVATEXT Textile Engineering and Testing Institute. This means that is has been tested for harmful substances and is considered safe in human-ecological terms. Class I is the highest level, and it means the yarn is suitable for baby articles (ages 0-3). Hope it can help. Happy knitting!
23.08.2022 - 13:36
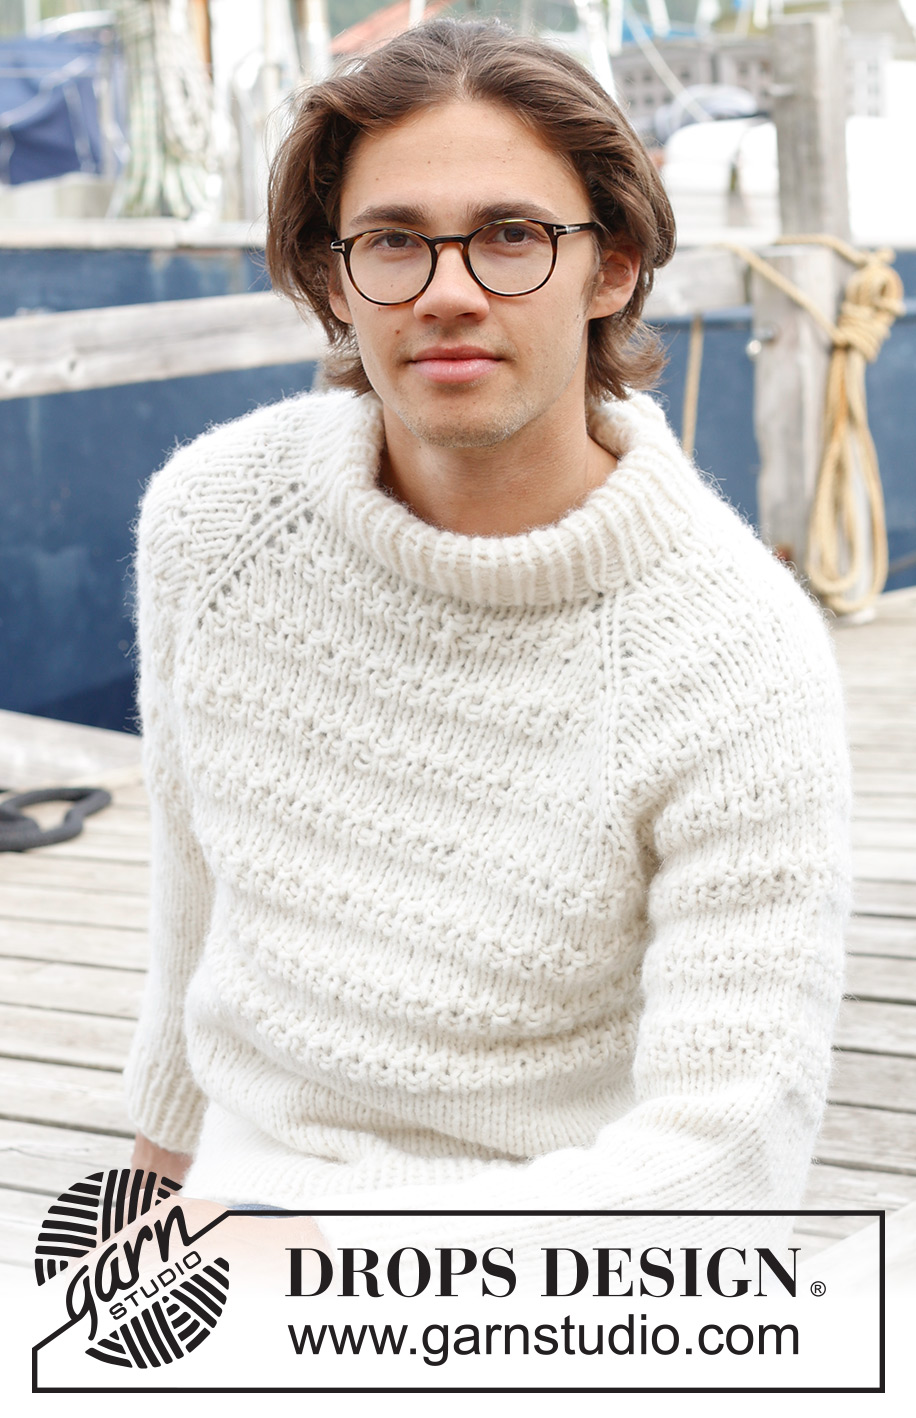
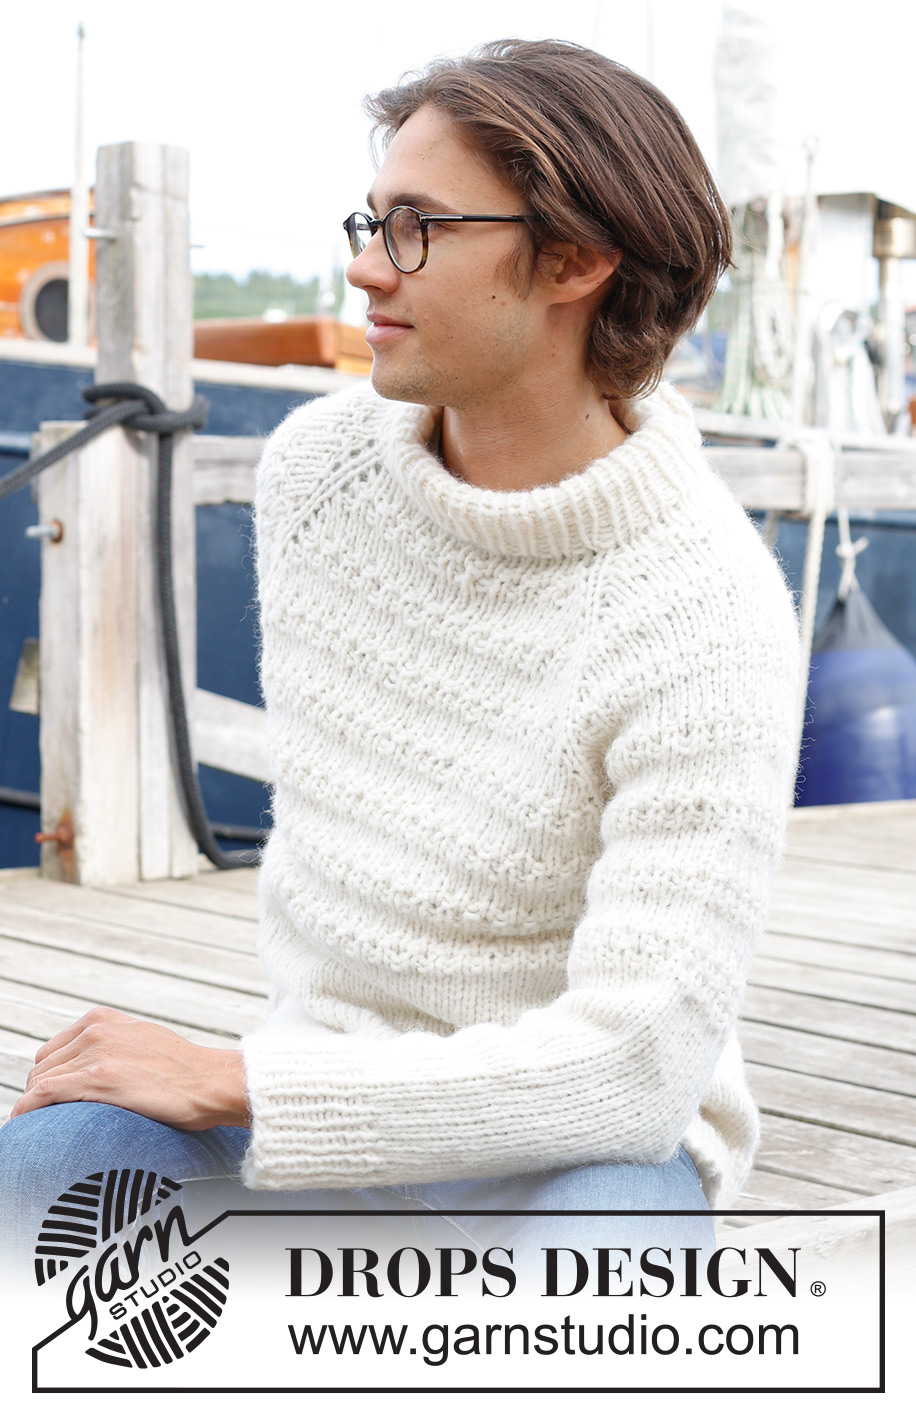
Misty Lines#mistylinessweater |
|||||||
 |
 |
||||||
Knitted jumper for men in DROPS Wish or 2 strands DROPS Air. The piece is worked top down with double neck, raglan and relief-pattern. Sizes S - XXXL.
DROPS 233-4 |
|||||||
|
------------------------------------------------------- EXPLANATIONS FOR THE PATTERN: ------------------------------------------------------- INCREASE TIP: Increase 1 stitch by picking up the stitch from the previous round and knitting this stitch. PATTERN: See diagram A.1. RAGLAN: The increases vary on the body and sleeves in the different sizes. Increase for body before markers 3 and 1 and after markers 2 and 4. Increase for sleeves after markers 3 and 1 and before markers 4 and 2. Increase by making 1 yarn over before/after the marker-stitch. When working back and forth work the yarn overs as follows from the wrong side: BEFORE MARKER: Purl yarn over in the back loop. There should not be holes and the increased stitches are worked in stocking stitch. AFTER MARKER: Slip the yarn over from the left needle and place it back the other way round (insert the left needle from the back when replacing it). Purl the front loop of the yarn over. There should not be holes and the increased stitches are worked in stocking stitch. When working in the round work the yarn overs as follows on the next round: BEFORE MARKER: Slip the yarn over from the left needle and place it back the other way round (insert the left needle from the back when replacing it). Knit the front loop (stitch twists to the right). There should not be holes and the increased stitches are worked into A.1. AFTER MARKER: Knit the back loop (stitch twists to the left). There should not be holes and the increased stitches are worked into A.1. DECREASE TIP (for sleeves): Decrease 1 stitch on either side of the marker as follows: Work until there are 3 stitches left before the marker, knit 2 together, knit 2 (marker sits between these 2 stitches), slip 1 stitch as if to knit, knit 1 and pass the slipped stitch over the knitted stitch. ------------------------------------------------------- START THE PIECE HERE: ------------------------------------------------------- JUMPER – SHORT OVERVIEW OF THE PIECE: The neck and yoke are worked in the round on circular needle from mid-back, top down. The yoke is divided for the body and sleeves and the body continued in the round. The sleeves are worked in the round with short circular needle/double pointed needles. DOUBLE NECK: Cast on 60-64-64-68-68-72 stitches with DROPS Wish or 2 strands DROPS Air over two short needles size 6 and 8 held together. Remove needle size 8 mm (this gives an elastic cast-on edge) keeping stitches on the circular needle size 6 mm. Work rib in the round (knit 1, purl 1) for 13 cm. Fold the rib double to the inside – work 1 more round of rib, working every 4th stitch together with its corresponding stitch on the cast-on edge, leaving a double neck of approx. 6 cm. SIZES S, M and L: Insert 4 markers as explained below (without working the stitches). Markers are used when increasing for raglan. Insert marker-1 in the first stitch, count 12 stitches (sleeve), insert marker-2 in the next stitch, count 16-18-18 stitches (front piece), insert marker-3 in the next stitch, count 12 stitches (sleeve), insert marker-4 in the next stitch. There are 16-18-18 stitches left after the last marker (back piece). Cut the strand. Go to NECK-LINE. SIZES XL, XXL and XXXL: Knit 1 round and increase 4-8-8 stitches evenly spaced – read INCREASE TIP = 72-76-80 stitches. Insert 4 markers as explained below (without working the stitches); they are used when increasing for raglan. Insert marker-1 in the first stitch, count 14 stitches (sleeve), insert marker-2 in the next stitch, count 20-22-24 stitches (front piece), insert marker-3 in the next stitch, count 14 stitches (sleeve), insert marker-4 in the next stitch. There are 20-22-24 stitches left after the last marker (back piece). Cut the strand. Go to NECK-LINE.. NECK-LINE: Change to circular needle size 8 mm. Work a neck-line with short rows AT THE SAME TIME as increasing for raglan – as described below. Start from the right side, 2 stitches before marker-stitch-3 (left front of neck). Work stocking stitch and increase for RAGLAN – read description above, until you have worked 2 stitches past marker-stitch-2 (right front of neck – 8 stitches increased for raglan). Turn, tighten the strand and purl back to 2 stitches past where you started the short row by marker-3. Turn and knit to 2 stitches past the last turn at marker-2 – remember to increase for raglan. Turn, tighten the strand and purl back to 2 stitches past the stitch with marker-3. Cut the strand. Work the yoke. YOKE: = 76-80-80-88-92-96 stitches. Start just before marker-1 (the marker-stitches are always knitted). Work diagram A.1 and continue to increase for raglan every 2nd round a total of 3-6-7-7-5-6 times (including the increases on the short rows) = 84-112-120-128-116-128 stitches. Continue with A.1 and increases for raglan, but every 2nd increase is only worked on the body (4 stitches increased on these rounds and you are increasing every 2nd round on the body and every 4th round on the sleeves). Increase like this 12-10-10-12-16-16 times on the body (6-5-5-6-8-8 times on the sleeves). A total of 15-16-17-19-21-22 times on the body and 9-11-12-13-13-14 times on the sleeves. REMEMBER THE KNITTING TENSION! There are 156-172-180-200-212-224 stitches. Continue A.1 without further increases until the yoke measures 21-23-25-26-28-30 cm mid-front – measured after the neck. Divide for the body and sleeves as follows: Knit 1 (belongs to the back piece), place the next 30-34-36-40-40-42 stitches on a thread for the sleeve, cast on 6-6-8-8-8-10 stitches (in side under sleeve), work 48-52-54-60-66-70 stitches (front piece), place the next 30-34-36-40-40-42 stitches on a thread for the sleeve, cast on 6-6-8-8-8-10 stitches (in side under sleeve), work the last 47-51-53-59-65-69 stitches (rest of back piece). The body and sleeves are finished separately. The piece is now measured from here! BODY: = 108-116-124-136-148-160 stitches. Continue pattern A.1 until you have 7 repeats in height on the jumper, then work stocking stitch. Work until the body measures 32 cm from the division. Knit 1 round and increase 20-24-24-28-32-32 stitches evenly spaced = 128-140-148-164-180-192 stitches. Change to circular needle size 6 mm and work rib (knit 1, purl 1) for 6 cm. Cast off with knit over knit and purl over purl. The jumper measures approx. 64-66-68-70-72-74 cm from the shoulder down. SLEEVES: Place the 30-34-36-40-40-42 stitches from the thread on the one side of the piece on short circular needle/double pointed needles size 8 mm and knit up 1 stitch in each of the stitches cast on under the sleeve = 36-40-44-48-48-52 stitches. Insert a marker thread in the middle of the new stitches under the sleeve. Start at the marker thread and continue diagram A.1 until you have 7 repeats in height on the jumper, then work stocking stitch. AT THE SAME TIME, when the sleeve measures 4 cm from the division, decrease 2 stitches under the sleeve – read DECREASE TIP. Decrease like this every 8-6-5-3-4-2½ cm a total of 5-6-7-9-8-10 times = 26-28-30-30-32-32 stitches. Continue working until the sleeve measures 41-39-38-38-37-35 cm from the division. There is approx. 7 cm left; try the jumper on and work to desired length. Knit 1 round where you increase 6 stitches evenly spaced = 32-34-36-36-38-38 stitches. Change to double pointed needles size 6 mm and work rib (knit 1, purl 1) for 6 cm. Cast off with knit over knit and purl over purl. The sleeve measures approx. 48-46-45-45-44-42 cm from the division. Work the other sleeve in the same way. |
|||||||
Diagram explanations |
|||||||
|
|||||||

|
|||||||

|
|||||||
Have you finished this pattern?Tag your pictures with #dropspattern #mistylinessweater or submit them to the #dropsfan gallery. Do you need help with this pattern?You'll find 30 tutorial videos, a Comments/Questions area and more by visiting the pattern on garnstudio.com. © 1982-2025 DROPS Design A/S. We reserve all rights. This document, including all its sub-sections, has copyrights. Read more about what you can do with our patterns at the bottom of each pattern on our site. |
|||||||


Post a comment to pattern DROPS 233-4
We would love to hear what you have to say about this pattern!
If you want to leave a question, please make sure you select the correct category in the form below, to speed up the answering process. Required fields are marked *.