
Popular categories
Looking for a yarn?


Comments / Questions (45)
![]() Sandrine wrote:
Sandrine wrote:
Bonjour, Pour les boutonnières, il est indiqué de faire la première après le col, hors sur les photos il y a un bouton sur le col. A quelle hautrur faut-il commencer?
21.01.2026 - 14:17DROPS Design answered:
Bonjour Sandrine, la première boutonnière doit etre sur le col, comme cela est montre sur la photo. Bon tricot!
30.01.2026 - 09:45
![]() Teddy Steen wrote:
Teddy Steen wrote:
Hall, kan ik dit vest ook met gewoner breinaalden breien? Ik werk niet graag met rondbreinaalden.
30.11.2025 - 12:01DROPS Design answered:
Dag Teddy,
Om een patroon aan te passen om op rechte naalden te breien hebben we een instructie gemaakt. Deze vind je hier. Helaas is dit niet geschikt voor alle patronen.
30.11.2025 - 15:53
![]() Martine wrote:
Martine wrote:
Bonjour, Très joli modèle que je réalise pour ma soeur comme cadeau de noël (taille L). Je suis juste arrêtée sur l'empiècement pour les motifs car je me pose une petite question : faut-il tricoter avant chaque diagramme, les 2 mailles jersey avant chaque A1, 4 mailles jersey avant le diagramme A2 ? Et ainsi de suite 2-3 mailles jersey avant A3 ? Merci d'avance pour votre aide...Bien cordialement.
07.11.2025 - 15:34DROPS Design answered:
Bonjour Martine et merci. En taille L, vous tricotez 2 mailles puis vous répétez A.1 jusqu'à ce qu'il reste 7 m et vous terminez par 2 m jersey et 5 m point mousse; vous tricotez ensuite 4 m jersey puis vous répétez A.2 jusqu'à ce qu'il reste 9 m et vous terminez par 4 m jersey et 5 m point mousse; et vous tricotez 5 m jersey puis vous répétez A.3 jusqu'à ce qu'il reste 7 m et vous terminez par 2 m jersey et 5 m point mousse. Bon tricot!
07.11.2025 - 17:16
![]() Marion wrote:
Marion wrote:
Bonjour, je n’arrive pas à comprendre l’explication des augmentations sur l’empiècement. Quand je regarde le nombres de mailles à augmenter par rapport au diagramme ça ne coïncide pas…. Merci
21.08.2025 - 10:00DROPS Design answered:
Bonjour Marion, pour former l'empiècement arrondi, on va tricoter les diagrammes A.1, A.2, et A.3 et ainsi augmenter 2 mailles dans chacun de ces diagrammes à chaque fois que vous les tricotez: vous répétez ces diagrammes 1 fois en hauteur mais tout le rang en largeur, en fonction de votre taille vous allez répéter ces digrammes un nombre différent de fois, mais vous augmentez 2 m par diagramme x le nombre de motifs en largeur, n'hésitez pas à donner votre taille, ce sera ainsi plus facile de vous expliquer pour A.1 (les autres se tricotent de la même façon). Bon tricot!
22.08.2025 - 15:00
![]() Pochon wrote:
Pochon wrote:
J’ai exécuté ce modèle magnifique avec une laine rapportée de Crête doublée d’un fil mohair et soie! Une réussite! Je suis ravie! Merci Mais j’ai du opté pour une grande taille afin d’avoir le même rendu!
20.02.2025 - 10:24
![]() Queenie Ng wrote:
Queenie Ng wrote:
Hi, I'm looking at pattern '228-33 Sailor Blues Jacket'. The yarn 'Drop Wish' has discontinued. What other yarn would you suggest? How many yarn would I need for a medium size? And needle sizes? Thank you.
31.01.2025 - 18:20DROPS Design answered:
Dear Queenie, you can work with 2 threads of DROPS Air; then you would need 600gr total for the jacket. If you want to work with only 1 thread you could use a Group E yarn; for example, DROPS Andes. You'd need approx. 950gr of DROPS Andes; here you will find more information on how to calculate the new yarn amounts. The needle size should be the same; make sure to work a gauge before starting the garment to check that these needle sizes fit your knitting tension. Happy knitting!
02.02.2025 - 20:19
![]() Gabriela Crhonková wrote:
Gabriela Crhonková wrote:
Dobry den , mam dotaz nevim jak u svetru wi-005 nahodit oci na pruramek .Nebo je nejaky video návod jak postupovat dál . Nebo je to myšleno uplest oči ze zadního dílu ? Děkuji G.Crhonková
13.01.2025 - 15:24
![]() Gabriela Crhonková wrote:
Gabriela Crhonková wrote:
Dobry den , mam dotaz nevim jak u svetru wi-005 nahodit oci na pruramek .Nebo je nejaky video návod jak postupovat dál . Nebo je to myšleno uplest oči ze zadního dílu ? Děkuji G.Crhonková
13.01.2025 - 15:05
![]() Alena wrote:
Alena wrote:
Dobrý den, prosím o radu. Jak poznám, jakou velikost svetru mám plést? Měřím 179 cm, jsem štíhlá. Vybrala jsem si tento svetr: Sailor Blues Jacket Propínací svetr s kruhovým sedlem a vysokým stojáčkem pletený shora dolů . Nevím, zda M nebo L. Předem děkuji. Alena
05.01.2025 - 19:50DROPS Design answered:
Dobrý den, Aleno, pokud váháte, jakou velikost zvolit, doporučujeme změřit svůj oblíbený kousek oblečení, který vám dobře sedí. Podle naměřených hodnot si pak vyberte vhodnou velikost z nákresu, který naleznete ve spodní části každého návodu. Ať se vám hezky plete!
09.01.2025 - 22:10
![]() Sophie wrote:
Sophie wrote:
Bonjour, Je souhaite faire ce gilet avec 2 fils DROPS AIR et d'y associer DROPS KID-SILK ? comment dois-je calculer le fil DROPS KID-SILK qu'il me faut et quelles aiguilles il me faut utiliser ? (forcément plus grosses ?) Merci de votre retour, merci pour toutes vos réalisations, publications et Joyeuses fêtes de fin d'année.
27.12.2024 - 12:55DROPS Design answered:
Bonjour Sophie, vous pouvez tricoter alors avec 1 fil Air + 2 fils Kid-Silk, divisez la quantité indiquée pour votre taille en Air par 2 et utilisez le convertisseur pour avoir la quantité Kid-Silk correspondante. Et pensez à bien vérifier votre tension (comme d'habitude). Bon tricot!
02.01.2025 - 12:16
|
|||||||
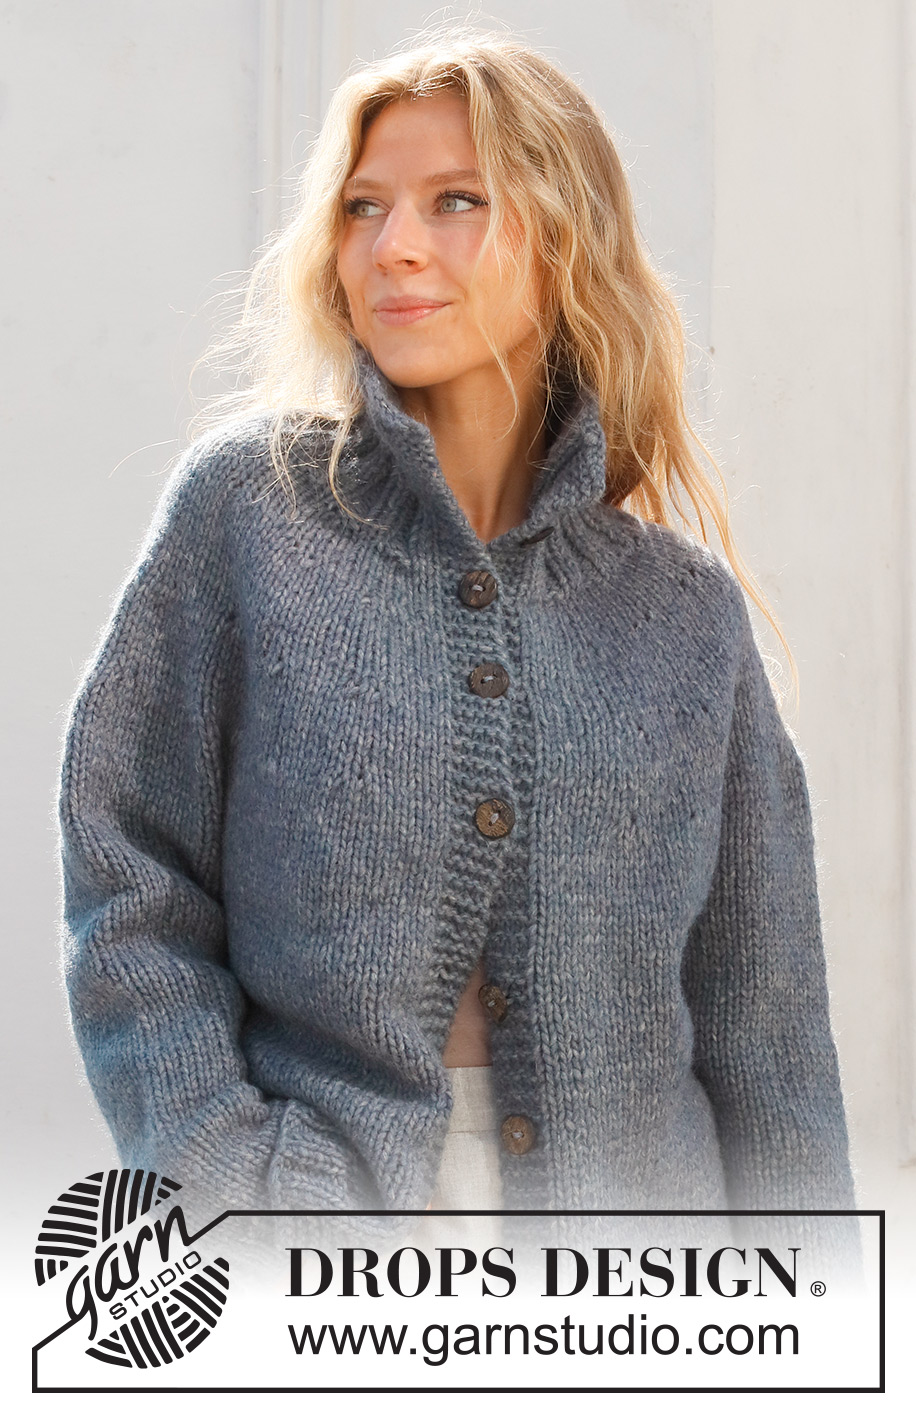
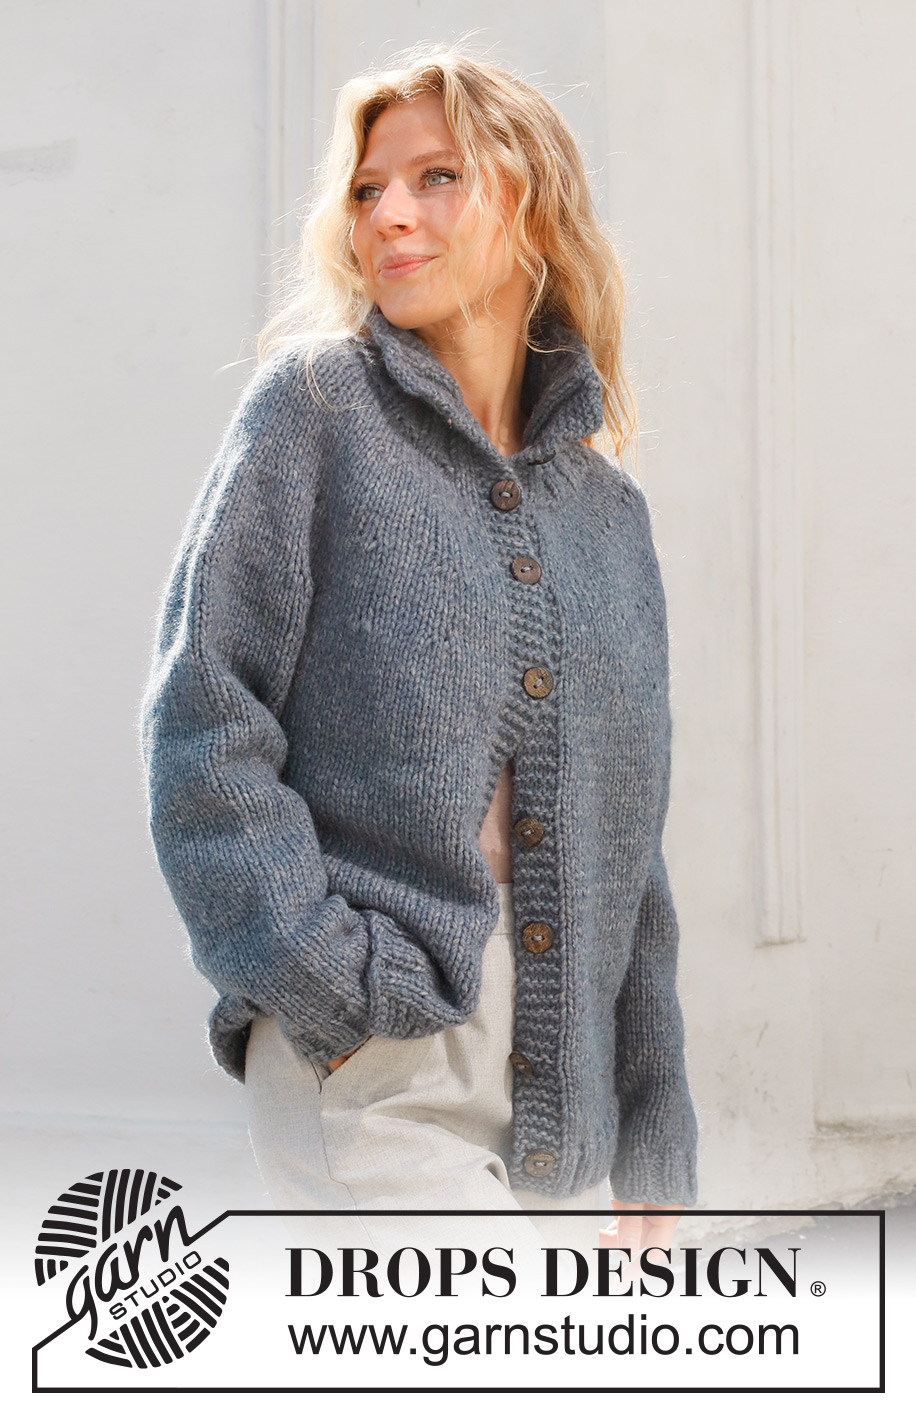
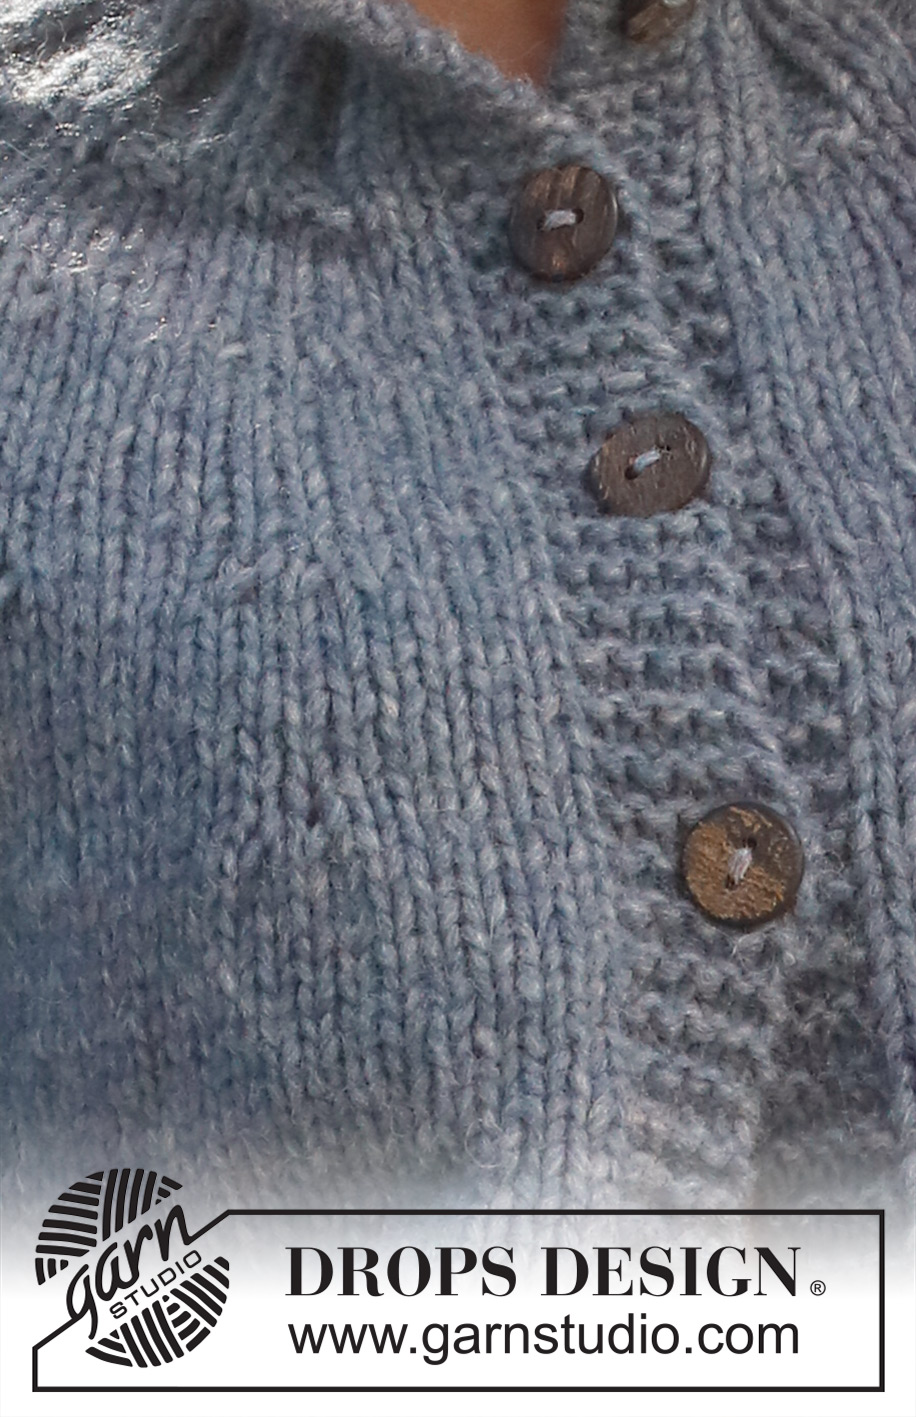
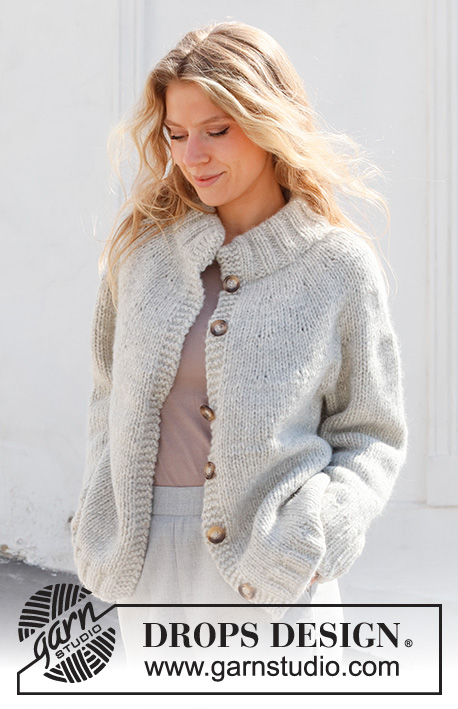
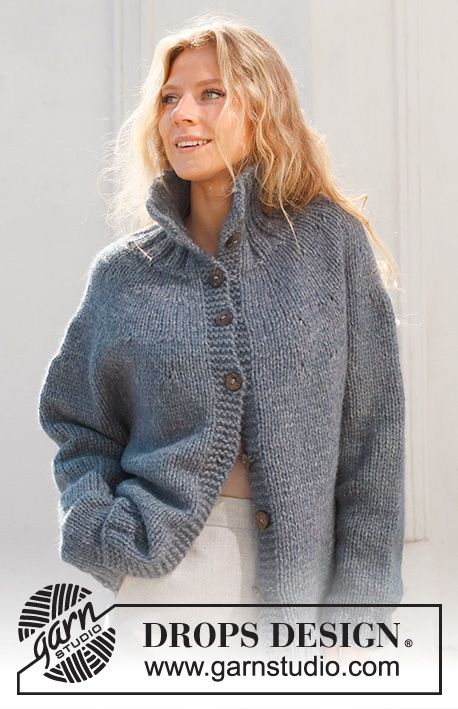
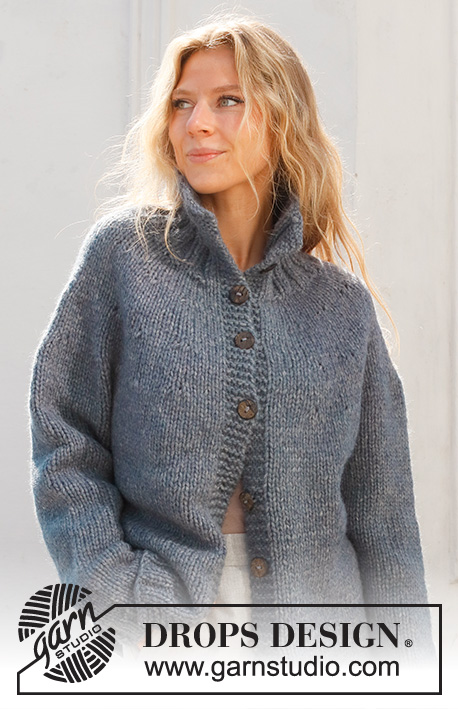
Sailor Blues Jacket#sailorbluesjacket |
|||||||
 |
 |
||||||
Knitted jacket in 1 strand DROPS Wish or 2 strands DROPS Air. The piece is worked top down with round yoke and high neck. Sizes XS - XXL.
DROPS 228-33 |
|||||||
|
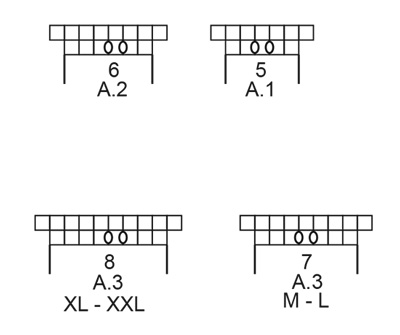
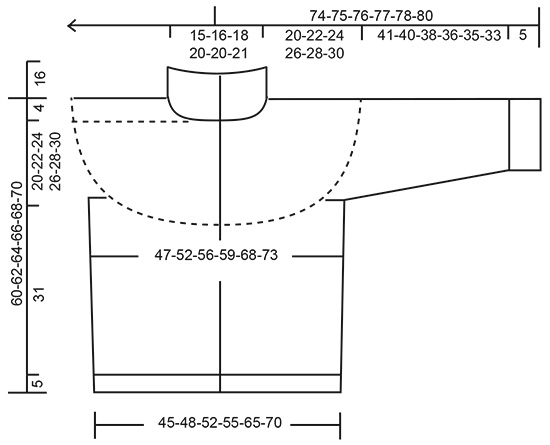
------------------------------------------------------- EXPLANATIONS FOR THE PATTERN: ------------------------------------------------------- RIDGE/GARTER STITCH (worked back and forth): Knit all rows. 1 ridge = knit 2 rows. PATTERN: See diagrams A.1 to A.3. Choose diagram for your size (applies to A.3 in sizes M, L, XL and XXL). The diagrams show all rows in the pattern from the right side. INCREASE TIP (evenly spaced): To work out how to increase evenly, count the total number of stitches on the needle (e.g. 64 stitches) minus the bands (e.g. 10 stitches) and divide the remaining stitches by the number of increases to be made (e.g. 13) = 4.1. In this example, increase by making 1 yarn over after approx. each 4th stitch. Do not increase over the bands. On the next row work the yarn overs twisted to avoid holes. DECREASE TIP (for body and sleeves): Decrease 1 stitch on either side of the marker thread as follows: Work until there are 3 stitches left before the marker thread, knit 2 together, knit 2 (marker thread sits between these 2 stitches), slip 1 stitch as if to knit, knit 1 and pass the slipped stitch over the knitted stitch. BUTTONHOLES: Work buttonholes on the right band (when the garment is worn). Work from the right side when there are 3 stitches left on the row as follows: Make 1 yarn over, knit 2 together and knit 1. On the next row (wrong side), knit the yarn over to leave a hole. The first buttonhole is worked when the neck measures 8 cm, the next buttonhole on the first row after the rib on the neck. The other 6-6-6-7-7-7 buttonholes are worked with approx. 8½-8½-9-8-8½-8½ cm between each one. CASTING-OFF TIP: To avoid the cast-off edge being tight you can cast off with a larger size needle. If the edge is still tight, make 1 yarn over after approx. each 6th stitch at the same time as casting off; the yarn overs are cast off as normal stitches. ------------------------------------------------------- START THE PIECE HERE: ------------------------------------------------------- JACKET – SHORT OVERVIEW OF THE PIECE. The neck and yoke are worked back and forth with circular needle, from mid front and top down. The yoke is divided for body and sleeves and the body continued back and forth with circular needle. The sleeves are worked in the round with double pointed needles/short circular needle, top down. HIGH NECK: Cast on 64-68-72-76-76-80 stitches (including 5 band stitches on each side towards mid-front) with circular needle size 6 mm and 1 strand DROPS Wish or 2 strands DROPS Air. Purl 1 row (= wrong side). The next row is worked as follows from the right side: 5 band stitches in GARTER STITCH – read description above, * knit 2, purl 2 *, work from *-* until there are 7 stitches left, knit 2 and 5 band stitches in garter stitch. When neck measures 8 cm, start BUTTONHOLES on right band – read description above. Work this rib for 16 cm. Knit 1 row from the right side where you increase 15-16-17-18-28-29 stitches evenly spaced – read INCREASE TIP = 79-84-89-94-104-109 stitches. Purl 1 row from the wrong side (yarn overs purled twisted and bands knitted). Insert 1 marker after the band at the beginning of the row; the yoke is measured from this marker! YOKE: Change to circular needle size 8 mm. Work stocking stitch with 5 band stitches in garter stitch on each side. REMEMBER THE KNITTING TENSION! When the yoke measures 4 cm from the marker increase as follows: INCREASE 1: 5 band stitches in garter stitch, 2 stitches in stocking stitch, A.1 until there are 7 stitches left (= 13-14-15-16-18-19 repeats of 5 stitches), 2 stitches in stocking stitch, 5 band stitches in garter stitch. When A.1 has been completed you have increased 26-28-30-32-36-38 stitches = 105-112-119-126-140-147 stitches. Continue with stocking stitch and 5 band stitches on each side until the yoke measures 9-10-10-11-12-13 cm from the marker. INCREASE 2: 5 band stitches in garter stitch, 3-3-4-4-5-3 stitches in stocking stitch, A.2 until there are 6-7-7-8-10-6 stitches left (= 15-16-17-18-20-22 repeats of 6 stitches), 2-3-3-4-5-2 stitches in stocking stitch, 5 band stitches in garter stitch. When A.2 has been completed you have increased 30-32-34-36-40-44 stitches = 135-144-153-162-180-191 stitches. Continue with stocking stitch and 5 band stitches on each side until the yoke measures 14-16-17-19-20-22 cm from the marker. Now continue the different sizes as follows: XS and S: 5 band stitches in garter stitch, 3-4 stitches in stocking stitch, A.2 until there are 7-9 stitches left (= 20-21 repeats of 6 stitches), 2-4 stitches in stocking stitch, 5 band stitches in garter stitch. When A.2 has been completed you have increased 40-42 stitches = 175-186 stitches. M and L: 5 band stitches in garter stitch, 2-3 stitches in stocking stitch, A.3 – choose diagram for your size, until there are 6-7 stitches left (= 20-21 repeats of 7 stitches), 1-2 stitches in stocking stitch, 5 band stitches in garter stitch. When A.3 has been completed you have increased 40-42 stitches = 193-204 stitches. XL and XXL: 5 band stitches in garter stitch, 5-3 stitches in stocking stitch, A.3 – choose diagram for your size, until there are 10-7 stitches left (= 20-22 repeats of 8 stitches), 5-2 stitches in stocking stitch, 5 band stitches in garter stitch. When A.3 has been completed you have increased 40-44 stitches = 220-235 stitches ALL SIZES: = 175-186-193-204-220-235 stitches. Continue with stocking stitch and 5 band stitches on each side until the piece measures 20-22-24-26-28-30 cm from the marker and the next row is from the wrong side. Now divide for the body and sleeves as follows: Work the first 29-30-32-33-37-40 stitches (= right front piece), place the next 35-37-38-40-40-42 stitches on 1 thread for the sleeve, cast on 4-6-8-8-10-10 stitches (= in side under sleeve), work 47-52-53-58-66-71 stitches (= back piece), place the next 35-37-38-40-40-42 stitches on 1 thread for the sleeve, cast on 4-6-8-8-10-10 stitches (= in side under sleeve), work the remaining 29-30-32-33-37-40 stitches (= left front piece). The body and sleeves are finished separately. THE PIECE IS MEASURED FROM HERE! BODY: = 113-124-133-140-160-171 stitches. Insert a marker thread in the middle of the 4-6-8-8-10-10 stitches cast on under each sleeve (= 2-3-4-4-5-5 new stitches on each side). Allow the threads to follow your work onwards; they will be used when decreasing. Work in stocking stitch with 5 band stitches in garter stitch on each side. When the piece measures 4 cm, decrease 1 stitch on each side of both marker threads – read DECREASE TIP. The decreases in XS are finished. Repeat the decrease in S, M, L, XL and XXL when the piece measures 15 cm from the division = 109-116-125-132-152-163 stitches. Continue with stocking stitch and 5 band stitches in garter stitch on each side until the piece measures 31 cm from the division. Try the jacket on and work to desired length; there is 5 cm left to finished length. To avoid the following rib being tight, increase 23-24-27-28-32-33 stitches evenly spaced = 132-140-152-160-184-196 stitches. Change to circular needle size 6 mm and work rib as follows: 5 band stitches in garter stitch, * knit 2, purl 2 *, work from *-* until there are 7 stitches left, knit 2 and 5 band stitches in garter stitch. Continue this rib for 5 cm. Cast off with knit over knit and purl over purl – read CASTING-OFF TIP. The jacket measures approx. 60-62-64-66-68-70 cm from the shoulder down. SLEEVES: Place the 35-37-38-40-40-42 stitches from the thread on the one side of the piece on double pointed needles/short circular needle size 8 mm and knit up 1 stitch in each of the 4-6-8-8-10-10 stitches cast on under the sleeve = 39-43-46-48-50-52 stitches. Insert a marker thread in the middle of the new stitches under the sleeve. Allow the thread to follow your work onwards; it will be used when decreasing. Start at the marker thread and work stocking stitch in the round for 4 cm. Now decrease 2 stitches under the sleeve – read DECREASE TIP. Decrease like this every 6-5-4-3-3-3 cm a total of 6-7-8-9-9-10 times = 27-29-30-30-32-32 stitches. Work until the sleeve measures 41-40-38-36-35-33 cm (shorter measurements in larger sizes due to wider neck and longer yoke). Try the jacket on and work to desired length; there is 5 cm left to finished length. Increase 5-7-6-10-8-8 stitches evenly spaced = 32-36-36-40-40-40 stitches. Change to double pointed needles size 6 mm. Work rib (knit 2, purl 2) for 5 cm. Cast off with knit over knit and purl over purl – remember CASTING-OFF TIP. The sleeve measures approx. 46-45-43-41-40-38 cm from the division. Work the other sleeve in the same way. ASSEMBLY: Sew the buttons onto the left band. |
|||||||
Diagram explanations |
|||||||
|
|||||||
 |
|||||||
 |
|||||||
Have you finished this pattern?Tag your pictures with #dropspattern #sailorbluesjacket or submit them to the #dropsfan gallery. Do you need help with this pattern?You'll find 26 tutorial videos, a Comments/Questions area and more by visiting the pattern on garnstudio.com. © 1982-2026 DROPS Design A/S. We reserve all rights. This document, including all its sub-sections, has copyrights. Read more about what you can do with our patterns at the bottom of each pattern on our site. |
|||||||


With over 40 years in knitting and crochet design, DROPS Design offers one of the most extensive collections of free patterns on the internet - translated to 17 languages. As of today we count 324 catalogues and 12290 patterns translated into English (UK/cm).
We work hard to bring you the best knitting and crochet have to offer, inspiration and advice as well as great quality yarns at incredible prices! Would you like to use our patterns for other than personal use? You can read what you are allowed to do in the Copyright text at the bottom of all our patterns. Happy crafting!
Post a comment to pattern DROPS 228-33
We would love to hear what you have to say about this pattern!
If you want to leave a question, please make sure you select the correct category in the form below, to speed up the answering process. Required fields are marked *.