
Popular categories
Looking for a yarn?


Comments / Questions (133)
![]() Fernanda Pinto wrote:
Fernanda Pinto wrote:
Boa tarde.Gostaria de saber como me guiar para saber qual o tamanho a escolher, visto o modelo ser muito grande. Não encontro aqui um guia de tamanhos. Obrigada
09.02.2013 - 20:52DROPS Design answered:
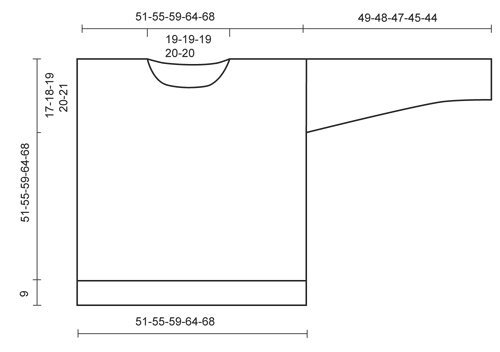
Bom dia. Deixamos-lhe aqui as medidas para este modelo (que são sempre indicadas nos esquemas): Tamanhos: S - M – L/XL - XXL - XXXL Medidas depois da peça feita: Busto: 102-110-118-128-136 cm Altura total na parte da frente: 51-55-59-64-68 cm Altura total nas costas: + 9 cm do que a frente Bom tricô!
11.02.2013 - 14:12
![]() Petra wrote:
Petra wrote:
Bitte um Ihre Hilfe; ich verstehe beim ersten Anschlag, wenn stehet "Hinten bzw. vorn" Mitte nicht ganz, wieso in Runden? bzw. wo genau sollen die Runden dann bitte sein? Im Voraus vielen Dank!
04.02.2013 - 14:20DROPS Design answered:
Liebe Petra, meinten Sie den Satz „ab der hinten Mitte bzw. ab der vorderen Mitte“? Dies bedeutet, dass sowohl das Vorder- als auch das Rückenteil in der Mitte des Quadrats begonnen wird, also quasi von innen nach außen – und zwar in Runden - gestrickt wird.
04.02.2013 - 23:24
![]() LAVIE wrote:
LAVIE wrote:
Bonjour, est-ce que le dos de ce modèle est plus grand, si oui comment faire pour qu'il soit de la même hauteur que le devant, le pan arriere ne me plait pas ! Merci de votre réponse. Bien cordialement
01.02.2013 - 13:06DROPS Design answered:
Bonjour Madame Lavie, le dos est effectivement plus long que le devant. Si vous les souhaitez à la même longueur, ajustez à celle qui vous convient entre les 3ème et 4ème marqueurs. Bon tricot !
01.02.2013 - 13:37Lily wrote:
Pattern, please!
29.01.2013 - 05:09Nina wrote:
Super
28.01.2013 - 09:34
![]() Chocolat Belge wrote:
Chocolat Belge wrote:
Très sympa,confortable et adapté à toutes les morphologies
28.01.2013 - 06:51
![]() VALE wrote:
VALE wrote:
STUPENDO!!! a quando le spiegazioni? non vedo l'ora di iniziarlo!!
24.01.2013 - 13:32
![]() Helle wrote:
Helle wrote:
Denne her glæder jeg til at lave i hvid - bliver helt sikker et sommer hit
24.01.2013 - 10:30
![]() Gunn wrote:
Gunn wrote:
Når kommer denne oppskriften?
23.01.2013 - 10:52
![]() Hallgunnur wrote:
Hallgunnur wrote:
Dejlig
22.01.2013 - 11:10
|
|
Hugs and kisses#hugsandkissessweater |
|
 |
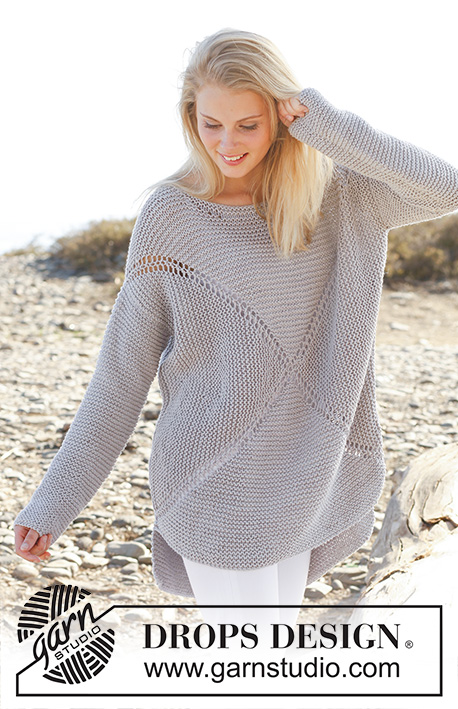 |
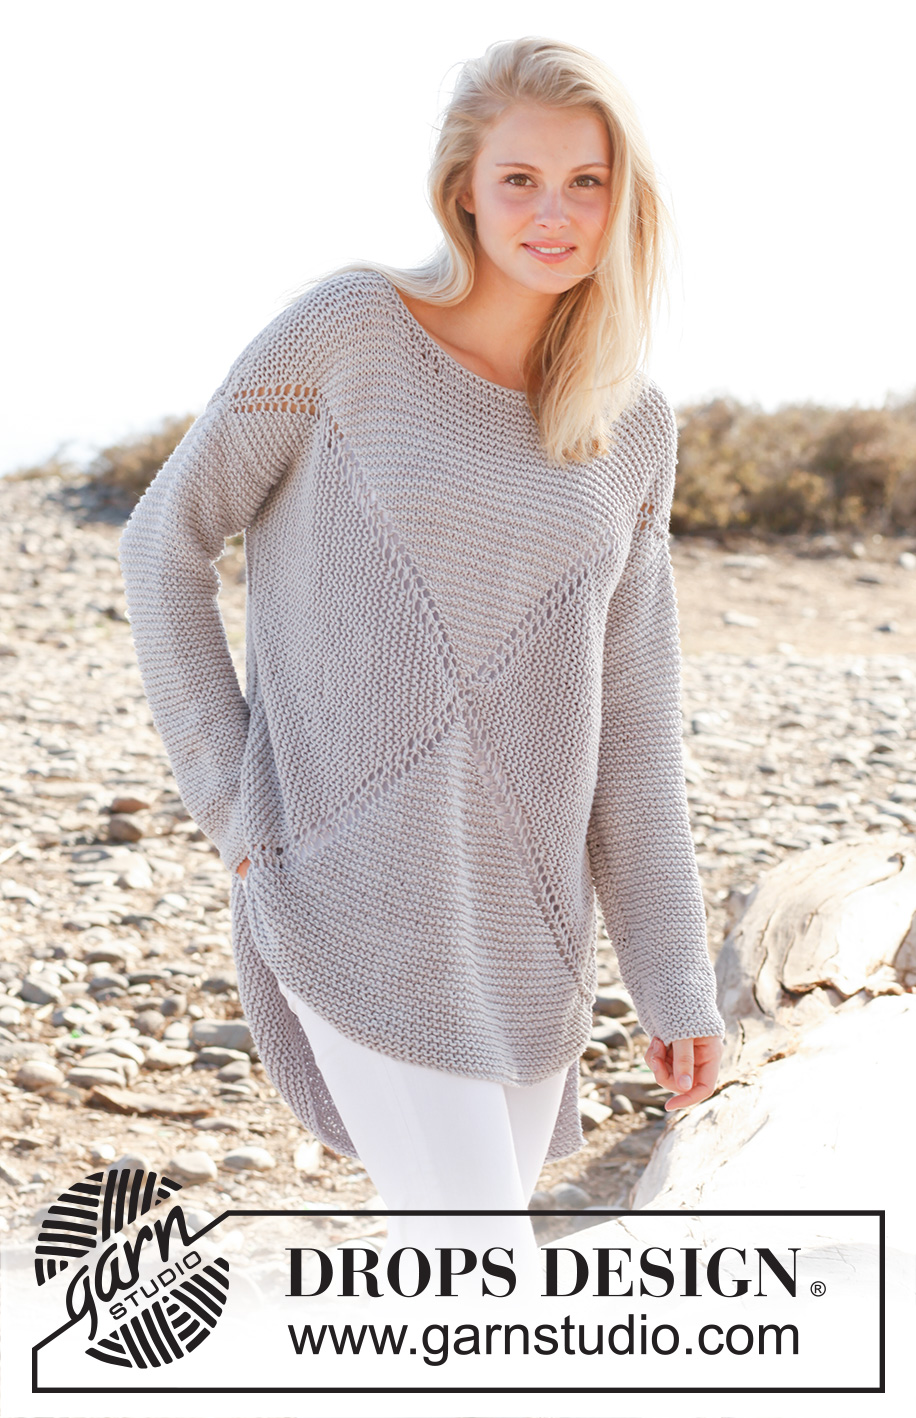
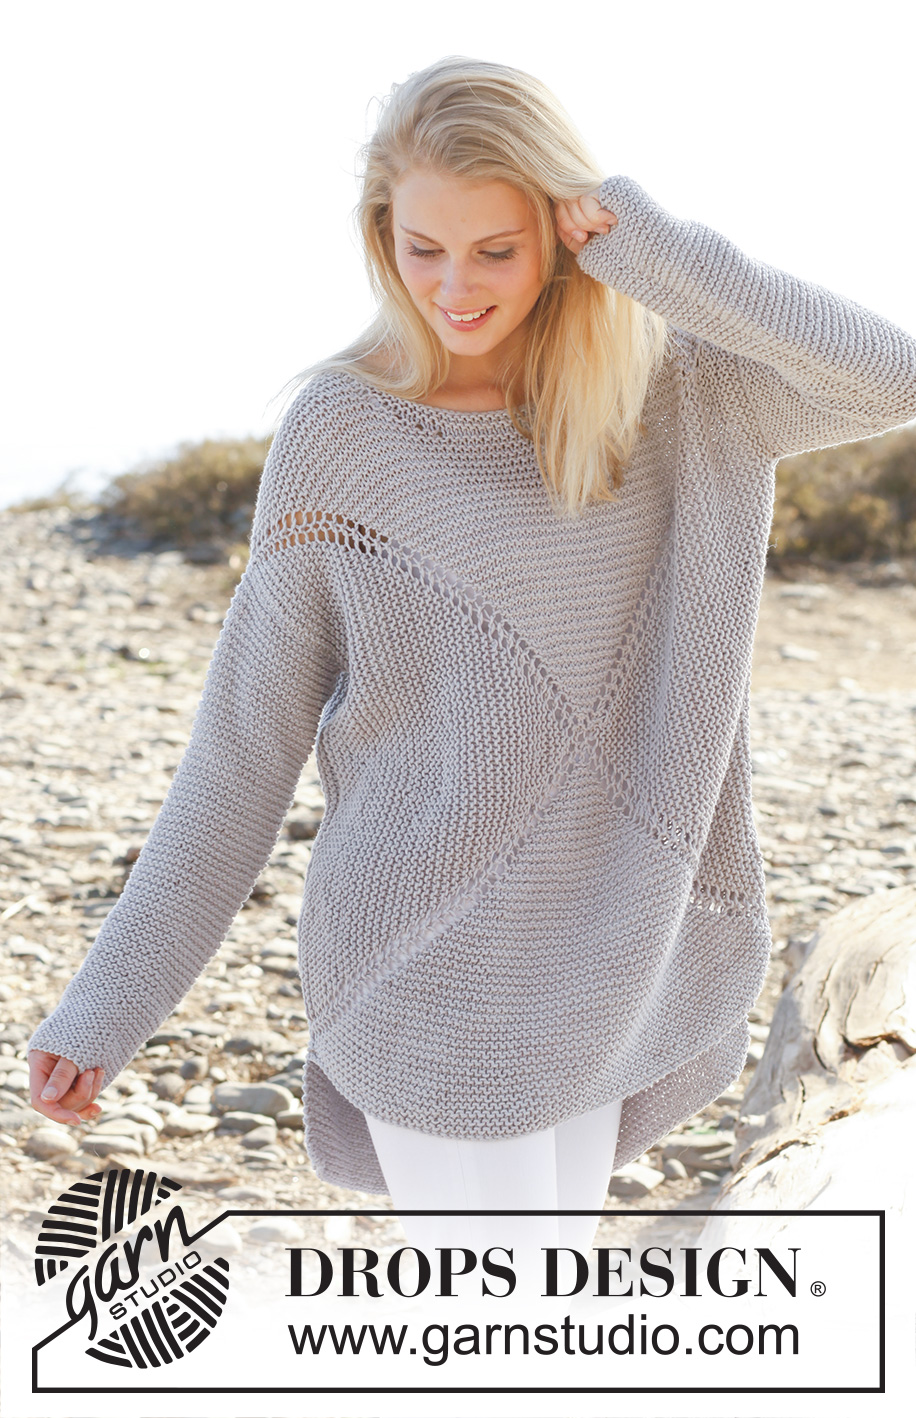
Knitted DROPS jumper worked in a square in garter st in ”Paris”. Size: S - XXXL.
DROPS 146-2 |
|
|
GARTER ST (in the round on circular needle): 1 ridge = 2 rounds. * K 1 round and P 1 round *, repeat from *-*. GARTER ST (back and forth on needle): K all rows. 1 ridge = 2 rows K. MEASURING TIP: Hold the piece up when measuring. Because of the garter st and the weight of the yarn the sleeve will be somewhat longer. If a lighter sleeve is wanted, work 4 ridges at the bottom of sleeve, then work in reversed stocking st. ---------------------------------------------------------- JUMPER: Worked in 2 parts from mid front/mid back in a square. Cast on and work on double pointed needles, switch to circular needle when needed. Finish by working the sleeves. FRONT PIECE: Cast on 8 sts with Paris and divide them on 4 double pointed needles size 6 mm (= 2 sts on every needle). Insert a marker in the first, third, fifth and seventh st (= 4 markers). Then work in the round and in GARTER ST over all sts - see explanation above. AT THE SAME TIME on every other round make 1 YO on each side of every marker (= 8 inc on every other round), on next round K YOs to make holes. Continue like this until there are 240-264-288-320-344 sts on needle (= 29-32-35-39-42 inc and 60-66-72-80-86 sts on each of the 4 sides). Stop with 1 P round. Now slip the middle 16-16-18-18-18 sts between 1st and 2nd marker on a stitch holder for neck, then work piece back and forth. Continue in garter st and continue inc at markers - AT THE SAME TIME cast off towards the neck on every other row as follows: 2 sts 2 times and 1 st 2 times. Continue inc until there are 284-308-330-362-386 sts on needle (= 38-41-44-48-51 inc, 78-84-90-98-104 sts between markers, 25-28-30-34-37 sts on each side of neck). Keep sts between 3rd and 4th marker on needle, cast off the other sts = 78-84-90-98-104 sts on needle. Work 2 ridges back and forth over these sts. Cast off. Insert a marker in each side, 17-18-19-20-21 cm down from the shoulder. This shows where the sleeve is sewn in. BACK PIECE: Cast on 8 sts with Paris and divide them on 4 double pointed needles size 6 mm (= 2 sts on every needle). Insert a marker in the first, third, fifth and seventh st (= 4 markers). Then work in the round and in garter st over all sts, AT THE SAME TIME on every other round make 1 YO on each side of every marker (= 8 inc on every other round), on next round K YOs to make holes. Continue like this until there are 288-312-336-368-392 sts on needle (= 35-38-41-45-48 inc and 72-78-84-92-98 sts between markers). Now cast off the middle 28-28-30-30-30 sts between 1st and 2nd marker for neck, then work piece back and forth = 260-284-306-338-362 sts. Continue inc until there are 284-308-330-362-386 sts on needle (= 38-41-44-48-51 inc, 78-84-90-98-104 sts between markers, 25-28-30-34-37 sts on each side of neck). Keep sts between 3rd and 4th marker on needle, cast off the other sts = 78-84-90-98-104 sts on needle. Work 15 ridges back and forth over these sts. Cast off. Insert a marker in each side, 17-18-19-20-21 cm down from the shoulder. This shows where the sleeve is sewn in. SLEEVE: Worked back and forth on circular needle. READ MEASURING TIP! Cast on 37-38-41-44-45 sts (incl 1 edge st in each side) on circular needle size 6 mm with Paris. Work in garter st. When piece measures 8 cm, inc 1 st in each side. Repeat inc every 5-4½-4½-4-3½ cm 7-8-8-8-9 more times (= 8-9-9-9-10 inc in total) = 53-56-59-62-65 sts. Cast off when piece measures 49-48-47-45-44 cm (shorter measurements in the larger sizes because of broader shoulder width). ASSEMBLY: Sew the shoulder seams. Sew in sleeves down to markers on front/back piece. Sew underarm and side seams in one inside 1 edge st, leave the bottom 10 cm = vent. NECK EDGE: Knit up approx. 66 to 74 sts (incl sts on stitch holder) on a short circular needle (40 cm) around the neck. Work 2 ridges. Cast off. |
|
 |
|
Have you finished this pattern?Tag your pictures with #dropspattern #hugsandkissessweater or submit them to the #dropsfan gallery. Do you need help with this pattern?You'll find 17 tutorial videos, a Comments/Questions area and more by visiting the pattern on garnstudio.com. © 1982-2026 DROPS Design A/S. We reserve all rights. This document, including all its sub-sections, has copyrights. Read more about what you can do with our patterns at the bottom of each pattern on our site. |
|


With over 40 years in knitting and crochet design, DROPS Design offers one of the most extensive collections of free patterns on the internet - translated to 17 languages. As of today we count 324 catalogues and 12245 patterns translated into English (UK/cm). 12245
We work hard to bring you the best knitting and crochet have to offer, inspiration and advice as well as great quality yarns at incredible prices! Would you like to use our patterns for other than personal use? You can read what you are allowed to do in the Copyright text at the bottom of all our patterns. Happy crafting!
Post a comment to pattern DROPS 146-2
We would love to hear what you have to say about this pattern!
If you want to leave a question, please make sure you select the correct category in the form below, to speed up the answering process. Required fields are marked *.