
Popular categories
Looking for a yarn?


Comments / Questions (152)
![]() Stijn Bonte wrote:
Stijn Bonte wrote:
Ik brei maat small. Dit zijn 176 steken opzetten. Na mijn boord van 4cm staat er beginnen met patroon m1. Dus 20st voorbies, 1r 1av 1r . (3x45) geeft 135st + (2x20): 40st. Maar dan zit ik nog met 1st over! Wat doe ik daarmee?? Brei ik die mee in mijn 20st (21st in totaal)? Want anders klopt mijn patroon m1 niet meer! Bedankt.
05.09.2014 - 17:06
![]() Fred wrote:
Fred wrote:
I think I am misunderstanding the pattern M.1. in the part of the body it says it starts and ends with 1 K stitch as seen from the right side. Does that mean I begin the right side as M.1 and begin the wrong side with 1P then follow the pattern? I did the math for the pattern and the body excluding the band stitches works out to a multiple of 3 plus one stitch. This will cause a column of garter stitch on one side and a column of stockinette stitch on the other side.
26.07.2014 - 15:11DROPS Design answered:
Dear Fred, you start M1 from RS with K1 (this st will be P from WS) and and with K1 (to be P from WS) after repeating diagram, so that you will have from RS K1 (=1 st in st st) inside front bands. Happy knitting!
28.07.2014 - 09:17
![]() Danielle wrote:
Danielle wrote:
How many balls of each type of yarn are needed for size XL?
22.05.2014 - 02:51DROPS Design answered:
Dear Danielle, total amount of yarn is given at the right side of the picture, ie in size XL: 800 g Karisma/50 g a ball = 16 balls + 200 g Kid-Silk/25 g a ball = 8 balls. So that you will need in size XL 16 balls Karisma + 8 balls Kid-Silk. Happy knitting!
22.05.2014 - 08:47Malina wrote:
When do I stop using 1 thread Karisma and 1 thread Kid-Silk? Is all the pattern using these two threads? Because it says to use 600 gr Karisma and only 100 gr Kid-Silk. Thanks
09.02.2014 - 09:42DROPS Design answered:
Dear Malina, whole jacket is worked with 1 thread Karisma + 1 thread Kid-Silk. Both qualities do not have same meterage, Karisma is approx. 100 m/50 g and Kid-Silk is approx. 200 m/25 g. So that you need in size S 600 g Karisma (= 12 balls) and 150 g Kid-Silk (= 6 balls), which is a total of 1200 m each. Happy knitting!
10.02.2014 - 09:50
![]() Franzi wrote:
Franzi wrote:
Hi, ich bin leider was Anleitungen lesen geht blutiger Anfänger. Habe ich das richtig verstanden für den Bund unten stricke ich erst die Blende kraus rechts und danach von vorne 1 rechts, 2links usw. bis zur zweiten Blende? Oder was heißt *-* ? Danke schon mal überhaupt für diese Anleitung!!
04.02.2014 - 13:03DROPS Design answered:
Liebe Franzi, nach den 20 M kraus re der Blende wird das Rippenmuster 1 re, 2 li gestrickt und zum Schluss wieder 20 M kraus re. *-* bedeutet von Symbol * bis Symbol * wiederholen.
05.02.2014 - 10:35
![]() Hilde Schmit Jongbloed wrote:
Hilde Schmit Jongbloed wrote:
Hoi, ik begrijp het bijgevoegde patroon niet. Als ik begin met 1 recht, 1 averecht en dan 2 recht en dan terug op de terugnaald 1 recht 2 averecht en weer 1 recht, dan krijg ik een mengelmoes van steken. Wat doe ik fout?
31.01.2014 - 15:37DROPS Design answered:
Hoi Hilde. Je breit telpatroon M.1 als volgt: 1e rij, goede kant, van rechts naar links: 1 r, 1 av, 1 r. 2e rij, verkeerde kant, van links naar rechts: 2 r, 1 av en zo voort. Je kan hier ook lezen hoe je onze telpatronen moet lezen (Punt 2).
07.02.2014 - 10:52
![]() Zora wrote:
Zora wrote:
Werden alle 3 letzten Reihen am Kragen rechts gestrickt oder die erste (Rückseite)- rechts, die zweite (vorne) - links und die dritte (Rückseite) - wieder rechts? Vielen Dank für die Hilfe Zora
21.01.2014 - 20:54DROPS Design answered:
Liebe Zora, es werden 3 Reihen rechts gestrickt wie in der Anleitung beschrieben.
22.01.2014 - 08:21
![]() BROUSTET wrote:
BROUSTET wrote:
Suite de la question posée précédemment : Si mes calculs sont exacts en fin de rang (vu sur l'endroit) avec 212 m pour une taille L (soit 20+172+20)il reste en fin de rang 4 mailles qui ne permettent pas de faire le point en entier.Est-ce que je dois refaire mon montage en incluant 3 m de plus (2m pour le point et une pour la maille endroit finale) ou est-il possible d'ajouter après les côtes 3 mailles ? Merci pour votre réponse.
01.01.2014 - 15:45DROPS Design answered:
Bonjour Mme Broustet, en taille L, vous tricotez : 20 m de bordure devant, 57 fois les 3 m de M1, la 1ère m de M1 (=1 m end sur l'end, env sur l'env), et 20 m de bordure devant = 212 m. Bon tricot!
02.01.2014 - 10:58
![]() Broustet wrote:
Broustet wrote:
Bonjour, je commence le point après les 4 cm de côtes.Si j'ai convenablement fait le point celui-ci se présente à l'endroit ainsi : une côte (m endroit) puis 5 mailles contrariées et une côte (m endroit) etc....(un point fantaisie sur 6 mailles) Est-ce exact ?
01.01.2014 - 15:44DROPS Design answered:
Bonjour Mme Broustet, le point fantaisie du diag. M1 se tricote sur 3 m, au 1er rang (endroit) vous avez : 1 m end, 1 m env, 1 m end, au 2ème rang (envers), tricotez *2 m end, 1 m env*. Au 1er rang de la veste, vous commencez et terminez par 1 m end (sur l'end = 1ère m de M1), au 2ème rang, vous commencez par 1 m env, puis reprenez le diag M1 de gauche à droite, soit de *-*. Bon tricot!
02.01.2014 - 09:38
![]() Annette wrote:
Annette wrote:
On Lewis 135-20 men's shawl collar sweater the pattern says to knit the ribbing and the body to 7.5" then bind off for a buttonhole. Is this right? Why would the bottom buttonhole be so high from the bottom edge? The diagram shows the first buttonhole right by the ribbing. Please clarify.
28.12.2013 - 19:16DROPS Design answered:
Dear Annette, it is correct that way, first buttonhole is not at the very bottom edge (as shown on the picture), but you may edit this to have more buttonholes and place the first one at the very bottom if you rather like that way. Happy knitting!
30.12.2013 - 15:25
|
|||||||
Lewis#lewisjacket |
|||||||
|
|
|||||||
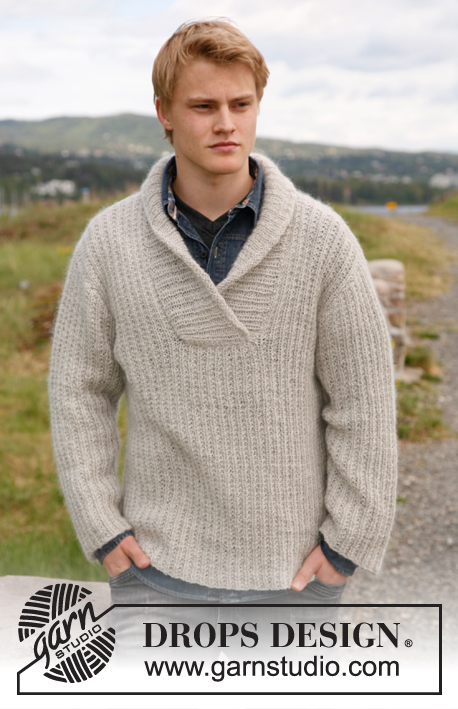
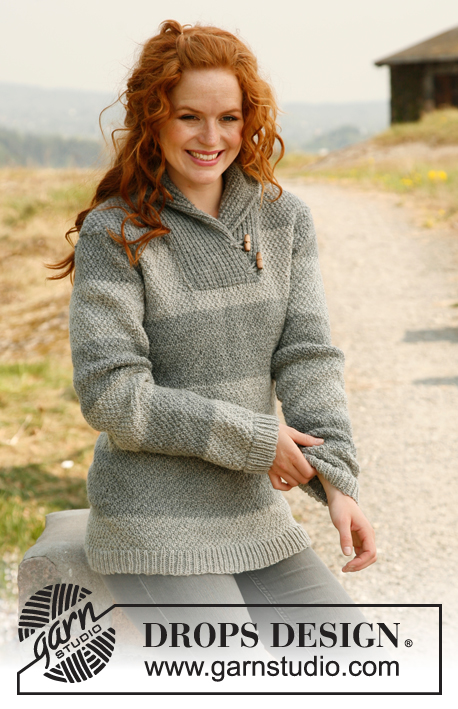
Knitted jacket for men with broad bands and shawl collar in DROPS Karisma and DROPS Kid-Silk. Size: S to XXXL.
DROPS 135-20 |
|||||||
|
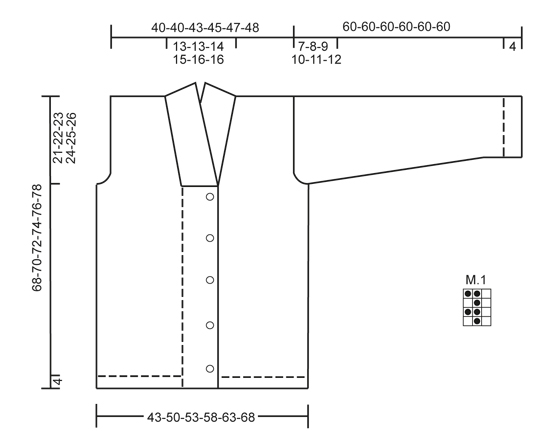
GARTER ST (back and forth on needle): K all rows. PATTERN: See diagram M.1 – diagram shows pattern from RS. BUTTON HOLES: Cast off for 5 button holes from RS on left front band. 1 button hole = cast off 5th st from mid front and cast on 1 new st on next row over this st. Cast off for button holes when piece measures: SIZE S: 14, 22, 30, 38 and 46 cm SIZE M: 15, 23, 31, 39 and 47 cm SIZE L: 16, 24, 32, 40 and 48 cm SIZE XL: 17, 25, 33, 41 and 49 cm SIZE XXL: 18, 26, 34, 42 and 50 cm SIZE XXXL: 19, 27, 35, 43 and 51 cm DECREASE TIP (applies to neck): Dec from RS inside 1 edge st in garter st. Dec AFTER 1 st as follows: Slip 1 st as if to K, K 1, psso. Dec BEFORE 1 st as follows: K 2 tog. ---------------------------------------------------------- BODY: Worked back and forth on circular needle from mid front. Cast on 176-200-212-227-248-263 sts (incl 20 band sts in each side towards mid front) on needle size 4.5 mm with 1 thread Karisma and 1 thread Kid-Silk. Work rib as follows (seen from from RS): 20 band sts in GARTER ST - see explanation above - * K 1, P 2 *, repeat from *-* until 21 sts remain, K 1 and 20 band sts in garter st. Then work K over K and P over P and band sts in garter st. When piece measures 4 cm, switch to needle size 5.5 mm. Continue with diagram M.1 and band sts in garter st – diagram M.1 starts and ends with 1 K st (seen from RS). When piece measures 14-15-16-17-18-19 cm, cast off for BUTTON HOLES on left front band - see explanation above! When piece measures 47-48-49-50-51-52 cm, work next row as follows: Cast off the first 19 sts, insert a marker (this marks where to start the knit up for collar), work 27-33-36-39-45-48 sts (= right front piece), cast off 6 sts for armhole, work 72-84-90-99-108-117 sts (= back piece), cast off 6 sts for armhole and work the rest of row (= 46-52-55-58-64-67 sts on left front piece). Turn and cast off the first 19 sts, insert a marker (this marks where to end the knit up for collar), work the rest of row = 27-33-36-39-45-48 sts. Finish each part separately. LEFT FRONT PIECE: = 27-33-36-39-45-48 sts. Continue with diagram M.1 as before and outermost st towards mid front in garter st. AT THE SAME TIME cast off for armhole at beg of every row from the side: 2 sts 0-2-2-3-4-5 times and 1 st 0-2-2-3-4-5 times. AT THE SAME TIME when piece measures 49-50-51-52-53-54 cm, dec 1 st towards the neck - SEE DECREASE TIP! Repeat dec every 5-5-5-5-3-4 cm a total of 3-3-4-3-5-4 times. After all cast offs and dec are done, 24-24-26-27-28-29 sts remain on needle. Cast off when piece measures 68-70-72-74-76-78 cm. RIGHT FRONT PIECE: Work as left front piece but reversed. BACK PIECE: = 72-84-90-99-108-117 sts. Continue with diagram M.1 while at the same time casting off for armholes at the beg of every row in each side as on front piece = 72-72-78-81-84-87 sts. When piece measures 66-68-70-72-74-76 cm, cast off the middle 22-22-24-25-26-27 sts for neck and finish each shoulder separately. At beg of next row from neck, dec 1 st = 24-24-26-27-28-29 sts remain on shoulder. Cast off when piece measures 68-70-72-74-76-78 cm. SLEEVE: Worked back and forth on needle. Cast on 50-53-53-56-56-59 sts (incl 1 edge st in each side) on needle size 4.5 mm with 1 thread Karisma and 1 thread Kid-Silk. Work as follows (seen from from RS): 1 edge st in garter st, * K 1, P 2 *, repeat from *-* and finish with 1 edge st in garter st. When piece measures 4 cm, switch to needle size 5.5 mm. Continue with diagram M.1 with 1 edge st in each side in garter st. AT THE SAME TIME when piece measures 10 cm, inc 1 st in each side. Repeat inc every 5-5-3½-3-2½-2½ cm a total of 9-9-12-12-15-15 times = 68-71-77-80-86-89 sts – work the inc sts gradually in diagram M.1. When piece measures 53-52-51-50-49-48 cm (shorter measurements in the larger sizes because of longer sleeve cap and broader shoulder width) cast off at beg of every row in each side: 4 sts 1 time, 2 sts 3 times and 1 st 1-2-4-5-7-8 times. Then cast off 2 sts in each side until piece measures 59 cm, then cast off 3 sts 1 time in each side. Cast off, the piece measures approx. 60 cm in all sizes. ASSEMBLY: Sew the shoulder seams. SHAWL COLLAR: Knit up sts (inside 1 edge st) on circular needle size 4.5 mm with 1 thread Karisma and 1 thread Kid-Silk - start mid front at marker on right front piece: Knit up approx. 40 to 50 sts up to shoulder, then 26 to 32 sts along the neck, and 40 to 50 sts down along left front piece until marker = 106 to 132 sts. K 1 row from WS while AT THE SAME TIME inc no of sts to 132-138-144-150-156-162. Then work rib as follows (seen from RS): 1 st in garter st, * K 1, P 2 *, repeat from *-* and finish with K 1 and 1 st in garter st. Continue like this until collar measures approx. 5 cm. Now inc 1 st in each of the middle 12 P-sections, seen from RS (= back of neck) = 144-150-156-162-168-174 sts. Continue with K over K and P over P until collar measures approx. 10 cm - adjust so that next row is from WS. K 3 rows over all sts, then cast off all sts with K from RS. Fasten collar with stitches in each side towards band – sew edge to edge to avoid a chunky seam. MORE ASSEMBLY: Sew in sleeves and sew on buttons. |
|||||||
Diagram explanations |
|||||||
|
|||||||
 |
|||||||
Have you finished this pattern?Tag your pictures with #dropspattern #lewisjacket or submit them to the #dropsfan gallery. Do you need help with this pattern?You'll find 14 tutorial videos, a Comments/Questions area and more by visiting the pattern on garnstudio.com. © 1982-2026 DROPS Design A/S. We reserve all rights. This document, including all its sub-sections, has copyrights. Read more about what you can do with our patterns at the bottom of each pattern on our site. |
|||||||


With over 40 years in knitting and crochet design, DROPS Design offers one of the most extensive collections of free patterns on the internet - translated to 17 languages. As of today we count 324 catalogues and 12260 patterns translated into English (UK/cm). 12260
We work hard to bring you the best knitting and crochet have to offer, inspiration and advice as well as great quality yarns at incredible prices! Would you like to use our patterns for other than personal use? You can read what you are allowed to do in the Copyright text at the bottom of all our patterns. Happy crafting!
Post a comment to pattern DROPS 135-20
We would love to hear what you have to say about this pattern!
If you want to leave a question, please make sure you select the correct category in the form below, to speed up the answering process. Required fields are marked *.