
Popular categories
Looking for a yarn?


Comments / Questions (3)
![]() Elena wrote:
Elena wrote:
C'è un errore, credo nella spiegazione degli aumenti nel dietro: "lavorare a diritto fino a quando rimangono 4 maglie, 1 maglia diritto, 1 maglia rovescio e finire con 2 maglie ad I-cord (= 2 maglie aumentate)" manca l'aumento alla fine del ferro
30.05.2025 - 00:40DROPS Design answered:
Buongiorno Elena, grazie per la segnalazione: abbiamo corretto il testo. Buon lavoro!
01.06.2025 - 14:26
![]() Elisa Soster wrote:
Elisa Soster wrote:
There's a mistake in the pattern: I-CORD: END OF ROW: Work 2 stitches as follows: Work until 2 stitches remain on needle, slip 1 stitch purlwise with strand in front of piece, knit 1. SHOULD BE : Work until 2 stitches remain on needle, knit 1, slip 1 stitch purlwise with strand in front of piece.
21.04.2025 - 12:53DROPS Design answered:
Dear Mrs Soster, I-Cord edge is correct, that's how it is supposed to be worked, see also in this video how to work these 2 -cord edge both at the beg and at the end of a row. Happy knitting!
23.04.2025 - 08:33
![]() Gudrun wrote:
Gudrun wrote:
Er det mulig å hekle denne? I såfall, hvordan?
18.04.2025 - 20:36DROPS Design answered:
Hei Gudrun, Akkurat denne toppen har vi ikke hekle oppskrift til. Men du finner våre heklet topper hvis du skriver "heklet topp" i søkeboksen. God fornøyelse!
23.04.2025 - 06:52
|
|||||||
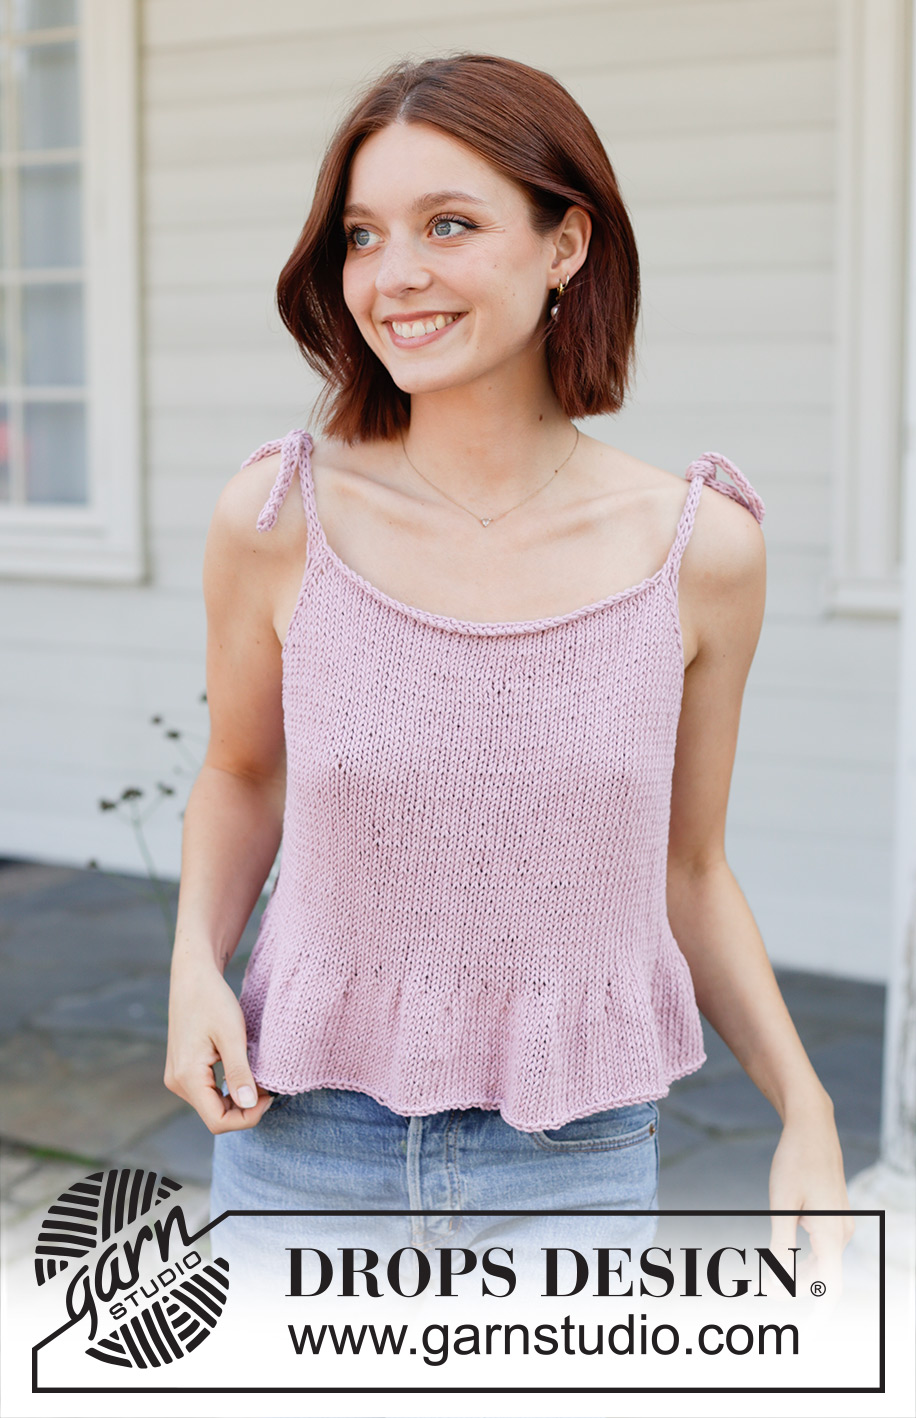
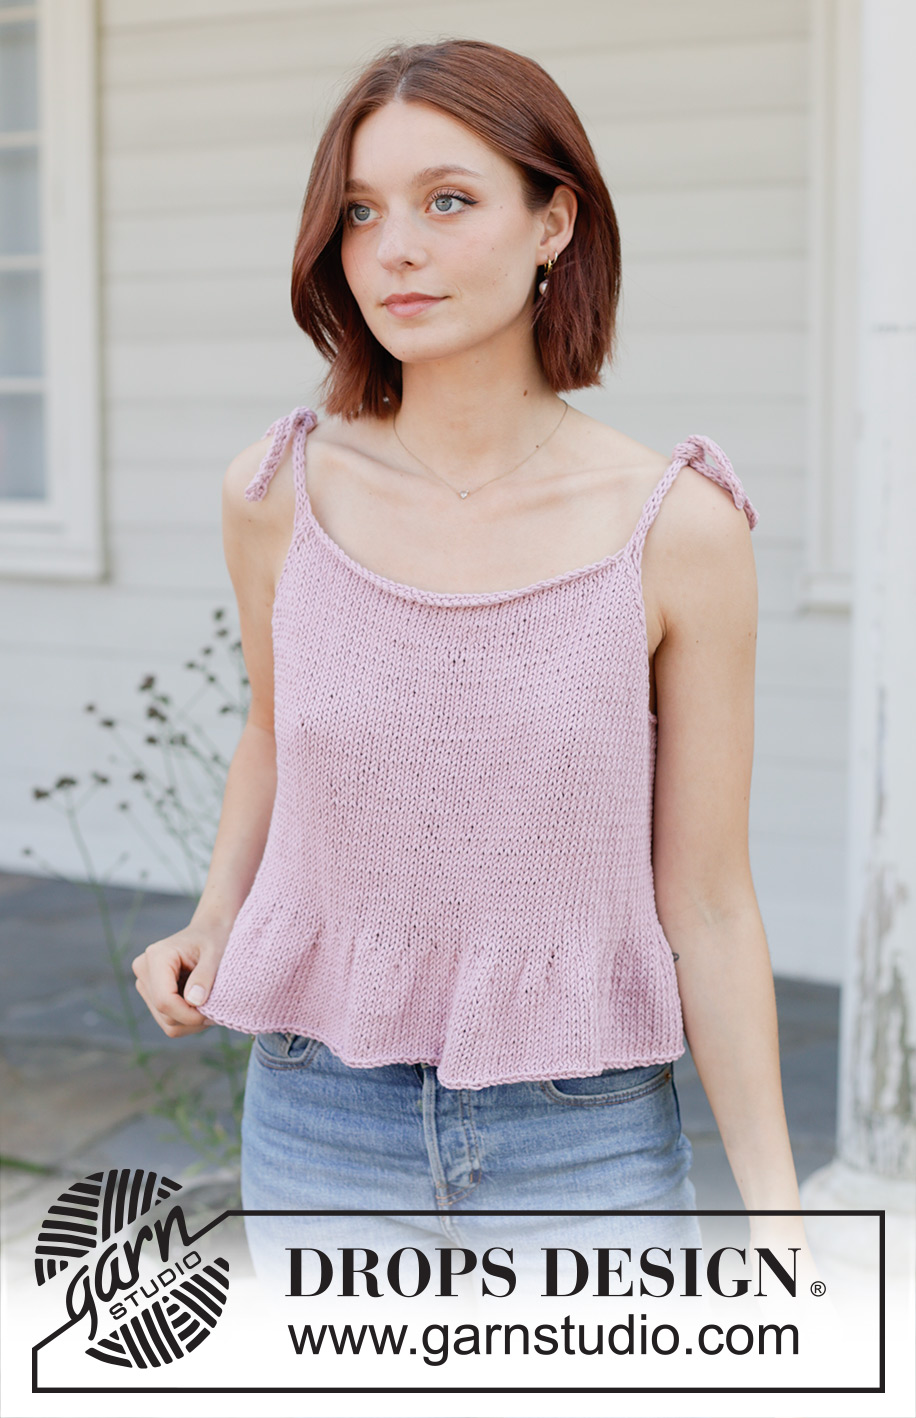
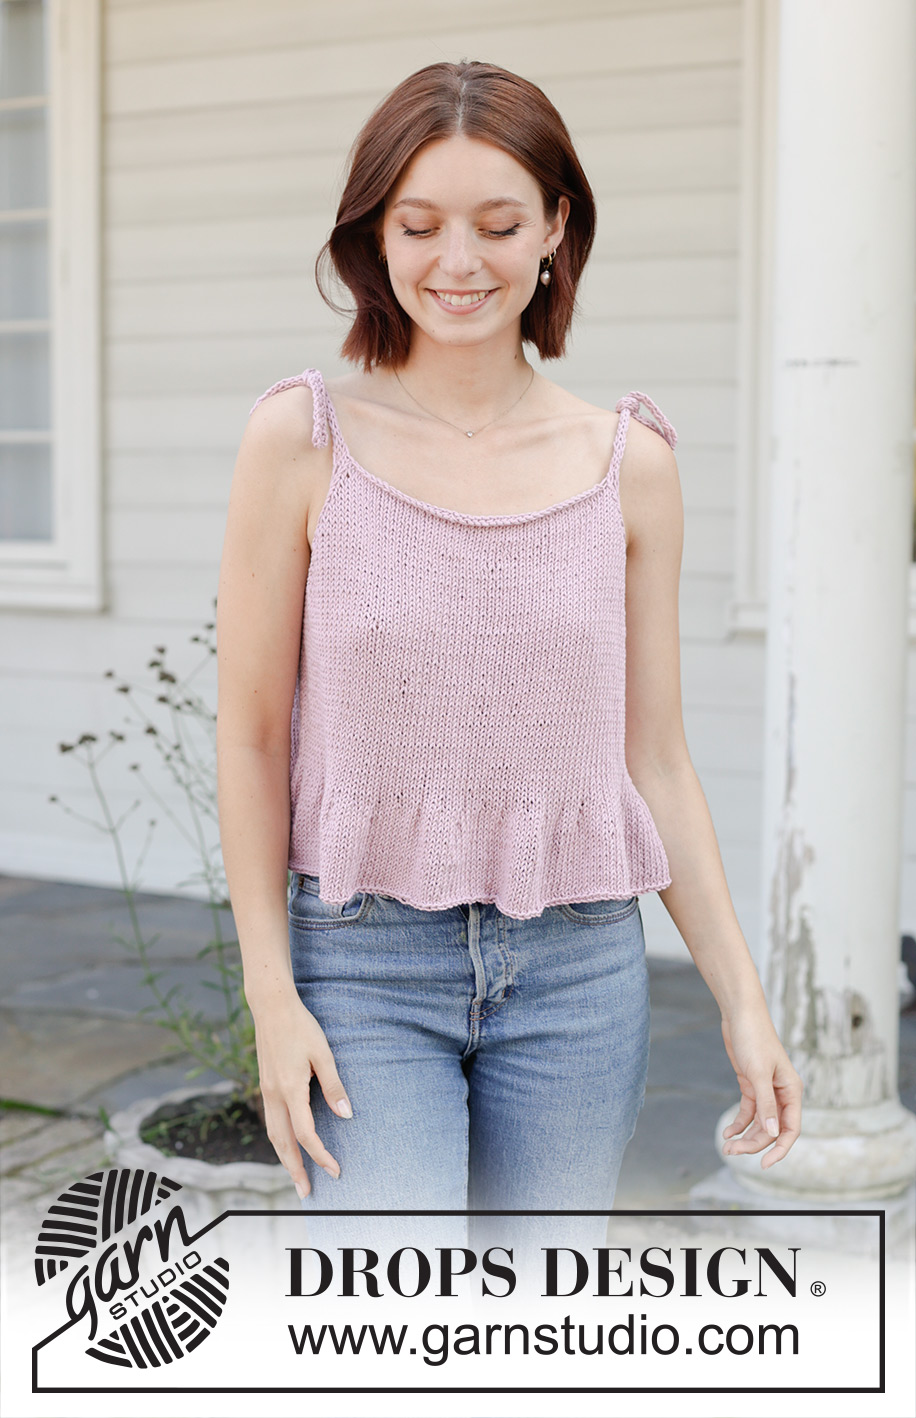
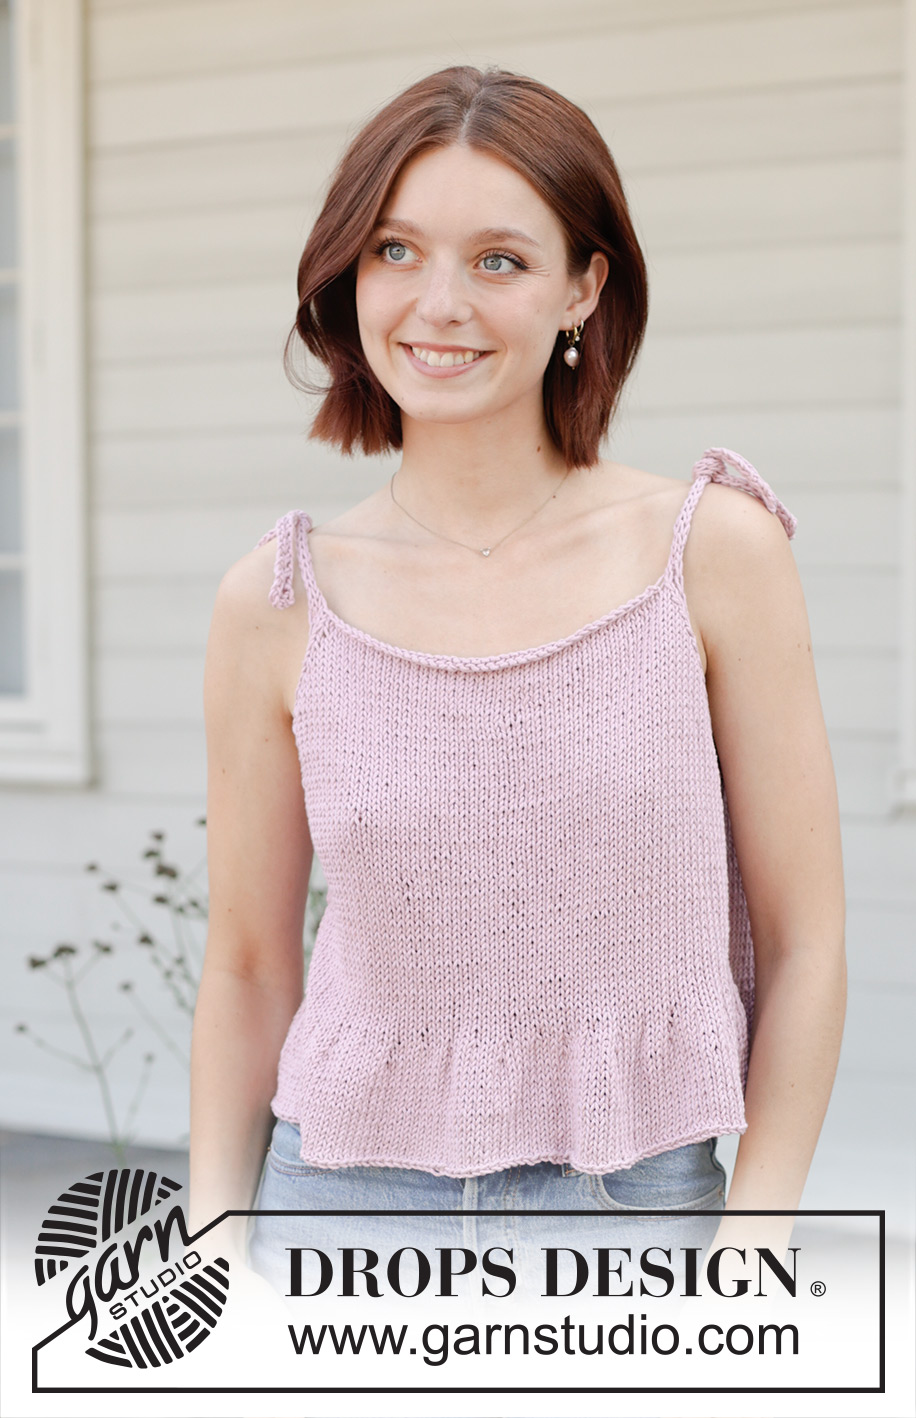
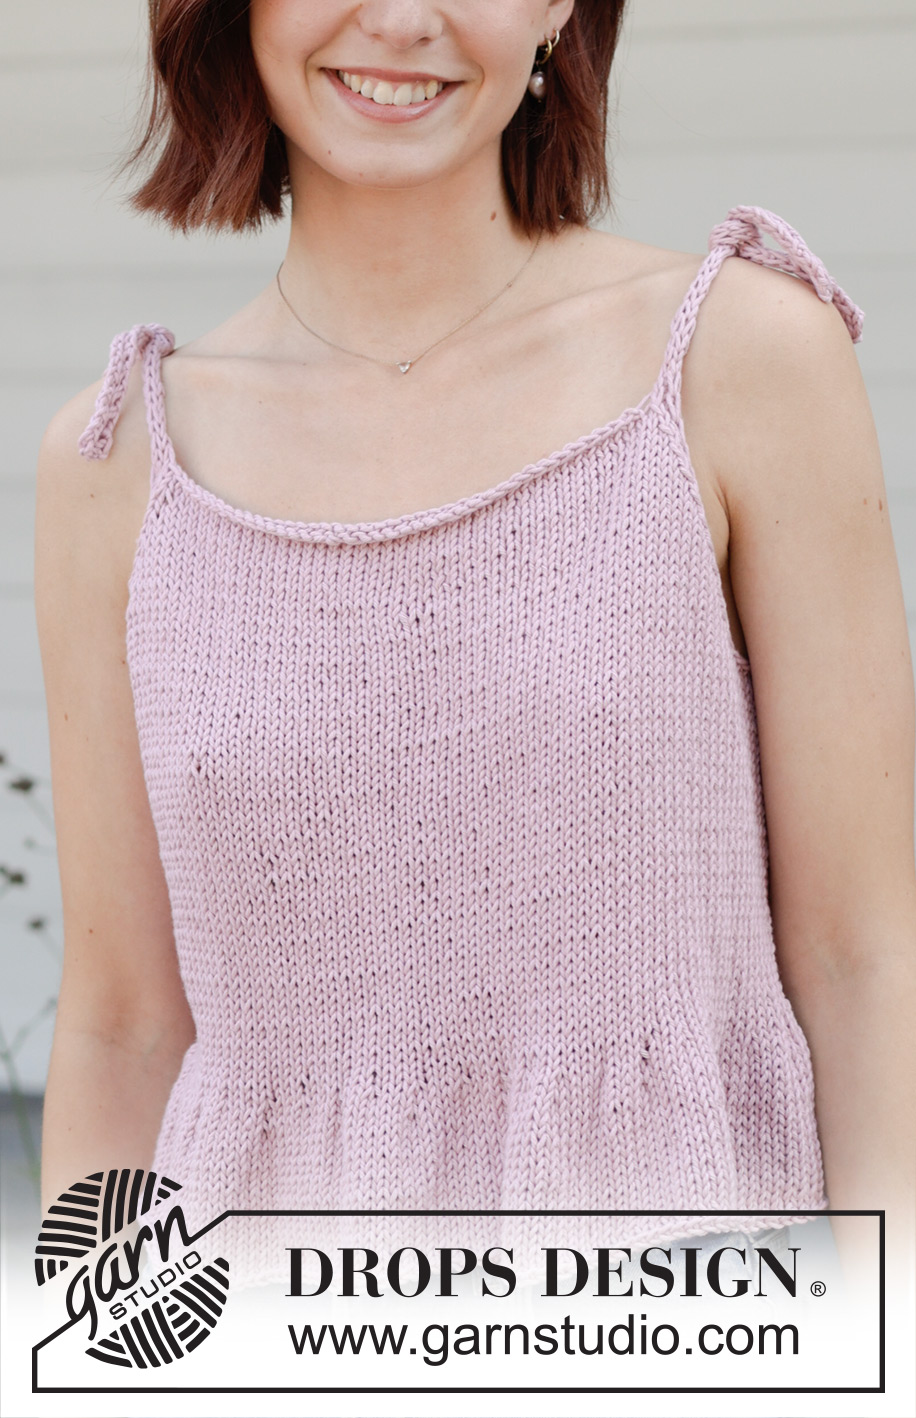
Dancing Darling Top#dancingdarlingtop |
|||||||
 |
 |
||||||
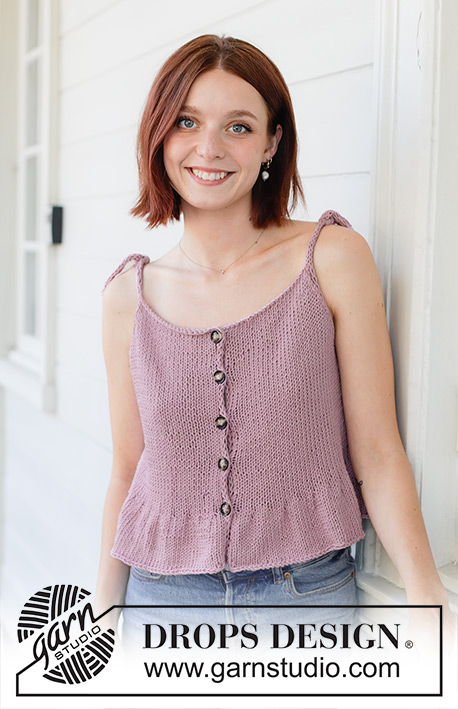
Knitted top in DROPS Paris. Piece is knitted top down with ties, I-cord and flounce. Size: S - XXXL.
DROPS 257-8 |
|||||||
|
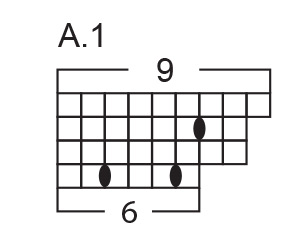
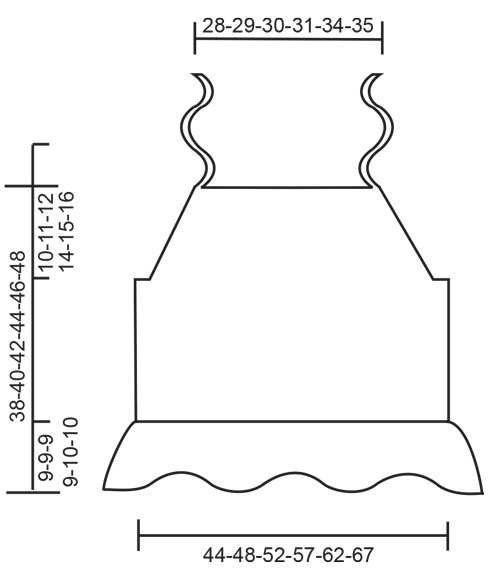
---------------------------------------------------------- EXPLANATION FOR THE PATTERN: ---------------------------------------------------------- PATTERN: See diagram A.1. I-CORD: BEGINNING OF ROW: Work 2 stitches as follows: Slip 1 stitch purlwise with strand in front of piece, knit 1. END OF ROW: Work 2 stitches as follows: Work until 2 stitches remain on needle, slip 1 stitch purlwise with strand in front of piece, knit 1. Work the same way both from right side and wrong side. INCREASE TIP: All increases are done from the right side. Increase 1 stitch by making 1 yarn over, on next row (= wrong side) work yarn overs as follows: AT THE BEGINNING OF ROW: Slip stitch off left needle and put it back on left needle but the opposite way (insert left needle in from behind when slipping it back on needle). Purl yarn overs in front loop of stitches to avoid holes. Then work the new stitches in stocking stitch. AT THE END OF ROW: Purl yarn overs in back loop of stitches to avoid holes. Then work the new stitches in stocking stitch. ---------------------------------------------------------- START THE PIECE HERE: ---------------------------------------------------------- TOP - SHORT OVERVIEW OF THE PIECE: First work 4 ties for straps. Then work front piece and back piece separately back and forth, work top down. Slip front piece and back piece together for body, then finishing body downwards in the round on circular needle. If 0 stitches is given for the chosen size, it means that you skip the information and jump to next information. TIES: Work 4 ties for straps (= 2 straps for front piece and 2 straps for back piece). Work ties as follows: Cast on 4 stitches on double pointed needles size 5 mm with DROPS Paris. Work in stocking stitch back and forth until tie measure approx. 30 cm. Work last row from wrong side. Put ties aside on a thread, work over these stitches when casting on stitches for back piece and front piece. BACK PIECE: Now cast on stitches for back piece between 2 of the ties, use circular needle size 5 mm and work as follows: Knit from right side over the 4 stitches from one of the ties, cast on 40-42-43-45-49-52 new stitches on needle, finish by knitting from right side over the 4 stitches in one of the other ties = 48-50-51-53-57-60 stitches. Insert 1 marker in the middle of the 40-42-43-45-49-52 new stitches on needle, measure piece from this marker. Work next row as follows from wrong side: Work 2 stitches I-CORD - read explanation above, knit 1, purl until 3 stitches remain, knit 1 and finish with 2 stitches I-CORD. Now work back and forth with knit over knit and purl over purl and 2 stitches I-cord in each side while AT THE SAME TIME increasing for armholes. Increase 1 stitch in each side inside 4 stitches - read INCREASE TIP, increase from right side as follows: Work 2 stitches I-CORD - read explanation above, purl 1, knit 1, increase 1 stitch, knit until 4 stitches remain, increase 1 stitch, knit 1, purl 1 and finish with 2 stitches I-cord (= 2 stitches increased). Increase like this every other row 11-12-13-15-16-17 times in total = 70-74-77-83-89-94 stitches. Work without increases until piece measures 10-11-12-14-15-16 cm from marker, last row is from wrong side. Cut the yarn and put piece aside while working a front piece. FRONT PIECE: Work as on back piece. When front piece is finish and the same length as back piece, put the pieces together for body. Work next row as follows from right side: Knit over the 70-74-77-83-89-94 stitches from front piece, cast on 4-8-12-14-16-20 new stitches on needle, knit over the 70-74-77-83-89-94 stitches from back piece, cast on 4-8-12-14-16-20 new stitches on needle = 148-164-178-194-210-228 stitches on needle. Then work body in the round in stocking as explained below. BODY: = 148-164-178-194-210-228 stitches. Insert 1 marker in one side of piece (= in the middle of the 4-8-12-14-16-20 stitches that were cast on under sleeve). Work until marker, round begins here and work in the round. Work until piece measures 29-31-33-35-36-38 cm from marker. Knit 1 round while decreasing 4-2-4-2-0-0 stitches evenly = 144-162-174-192-210-228 stitches. Now increase for flounce, work as follows: Work A.1 24-27-29-32-35-38 times in the round on round. When A.1 has been worked, there are 216-243-261-288-315-342 stitches on needle. Continue with stocking stitch in the round until piece measures 38-40-42-44-46-48 cm from marker – flounce measures approx. 9-9-9-9-10-10 cm. Cast off somewhat loosely by working every other stitch knit and purl. Top measures 38-40-42-44-46-48 cm from marker mid back – tie the ties over the shoulders approx. 6 cm from front piece or in desired height. |
|||||||
Diagram explanations |
|||||||
|
|||||||
 |
|||||||
 |
|||||||
Have you finished this pattern?Tag your pictures with #dropspattern #dancingdarlingtop or submit them to the #dropsfan gallery. Do you need help with this pattern?You'll find 21 tutorial videos, a Comments/Questions area and more by visiting the pattern on garnstudio.com. © 1982-2026 DROPS Design A/S. We reserve all rights. This document, including all its sub-sections, has copyrights. Read more about what you can do with our patterns at the bottom of each pattern on our site. |
|||||||

With over 40 years in knitting and crochet design, DROPS Design offers one of the most extensive collections of free patterns on the internet - translated to 17 languages. As of today we count 324 catalogues and 12145 patterns translated into English (UK/cm). 12145
We work hard to bring you the best knitting and crochet have to offer, inspiration and advice as well as great quality yarns at incredible prices! Would you like to use our patterns for other than personal use? You can read what you are allowed to do in the Copyright text at the bottom of all our patterns. Happy crafting!
Post a comment to pattern DROPS 257-8
We would love to hear what you have to say about this pattern!
If you want to leave a question, please make sure you select the correct category in the form below, to speed up the answering process. Required fields are marked *.