
Popular categories
Looking for a yarn?


Comments / Questions (5)
![]() Martine CACHE wrote:
Martine CACHE wrote:
Bonjour. Je ne comprends pas les jetés d'augmentation RAGLAN. sur les 4 tours. Au Tour3: "1 jeté après maille du raglan -2" etc··· Où faire le jeté ? La maille du raglan après le milieu Dos amène à être dans la manche or -2 donc Avant la maille du raglan dans le dos. Même question pour la suite pour les "avant" ou "après" les mailles du raglan et les chiffres négatifs. Je me retrouve avec les mailles des raglan décalées. Pouvez-vous m'expliquer ? Merci
20.03.2025 - 19:35DROPS Design answered:
Bonjour Mme Cache, les chiffres ne sont pas négatifs, le tiret indique juste le numéro du marqueur/raglan. ; ainsi, vous allez augmenter au tour 3 pour le devant et le dos seulement, autrement dit, faites 1 jeté après la maille du raglan-2 = au début du devant + avant la maille du raglan -3 = à la fin du devant mais aussi après la maile du raglan -4 = au début du dos et avant la maille du raglan-1 = à la fin du tour. Bon tricot!
21.03.2025 - 08:26
![]() Sylvie wrote:
Sylvie wrote:
Bonjour, pour un échantillon de 21m, comment obtenir en taille M 15 cm de col, soit 30cm en circonférence ? Vous donnez 116 m, ce qui fait un col beaucoup plus large. Merci pour votre réponse
20.02.2025 - 10:04DROPS Design answered:
Bonjour Sylvie, les 15 cm de l'encolure mesurés dans le schéma correspondent à la largeur de l'encolure, pull posé à plat. Notez que dans les mailles montées, sont également comprises les mailles des épaules (10 cm de chaque côté). Si votre échantillon est juste et que vous conservez la bonne tension tout du long, vous obtiendrez les mêmes mesures que dans le schéma. Bon tricot!
20.02.2025 - 14:39
![]() Maggie Robinson wrote:
Maggie Robinson wrote:
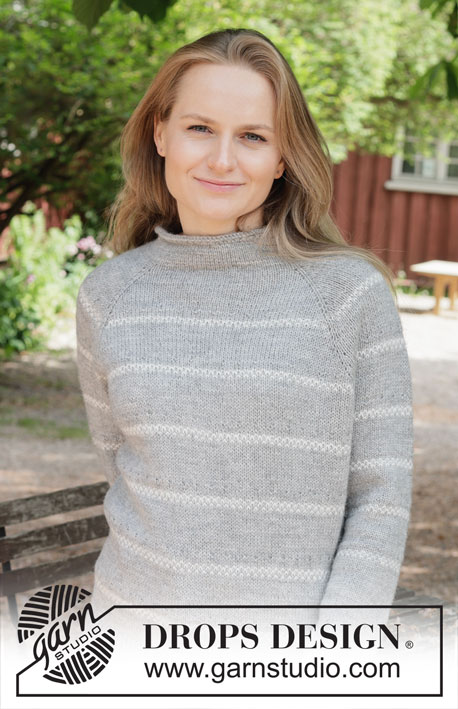
Can you tell me what is the measurement between each stripe on Moon Phase jumper? Maggie
19.01.2025 - 16:00DROPS Design answered:
Dear Mrs Robinson, read more about stripes under STRIPES WITH PATTERN:, between each A.1 (6 rounds), work 14 rounds stocking stitch with light grey. Happy knitting!
20.01.2025 - 09:14
![]() Susi wrote:
Susi wrote:
Ich hatte doch von den regelmäßigen Löchern über den weißen Streifen gesprochen. Auf den Fotos sehr gut im Rumpfbereich erkennbar... von den Raglanzunahmen war nicht die Rede.
26.10.2024 - 10:34DROPS Design answered:
Liebe Susi, in den weissen Streifen sind es keine Löcher, diese Streifen werden mit 2 Farben gestrickt - siehe Diagram A.1. - wo man auch eine linke Masche regelmäßig (1. M A.1) strickt. Viel Spaß beim Stricken !
28.10.2024 - 10:21
![]() Susi wrote:
Susi wrote:
Was sind das für regelmäßige Lochreihen jeweils oberhalb der Streifen? In den Fotos gut in Rumpfhöhe erkennbar?
25.10.2024 - 10:17DROPS Design answered:
Liebe Susi, meinen Sie die Raglanzunahmen? Sonnst sehe ich nicht was Sie hier meinen, können Sie bitte anders ausdrücken im Falle ich misverstehe? Danke im voraus für Ihr Verständnis.
25.10.2024 - 13:09
|
||||||||||
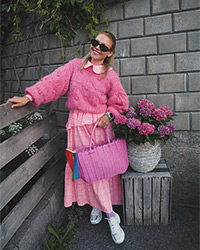
Moon Phase#moonphasesweater |
||||||||||
 |
 |
|||||||||
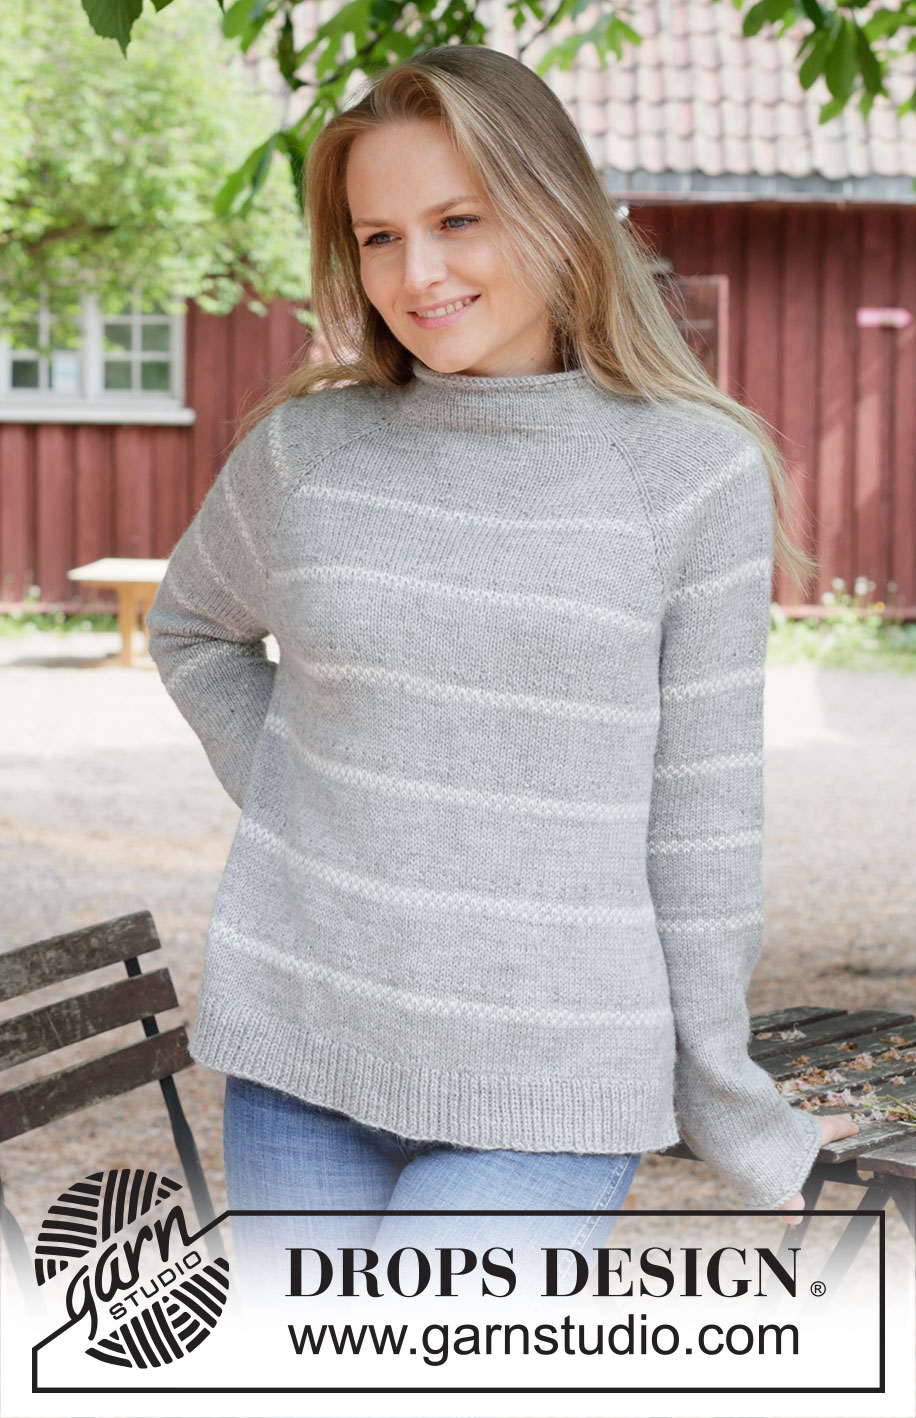
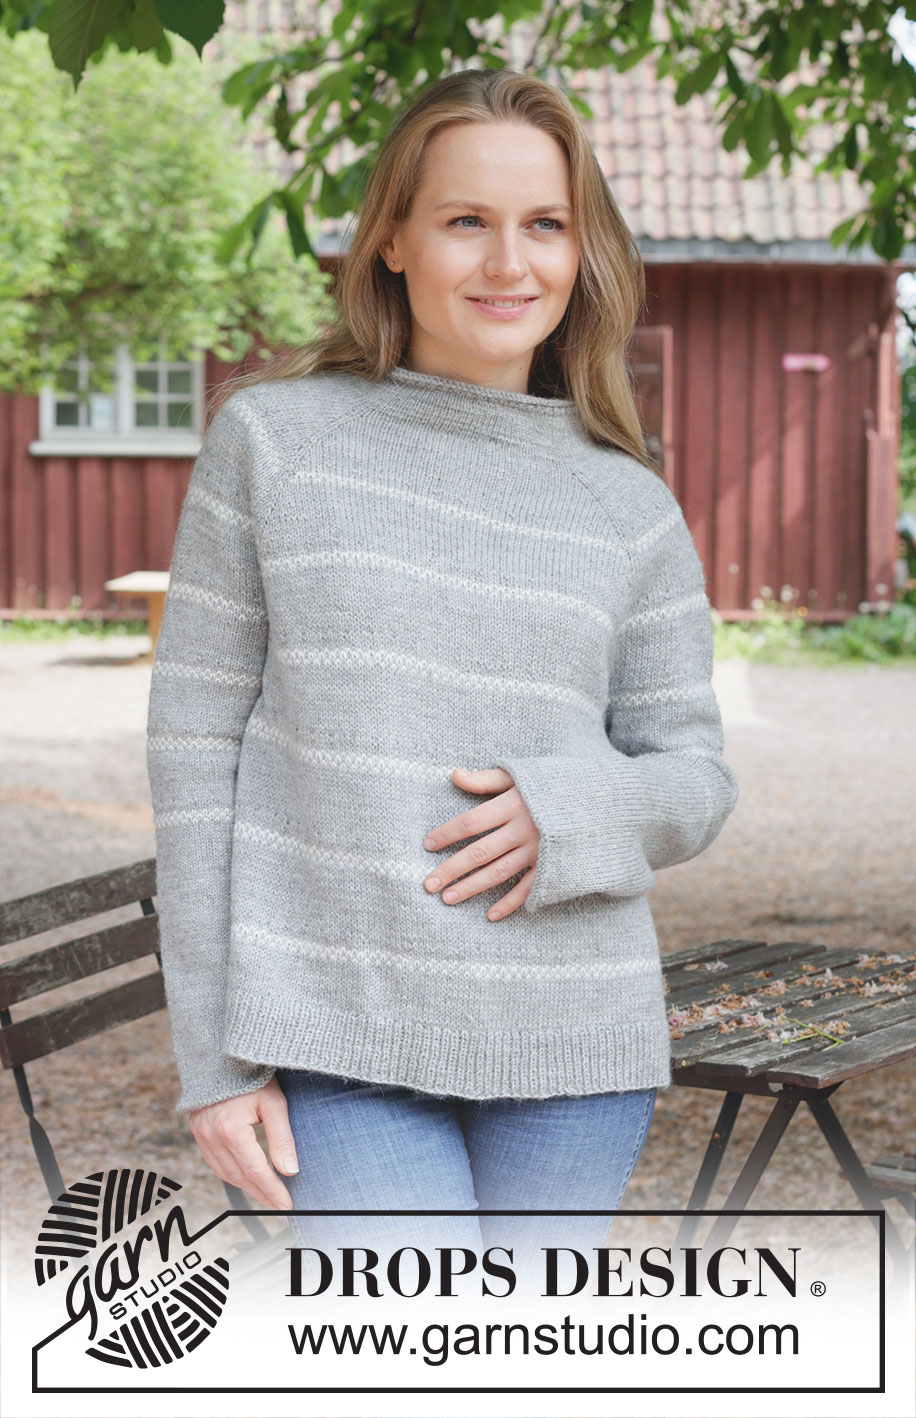
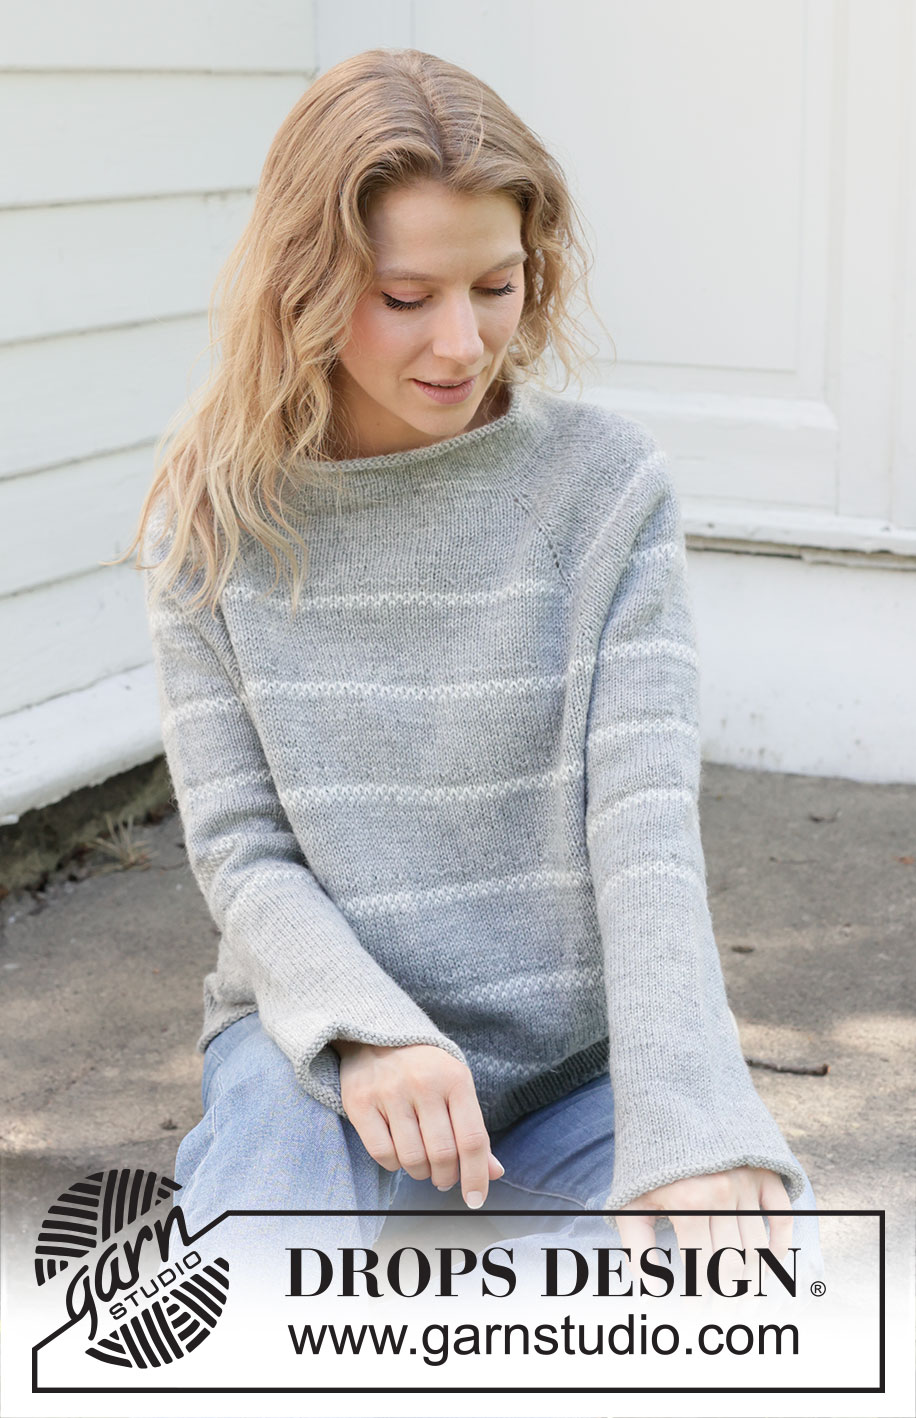
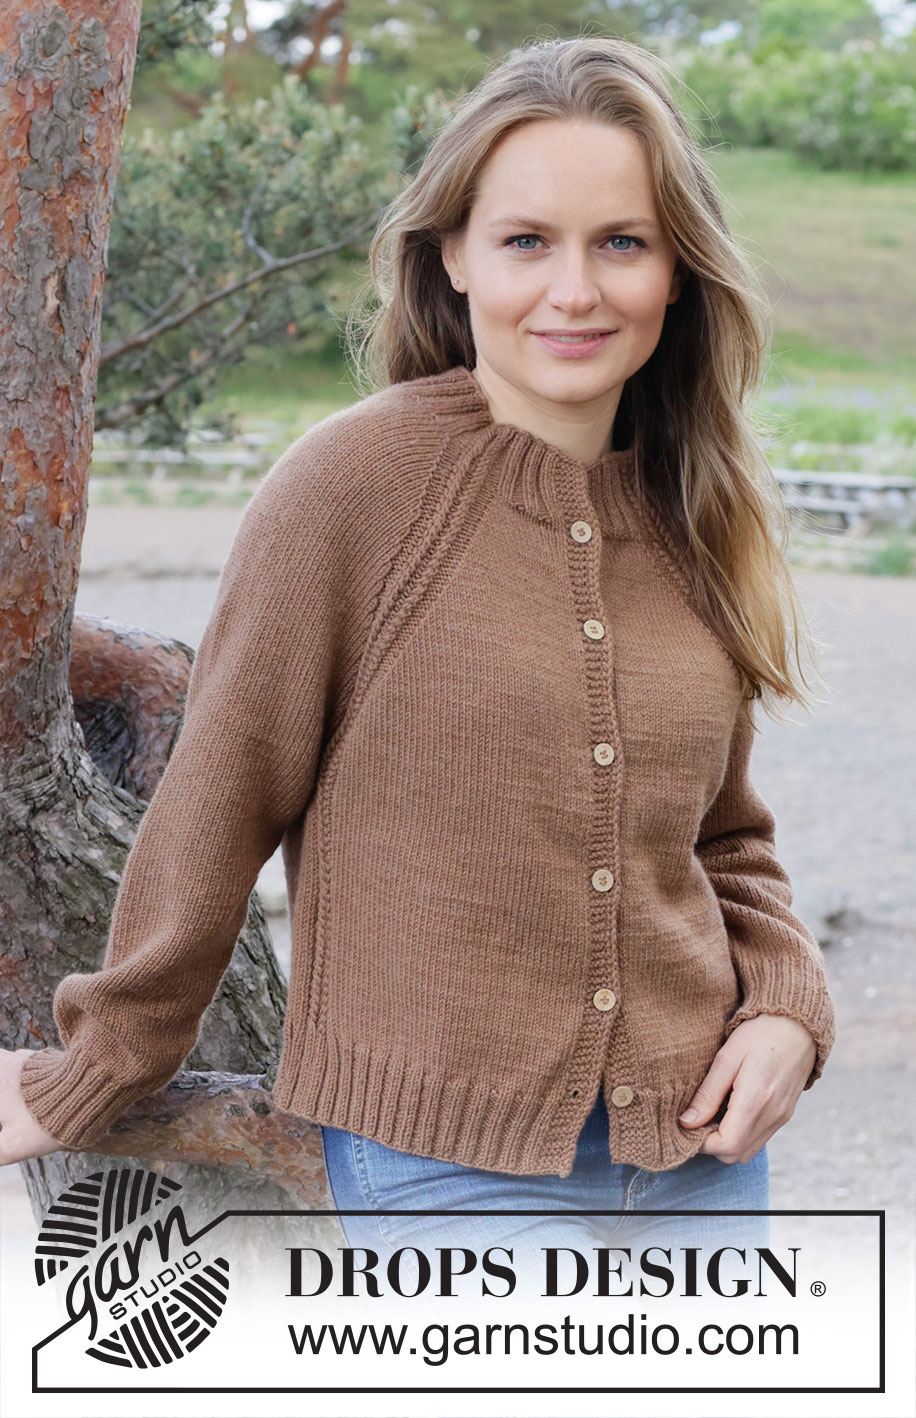
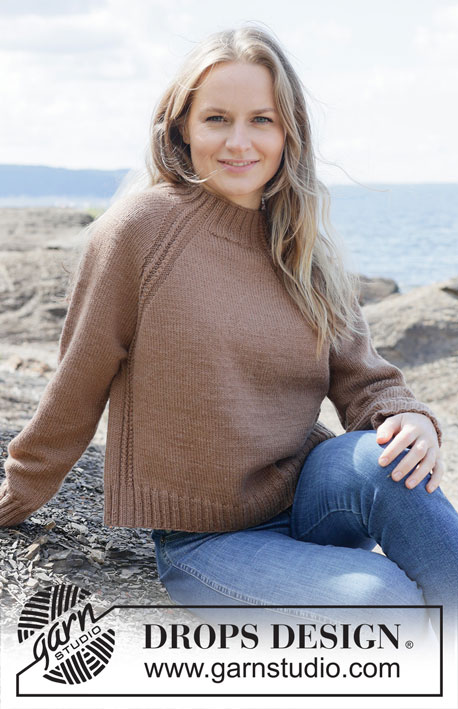
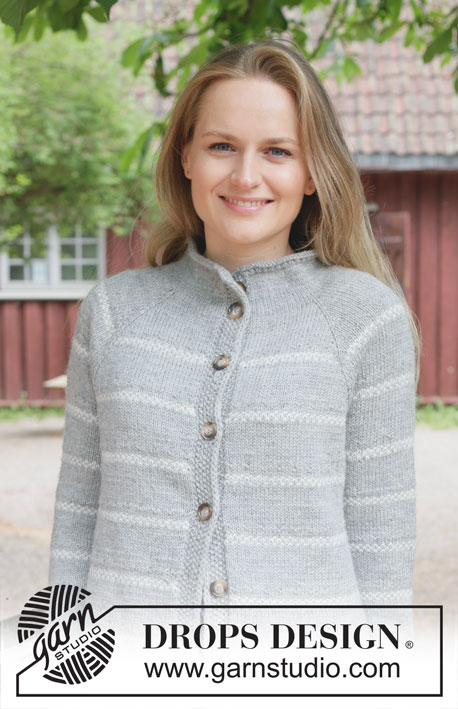
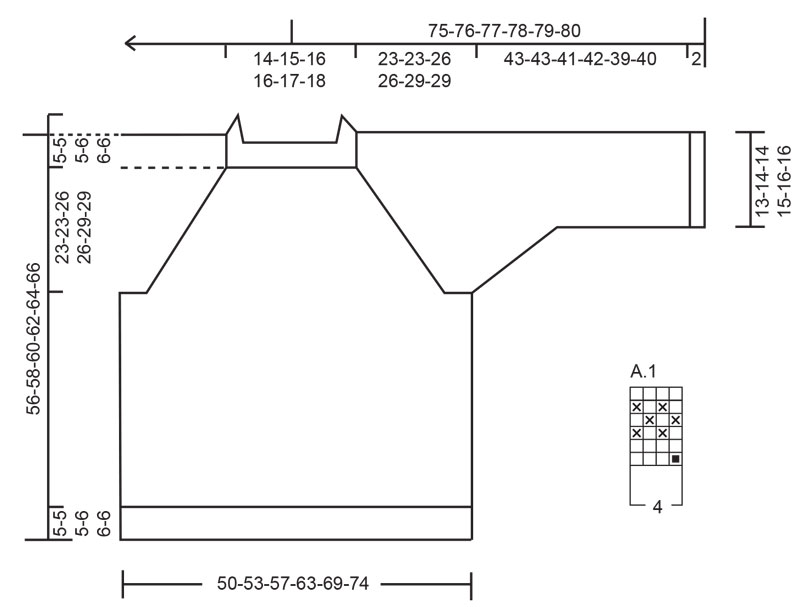
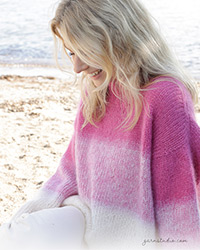
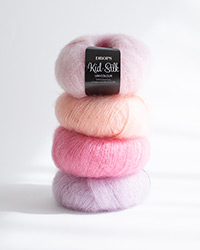
Knitted jumper in DROPS Karisma. The piece is worked top down with raglan, two-coloured stripe pattern and rolled edges. Sizes S - XXXL.
DROPS 252-26 |
||||||||||
|
------------------------------------------------------- EXPLANATIONS FOR THE PATTERN: ------------------------------------------------------- PATTERN: See diagram A.1. STRIPES WITH PATTERN: * Work pattern according to diagram A.1 (= 6 rounds), then 14 rounds stocking stitch with colour light grey *, work from *-* a total of 5 times, work pattern according to diagram A.1, finish the piece with stocking stitch and colour light grey. INCREASE TIP: Increase 1 stitch by picking up the stitch around the outermost stitch on the left needle (from the previous round), knit this stitch. RAGLAN: Increase 1 stitch by making 1 yarn over which is worked as follows on the next round: BEFORE MARKER: Slip the yarn over off the left needle and replace it twisted (insert the left needle through the back when replacing it). Knit the front loop to avoid a hole. Then work the new stitches in stocking stitch. AFTER MARKER: Knit through the back loop to avoid a hole. Then work the new stitches in stocking stitch. DECREASE TIP: Decrease 1 stitch on each side of the marker-stitch as follows: Work until there are 2 stitches left before the marker-stitch, knit 2 together, knit 1 (marker-stitch), slip 1 stitch knit-wise, knit 1 and pass the slipped stitch over the knitted stitch (2 stitches decreased). ------------------------------------------------------- START THE PIECE HERE: ------------------------------------------------------- JUMPER – SHORT OVERVIEW OF THE PIECE: The pattern uses both long and short needles; start with the length which fits the number of stitches and change when necessary. The neck and yoke are worked in the round with circular needle, top down and from the right back shoulder. When the yoke is finished, it is divided for the body and sleeves and the body continued in the round, while the sleeves wait. The sleeves are worked top down, in the round. If there is a «0» in your chosen size, skip the information and go straight to the next instruction. NECK: Cast on 110-116-120-128-132-140 stitches with circular needle size 4 mm and colour light grey DROPS Karisma. Change to needle size 3 mm (casting on with a larger needle size makes the cast-on edge elastic). Knit 3 rounds, then work 2 rounds of rib (knit 1, purl 1). Continue with stocking stitch until the neck measures 6-6-6-7-7-7 cm from the cast-on edge. AT THE SAME TIME, increase 2-12-8-16-20-36 stitches evenly on the last round – read INCREASE TIP = 112-128-128-144-152-176 stitches. The round begins right back shoulder. Insert 1 marker after the first 39-43-43-49-51-57 stitches (approx. mid-front), the piece is now measured from here. YOKE: Change to circular needle size 4 mm. Insert 4 markers as follows, without working the stitches and each marker inserted into a stitch (raglan-stitch) which is always worked in stocking stitch with colour light grey. Insert 1 marker in the first stitch, count 21-21-21-25-25-25 stitches (= sleeve), insert 1 marker in the next stitch, count 33-41-41-45-49-61 stitches (= front piece), insert 1 marker in the next stitch, count 21-21-21-25-25-25 stitches (= sleeve), insert 1 marker in the next stitch. There are 33-41-41-45-49-61 stitches left after the last marker (= back piece). You now increase for RAGLAN and work STRIPES WITH PATTERN – read descriptions above and read both the next 2 sections before continuing. RAGLAN: ROUND 1: Knit and increase for raglan by making 1 yarn over before and after each raglan-stitch (8 increased stitches). ROUND 2: Work the new stitches in stocking stitch (remember to twist the yarn overs as described under RAGLAN). Work ROUNDS 1 and 2 a total of 4-8-12-8-8-12 times (8-16-24-16-16-24 worked rounds) = 144-192-224-208-216-272 stitches. Remember to maintain the knitting tension. Continue with stocking stitch/pattern and increase as follows: ROUND 1: Increase by making 1 yarn over before and after each raglan-stitch (8 increased stitches). ROUND 2: Work the new stitches in stocking stitch/into the pattern. ROUND 3: Increase by making 1 yarn over after raglan-stitch-2, before raglan-stitch-3, after raglan-stitch-4 and before raglan-stitch-1, i.e., you only increase on the front and back pieces, not on the sleeves (4 increased stitches). ROUND 4: Work the new stitches in stocking stitch/into the pattern. Work rounds 1 to 4 a total of 14-12-12-14-16-14 times (56-48-48-56-64-56 rounds worked). All increases for raglan are now finished (a total of 32-32-36-36-40-40 times on the front and back pieces and 18-20-24-22-24-26 times on the sleeves) = 312-336-368-376-408-440 stitches. The yoke measures approx. 23-23-26-26-29-29 cm from the marker mid-front. Now divide for the body and sleeves. STRIPES IN PATTERN: When you have worked 16 rounds with colour light grey after the neck, work STRIPES IN PATTERN. Work as follows each time A.1 is worked: Knit the first raglan-stitch with colour light grey, increase 1 stitch for raglan, work A.1 as far as raglan-stitch-2, increase before/after the raglan-stitch (which is knitted with colour light grey), work A.1 as far as raglan-stitch-3 (A.1 starts in the same way as A.1 finished before the raglan-stitch), increase before/after the raglan-stitch (which is knitted with colour light grey), work A.1 as far as raglan-stitch-4 (A.1 starts in the same way as A.1 finished before the raglan-stitch), increase before/after the raglan-stitch (which is knitted with colour light grey), work A.1 as far as raglan-stitch-1 (A.1 starts in the same way as A.1 finished before the raglan-stitch), increase before the raglan-stitch. DIVIDE FOR BODY AND SLEEVES: Place the first 59-63-71-71-75-79 stitches on a thread for the sleeve, cast on 7-7-7-15-15-15 stitches (in side mid-under sleeve), work 97-105-113-117-129-141 stitches as before (= front piece), place the next 59-63-71-71-75-79 stitches on a thread for the sleeve, cast on 7-7-7-15-15-15 stitches (in side mid-under sleeve), work the last 97-105-113-117-129-141 stitches as before (= back piece). The body and sleeves are finished separately. BODY: = 208-224-240-264-288-312 stitches. Insert 1 marker in the middle stitch of the 7-7-7-15-15-15 cast-on stitches under one sleeve. Work to the marker. The new round begins here. Continue with stocking stitch and stripes in the round until the piece measures 46-48-50-50-52-54 cm from the marker mid-front (after the last stripe with A.1, continue with stocking stitch and colour light grey). Change to circular needle size 3 mm. Work rib (knit 1, purl 1), AT THE SAME TIME increase 44-44-48-54-62-62 stitches evenly on the first round = 252-268-288-318-350-374 stitches. When the rib measures 5-5-5-6-6-6 cm, cast off. The jumper measures approx. 51-53-55-56-58-60 cm from the marker mid-front and 56-58-60-62-64-66 cm from the shoulder. SLEEVES: Place the 59-63-71-71-75-79 sleeve-stitches from 1 thread on circular needle size 4 mm. Knit up 1 stitch in each of the 7-7-7-15-15-15 cast-on stitches under the sleeve = 66-70-78-86-90-94 stitches. Insert 1 marker in the middle stitch under the sleeve. The marker is used when decreasing under the sleeve. Now decrease and work pattern – read the next 2 sections before continuing. DECREASE: When the sleeve measures 2 cm from the division, decrease 2 stitches under the sleeve – read DECREASE TIP. Decrease like this every 2-2-1½-1-1-1 cm a total of 5-6-9-12-12-13 times = 56-58-60-62-66-68 stitches. PATTERN: Remember to decrease. Start at the marker-stitch under the sleeve and continue the pattern from the yoke - A.1 will not fit under the sleeve. Work until the sleeve measures 43-43-41-42-40-40 cm from the division (after the last stripe, continue with stocking stitch and colour light grey). Change to double pointed needles size 3 mm. Work 2 rounds of rib (knit 1, purl 1), then 3 rounds of stocking stitch (= rolled-edge). Change to double pointed needles size 4 mm. Cast off with knit. The sleeve measures approx. 45-45-43-44-42-42 cm from the division. |
||||||||||
Diagram explanations |
||||||||||
|
||||||||||
|
||||||||||
Have you finished this pattern?Tag your pictures with #dropspattern #moonphasesweater or submit them to the #dropsfan gallery. Do you need help with this pattern?You'll find 27 tutorial videos, a Comments/Questions area and more by visiting the pattern on garnstudio.com. © 1982-2025 DROPS Design A/S. We reserve all rights. This document, including all its sub-sections, has copyrights. Read more about what you can do with our patterns at the bottom of each pattern on our site. |
||||||||||
With over 40 years in knitting and crochet design, DROPS Design offers one of the most extensive collections of free patterns on the internet - translated to 17 languages. As of today we count 314 catalogues and 11831 patterns translated into English (UK/cm). 11831
We work hard to bring you the best knitting and crochet have to offer, inspiration and advice as well as great quality yarns at incredible prices! Would you like to use our patterns for other than personal use? You can read what you are allowed to do in the Copyright text at the bottom of all our patterns. Happy crafting!
Post a comment to pattern DROPS 252-26
We would love to hear what you have to say about this pattern!
If you want to leave a question, please make sure you select the correct category in the form below, to speed up the answering process. Required fields are marked *.