
Popular categories
Looking for a yarn?


Comments / Questions (23)
![]() Kethnaly wrote:
Kethnaly wrote:
Bonjour, Pouvez-vous expliquer comment faire les côtes mousse? 1 côte mousse = Tricoter 2 rangs endroit.
14.12.2022 - 09:30DROPS Design answered:
Bonjour Mme Kethnaly, effectivement, pour tricoter 1 côte mousse, on tricote 1 rang endroit sur l'endroit puis 1 rang endroit sur l'envers. Retrouvez dans cette vidéo comment tricoter au point mousse. Bon tricot!
14.12.2022 - 13:12
![]() Maminou wrote:
Maminou wrote:
Est il possible d’avoir les explications du modèle en français et en cm. Je saurai adapter selon la laine utilisée ici. Merci d’avance pour mes petites filles qui aiment beaucoup votre modèle.
10.12.2022 - 18:16DROPS Design answered:
Bonjour, vous pouvez voir les explications en français ici: https://www.garnstudio.com/pattern.php?id=10083&cid=8. Bon tricot!
11.12.2022 - 20:40
![]() Monique Bannink-Douven wrote:
Monique Bannink-Douven wrote:
Ik brei al heel lang maar ik begrijp het patroon echt niet. Begin ik met rondbreinaald of een gewone naald en ga later met rondbreinaald verder. De steken, zet ik 2x steken op.............er staat zet 28-28 steken op....begrijp het echt niet.....filmpje zou handig zijn
15.11.2022 - 15:35DROPS Design answered:
Dag Monique,
De reeks getallen (28-28) die je steeds in het patroon ziet staan staan voor de verschillende maten, dus in dit geval 28 steken voor maat S/M en 28 steken voor maat L.
Je breit eerst een rechthoek heen en weer gebreid. Daarna neem je steken op langs beide zijkanten van die rechthoek (dus aan weerskanten van de steken die je al op de naald hebt staan en vervolgens brei je alle steken heen en weer verder. Vanwege het aantal steken brei je op de rondbreinaald, maar je breit wel heen en weer. Voor de hals brei je wel weer verder in de rondte
16.11.2022 - 15:35
![]() Alex wrote:
Alex wrote:
Could you make a video for this pattern from the beginning to the end, please?\r\nIt would be helpful.\r\nThank you.
29.10.2022 - 15:00
![]() ANNICK PLATTEEURO wrote:
ANNICK PLATTEEURO wrote:
Bonjour Je pense que je vais me lancer et réaliser ce modèle .Pour moi tout me parait à peu près clair sauf cette histoire de marqueur au milieu du rang qui sera le milieu du dos ! Là vous m'avez perdu ,je ne visualise pas la chose et je décroche ...Une petite explication serait la bienvenue Merci pour votre aide .Cordialement
23.09.2022 - 19:41DROPS Design answered:
Bonjour Mme Platteeuro, lorsque vous avez terminé le dessus de la tête, vous relevez les mailles à droite de cette partie, tricotez ces mailles et relevez les mailles à gauche de cette partie pour tricoter la cagoule au niveau de l'ouverture du visage (d'un côté à l'autre du visage), on doit placer un marqueur au milieu de ce rang (= milieu dos de la cagoule) pour diminuer de chaque côté de ce marqueur, et, simultanément, vous augmentez de chaque côté (ouverture du visage). En espérant que ce soit plus clair ainsi, bon tricot!
26.09.2022 - 09:00
![]() Josée wrote:
Josée wrote:
Bonjour C’est un modèle que j’ai fait pour moi cet hiver en vert sapin. Beaucoup de compliments et aucune remarque désagréable. J’en referai une ,c’est sûr,probablement en blanc.merci
23.07.2022 - 08:17
![]() Dea wrote:
Dea wrote:
Buonasera. Nella spiegazione si parla di \"Suggerimento per gli aumenti -1\"e \" Suggerimento per gli aumenti- 2\", ma dove si spiegano le tecniche manca qualcosa ...
24.03.2022 - 17:17DROPS Design answered:
Buonasera Dea, grazie per la segnalazione, abbiamo corretto il testo. Buon lavoro!
24.03.2022 - 22:49
![]() PH wrote:
PH wrote:
Guten Tag, ich habe eine Frage bezüglich der Zunahme an den vorderen Rändern der Arbeit: Verstehe ich es richtig, dass in jeder 4. Reihe (jeder 2. Hinreihe) beidseitig je eine Masche hinzugenommen wird? Oder soll für jede Reihe beidseitig je eine Mache aufgenommen werden - sprich eine beidseitige Zunahme von je 4 Machen in jeder 4. Reihe? Schon im Voraus danke für die Antwort
24.02.2022 - 19:04DROPS Design answered:
Liebe PH, es wird jeweils 2 Maschen pro Zunahmenreihen zugenmomen -siehe ZUNAHMETIPP (gilt für die vorderen Ränder): - 1 Masche nach den 5 ersten Maschen und 1 Masche vor den 5 letzten Maschen. Dann stricken Sie 3 Reihen ohne Zunahmen. Diese 4 Reihe wierderholen Sie noch 2 Mal, dann stricken Sie noch 1 Zunahmenreihe = 4 Mal insgesamt (8 Maschen werden insgesamt zugenommen). Und gleichzeitig, bei der 3. Zunahmen nehmen Sie 4 Mal 2 Maschen an der hinteren Mitte ab - siehe ABNAHMETIPP. Viel Spaß beim stricken!
25.02.2022 - 08:56
![]() Hannelore wrote:
Hannelore wrote:
Hallo. In der Anleitung steht, im Mittelteil die 2 Randmaschen abketten, Faden abschneiden. Soll ich die restlichen Maschen auch abketten? Außerdem soll man bei der Mütze Maschen aufnehmen 26 Stück innerhalb 1kraus rechten Randmasche. Heißt das aus einer Masche 26 aufnehmen? Und wenn ja, wie arbeite ich da richtig? Danke für ihre Antwort
10.01.2022 - 12:25DROPS Design answered:
Liebe Hannelore, nur die Randmaschen werden beidseitig abgkettet (ketten Sie die 1. Masche am Anfang der Reihe ab, stricken Sie bis zur letzten Masche und ketten Sie die letzte Masche ab, den Faden schneiden Sie jetzt ab). Dann soll man an der rechten Seite vom Mittelteil (von der Vorderseite gesehen) 28-32 M innerhalb 1 Randmasche auffasen, die 26 Maschen vom Mittelteil stricken und 28-32 Maschen innderhalb 1 Randmasche an der linken Seite vom Mittelteil aufffassen = 82/90 Maschen. Viel Spaß beim stricken!
10.01.2022 - 16:05
![]() Govart wrote:
Govart wrote:
Bonjour, Je ne comprends pas très bien les explications. Avez-vous un dessin représentant le patron de cette cagoule? Cordialement. B. Govart
26.11.2021 - 16:48DROPS Design answered:
Bonjour Mme Govart, nous n'avons pas de schéma pour ce modèle, suivez pas à pas les indications et n'hésitez pas à poser votre question si besoin, nous vous aiderons volontiers pour la réaliser. Bon tricot!
29.11.2021 - 07:23
|
|
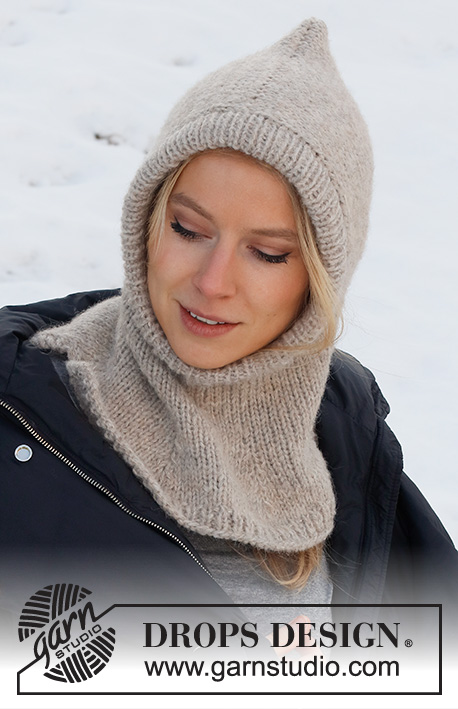
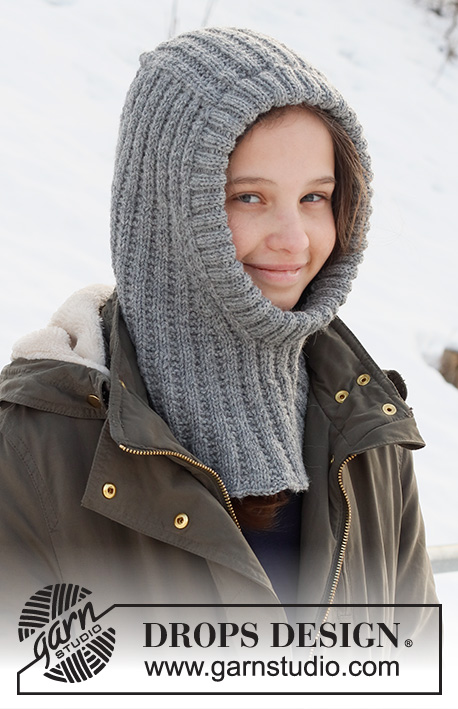
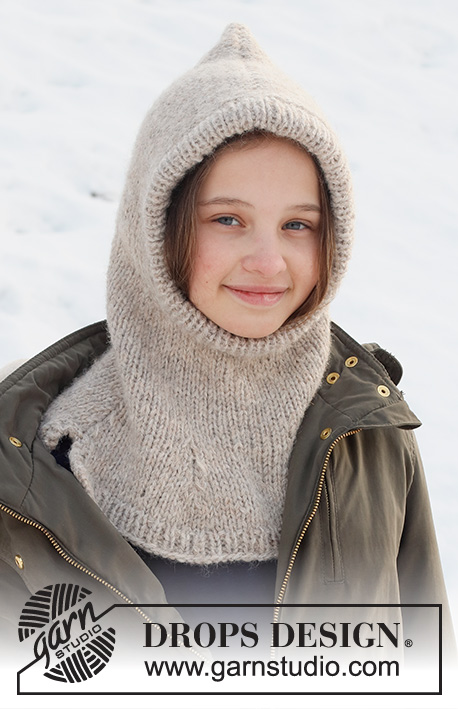
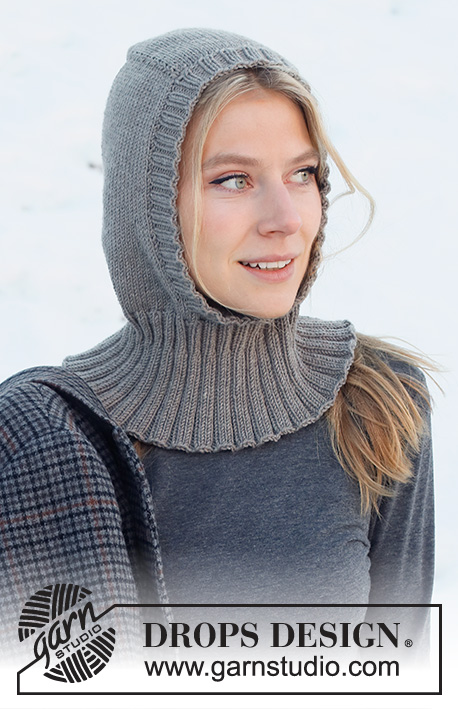
Uncharted Territory#unchartedterritorybalaclava |
|
 |
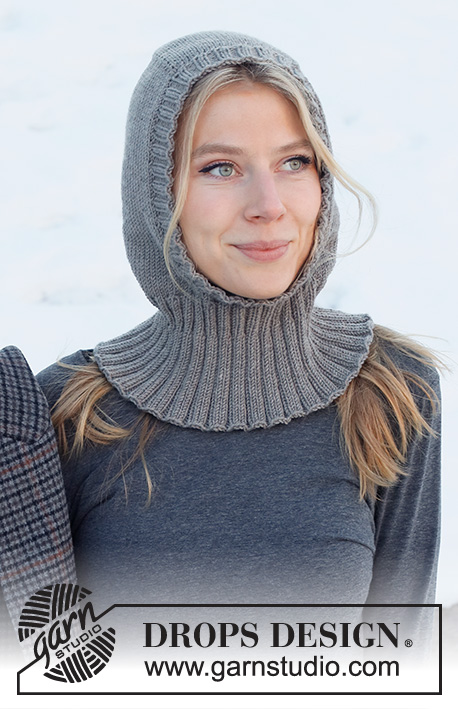 |
Knitted hat / balaclava in DROPS Merino Extra Fine. The piece is worked top down with stocking stitch and ribbed edging.
DROPS 214-72 |
|
|
------------------------------------------------------- EXPLANATIONS FOR THE PATTERN: ------------------------------------------------------- RIDGE/GARTER STITCH (worked back and forth): Knit all rows. 1 ridge in height = Knit 2 rows. INCREASE TIP (for sides of face-opening): Increase on the inside of the 5 stitches on each side. All increases are worked from the right side! Increase 1 stitch by making 1 yarn over. On the next row (wrong side) purl the yarn over twisted to avoid a hole. Then work the new stitches in stocking stitch. INCREASE TIP-2 (evenly spaced): To work out how to increase evenly, count the total number of stitches on the needle (e.g. 102 stitches) and divide by the number of increases to be made (e.g. 22) = 4.6. In this example, increase by making 1 yarn over after alternately each 4th and 5th stitch. On the next round work the yarn overs twisted to avoid holes. DECREASE TIP (mid-back): All decreases are worked from the right side! Start 5 stitches before the marker thread mid-back, knit 2 together, knit 6 (the marker sits between these 6 stitches), slip 1 stitch as if to knit, knit 1 and pass the slipped stitch over the knitted stitch (= 2 stitches decreased). CASTING-OFF TIP: To avoid the cast-off edge being tight you can cast off with a larger size needle. If the edge is still tight, make 1 yarn over after approx. each 4th stitch at the same time as casting off; the yarn overs are cast off as normal stitches. ------------------------------------------------------- START THE PIECE HERE: ------------------------------------------------------- BALACLAVA – SHORT OVERVIEW OF THE PIECE: The mid-section is worked back and forth with circular needle from mid-front and backwards. Stitches are knitted up on each side of the mid-section and the piece continued back and forth before stitches are cast on for the neck. The piece finished in the round. A ribbed edge is worked around the face-opening to finish. MID-SECTION: Cast on 28-28 stitches (including 1 edge stitch on each side) with circular needle size 3.5 mm and Merino Extra Fine. Purl 1 row from the wrong side. Then continue back and forth with stocking stitch and 1 edge stitch in GARTER STITCH on each side – read description above . REMEMBER THE KNITTING TENSION! When the piece measures 13-14 cm, cast off the edge stitches on each side = 26-26 stitches. Cut the strand, then work the hood as described below. HOOD: Knit up stitches on each side of the mid-section from the right side as follows: Knit up 28-32 stitches along the one side inside the 1 edge stitch, work stocking stitch over the 26-26 stitches on the needle and knit up 28-32 stitches along the other side inside the 1 edge stitch = 82-90 stitches. Insert 1 marker thread in the middle of the row (= mid-back). Allow the thread to follow your work onwards, it is used when decreasing mid-back. In addition, insert 1 marker at the beginning of the row. THE PIECE IS NOW MEASURED FROM THIS MARKER! Work stocking stitch back and forth with 1 edge stitch in garter stitch on each side towards mid-front. Then increase each side towards mid-front and decrease mid-back as follows – read the whole section on increasing and decreasing before continuing! INCREASES MID-FRONT: When the piece measures 13-15 cm from the marker, increase 1 stitch on each side towards mid-front – read INCREASE TIP-1 (= 2 stitches increased). Increase like this every 4th row (every 2nd row from the right side) a total of 6 times on each side. DECREASES MID-BACK: AT THE SAME TIME the 3rd time you increase, decrease 2 stitches mid-back – read DECREASE TIP. Decrease like this every 4th row a total of 4 times (increases and decreases are finished at the same time). After all the increases and decreases there are 86-94 stitches. When the piece measures 20-22 cm from the marker, cast on stitches for the neck (try the hat on and work to desired length before casting on). Cast on 16-16 stitches at the end of the next row from the right side = 102-110 stitches. Continue working in the round as described below. NECK: Work 5 rounds of stocking stitch over all stitches. On the first round increase 22-22 stitches evenly spaced – read INCREASE TIP-2 = 124-132 stitches. Change to circular needle size 3 mm and work rib in the round (knit 2, purl 2) for 3 cm. Now increase all knit 2 to knit 3 by making 1 yarn over after each knitted section (the yarn overs are knitted twisted on the next row to avoid holes) = 155-165 stitches. Continue in the round with knit 3, purl 2 until the rib measures 11-12 cm. Loosely cast off with knit over knit and purl over purl – read CASTING-OFF TIP. The piece measures approx. 39-42 cm from the middle of the mid-section down the side. EDGE AROUND FACE-OPENING: Start from the right side at the bottom of the opening, where stitches were cast on for the neck. Knit up 140 to 152 stitches around the opening, inside the 1 edge stitch using short circular needle size 3 mm and Merino Extra Fine. The number of stitches should be divisible by 4. Work rib in the round (knit 2, purl 2) for 3-3 cm. Loosely cast off with knit over knit and purl over purl – remember CASTING-OFF TIP. |
|
Have you finished this pattern?Tag your pictures with #dropspattern #unchartedterritorybalaclava or submit them to the #dropsfan gallery. Do you need help with this pattern?You'll find 23 tutorial videos, a Comments/Questions area and more by visiting the pattern on garnstudio.com. © 1982-2025 DROPS Design A/S. We reserve all rights. This document, including all its sub-sections, has copyrights. Read more about what you can do with our patterns at the bottom of each pattern on our site. |
|


With over 40 years in knitting and crochet design, DROPS Design offers one of the most extensive collections of free patterns on the internet - translated to 17 languages. As of today we count 314 catalogues and 11820 patterns translated into English (UK/cm). 11820
We work hard to bring you the best knitting and crochet have to offer, inspiration and advice as well as great quality yarns at incredible prices! Would you like to use our patterns for other than personal use? You can read what you are allowed to do in the Copyright text at the bottom of all our patterns. Happy crafting!
Post a comment to pattern DROPS 214-72
We would love to hear what you have to say about this pattern!
If you want to leave a question, please make sure you select the correct category in the form below, to speed up the answering process. Required fields are marked *.