
Szukasz włóczki?





Komentarze / Pytania (10)
 Emma napisała::
Hello! I'm afraid I don't understand the front piece decrease section : " Dec to shape the armhole on every other row as follows: 2 sts 1 time, 1 st 2 times = 25-38-31 (34-37) sts. " Does that mean I decrease by 4 stitches every other row (RS)? Or do I decrease by 2 sts one time at the arm home and by 1 st two times spaced throughout the rest of the piece ? Thank you very much!
05.09.2026 - 03:05Odpowiedź DROPS Design :
Hi Emma, You decrease by the armhole every 2nd row: Decrease 2 stitches on the first row, work to end of row, turn and work back to the armhole without decreasing. Turn and decrease 1 stitch on this row, then decrease 1 stitch in the same way on the 5th row. Regards Drops Team.
05.09.2026 - 06:31
 Hélène napisała::
I believe there is a mistake in the stitch count for the second size, when shaping the armhole: It says; Front piece: = 29-32-35 (38-41) sts. Continue in pattern. Dec to shape the armhole on every other row as follows: 2 sts 1 time, 1 st 2 times = 25-38-31 (34-37) sts. Should be 28 sts instead of 38, right?
30.06.2026 - 14:24Odpowiedź DROPS Design :
Dear Hélène, yes, that's correct, there is a typo in the pattern. It should be 28 instead of 38. We will correct it as soon as possible. Happy knitting!
30.06.2026 - 21:05
 Tessa napisała::
Um die Armkugel zu formen, werden beidseitig insgesamt 4x4 Maschen (=16) abgenommen oder 4x4 Maschen auf jeder Seite (=32)?
01.06.2026 - 20:49Odpowiedź DROPS Design :
Liebe Tessa, es wird 4 Mal 4 Maschen beidseitig abgekettet = 16 Maschen beidseitig x 2 Seite= insg. 32 Maschen. Viel Spaß beim Stricken!
02.06.2026 - 09:48
 Linda napisała::
Are the sleeves worked in the round or flat?
14.02.2026 - 17:48Odpowiedź DROPS Design :
Hi Linda, The sleeves are worked in the round. Regards, Drops Team.
16.02.2026 - 07:01
Linda napisała::
How do you complete front & back pieces separately? do you cut yarn after binding off the 4 sts on each frt pc & put 2 of the pcs on holders while working on the 3rd pc? I have bound off 4 sts on 1st front pc & ready to start the back. Do I cut the yarn & put the sts for front pc on a holder, then knit the back stitches up to the other side front pc & put back sts on holder, then bind off another 4 sts & finish the other front pc?
13.02.2026 - 17:34Odpowiedź DROPS Design :
Hi Linda, You work the complete row while casting off for the armholes,. Place the first front piece stitches on a stitch holder after working them, cast off for the armhole, work the back piece then place these stitches on a stitch holde, cast off for the armhole and work the second front piece. Now continue back and forth across the second front piece as described in the text. Regards, Drops Team.
18.02.2026 - 07:25
 Bella napisała::
Firstly thankyou for the pattern. 12/18 months On the back piece - after the first deductions I have 61 sts then I am advised to bind off 27 stiches for neck - leaving me with 34 stiches. then decrease 2 stitches on next row. Am I correct to assume I must do thison all rows until I get to 15 stitches and then bind off when I have reached my measurement? thank you and regards
14.04.2025 - 20:34Odpowiedź DROPS Design :
Dear Bella, after casting off 27 stitches for the neck you have 34 stitches in total or 17 stitches for each shoulder. Then you work each shoulder separately. Cast off 2 stitches at the beginning of the next row that starts on the neck edge, on each shoulder. So you have 34-2-2 (17-2 in each shoulder) which is 30 stitches in total and 15 on each shoulder. Then, bind off the remaining stitches. Happy knitting!
19.04.2025 - 19:42
Naomi napisała::
On the sleeve of the pattern when you start the rib. Shouldn’t it say- “ but after 1 round change to green”?
05.10.2020 - 21:23Odpowiedź DROPS Design :
Dear Naomi, you are right, thanks for your feedback, pattern will be edited. Happy knitting!
06.10.2020 - 17:16
Naomi napisała::
Thank you for answering my 1st question. The second one was the pattern reads to start on front with M1. That means I will be adding a color on the purl side in the second row. Is there a tutorial for adding yarn in the fair isle technique on the purl side? I can just wing it but I didn’t know if there is a specific way to do it.
21.05.2020 - 00:57Odpowiedź DROPS Design :
Dear Naomo, depending on how you are working, you will find videos showing how to knit stranded patterns in rows: continental method or English/American method. Happy knitting!
22.05.2020 - 09:05
Naomi napisała::
I added 3 stitches after the rib for size 2 and have 159 stitches - the chart is 12 stitches that gives me 3 left over? Do I leave 2 on one side and 1 on the other? Does the Chart start on the right or wrong side? If it is on the right side I am adding my first color on a purl side...how do I do that? Thank you, I am a beginner and am determined to get it right.
19.05.2020 - 15:08Odpowiedź DROPS Design :
Dear Naomi, work pattern-1 as follows: 1 edge st, repeat the 12 sts a total of 13 times in width, finish with the 1st st in diagram and 1 edge st. That way, pattern will be symetrical on each side. Read more about diagrams here. Happy knitting!
19.05.2020 - 15:48
Fran Ordway napisała::
What does this mean? When piece measures 4-4-4 (5-5) cm / 1½"-1½"-1½" (2"-2") work M.1 with 1 edge st each side towards mid front.
05.11.2017 - 16:55Odpowiedź DROPS Design :
Dear Fran, it means the when the piece is 4 cm /1½ inch (for size 3 month)– 4 cm / 1½ inch (for size 6/9 months)– 4 cm / 1½ inch for (for size 12/18 months), 5 cm / 2 inch (for size 2 years) and 5 cm / 2 inch (for size 3 yearsm you should continue the knitting with pattern M.1 (see the diagram at the end of the written pattern), but knit an edge stitch at both edges (which are the endge of th w two fronts. Happy Knitting!
06.11.2017 - 02:23
|
||||||||||||||||
Baby Goose#babygooseset |
||||||||||||||||
 |
 |
|||||||||||||||
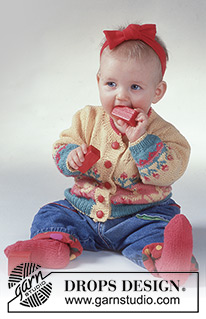
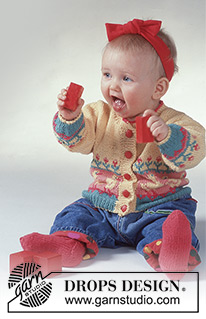
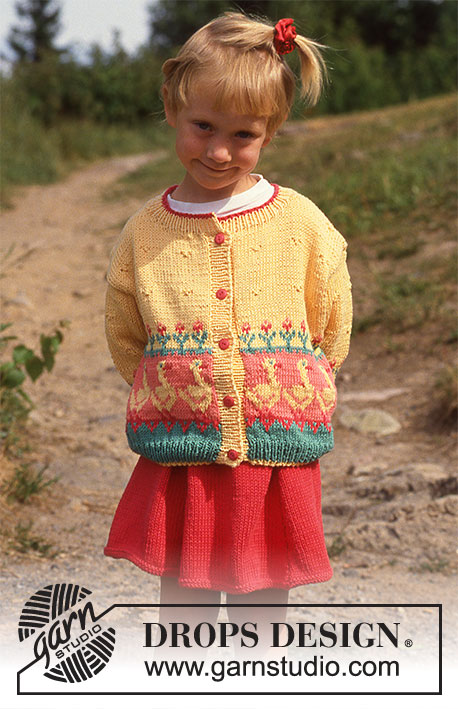
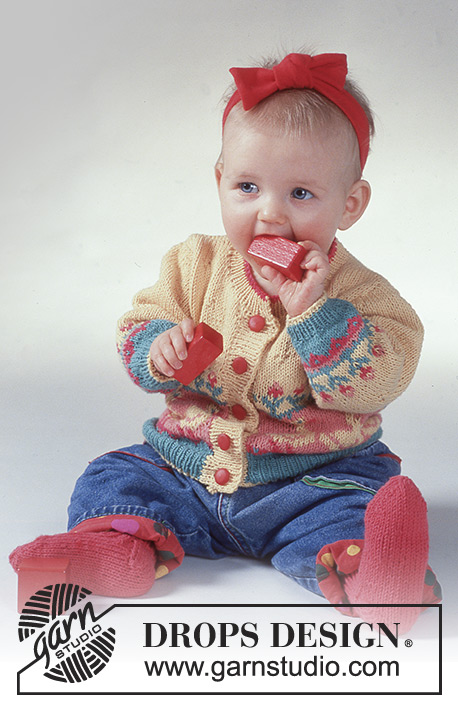
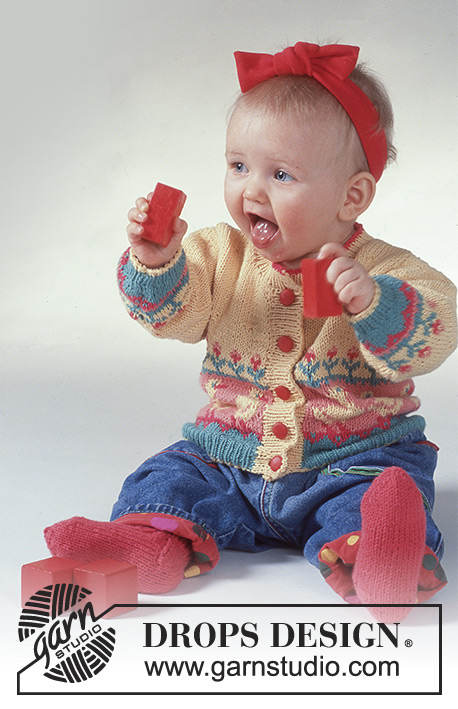
Rozpinany sweter na drutach, z żakardem w kaczki i kwiaty i skarpetki na drutach z włóczki DROPS Safran
DROPS Baby 2-2 |
||||||||||||||||
|
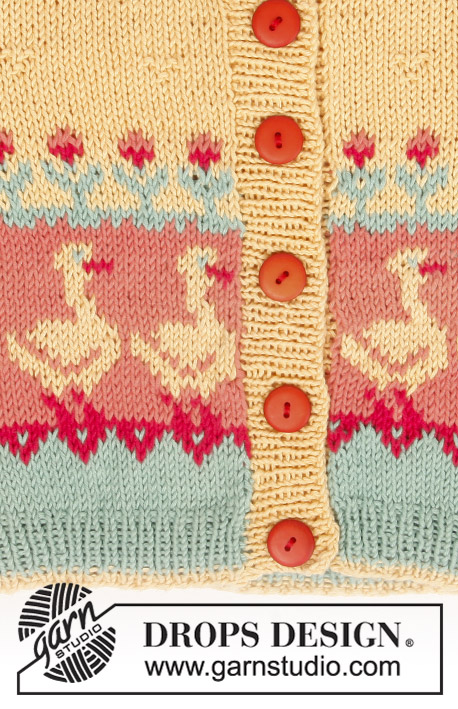
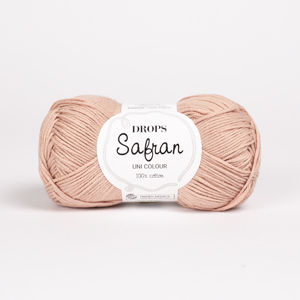
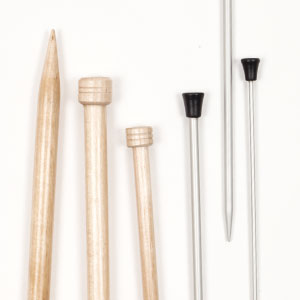
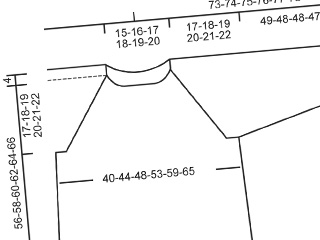
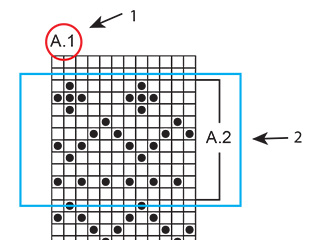
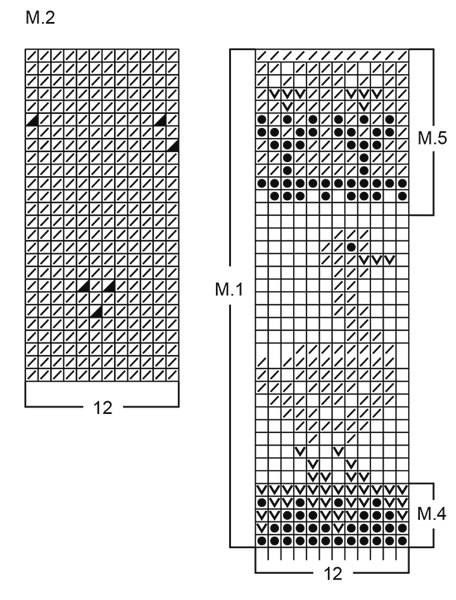
SWETER Próbka: 24 oczka x 32 rzędy dżersejem na drutach nr 3 = 10 x 10 cm Ściągacz: 1 oczko prawe, 1 oczko lewe. Żakard i ścieg fantazyjny: patrz schematy poniżej. Schematy przedstawiają motywy na prawej stronie robótki. Wykonanie Tył & przód: sweter jest przerabiany w tę i z powrotem na drutach z żyłką, od środka przodu. Włóczką w kolorze żółtym i na drutach z żyłką nr 2,5 nabrać 120-132-144 (156-156) oczek. Przerabiać 3-3-3 (4-4) cm ściągaczem, ale po przerobieniu 1 rzędu wziąć nitkę w kolorze zielonym. Po przerobieniu ściągacza dalej przerabiać na drutach nr 3, w tym samym czasie równomiernie dodać 3-3-3 (3-15) oczek = 123-135-147 (159-171) oczek. Na wys. 4-4-4 (5-5) cm przerabiać schemat M1 z 1 oczkiem brzegowym z każdej strony swetra. Po przerobieniu schematu M1 dalej przerabiać wg schematu M2 do końca. W tym samym czasie na wys. 14-15-17 (19-18) cm przerabiać następny rząd: 29-32-35 (38-41) oczek = przód, zamknąć 4 oczka na podkrój rękawa, 57-63-69 (75-81) oczek = tył, zamknąć 4 oczka na podkrój rękawa, 29-32-35 (38-41) oczek = przód. Kończyć tył i przód oddzielnie. Przód: = 29-32-35 (38-41) oczek. Dalej przerabiać jak wcześniej. Zamykać na podkrój rękawa co 2 rzędy: 1 raz 2 oczka i 2 razy 1 oczko = 25-28-31 (34-37) oczek. Na wys. 21-23-26 (29-32) cm zamknąć na dekolt 5-6-8 (9-13) oczek, dalej zamykać co 2 rzędy: 2 razy 2 oczka i 4 razy 1 oczko. Zamknąć 12-14-15 (17-16) pozostałych oczek na wys. 26-28-31 (34-37) cm. Tył: = 57-63-69 (75-81) oczek. Formować podkroje rękawów jak na przodach = 49-55-61 (67-73) oczka. Na wys. 24-26-29 (32-35) cm zamknąć 21-23-27 (29-37) oczek środkowych, a w następnym rzędzie zamknąć 2 oczka z każdej strony dekoltu. Zamknąć 12-14-15 (17-16) pozostałych oczek na wys. 26-28-31 (34-37) cm. Rękawy Włóczką w kolorze żółtym i na drutach pończoszniczych nr 2,5 nabrać 38-40-40 (42-42) oczka. Przerabiać 2-2-3 (3-4) cm ściągaczem, ale po przerobieniu 1 rzędu zmienić kolor nitki na zielony. Dalej przerabiać na drutach nr 3 żakardem, w tym samym czasie w 1-szym rzędzie równomiernie dodać 2-4-8 (10-16) oczek = 40-44-48 (52-58) oczek. Na wys. 3-3-4 (4-5) cm przerabiać schemat M4, dalej przerabiać schemat M5. Po przerobieniu schematu M5, dalej kończyć wg schematu M2. W tym samym czasie po przerobieniu ściągacza dodać 2 oczka pod rękawem; powtarzać dodawanie oczek 9-9-10 (10-16) razy: Rozmiar 3 miesiące: na przemian co 3 i 4 okrążenia Rozmiary 6/9 + 12/18 miesięcy: co 5 okrążeń Rozmiar 2 lata: co 6 okrążeń Rozmiar 3 lata: co 4 okrążenia = 58-62-68 (72-90) oczek. Na wys. 15-19-21 (24-27) cm zamknąć 4 oczka pod rękawem i dalej przerabiać w tę i z powrotem zamykając z każdej strony co 2 rzędy: 4 razy 4 oczka. Zamknąć wszystkie oczka na wys. 18-22-24 (27-30) cm. Wykończenie Zszyć ramiona. Włóczką w kolorze żółtym i na drutach nr 2,5 nabrać wzdłuż lewego przodu ok. 70-90 oczek i przerabiać 3 cm ściągaczem. Taki sam brzeg wykonać wzdłuż prawego przodu, ale na wys. 1 cm równomiernie wykonać 5 dziurek na guziki. 1 dziurka na guzik = zamknąć 2 oczka, w następnym rzędzie nabrać 2 oczka ponad zamkniętymi oczkami. Włóczką w kolorze żółtym i na drutach nr 2,5 nabrać ok. 90-100 oczek wokół dekoltu, przerobić 2 cm ściągaczem, ale po przerobieniu 1,5 cm na wysokość, zmienić kolor nitki na koralowy. Wszyć rękawy, przyszyć guziki. SKARPETKI: patrz DROPS Baby 2-6 |
||||||||||||||||
Objaśnienia do schematu |
||||||||||||||||
|
||||||||||||||||
 |
||||||||||||||||
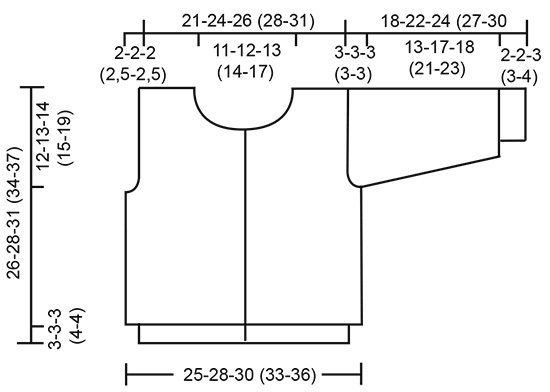 |
||||||||||||||||
Skończyłaś ten wzór?Otaguj swoje zdjęcia #dropspattern #babygooseset lub prześlij je do #dropsfan gallery. Potrzebujesz pomocy w związku z tym wzorem?Zobacz 13 instrukcje video, sekcję Komentarze/Pytania i jeszcze więcej, wchodząc na stronę wzoru na garnstudio.com © 1982-2026 DROPS Design A/S. Wszelkie prawa zastrzeżone. Ten dokument, w całości, jest chroniony prawem. Zobacz co możesz robić z naszymi wzorami na dole każdego wzoru na naszej stronie. |
||||||||||||||||
Posiadając 40 lat doświadczenia w projektowaniu wzorów na druty i szydełko, DROPS Design oferuje jedną z największych kolekcji bezpłatnych wzorów w internecie – przetłumaczonych na 17 języków. Obecnie jest dostępnych 333 katalogów i 12532 wzorów w języku polskim.
Dokładamy wszelkich starań, aby oferować Wam druty i szydełka, inspiracje, fachowe porady oraz doskonałej jakości włóczki w najlepszych cenach! Zamierzasz wykorzystać nasze wzory inaczej niż tylko do osobistego użytku? Przeczytaj jakie masz prawa w Copyright, który znajdziesz na końcu każdego wzoru. Miłej pracy!
Dodaj komentarz do modelu DROPS Baby 2-2
Chcielibyśmy się dowiedzieć co masz do powiedzenia o tym wzorze!
Jeśli chcesz zadać pytanie i szybko uzyskać odpowiedź, upewnij się, że została wybrana właściwa kategoria w formularzu poniżej. Pola obowiązkowe są oznaczone *.