
Popularne kategorie
Szukasz włóczki?


Komentarze / Pytania (18)
![]() Birgitta napisała::
Birgitta napisała::
Hej 🧶🙏☀️ Förstår inte hur jag ska öka på armen så mönstret stämmer . Med vänlig hälsning, Birgitta
24.02.2026 - 12:14Odpowiedź DROPS Design :
Hei Birgitta. Strikk de økte maskene i glattstrikk til du har nok masker til at de kan inngå i mønstret. Men husk at når du starter på mønstret, så sørg for å få en rapport midt oppå ermet. mvh DROPS Design
09.03.2026 - 09:47
![]() Lydie napisała::
Lydie napisała::
Bonjour et merci de vos réponses, de plus rapides. Comment tricoter les motifs quand le nombre de mailles est inférieur aux 12 du diagramme ? Cordialement Lydie
24.11.2025 - 16:53Odpowiedź DROPS Design :
Bonjour Lydie, regardez la lecon DROOPS ICI. Bon tricot!
30.11.2025 - 19:00
![]() Lydie napisała::
Lydie napisała::
Comment tricoter les motifs avec les augmentations de la manche ? Merci de votre réponse Cordialement
20.11.2025 - 22:10Odpowiedź DROPS Design :
Bonjour Lydie, les augmentations à la fin de tour se tricotent comme la maille suivante du motif (en lisant le diagramme de droite à gauche), celles au début du tour vont se tricoter comme la maille précédente (on va lire le diagramme de gauche à droite pour étendre le motif vers la droite). Bon tricot!
21.11.2025 - 07:43
![]() Lydie napisała::
Lydie napisała::
Peut on tricoter les manches avec une aiguille circulaire D avance merci
05.11.2025 - 22:22Odpowiedź DROPS Design :
Bonjour Lydie, tout à fait, vous pouvez commencer les manches avec une aiguille circulaire de 40 cm ou bien dès le début tricoter en magic loop avec une aiguille circulaire de 80 cm. Bon tricot!
06.11.2025 - 09:19
![]() Lone napisała::
Lone napisała::
Hvordan får man placeret en rapport på midten?
06.09.2025 - 18:18Odpowiedź DROPS Design :
Hei Lona. Da må man telle hvor mange masker man har, og så finne ut hvor man skal starte på diagrammet i forhold til hvor mange masker man har fra midt under til midt oppå. mvh DROPS Design
22.09.2025 - 10:15
![]() Alice napisała::
Alice napisała::
Is there a simple way to convert this pattern to a cardigan? I just love the design!
24.08.2025 - 18:30Odpowiedź DROPS Design :
Dear Alice, we don't make custom patterns. You will need to calculate the pattern by checking how to center the texture patterns while adding the bands. It would be easier to look for a simple cardigan worked in DROPS Karisma and then work the texture pattern over that cardigan. Happy knitting!
26.08.2025 - 23:12
![]() Silke napisała::
Silke napisała::
Moin Der Pullover ist wunderschön und ich würde ihn mir gerne stricken. Aber leider nur bis Gr. L . Das ist mir zu klein. Wird die Anleitung aktualisiert? Die neueren Anleitungen sind meistens bis Gr. XXL.
23.08.2025 - 19:58Odpowiedź DROPS Design :
Liebe Silke, hier finden Sie Modellen für XXL mit einer ähnlichen Maschenprobe, das kann Ihnen inspirieren, um dieses Modell zu den gewüsnchten Größe anzupassen. Viel Spaß beim Stricken!
25.08.2025 - 10:01
![]() Lena napisała::
Lena napisała::
Ik heb een proeflesje gebreid van de wol die voor dit patroon genoemd wordt en nu is het proeflapje 11 breedt en 11,5 hoog. Maar ik vind de stevigheid en dichtheid van het lapje al best hoog en wil liever niet een dunnere naald gebruiken. Wat kan ik doen?
03.04.2025 - 10:02Odpowiedź DROPS Design :
Dag Lena,
Dit is wel de normale stekenverhouding voor dit garen. Als je het toch losser wilt hebben, zou je het patroon om kunnen rekenen op basis van je stekenverhouding. Dus berekenen hoeveel steken je op moet zetten om dezelfde breedte te krijgen. Je zult dus minder op moeten zetten.
09.04.2025 - 11:00
![]() Jillian Watson napisała::
Jillian Watson napisała::
I require a shorter garment than the pattern shows. I have adjusted the length of the body between the bottom & the split for the armholes. Do i adjust the armhole length accordingly, or do I follow the armhole measurement shown on the pattern to accommodate the sleeve? Thank you.
01.03.2025 - 11:07Odpowiedź DROPS Design :
Dear Jillian, the upper section, from the armholes to the neck, should remain the same, since these yoke decreases are fundamental to keep the correct shaping of the piece.To shorten the piece you only need to shorten the body section, between the lower edge and before the armholes. Happy knitting!
02.03.2025 - 18:43
|
|||||||
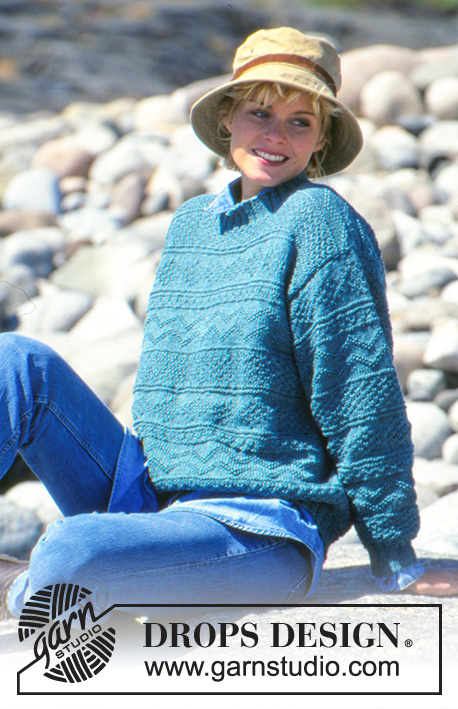
Water Textures |
|||||||
 |
 |
||||||
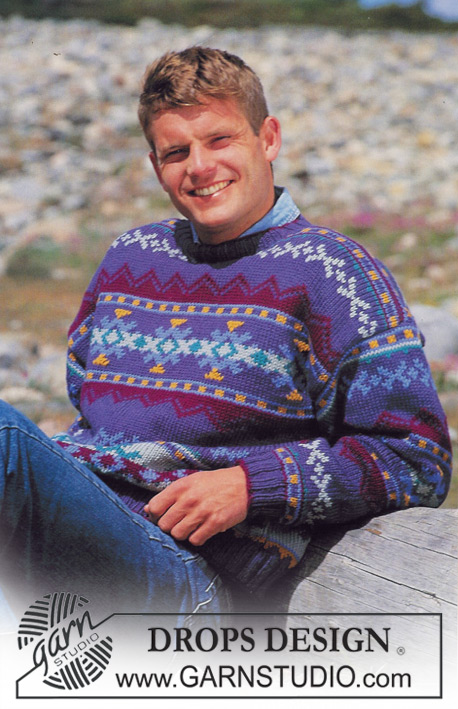
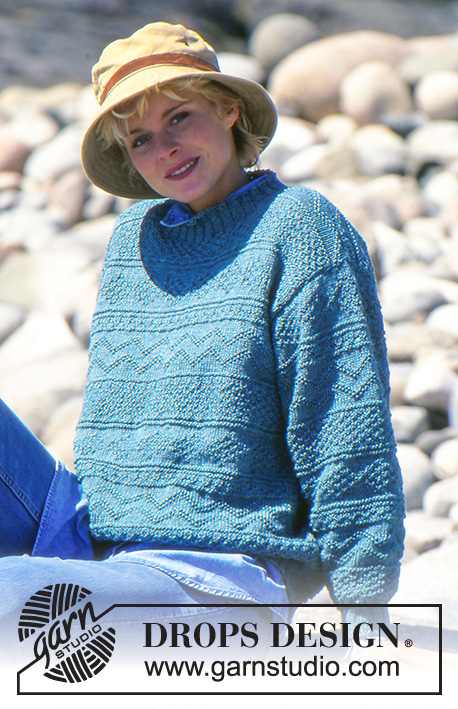
Damski lub męski sweter na drutach, ze ściegiem strukturalnym, z włóczki DROPS Karisma. Od S do L.
DROPS 40-8 |
|||||||
|
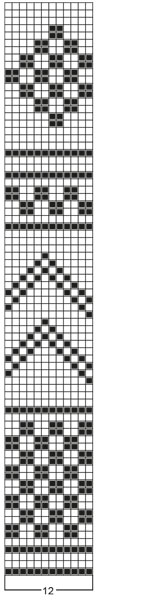
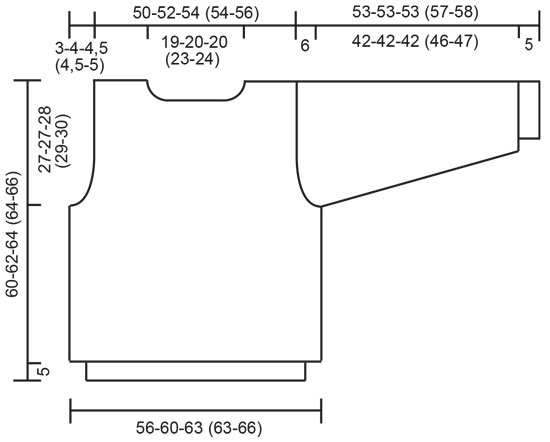
ŚCIEG FANTAZYJNY: patrz schemat poniżej. Schemat przedstawia motyw na prawej stronie robótki. Mönster: ścieg fantazyjny. 12 m = 12 oczek. Ściągacz: *2 oczka prawe, 2 oczka lewe *, powtarzać od * do *. Tył i przód: Liczby/dane w nawiasach dotyczą rozmiarów męskich. Na drutach z żyłką nr 2,5 nabrać 188-192-200 (200-208) oczek i przerobić 5 cm ściągaczem. Dalej przerabiać na drutach z żyłką nr 4 ściegiem fantazyjnym, wg schematu, W TYM SAMYM CZASIE w 1-szym okrążeniu równomiernie dodać 40-48-52 (52-56) oczek = 228-240-252 (252-264) oczka. ZACHOWAĆ TAKIE SAMO NAPRĘŻENIE NICI JAK W PRZYPADKU PRÓBKI! Na wys. 33-35-36 (35-36) cm zamknąć 4 oczka z każdej strony na podkroje rękawów (wyśrodkować motyw na przodzie) i kończyć każdą część oddzielnie. Przód: = 110-116-122 (122-128) oczek. Zamykać na podkroje rękawów z każdej strony co 2 rzędy: 2-2-2 (3-3) razy 2 oczka i 1-2-3 (3-2) razy 1 oczko = 100-104-108 (108-112) oczek. Na wys. 55-57-59 (59-61) cm zamknąć na dekolt 28-30-30 (36-38) oczek środkowych, dalej zamykać od strony dekoltu co 2 rzędy: 2 razy 2 oczka i 1 raz 1 oczko. Na wys. 60-62-64 (64-66) cm zamknąć wszystkie oczka. Tył: = 110-116-122 (122-128) oczek. Formować podkroje rękawów jak na przodzie = 100-104-108 (108-112) oczek. Na wys. 58-60-62 (62-64) cm zamknąć na dekolt 34-36-36 (42-44) oczka środkowe, a w następnym rzędzie zamknąć 2 oczka od strony dekoltu. Na wys. 60-62-64 (64-66) cm zamknąć wszystkie oczka. Rękawy: Na drutach pończoszniczych nr 2,5 nabrać 48-48-48 (48-52) oczka. Przerobić 5 cm ściągaczem. Dalej przerabiać na drutach pończoszniczych nr 4 ściegiem fantazyjnym (wyśrodkować motyw na rękawie), W TYM SAMYM CZASIE w 1-szym okrążeniu równomiernie dodać 6-6-8 (10-8) oczek = 54-54-56 (58-60) oczek. W TYM SAMYM CZASIE po przerobieniu ściągacza, dodać 2 oczka pod rękawem; powtarzać dodawanie oczek 27-27-28 (29-30) razy: Wersja damska, rozmiary S, M i L: co 4 okrążenia; Wersja męska, rozmiary S/M i M/L: na przemian co 4 i 5 okrążeń = 108-108-112 (116-120) oczek. Na wys. 47-47-47 (51-52) cm zamknąć 6 oczek pod rękawem i dalej przerabiać w tę i z powrotem zamykając 8 razy 4 oczka z każdej strony co 2 rzędy, zamknąć pozostałe oczka. Długość rękawa wynosi ok. 53-53-53 (57-58) cm. Wykończenie Zszyć ramiona. Na drutach pończoszniczych nr 2,5 nabrać ok. 100-112 oczek wokół dekoltu, przerobić 5 cm ściągaczem, zakończyć. Wszyć rękawy. |
|||||||
Objaśnienia do schematu |
|||||||
|
|||||||
 |
|||||||
 |
|||||||
Skończyłaś ten wzór?Otaguj swoje zdjęcia #dropspattern lub prześlij je do #dropsfan gallery. Potrzebujesz pomocy w związku z tym wzorem?Zobacz 18 instrukcje video, sekcję Komentarze/Pytania i jeszcze więcej, wchodząc na stronę wzoru na garnstudio.com © 1982-2026 DROPS Design A/S. Wszelkie prawa zastrzeżone. Ten dokument, w całości, jest chroniony prawem. Zobacz co możesz robić z naszymi wzorami na dole każdego wzoru na naszej stronie. |
|||||||


Posiadając 40 lat doświadczenia w projektowaniu wzorów na druty i szydełko, DROPS Design oferuje jedną z największych kolekcji bezpłatnych wzorów w internecie – przetłumaczonych na 17 języków. Obecnie jest dostępnych 324 katalogów i 12290 wzorów w języku polskim.
Dokładamy wszelkich starań, aby oferować Wam druty i szydełka, inspiracje, fachowe porady oraz doskonałej jakości włóczki w najlepszych cenach! Zamierzasz wykorzystać nasze wzory inaczej niż tylko do osobistego użytku? Przeczytaj jakie masz prawa w Copyright, który znajdziesz na końcu każdego wzoru. Miłej pracy!
Dodaj komentarz do modelu DROPS 40-8
Chcielibyśmy się dowiedzieć co masz do powiedzenia o tym wzorze!
Jeśli chcesz zadać pytanie i szybko uzyskać odpowiedź, upewnij się, że została wybrana właściwa kategoria w formularzu poniżej. Pola obowiązkowe są oznaczone *.