
Categorie popolari
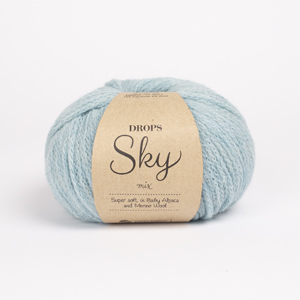
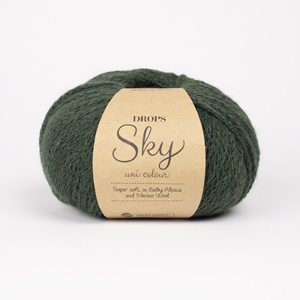
State cercando un filato?































Commenti / Domande (67)
 Gemma ha scritto:
Hi. I’ve worked the yoke and am trying to figure out next steps based on other answers here. Is this correct (for size 7/8): Knit 38 to new beginning of round (first stitch of round is now the 4th of 6 cast on stitches under the right sleeve). Then inc 1 on each side of marker - does that mean inc 2 stitches next to each other? So I’d inc 2 (yo 2), knit stitches 1-26, inc 2, knit 27-52, inc 2, etc etc. TIA!
31.10.2023 - 17:40DROPS Design ha risposto:
Dear Gemma, you are right for the beg of the round, you will then have 4 markers: 1 in the first stitch of the round (the 3rd of the 6 new sts cast on), then 2nd marker in the 26th stitch, 3rd marker in the 52th stitch, 4th marker in the 77th stitch (other side of dress), 5th marker in the 102nd stitch and 6th marker in the 128th stitch. Now increase 1 stitch on each side of each marker (see INCREASE TIP) a total of 4 times on every 2nd cm, then increase on each side of 1st + 4th markers (sides) and 1 st after 2nd + 5th marker and 1 st before 3rd and 6th marker (8 sts increased) on every 3 cm a total of 12 times. Happy knitting!
01.11.2023 - 14:53
 Aline ha scritto:
Hallo, kan het zijn dat de minderingen voor de mouwen nog niet opgenomen zijn in het patroon? Als ik naar de tekening van de jurk kijk, zouden deze wel geminderd moeten worden maar dit lees ik niet terug in de tekst. Dank voor de reactie!
21.01.2023 - 21:22DROPS Design ha risposto:
Dag Aline,
Je mindert pas aan het eind van de mouw, vlak voordat je de manchet/boord breit.
22.01.2023 - 17:31
 Helle ha scritto:
Skal der ikke stå i opskriften, at omgangen-starten skal flyttes ind under ærmet? Det er meget forvirrende at det ikke står tydeligt i opskriften.
04.01.2023 - 16:08
 Covych ha scritto:
Bonjour, j’avais la même interrogation que R. (17-10-22) au sujet du premier marqueur. SVP faites une correction et ajoutez votre réponse directement dans le patron pour éviter aux tricoteuses de commettre la même erreur que je viens de faire et avoir à défaire 20 rangs !! Merci .
13.11.2022 - 21:12
 Rasha ha scritto:
Hi, I am at the insert 6 markers part and I am confused it says insert the first marker at tge beginning of the row “ side “although the beginning of the row is midback , can you explain this please?
17.10.2022 - 06:06DROPS Design ha risposto:
See answer below.
17.10.2022 - 10:21
Rasha ha scritto:
Hi, I am knitting this dress and I finished the yoke, I’m now at the insert 6 markers part, I am confused I don’t know where to insert the markers, it says insert the first marker at the beginning of the row “side” although the beginning of the row is the mid back, not the side, can you explain this please?
17.10.2022 - 06:03DROPS Design ha risposto:
Dear Rasha, after division, work from mid back (beg of rounds) towards the side, to the middle of the new stitches cast on on the side, the rounds will now start there, ie insert 1st marker here. Happy knitting!
17.10.2022 - 10:21
 Tess ha scritto:
Hello, Just wondering if you have any recommendations on what to do if I wanted to make this in a short sleeve?
19.09.2022 - 06:37DROPS Design ha risposto:
Hi Tess, Place the stitches from the one thread on double pointed needles size 4 mm and knit up 1 stitch in each of the 6 stitches cast on in the side of the body (insert 1 marker in the middle of these stitches) = 50-54-58-64-68 stitches. Work stocking stitch in the round until the sleeve measures X cm, Change to double pointed needles size 3.5 mm and work rib with knit 1/ purl 2 for 4 cm. Happy knitting!
19.09.2022 - 07:33
 Rebecca ha scritto:
Hallo, Welche Nadelstärke nehme ich denn für die Maschenprobe, 3,5 oder 4?
12.02.2022 - 16:53DROPS Design ha risposto:
Liebe Rebecca, für die Maschenprobe stricken Sie mit den grösseren Nadeln = Nr 4. Viel Spaß beim stricken!
14.02.2022 - 09:38
 Kerstin ha scritto:
När jag kom till delningen av fram och bakstycke på storlek 7/8 år så får jag inte maskantalet att stämma. Ska jag räkna in de maskorna som jag lägger upp för ärmen och hur ska jag i så fall räkna in dem? Jag vill fortsätta sticka så jag får väl hitta en lösning själv men tänker att jag ändå vill berätta vad jag har problem med. Är det jag som tänker fel eller är det mönstret som är fel?
11.02.2022 - 23:37DROPS Design ha risposto:
Hei Kerstin. Ja, du må legge til de nye maskene undere ermene. I str. 7/8 år har du 244 masker før du skal dele til til ermer. Strikk 35 masker (halve bakstykket) + 6 nye masker under 1. erme + strikk 70 masker (framstykket) + 6 nye masker under 2. erme + strikk 35 masker (halve bakstykket) = 35+6+70+6+35= 152 masker. Du har også satt 52 x 2 masker på tråder til ermer = 104 masker. 152+104-12 (nye erm masker) = 244 masker som du hadde. mvh DROPS Design
14.02.2022 - 11:33
Birgit Hommes ha scritto:
Hallo, ich möchte diese Anleitung gern als Grundlage für eine Tunika verwenden, d.h. ohne Arm und etwas kürzer. Wieviel Merino extra fine würde ich für Gr. 146/152 ungefähr benötigen?
29.09.2021 - 12:21DROPS Design ha risposto:
Liebe Frau Hommes, leider können wir jeder Anleitung nach jedem individuellen Frage anpassen und einzelne Modelle auf individuellen Wunsch hin umrechnen. Wenn sie Hilfe damit brauchen, wenden Sie sich bitte an Ihrem DROPS Laden - auch telefonisch oder per E-Mail; dort hilft man Ihnen gerne weiter. Danke im voraus für Ihr Verständnis. Viel Spaß beim stricken!
30.09.2021 - 09:16
|
||||||||||||||||||||||
Woodland Fairy#woodlandfairydress |
||||||||||||||||||||||
 |
 |
|||||||||||||||||||||
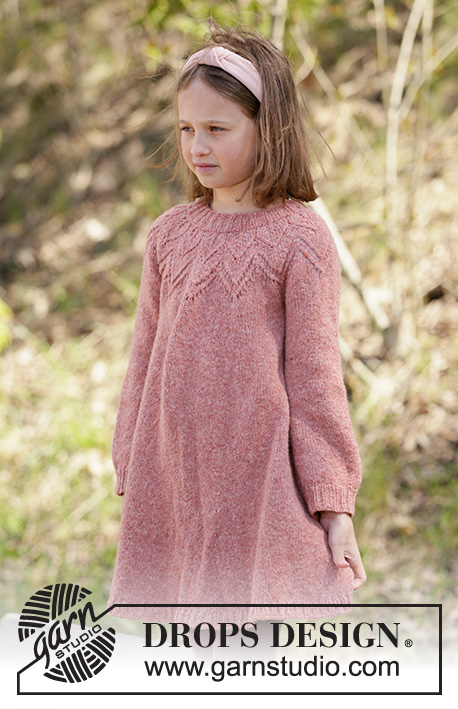
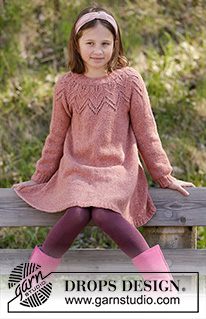
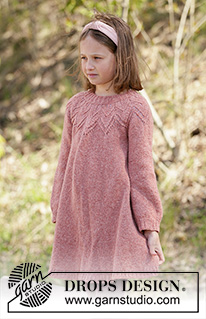
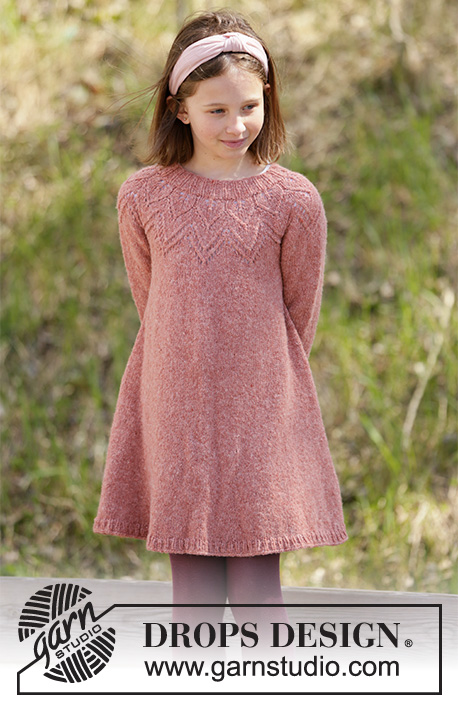
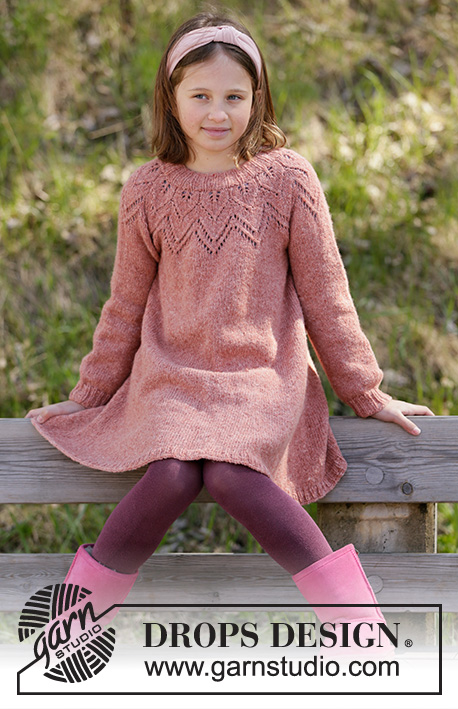
Vestito per bambini lavorato ai ferri in DROPS Sky o DROPS Merino Extra Fine. Lavorato dall’alto in basso con motivo traforato. Taglie: 3-12 anni.
DROPS Children 34-25 |
||||||||||||||||||||||
|
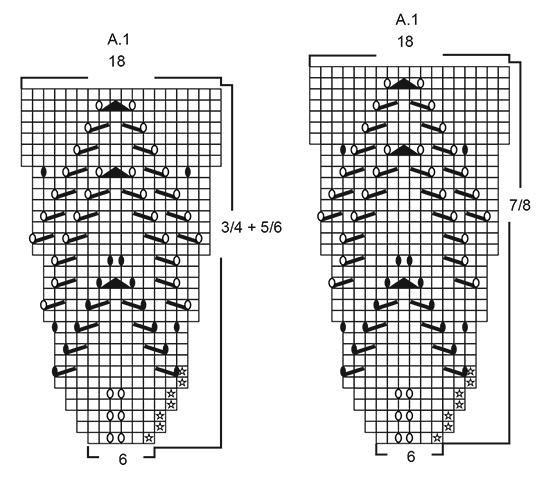
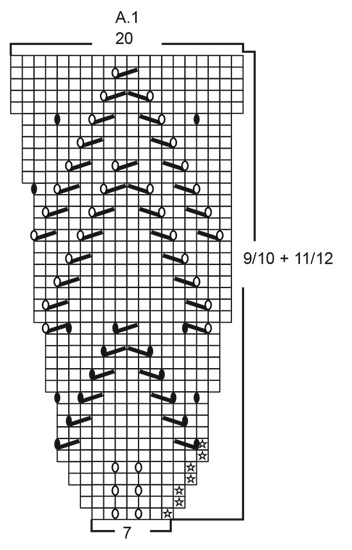
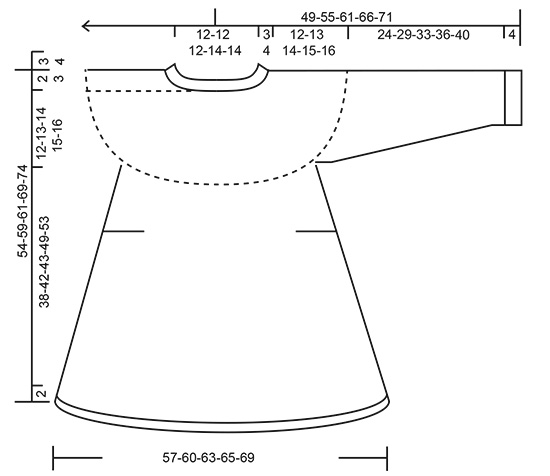
------------------------------------------------------- PRIMA DI INIZIARE: ------------------------------------------------------- SUGGERIMENTO PER GLI AUMENTI: Aumentare con 1 gettato; sul giro successivo lavorare i gettati a ritorto per evitare buchi. MOTIVO: Vedere il diagramma A.1; scegliere il diagramma per la vostra taglia. ------------------------------------------------------- INIZIO DEL LAVORO: ------------------------------------------------------- VESTITO: Lavorare lo sprone in tondo, dall’alto in basso. Dopo che il lavoro è stato diviso per il corpo e le maniche, continuare il corpo in tondo con i ferri circolari, e lavorare le maniche in tondo con i ferri a doppia punta. SPRONE: Avviare 72-78-84-90-96 maglie con i ferri circolari corti n° 3,5 mm e Sky. Inserire 1 segnapunti all’inizio del giro (= centro dietro). Lavorare a coste con 1 maglia diritto/ 2 maglie rovescio per 3-3-4-4-4 cm (= collo). Ora misurare il lavoro da qui. Passare ai ferri circolari n° 4 mm e lavorare 2 giri diritto, aggiustando il n° di maglie sul 1° giro a 66-72-78-84-91 maglie. Poi lavorare A.1 (= 11-12-13-12-13 ripetizioni in larghezza) – vedere il diagramma per la taglia corretta! FARE ATTENZIONE ALLA TENSIONE DEL LAVORO! Passare ai ferri circolari più lunghi quando sono state aumentate abbastanza maglie. Alla fine di A.1 ci sono 198-216-234-240-260 maglie sul ferro. Sul giro successivo aumentare 14-12-10-24-20 maglie in modo uniforme e allo stesso tempo lavorare a maglia rasata = 212-228-244-264-280 maglie. Continuare a. aglia rasata fino a quando il lavoro misura 12-13-14-15-16 cm (senza le coste). Lavorare il giro successivo come segue: 31-33-35-37-39 maglie diritto (= metà dietro), mettere le 44-48-52-58-62 maglie successive in sospeso per la manica (senza lavorarle), avviare 6 nuove maglie, 62-66-70-74-78 maglie diritto (= davanti), mettere le 44-48-52-58-62 maglie successive in sospeso per la manica (senza lavorarle), avviare 6 nuove maglie e lavorare 31-33-35-37-39 maglie diritto (= metà dietro). CORPO: = 136-144-152-160-168 maglie. ORA MISURARE IL LAVORO DA QUI! Ora inserire 6 segnapunti nel lavoro come segue: inserire il segnapunti 1 nella 1° maglia all’inizio del giro (= lato), inserire il segnapunti 2 nella 23°-25°-26°-27°-28° maglia, inserire il segnapunti 3 nella 47°-49°-52°-55°-58° maglia, inserire il segnapunti 4 nella 69°-73°-77°-81°-86° maglia (= lato), inserire il segnapunti 5 nella 91°-97°-102°-107°-114° maglia, inserire il segnapunti 6 nella 115°-121°-128°-135°-144° maglia (rimangono 21-23-24-25-24 maglie sul giro dopo l’ultimo segnapunti). LEGGERE IL SUGGERIMENTO PER GLI AUMENTI! Sul giro successivo aumentare 1 maglia a ogni lato di tutti i segnapunti (12 aumenti sul giro) e ripetere questi aumenti ogni 1½-2-2-2-1½ cm per un totale di 4 volte. Poi aumentare come segue: aumentare 1 maglia a ogni lato dei segnapunti 1 e 4 (= lati), 1 maglia dopo i segnapunti 2 e 5 e 1 maglia prima dei segnapunti 3 e 6 – LEGGERE IL SUGGERIMENTO PER GLI AUMENTI (= 8 aumenti sul giro). Aumentare per le diverse taglie come segue: 3/4 anni: aumentare circa ogni 3 cm per un totale di 11 volte. 5/6 anni: aumentare circa ogni 3 cm per un totale di 11 volte. 7/8 anni: aumentare circa ogni 3 cm per un totale di 12 volte. 9/10 anni: aumentare circa ogni 3½ cm per un totale di 12 volte. 11/12 anni: aumentare circa ogni 4 cm per un totale di 12 volte. Ora ci sono 272-280-296-304-312 maglie sul giro. Lavorare fino a quando il lavoro misura 38-42-43-49-53 cm. Sul giro successivo aumentare 34-35-37-38-39 maglie in modo uniforme – LEGGERE IL SUGGERIMENTO PER GLI AUMENTI (aumentare circa dopo ogni 8° maglia) = 306-315-333-342-351 maglie. Passare ai ferri circolari n° 3,5 mm e lavorare a coste con 1 maglia diritto/ 2 maglie rovescio per 2 cm. Intrecciare senza stringere a diritto sul giro successivo. MANICA: Riportare le maglie di un segnapunti sui ferri a doppia punta n° 4 mm e riprendere 1 maglia in ognuna delle 6 maglie avviate a lato del corpo (inserire 1 segnapunti al centro di queste maglie) = 50-54-58-64-68 maglie. ORA MISURARE IL LAVORO DA QUI! Lavorare a maglia rasata in tondo. Quando il lavoro misura 24-29-33-36-40 cm dal segnapunti aggiustare il n° di maglie a 42-42-48-48-48. Passare ai ferri a doppia punta n° 3,5 mm e lavorare a coste con 1 maglia diritto/ 2 maglie rovescio per 4 cm. Intrecciare senza stringere a diritto sul giro successivo. Lavorare l’altra manica nello stesso modo. |
||||||||||||||||||||||
Spiegazioni del diagramma |
||||||||||||||||||||||
|
||||||||||||||||||||||
 |
||||||||||||||||||||||
 |
||||||||||||||||||||||
 |
||||||||||||||||||||||
Avete terminato questo modello?Allora taggate le vostre foto con #dropspattern #woodlandfairydress o inviatele alla #dropsfan gallery. Avete bisogno di aiuto con questo modello?Troverete 16 video tutorial, una sezione per i commenti/domande e molto altro guardando il modello su www.garnstudio.com © 1982-2026 DROPS Design A/S. Ci riserviamo tutti i diritti. Questo documento, compreso tutte le sue sotto-sezioni, è protetto dalle leggi sul copyright. Potete leggere quello che potete fare con i nostri modelli alla fine di ogni modello sul nostro sito. |
||||||||||||||||||||||






Con oltre 40 anni di esperienza nel design di modelli di maglia e uncinetto, DROPS Design offre la più estesa collezione di modelli gratuiti su internet - tradotti in 17 lingue. Ad oggi vi possiamo fornire 333 cataloghi e 12532 modelli - 9806 dei quali sono tradotti in Italiano.
Ci stiamo impegnando molto per darvi il meglio che vi possiamo offrire in termini di maglia e uncinetto, ispirazioni e consigli così come filati di grande qualità ad un prezzo incredibile! Volete utilizzare i nostri modelli per qualcosa d'altro oltre al vostro uso personale? Potete leggere tutto ciò che è consentito nel testo sul Copyright in basso su tutte le pagine dei nostri modelli. Buon lavoro!
Lasciare un commento sul modello DROPS Children 34-25
Noi saremmo felici di ricevere i tuoi commenti e opinioni su questo modello!
Se vuoi fare una domanda, fai per favore attenzione a selezionare la categoria corretta nella casella qui sotto per velocizzare il processo di risposta. I campi richiesti sono indicati da *.